WGS ClientX – Client Area & Home Settings Guide
How to Change the Layout of the Home Page
The ClientX theme provides flexible Home page layouts with built-in customization options, allowing you to control content visibility and slider behavior easily.
Accessing Home Page Layout Settings
Before configuring the Home page layout, follow these steps:
-
Log in to your WHMCS Admin Panel.
-
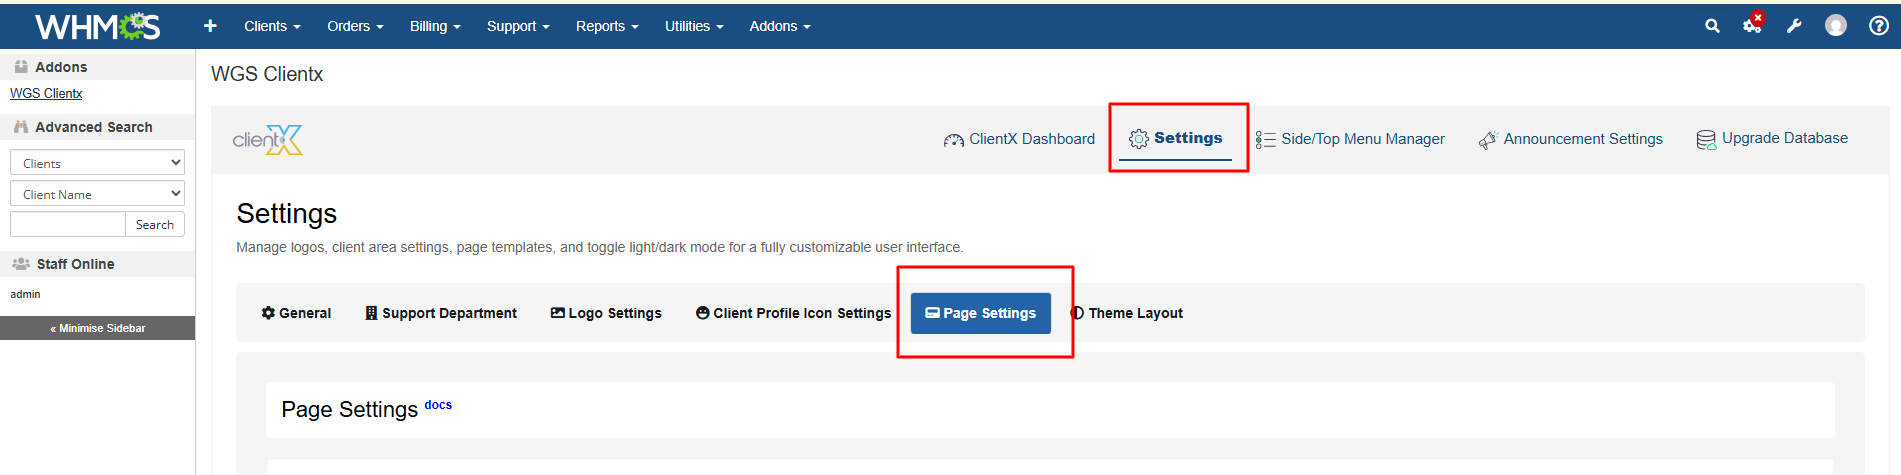
Navigate to Addons > WGS ClientX > Settings.
-
Click Settings and open the Page Settings tab.
Managing Home Page Layouts
-
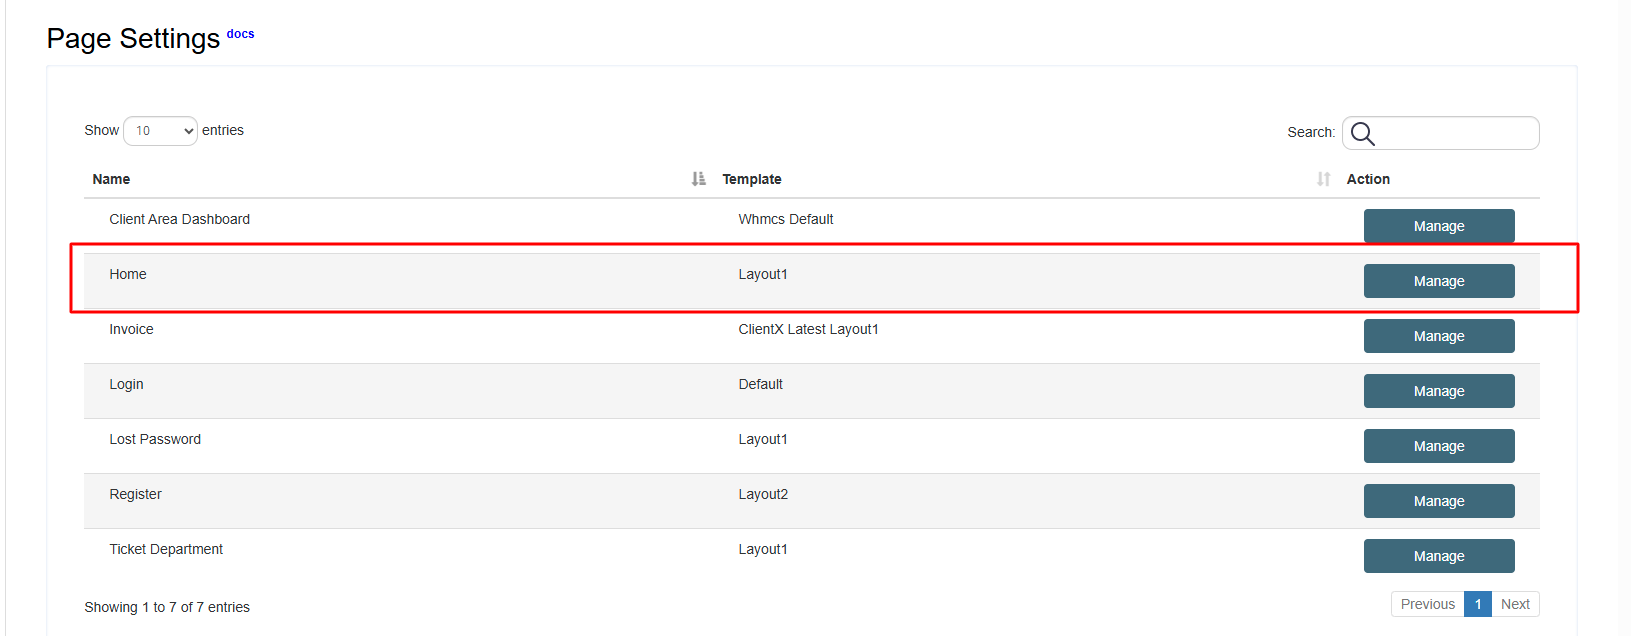
Under the Page Settings tab, locate Home.
-
Click the Manage button.
-
You will be redirected to the Home Page Template screen.
Available Home Page Layout Options
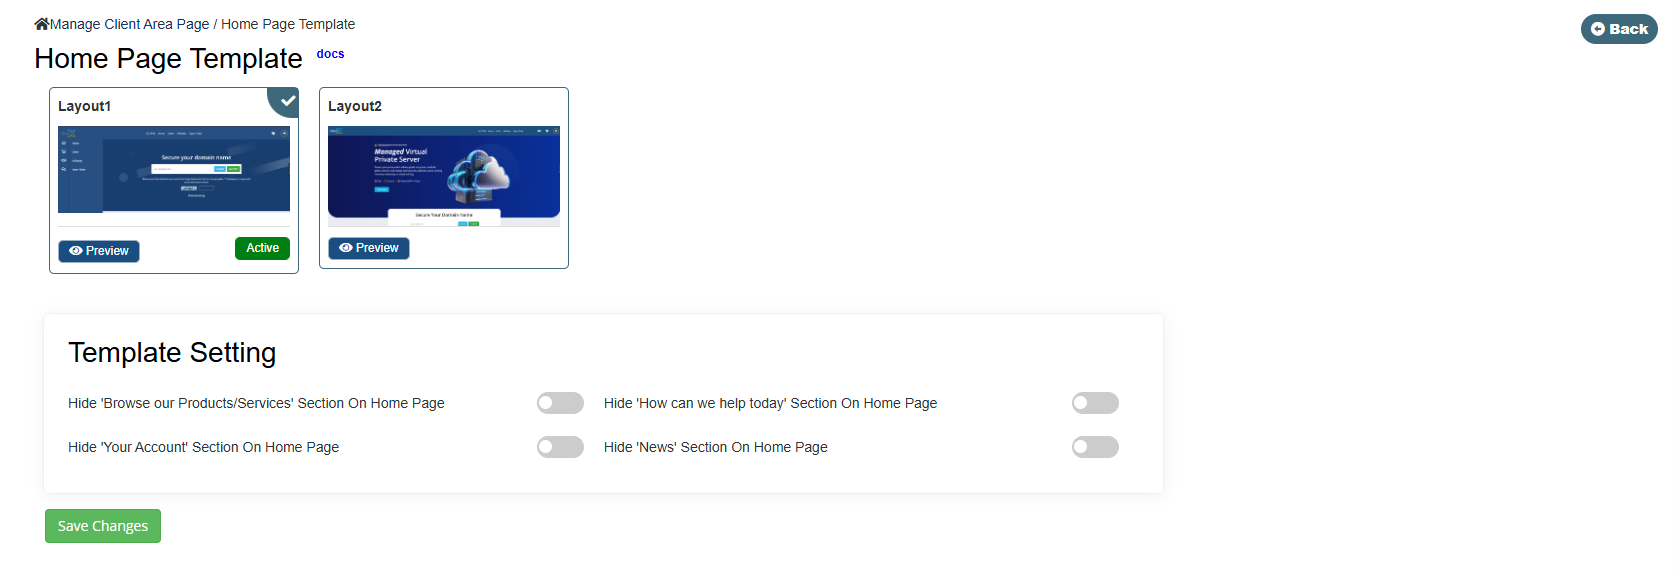
On this screen, you will find two Home page layout options:
-
Layout 1
-
Layout 2
Select the desired layout and click Save Changes to apply it.
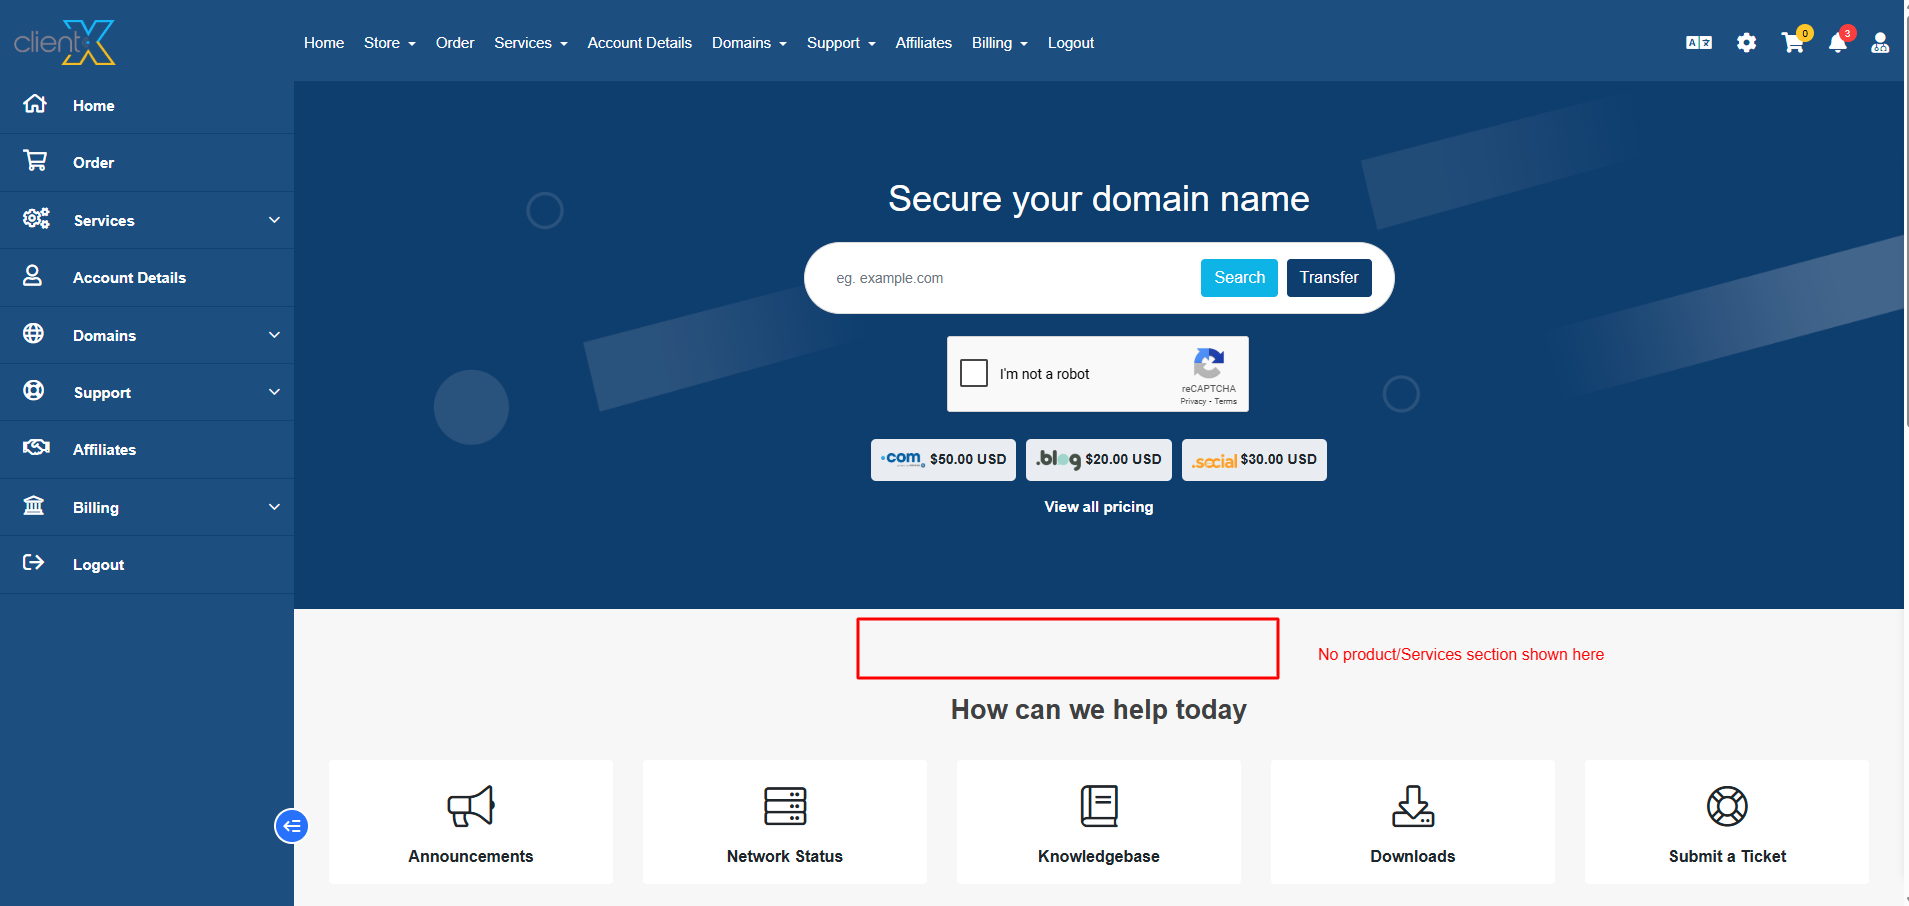
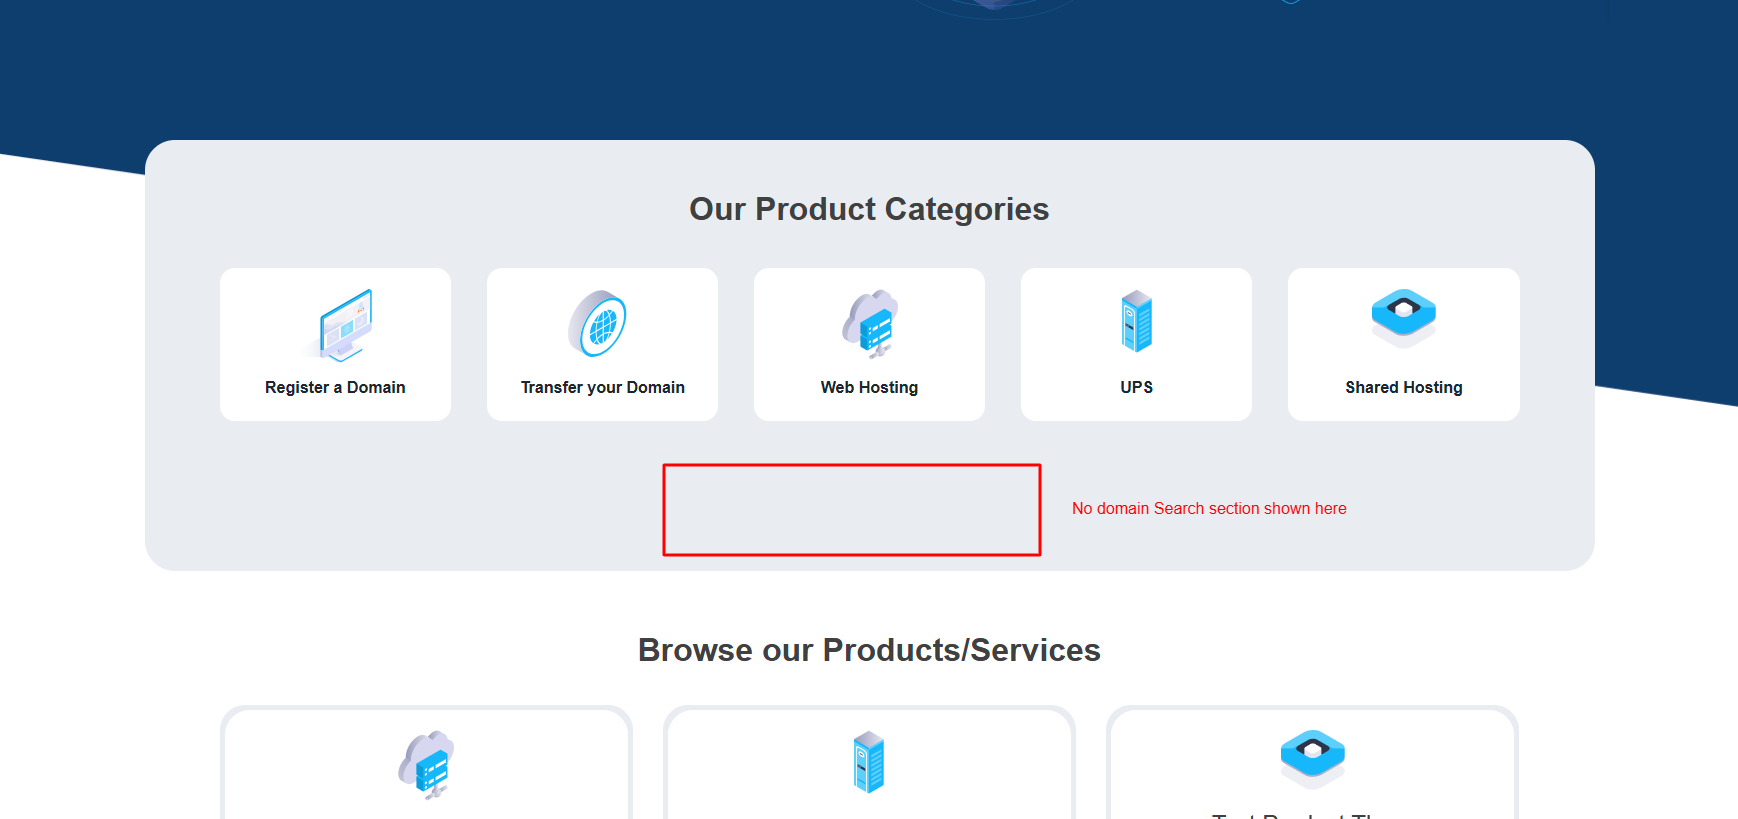
Layout 1
Frontend Preview
-
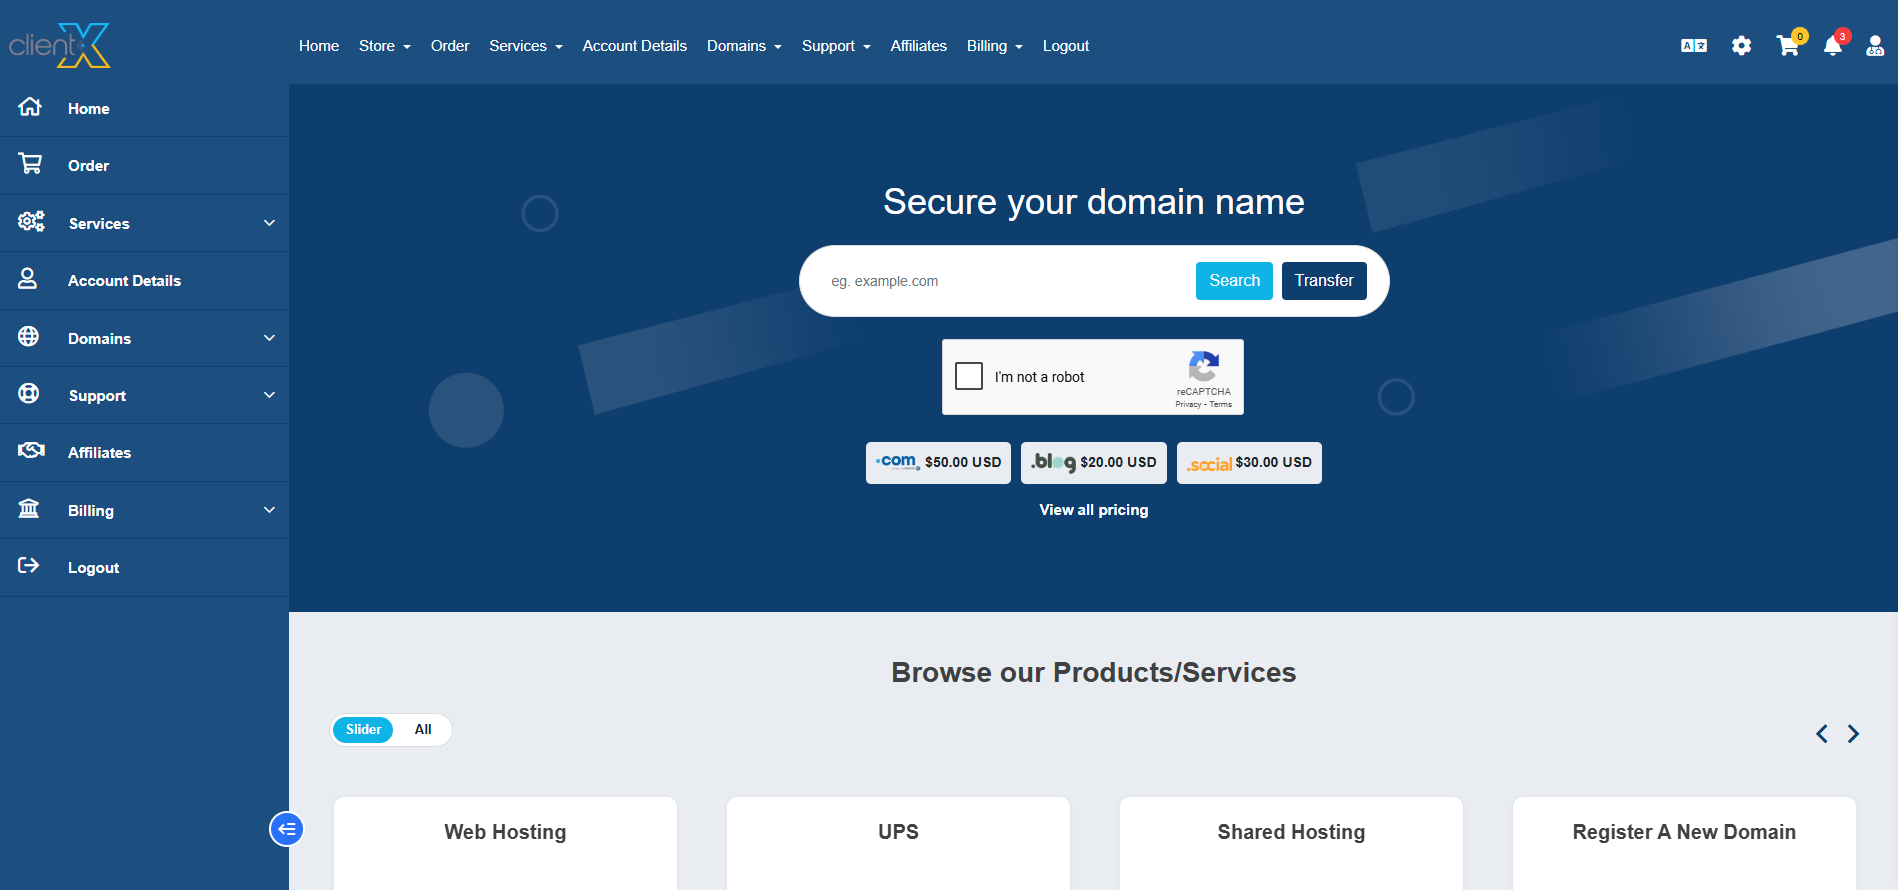
When Layout 1 is selected, the Home page will appear on the frontend as shown below.
Template Settings
-
Layout 1 includes Template Settings that allow you to:
-
Show or hide specific Home page sections
-
Control content visibility based on your requirements
-
After updating the settings, click Save Changes to apply them.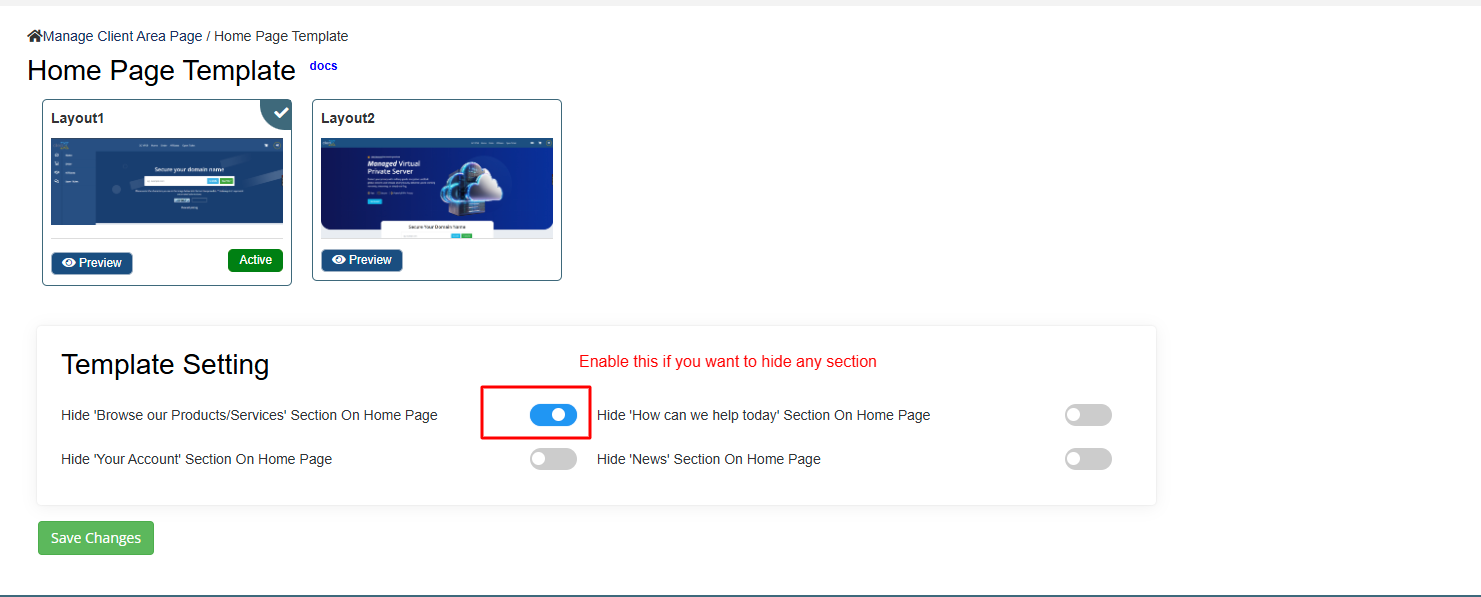
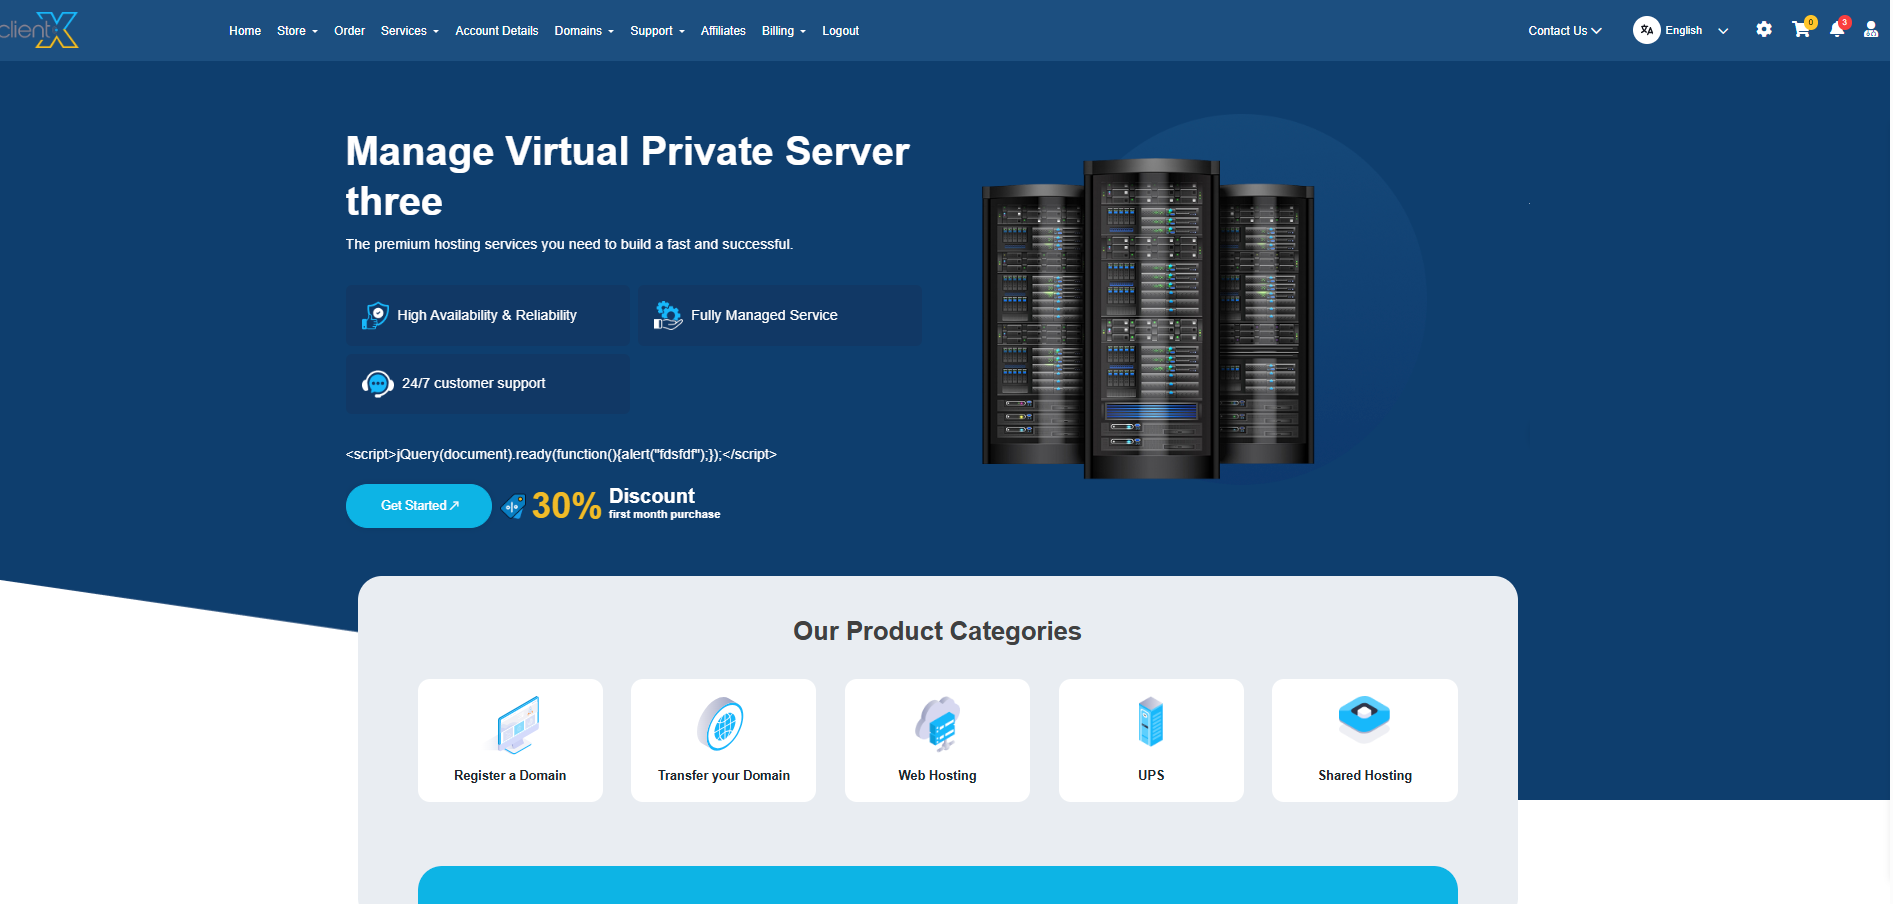
Layout 2
Frontend Preview
-
When Layout 2 is selected, the Home page will display with a different structure and design.
Template Settings
-
Layout 2 also includes dedicated Template Settings, allowing you to:
-
Enable or disable specific Home page sections
-
Manage slider content dynamically
-
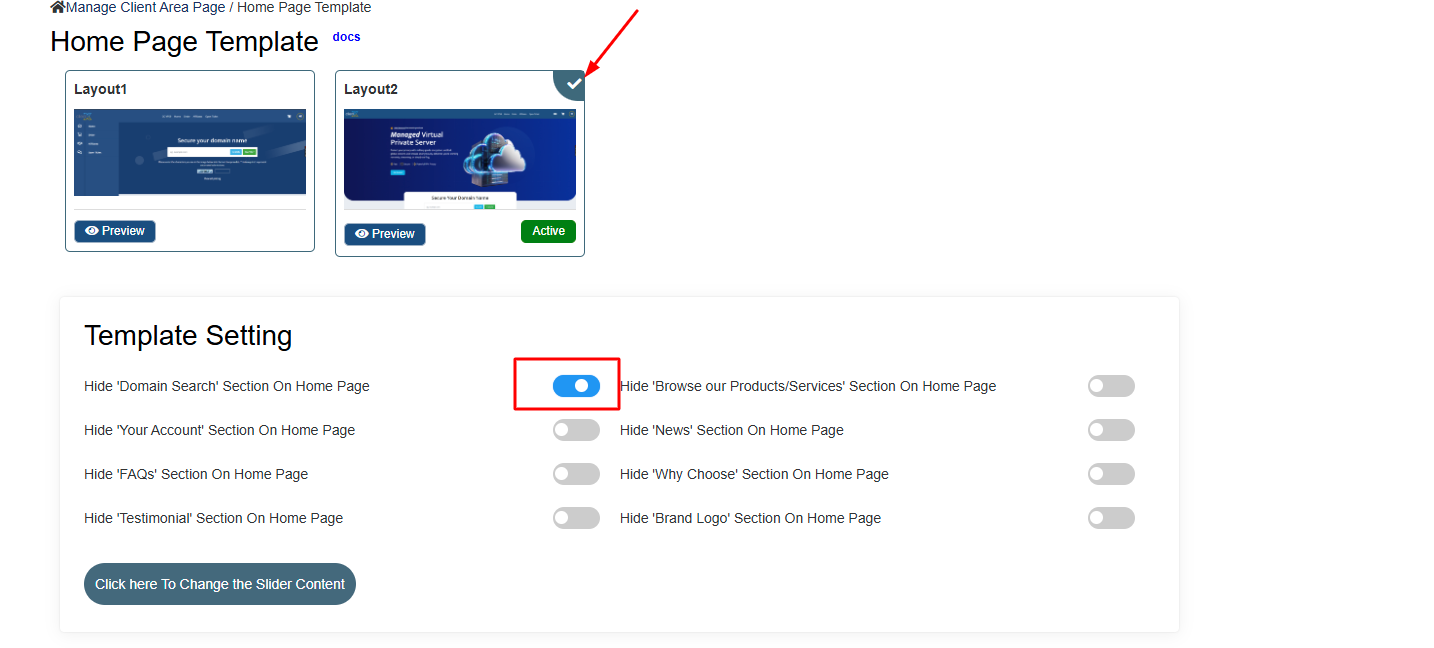
How to Change Slider Content in Layout 2
Layout 2 includes a built-in slider system that can be fully managed from the admin panel.
Step 1: Open Slider Settings
-
Under the Template Settings section, click the Change Slider Content button.

Step 2: Access Slider Content Page
-
You will be redirected to the Slider Content management page.
-
Click Add New Slider to create a new slider.

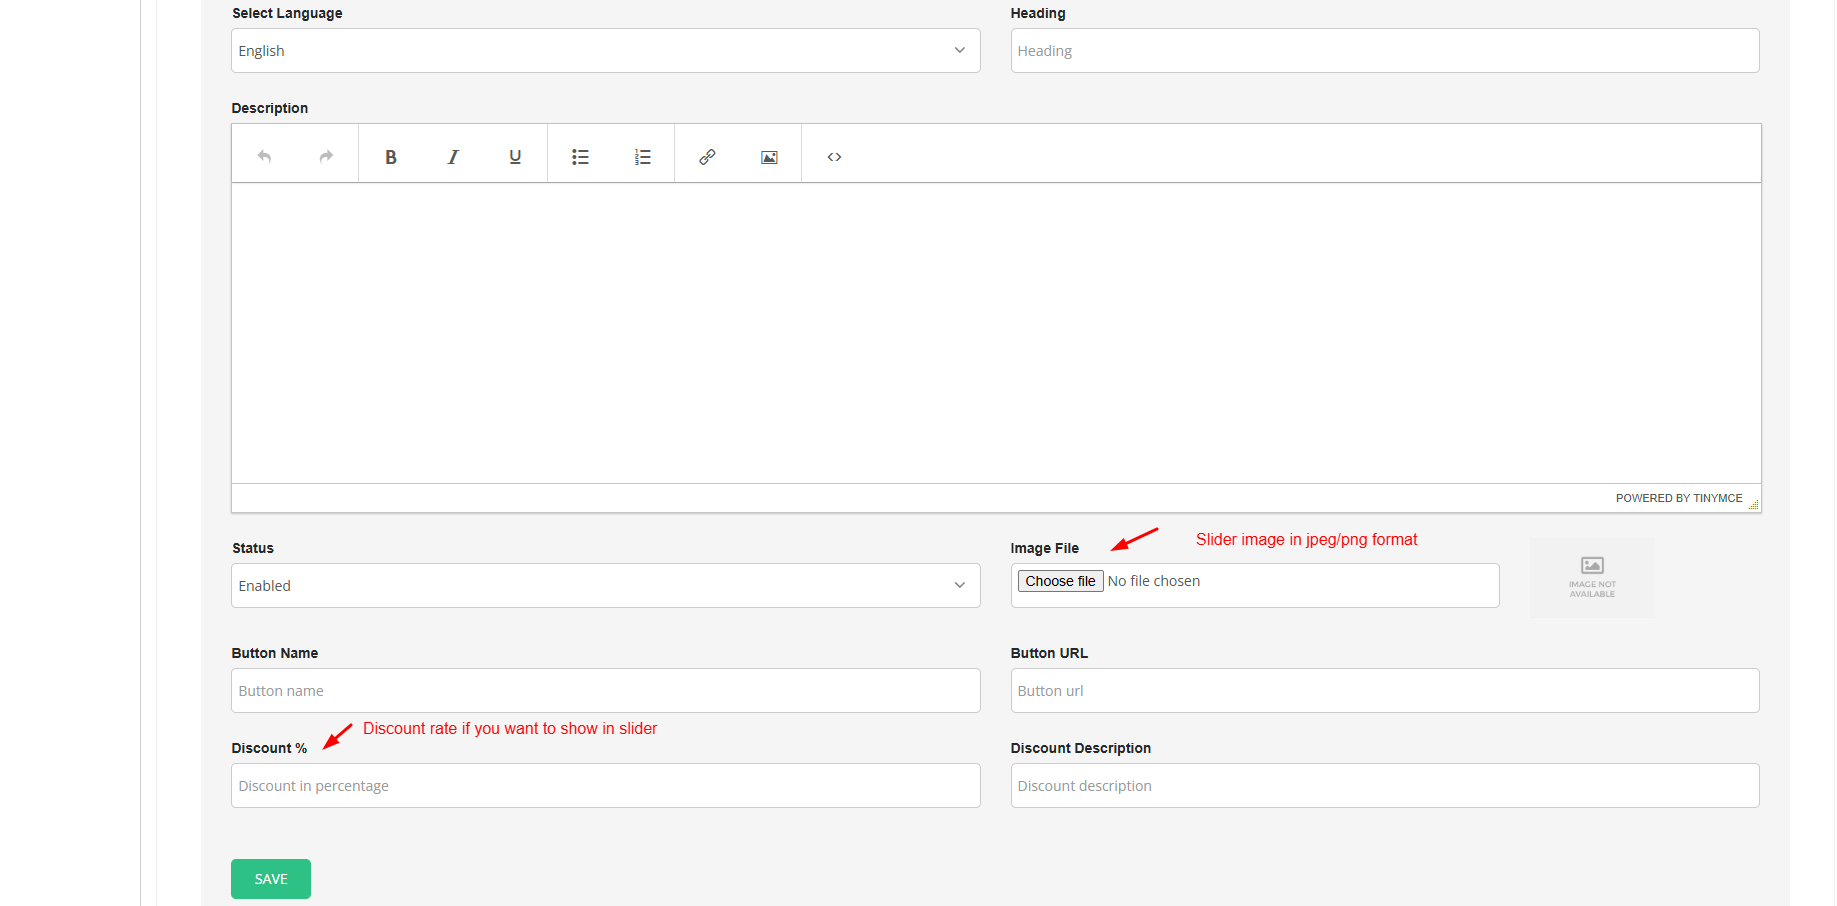
Step 3: Add a New Slider
-
Fill in all the required slider details such as title, content, images, and settings.
-
Click Save Changes to add the slider.
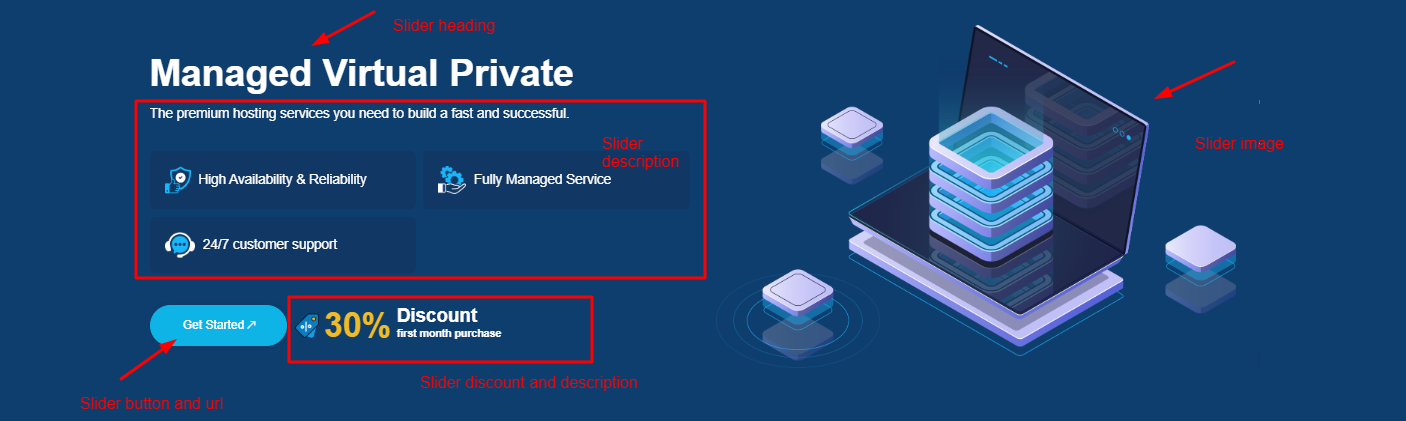
Step 4: Frontend Preview After Adding Slider
-
Once added, the slider will immediately appear on the Home page frontend.
Step 5: Edit Existing Slider
-
To update an existing slider:
-
Click the Edit icon
-
Modify the slider details as required
-
Save the changes
-
Step 6: Enable or Disable Slider
-
Use the toggle button in the Slider Content list to enable or disable any slider.
-
Changes will reflect instantly on the frontend.
Step 7: Delete Slider
-
To permanently remove a slider:
-
Click the Delete icon in the Slider Content list
-
-
The slider will be completely removed and will no longer appear on the frontend.
