WGS ClientX – Client Area & Client Profile Icon Settings Guide
Before configuring any of the options below, follow these steps once:
-
Log in to your WHMCS Admin Panel.
-
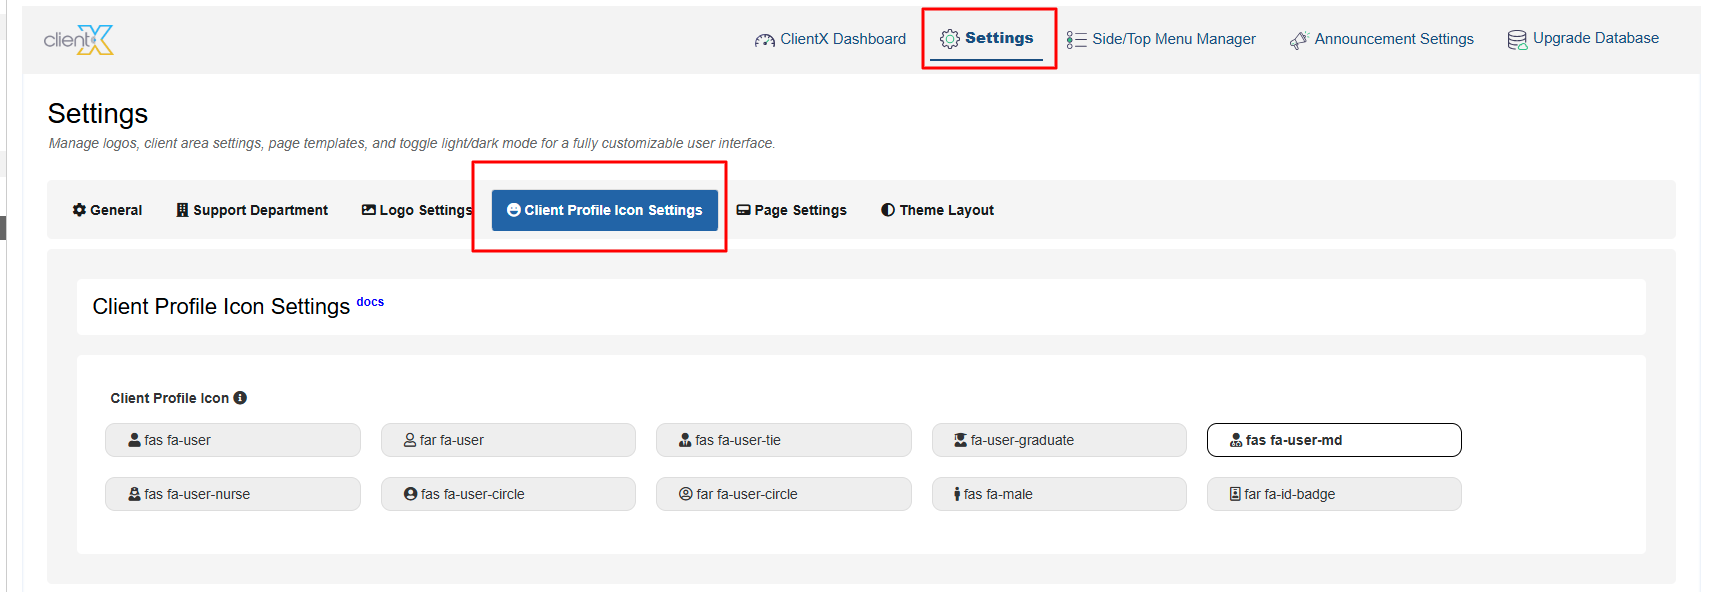
Navigate to Addons > WGS ClientX > Settings.
-
Click Settings to open the Client Profile Icon Settings tab.
How to change the Client Profile Icon?
In the Settings tab, locate the Client Profile Icon section.
-
You will see multiple icon options available.
-
Select the icon you want to use for the client profile.
-
Click Save Changes to apply the selection.

Once the changes are saved, the selected profile icon will appear in the Client Area top navigation bar, as shown in the attached screenshot below.

