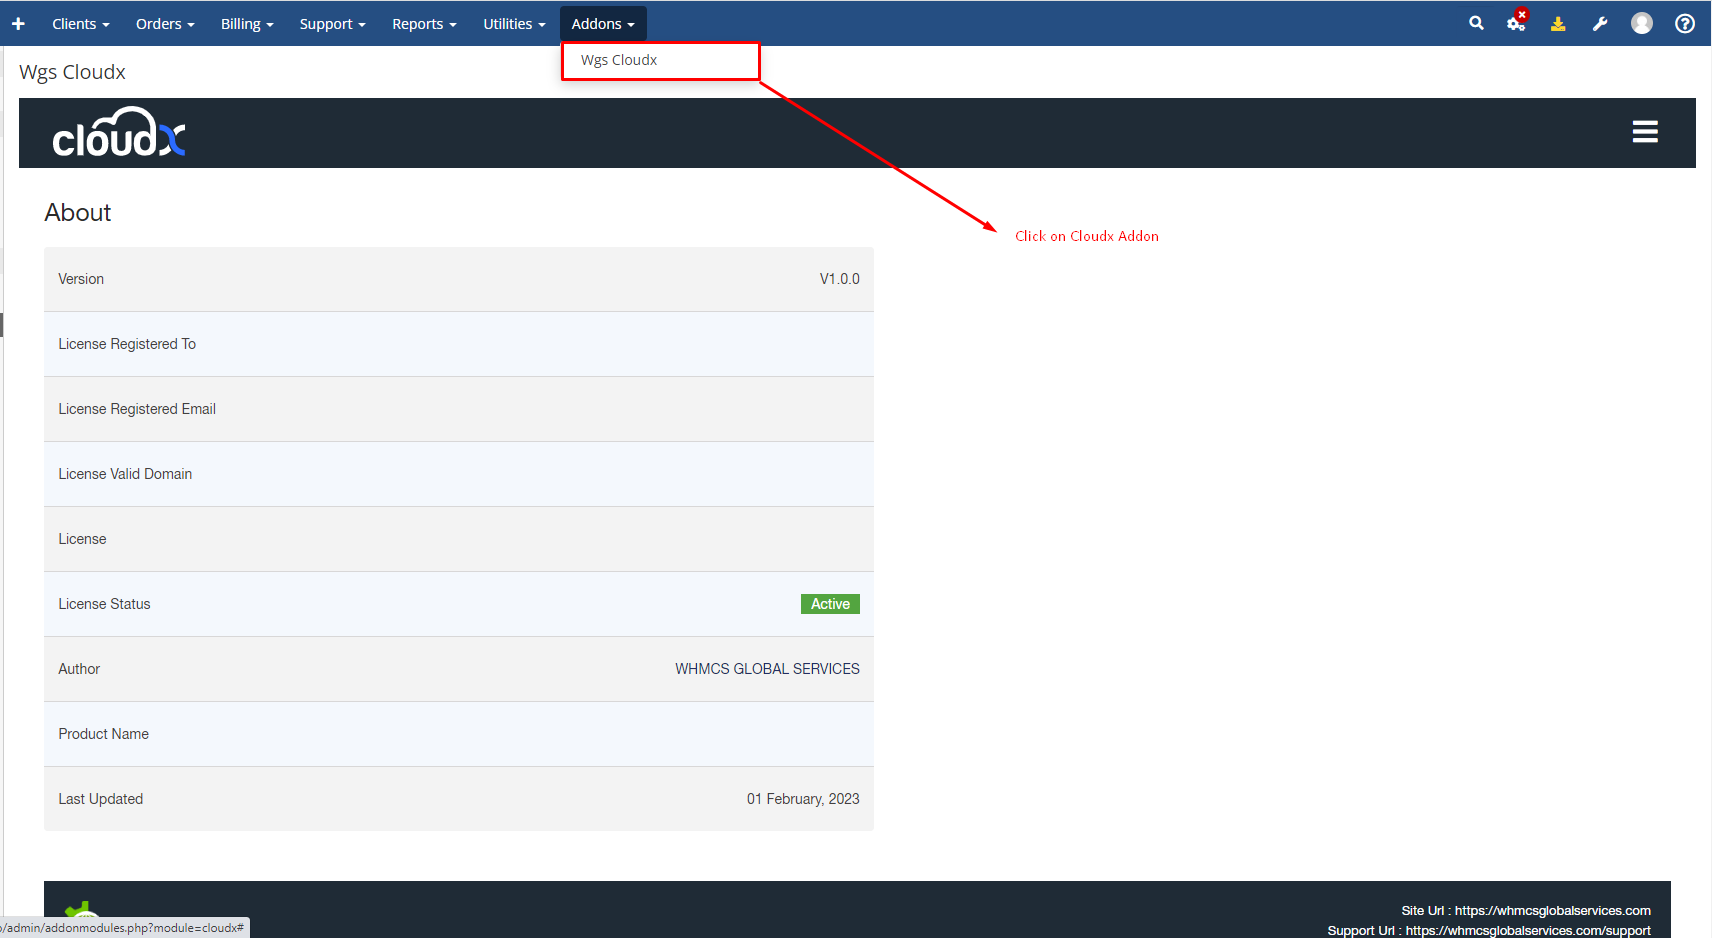
Step 1: Log in to WHMCS Admin and click on Cloudx Addon
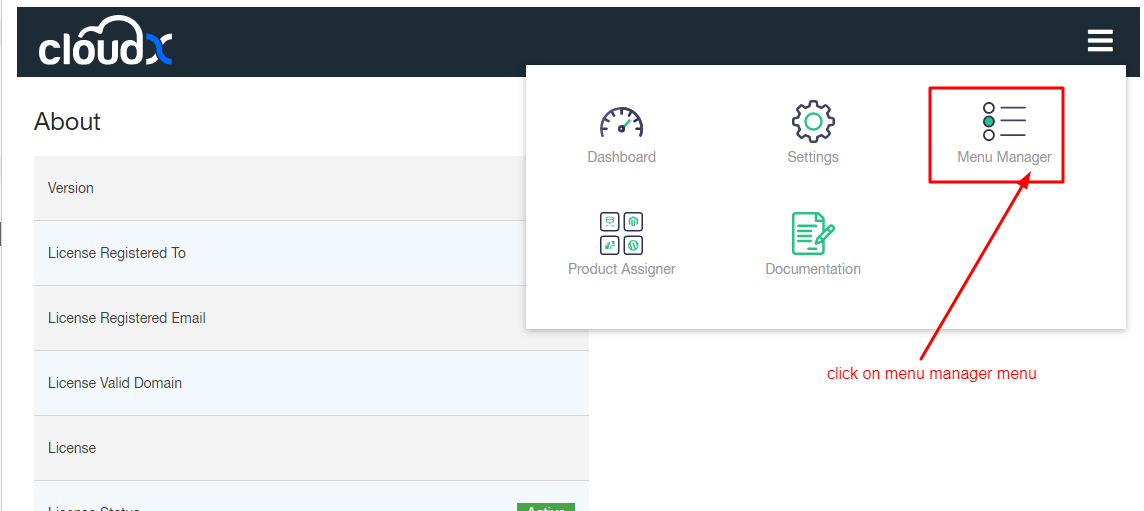
Step 2: The click on Menu Manager Menu
Step 3: Search the page name and click on the Pencil icon from the right-side of the screen.
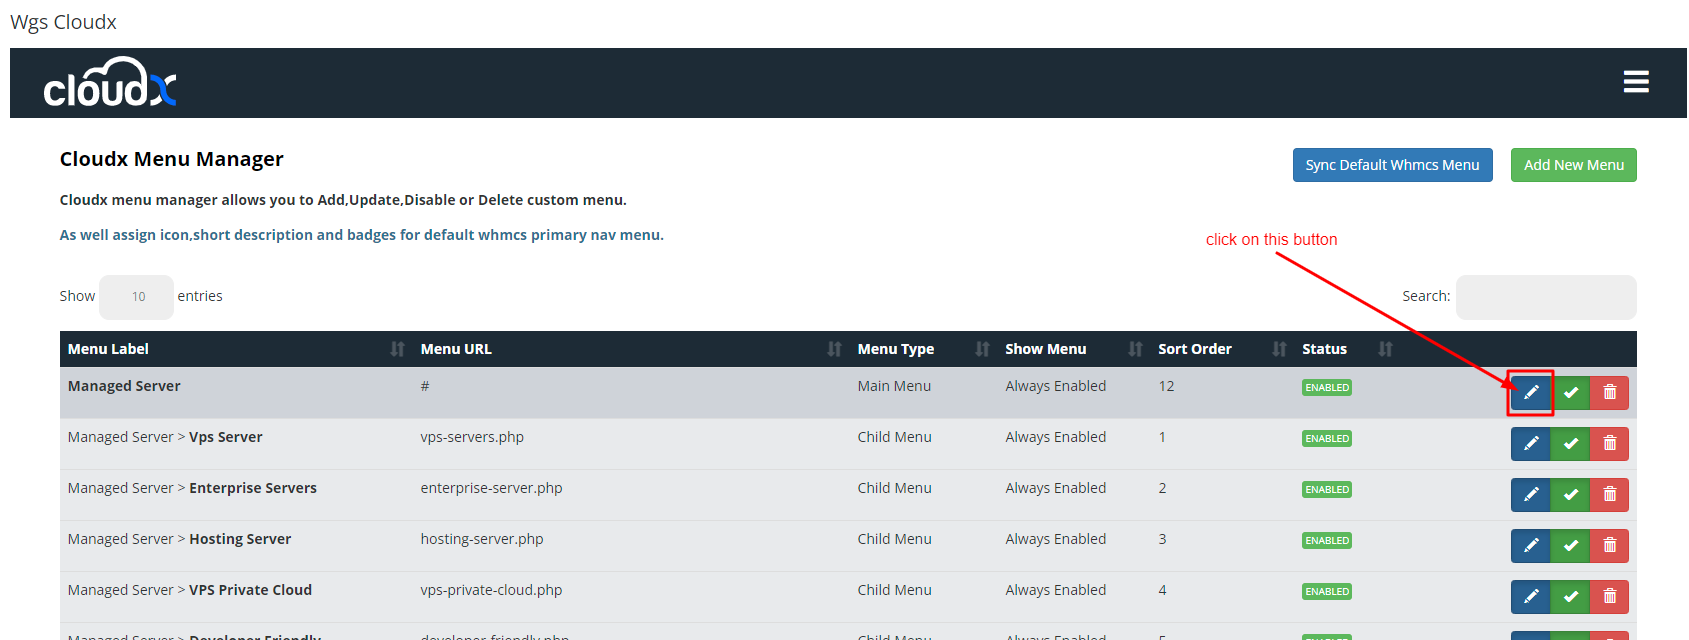
Step 4: After that you will make the changes for example in this screenshot here added Test Server under Menu Name & Menu label, Menu Description similarly you can add as many you want and then click on save button.

Step 5: Before editing the frontend was looking like this.
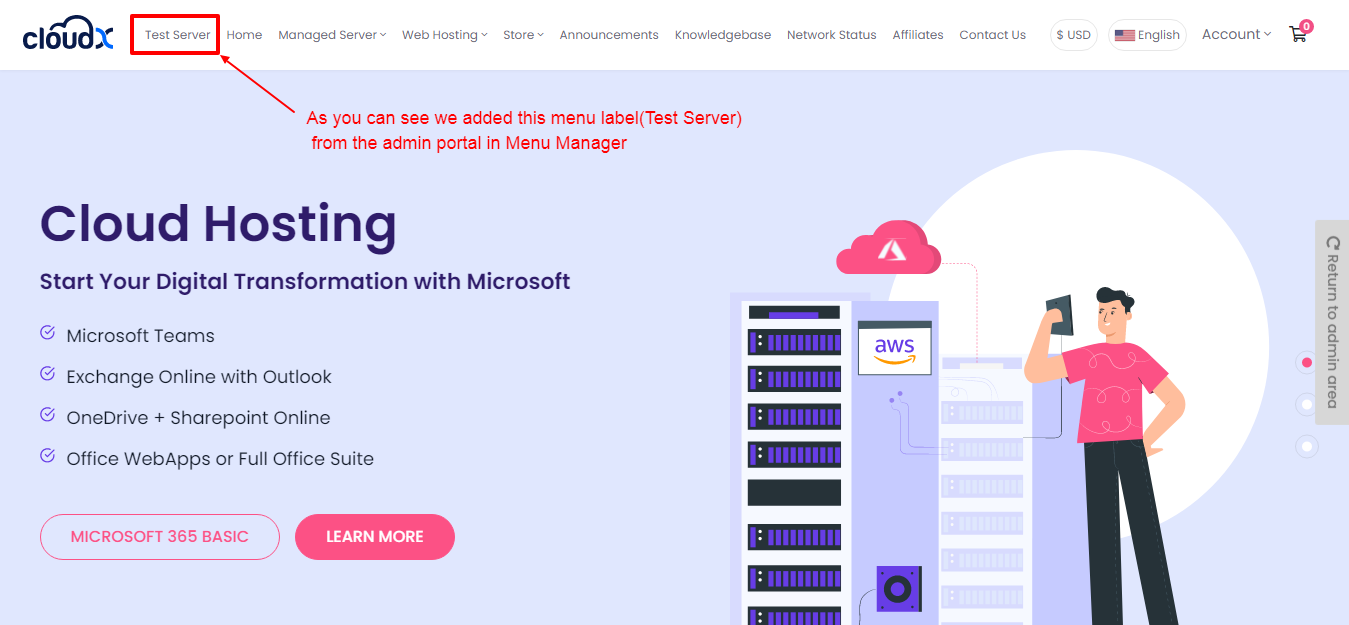
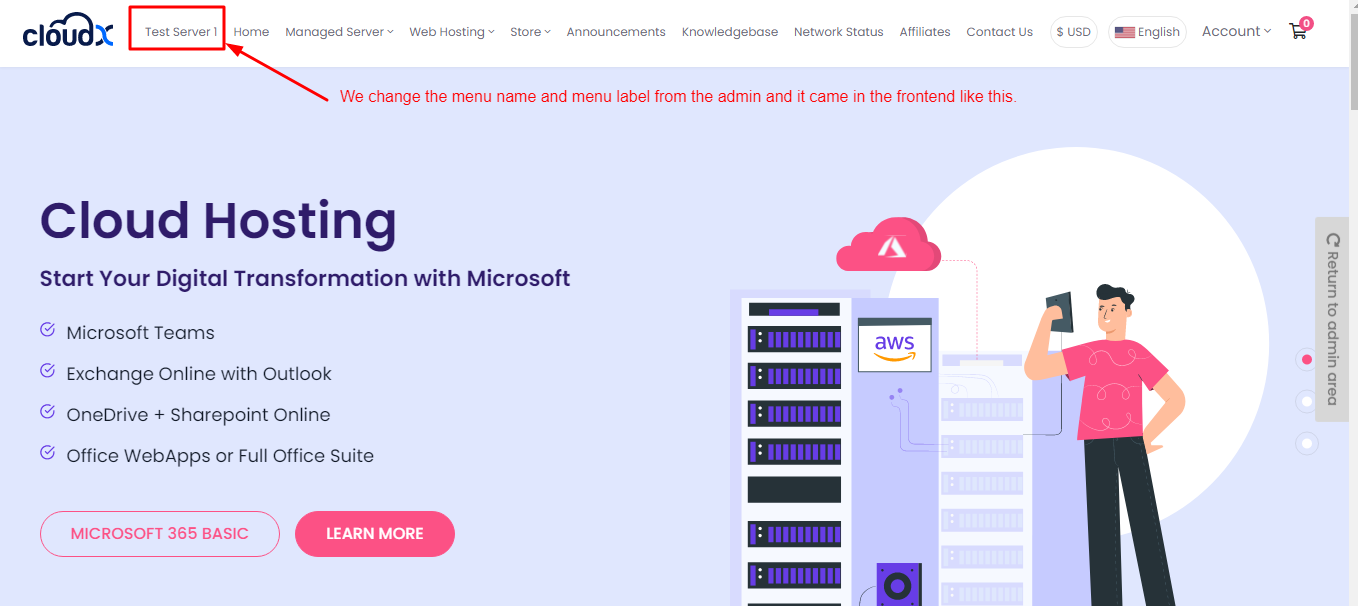
Step 6: After editing the frontend will look like this.
Note: Similarly you can edit any menu option as you want.
