Step 1: Extract the downloaded zip file.
Step 2: Now, connect to your local FTP Client example: FileZilla, cPanel, etc
Step 3: Next, Put the address of your extracted (Blesta) file in the Local Site bar.
Step 4: Open the extracted Blesta folder in your local FTP Client.
Step 5: Upload the extracted folder to your Blesta installation directory
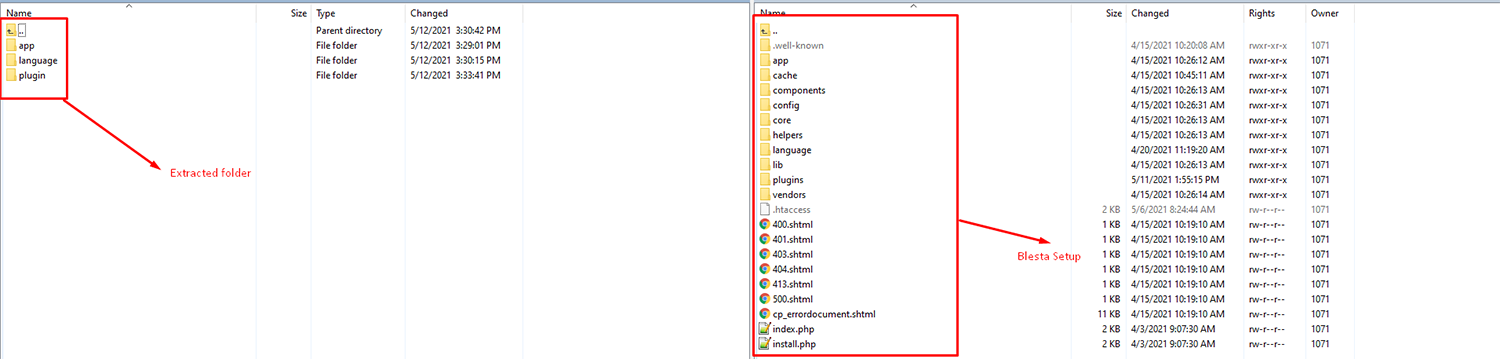
Step6: After extracting files upload the clientx folder to the given path:/public_html/app/views/client/over blesta set up.
Then go to the following path on your blesta setup.

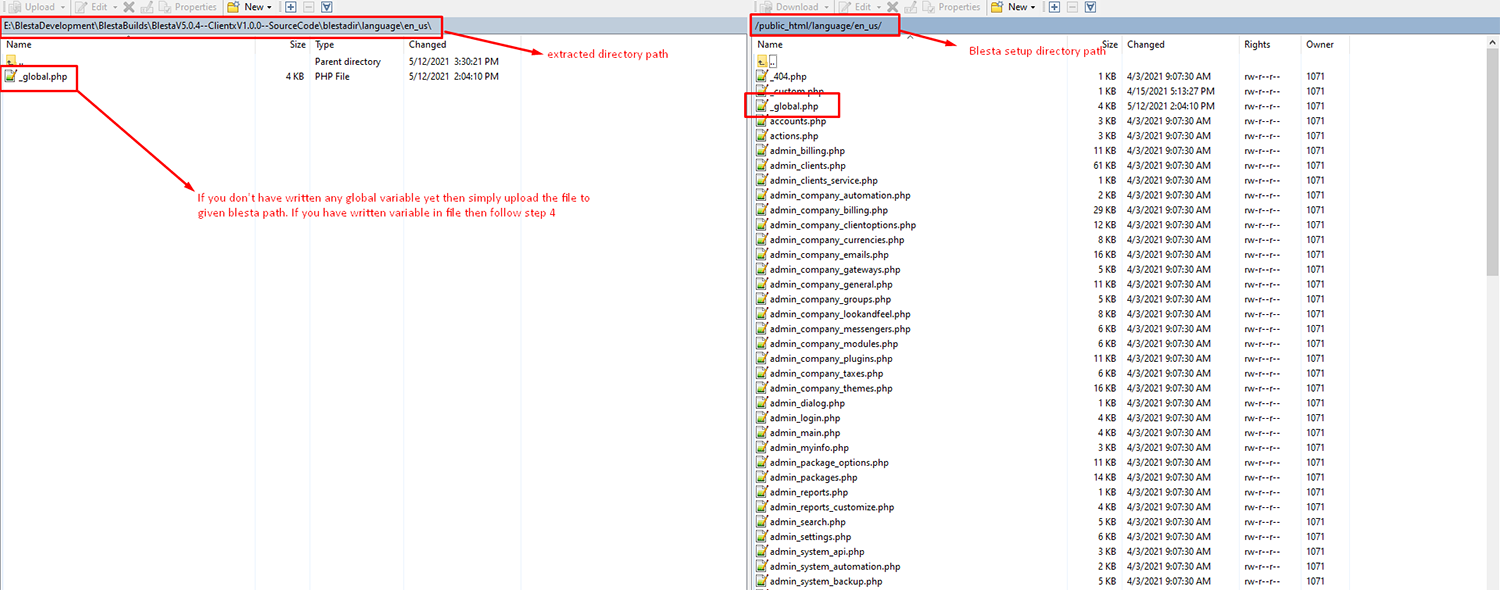
Step7: Extract the directory path and upload the _global.php variable and upload the file into blesta set up directory path.
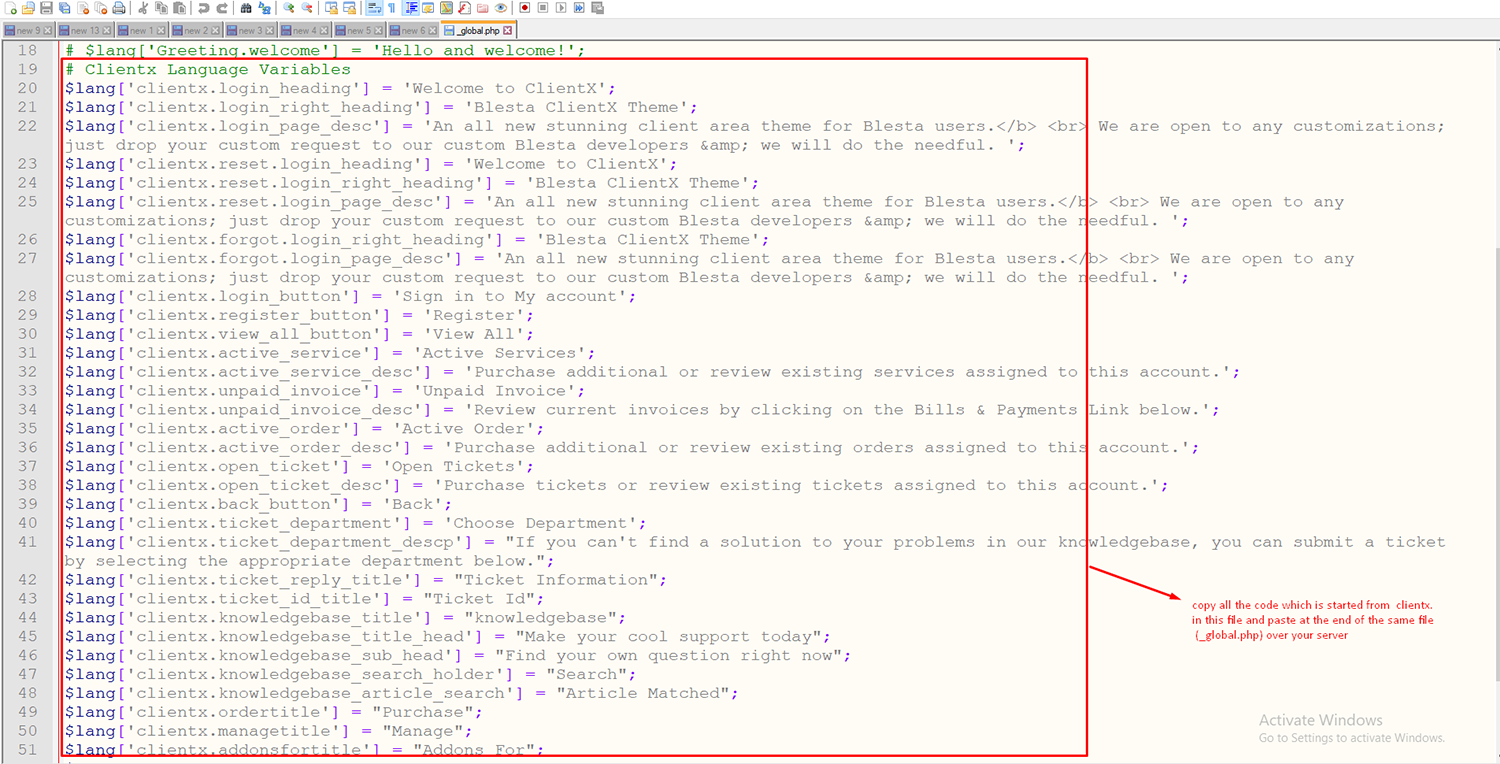
Step8: Copy all the code which is started from the of clientX in this file and paste at the end of the same files(_global.php) over your server.
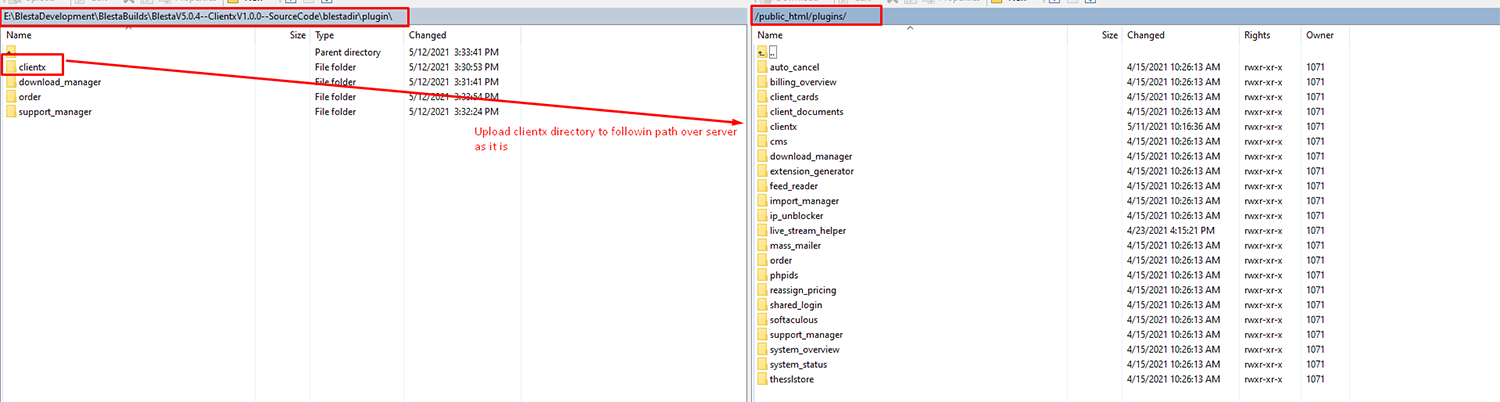
Step9: Upload the directory to the following path /public_html/plugins/over the server.
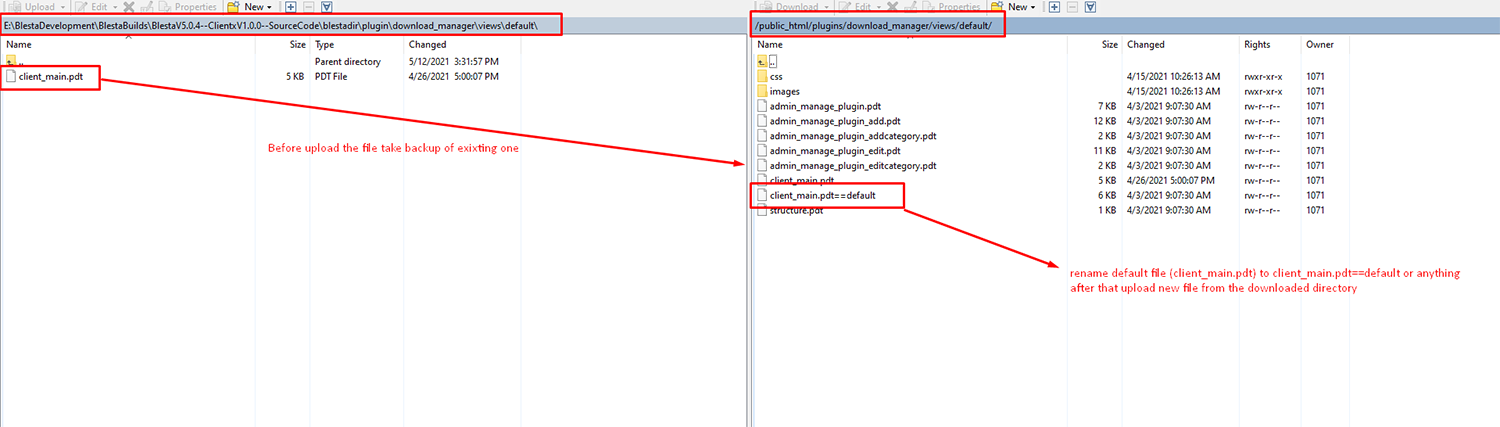
Step10: Please note before upload all the files take a backup of the existing one.
Then go to the following path/public_html/plugins/download_manger/views/default/ and rename default file(client_main.pdt) to client_main.pdt==default . After that upload the new file from the downloaded directory.
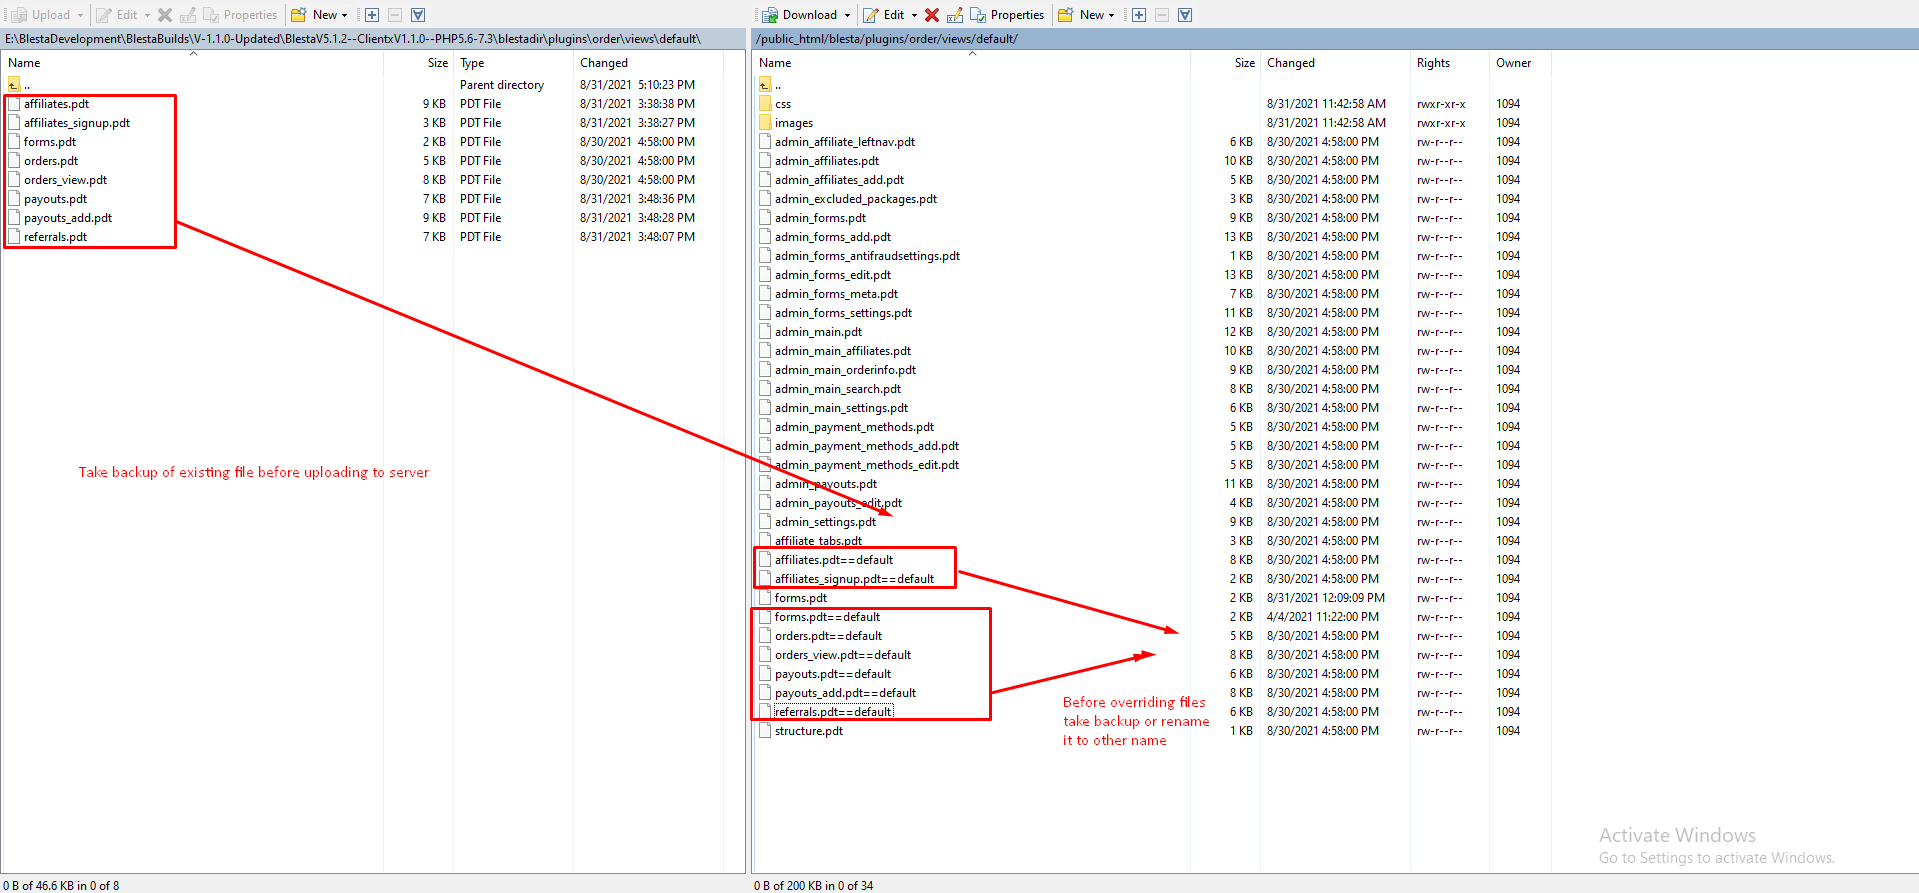
Step11: Before uploading the files take the backup of the existing one or rename it to the default.
Then go to the following path/public_html/plugins/download_manger/views/default/ and rename both default files before uploading/overriding.
Step12: Now upload the cartx folder to the same location over your server.

Step13: Upload these 9 files shown in the below screenshot to the same location /public_html/plugins/download_manger/views/default/ of your server.
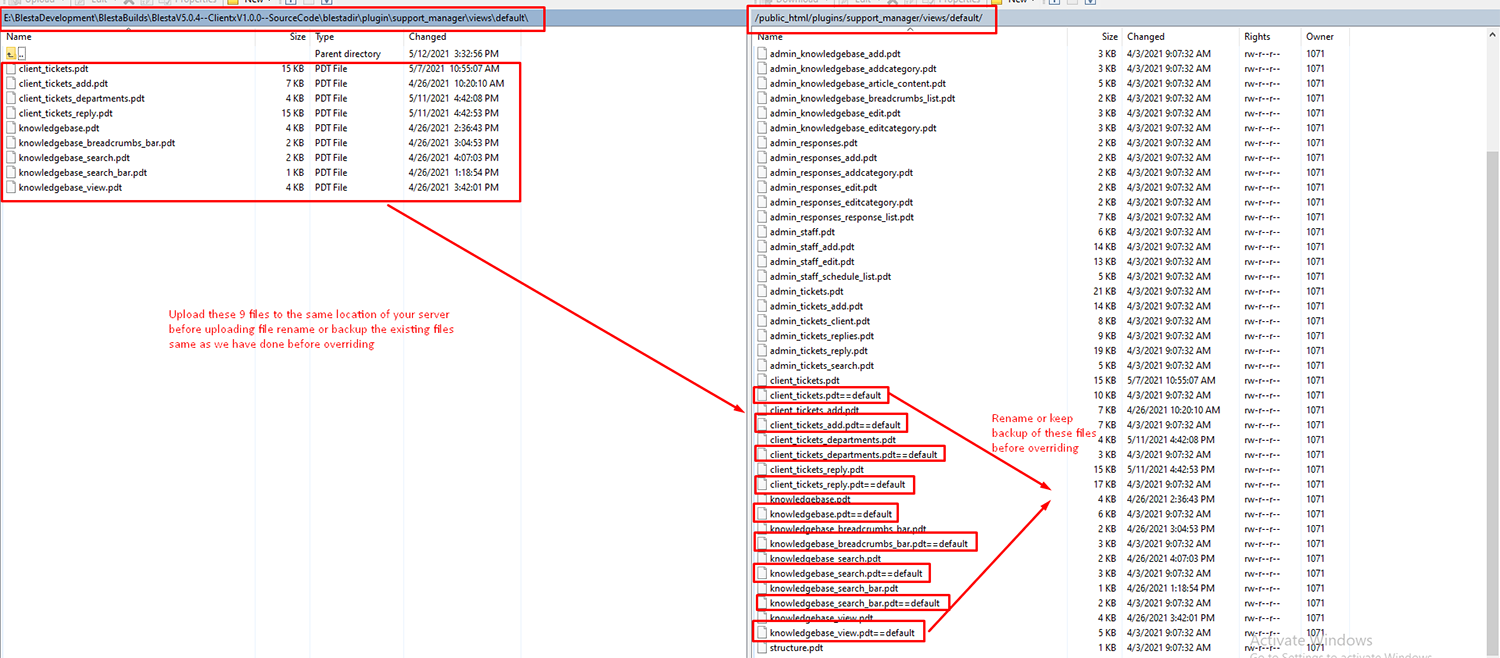
Step 14: Take the back of all the files before uploading to the server.
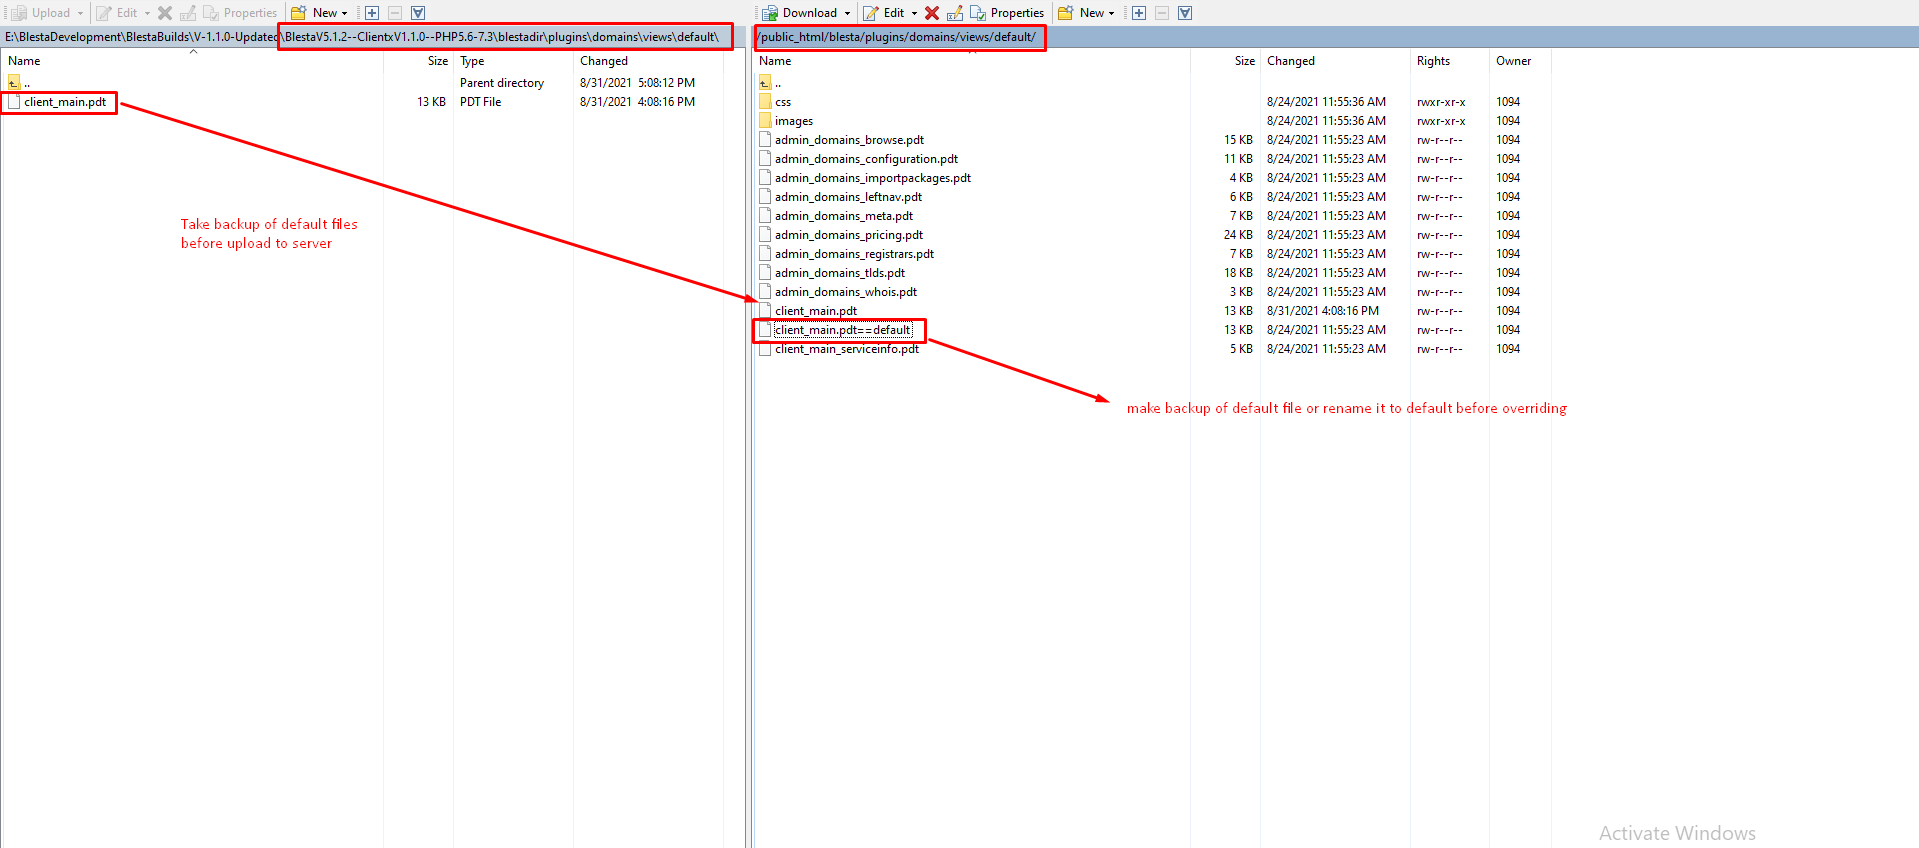
Note: Before uploading the files take the backup of the existing files same as we have done before overriding. And Rename or keep the backup of all these files before overriding.
