Note -> Please take backup before applying patch
Step 1: Download the patch, as shown in the screenshot below.

Step 2: Now from local go to the patch folder that you have extracted.
Step 3: Now navigate to the path shown below in the screenshot on both local (extracted file root path ) and server (whmcs root path).
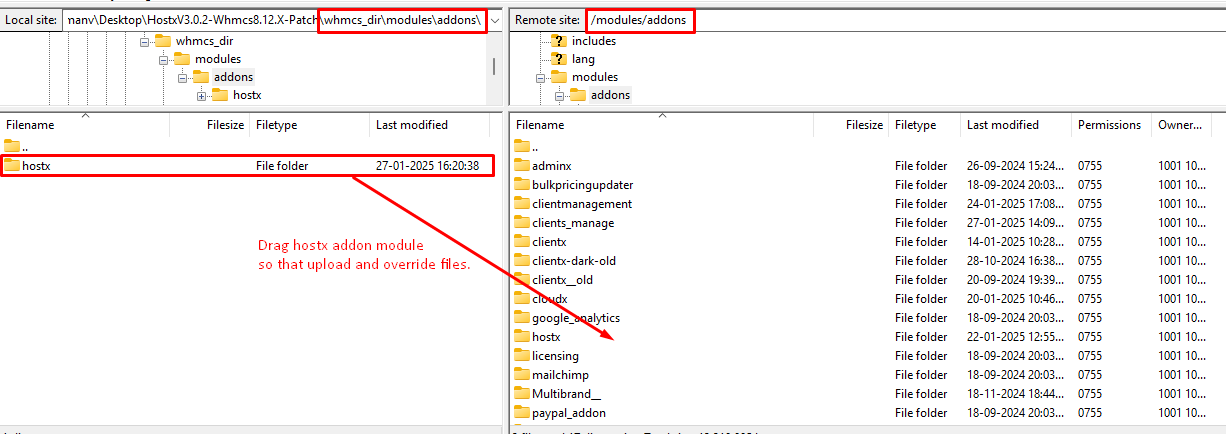
Step 4: After extracting the build go to the path as shown in the screenshot (\whmcs\modules\addons\ ->In local ) and (/modules/addons/ -> In server ). For addon module to upload “hostx” patch and override files screenshot given below.
Note : Please keep the backup of the existing folder in your local.Then start upload process.
Step 5: Now navigate to the path shown below in the screenshot on both local and server for templates file, (\whmcs\templates\hostx-child -> In local ) and (/templates/hostx-child-> In server ). For template files.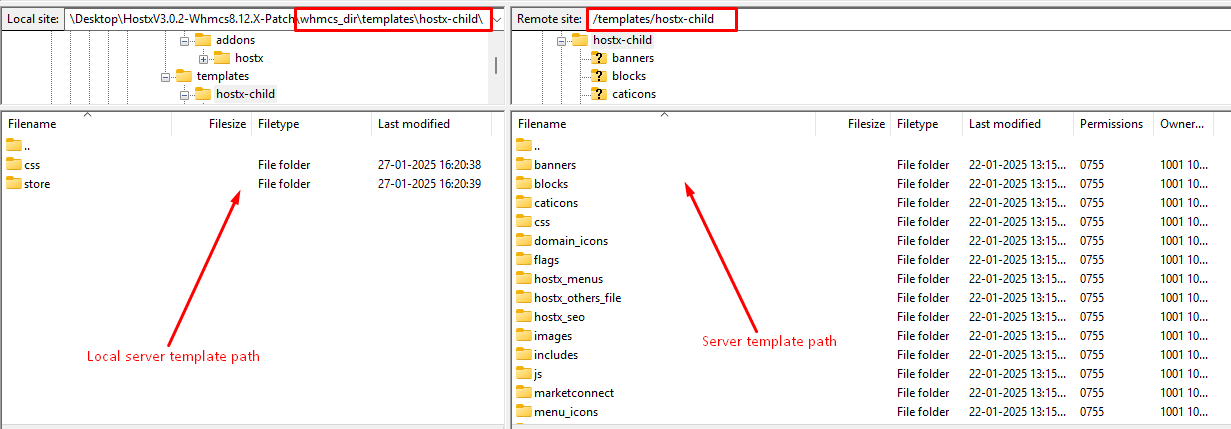
Step 6. Now Drag the file to upload “css” patch file (“store_hostx.css”) and override file screenshot given below.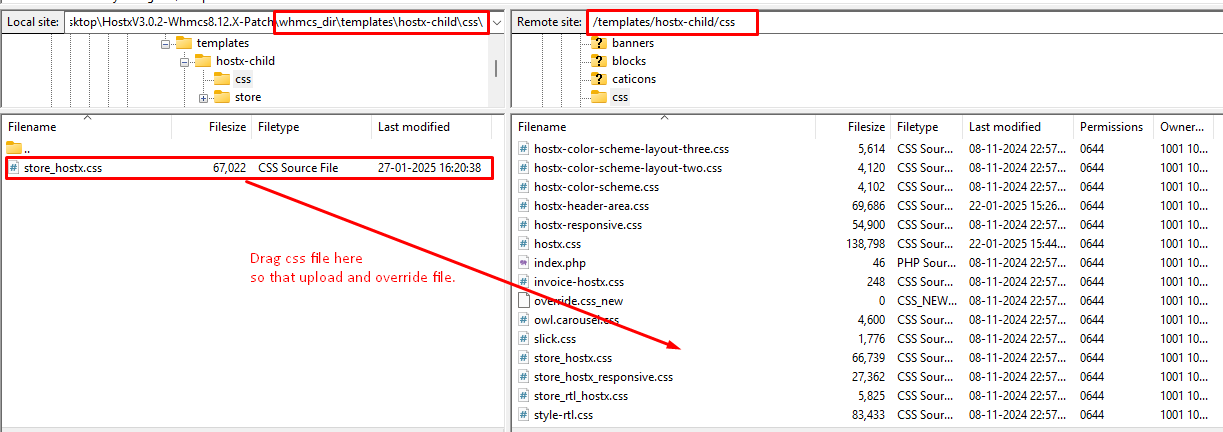
Step 7. Now navigate to the path shown below in the screenshot to upload the “store” directory’s patch files.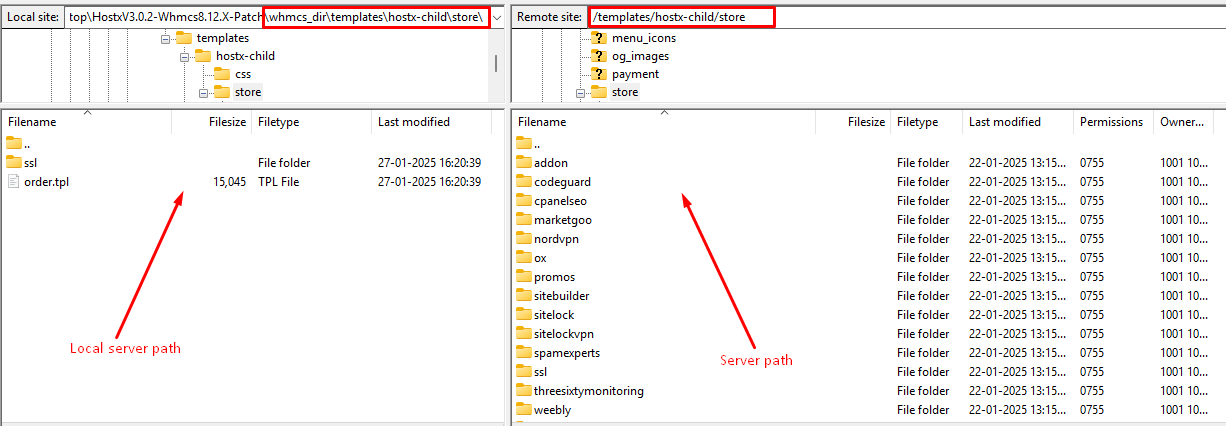
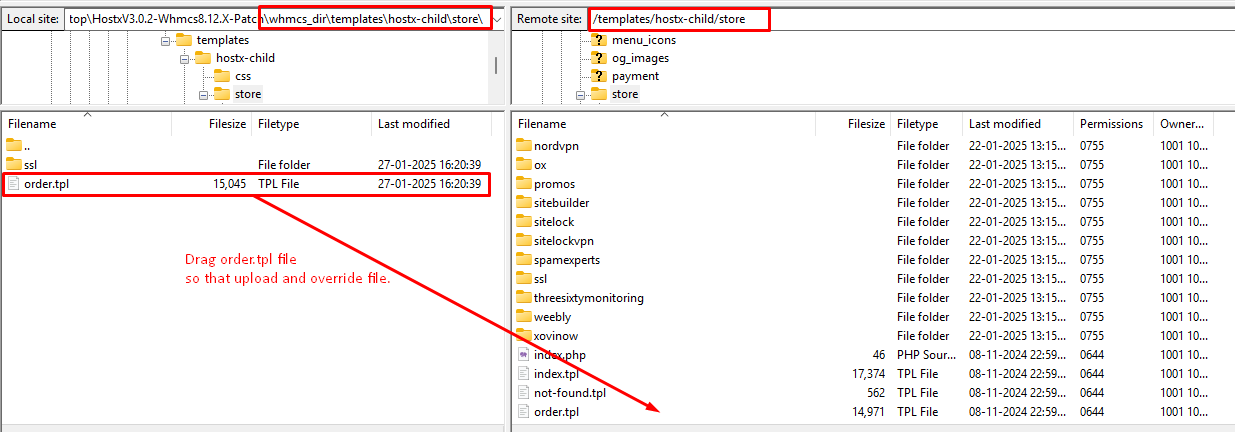
Step 8. Now Drag the “order.tpl” file from the “store” directory to upload and override files as mentioned in the given screenshot below.
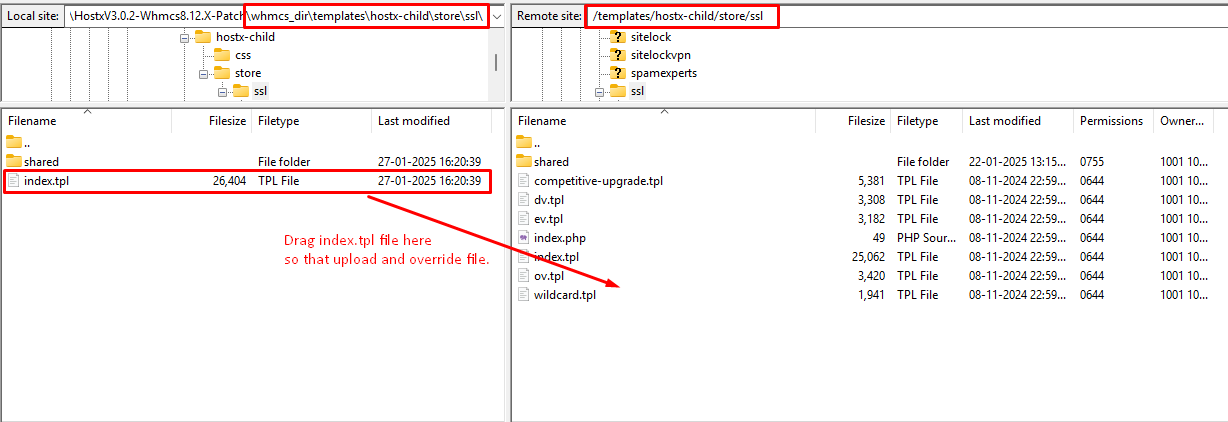
Step 9. Now navigate to the path shown below in the screenshot to upload the “index.tpl” patch files from the directory “ssl”.
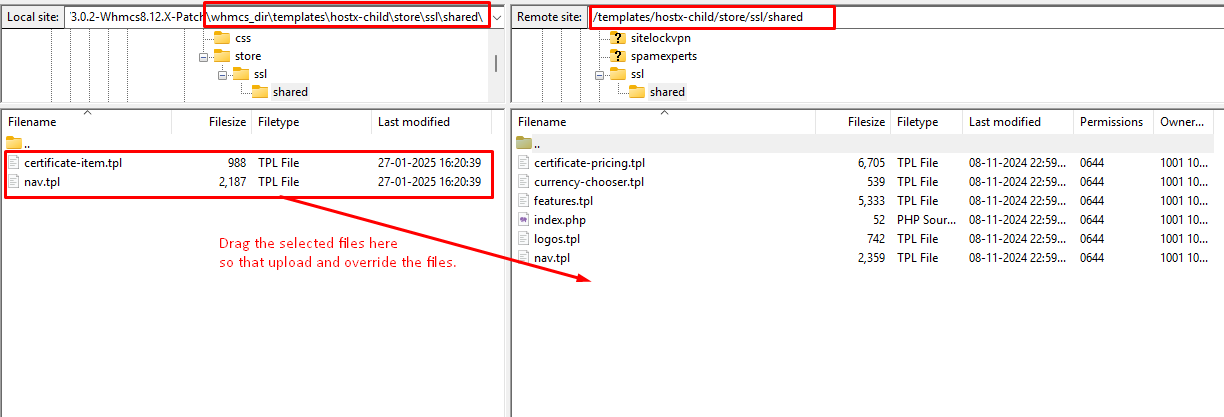
Step 10. Now navigate to the path shown below in the screenshot to upload the selected files from the “shared” directory.