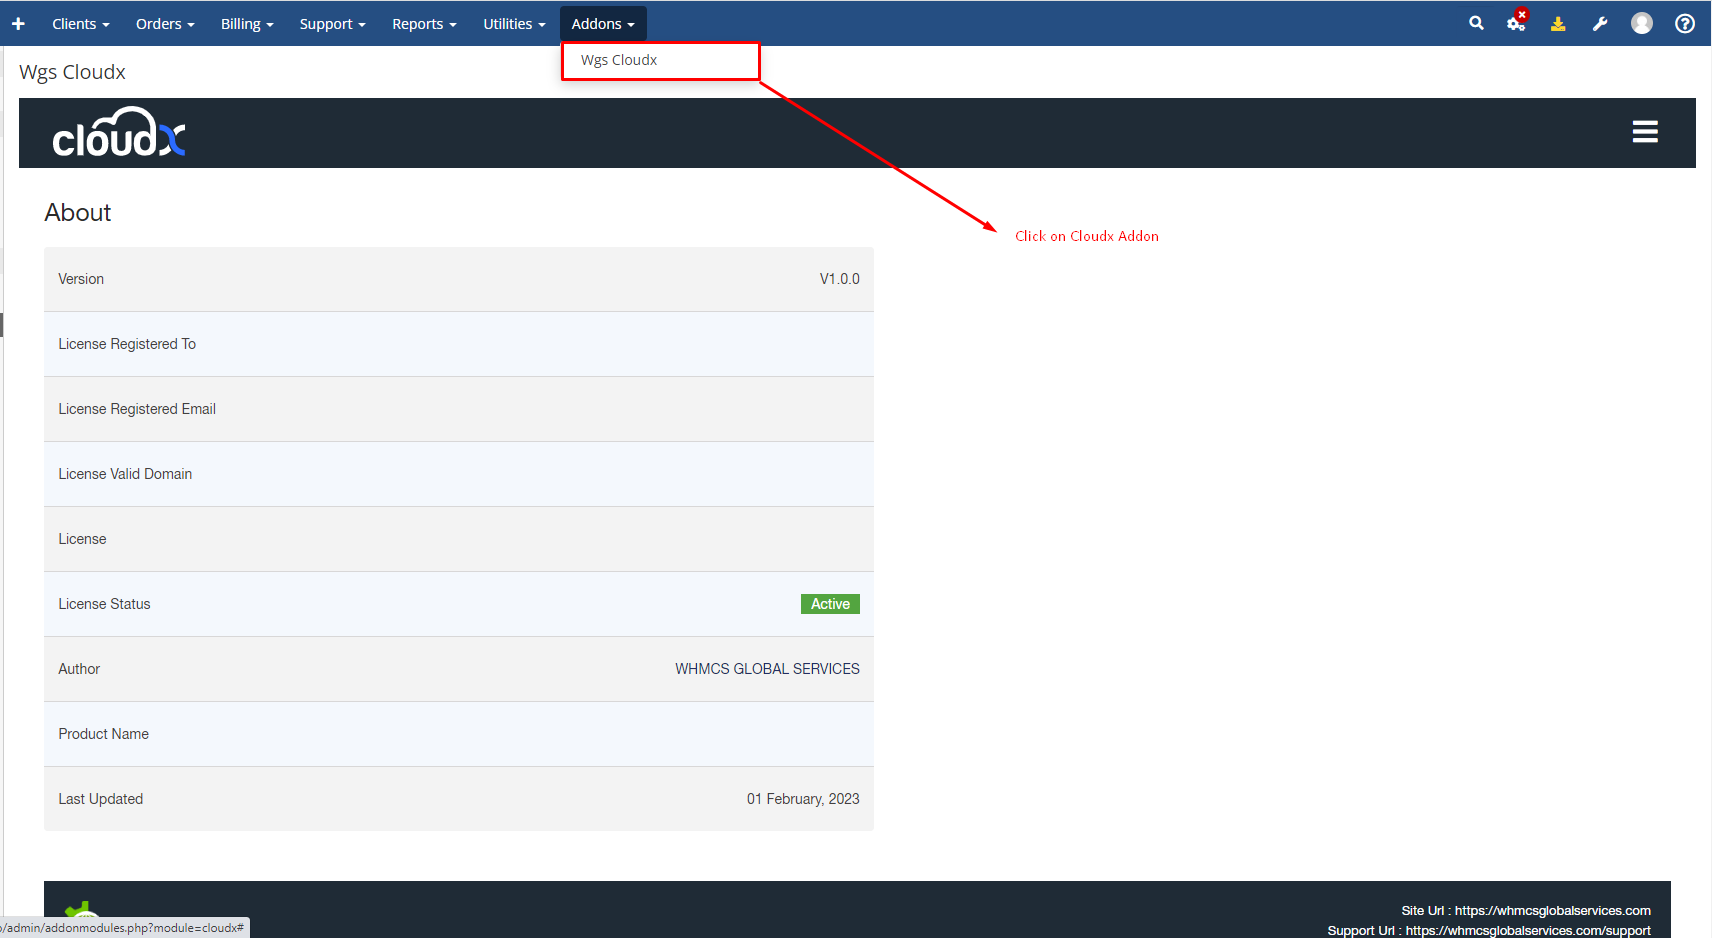
Step 1: Log in to WHMCS Admin and click on Cloudx Addon.
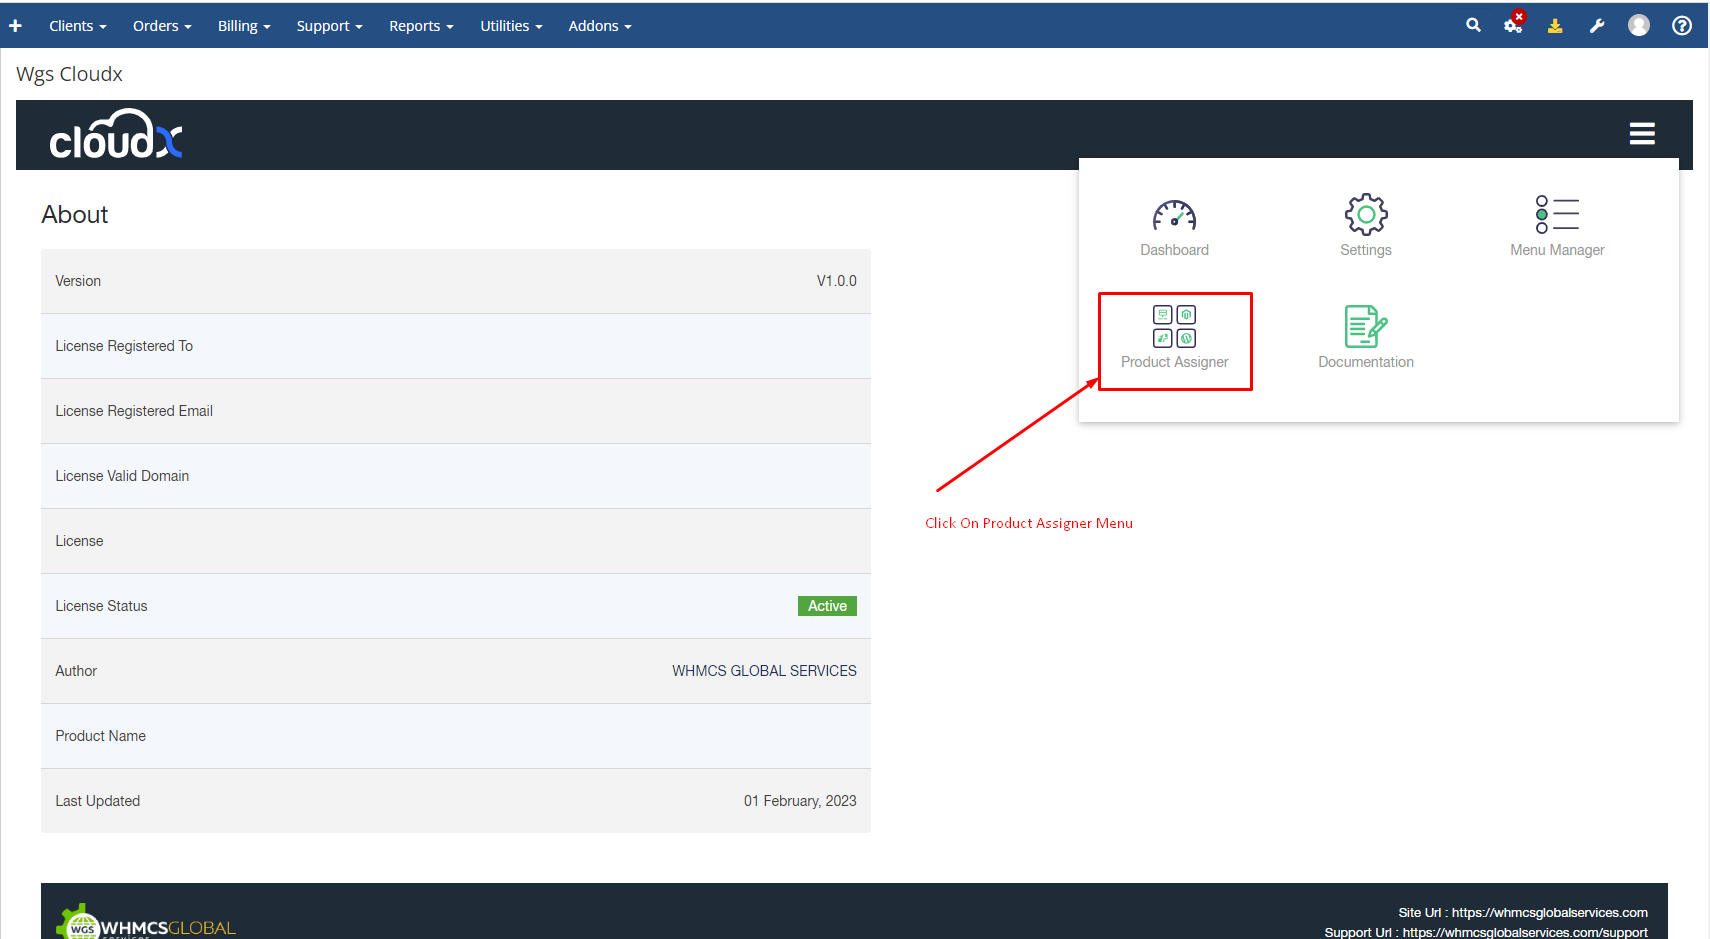
Step 2: Now click on Product Assigner Menu.
Step 3: When you will reach this page, on the left-hand side under the home page menu you will see all custom created pages which will be sorted as per the file name. For example you will see "eample wgs page" which we created recently.
On the right-hand side you will see the available product and the selected product for the page that we selected.
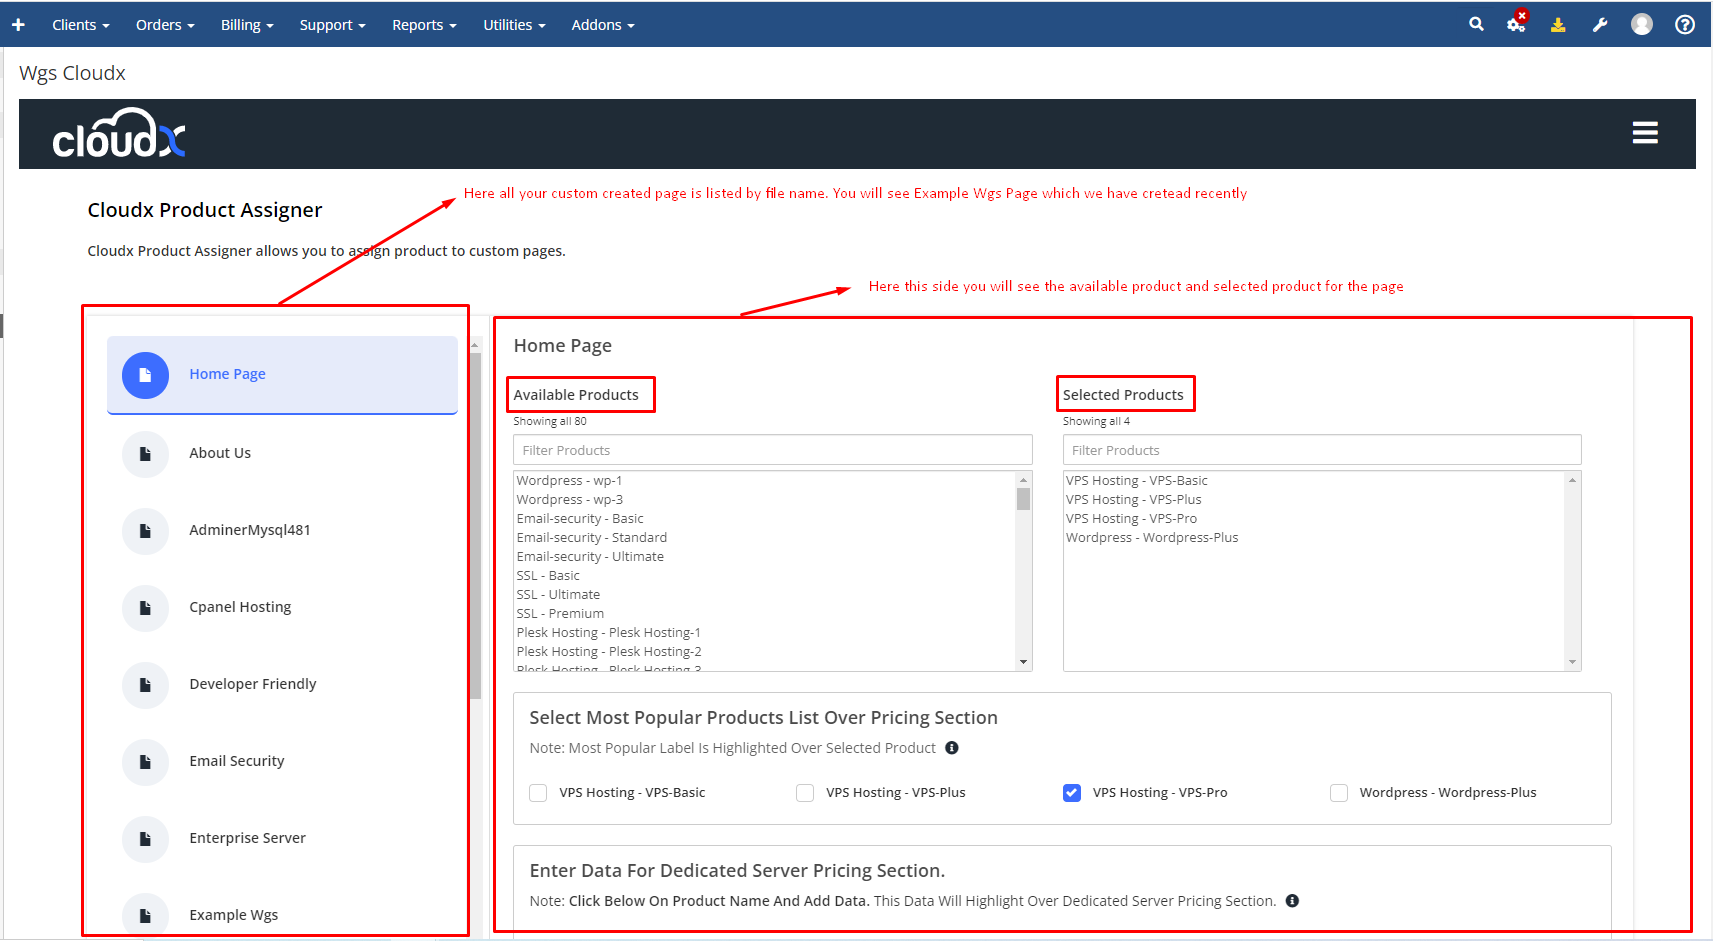
Step 4: Now click on the page name for which want to assign or update the product. On the right-hand side you will see list of all the available products which you can add which you can add as per your requirement.

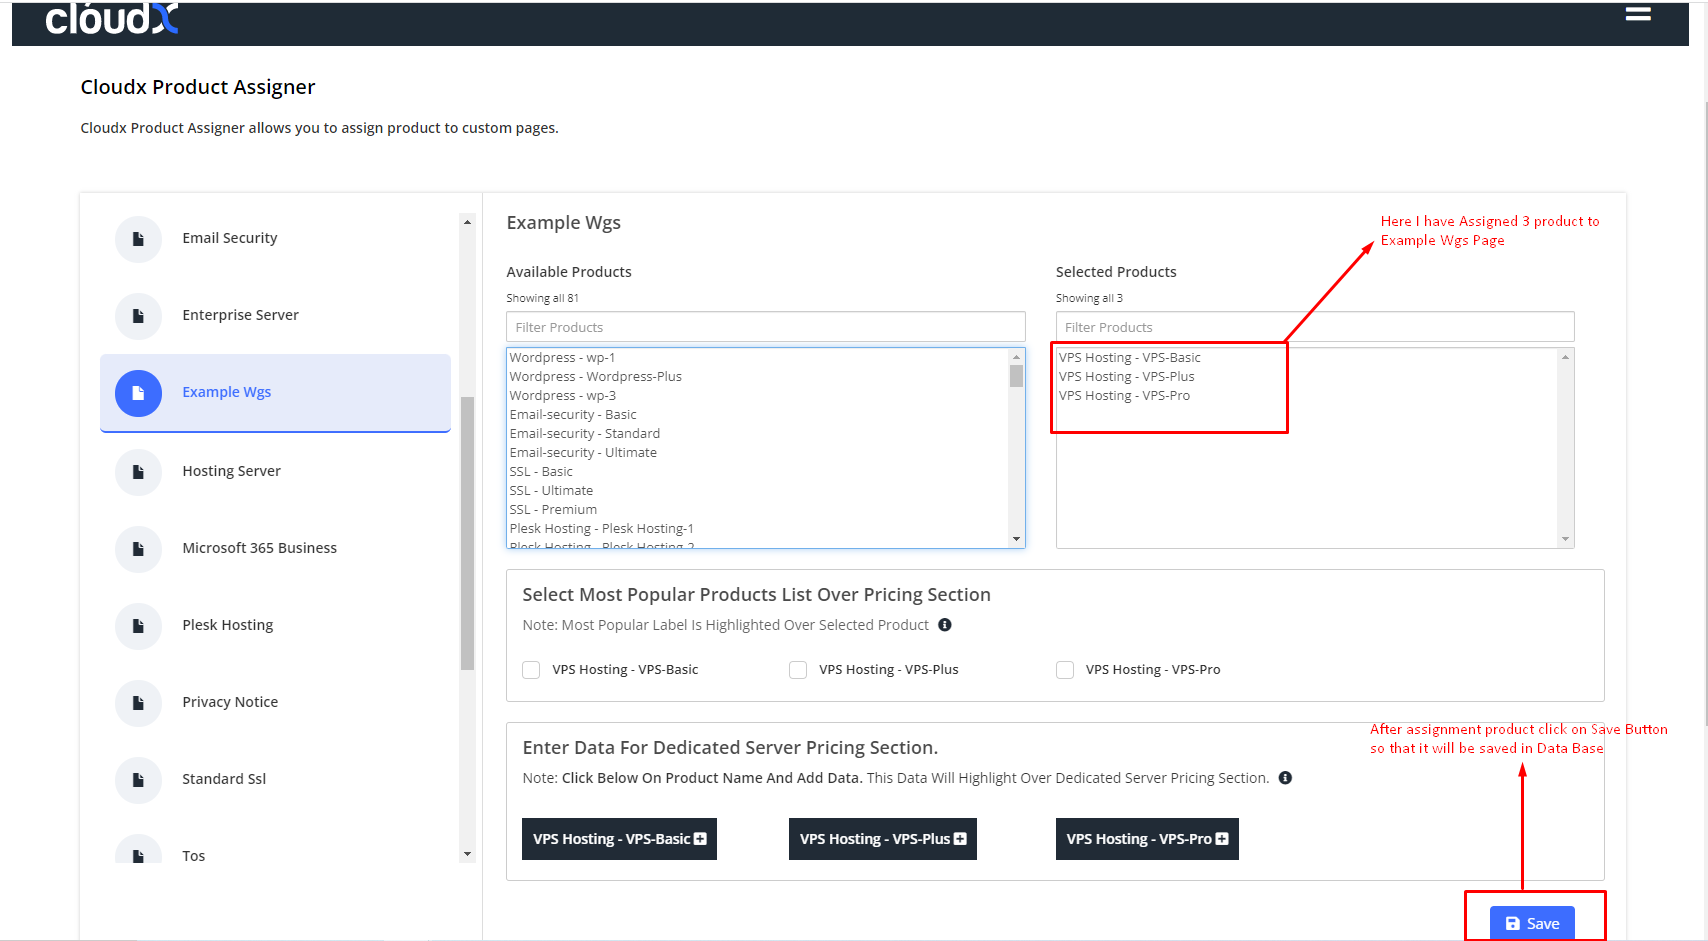
Step 5: For example as shown in the screenshot below I have assigned 3 products from the available product list that got selected under the selected product list. Once you have selected all the required products click on the save button so that it gets saved.
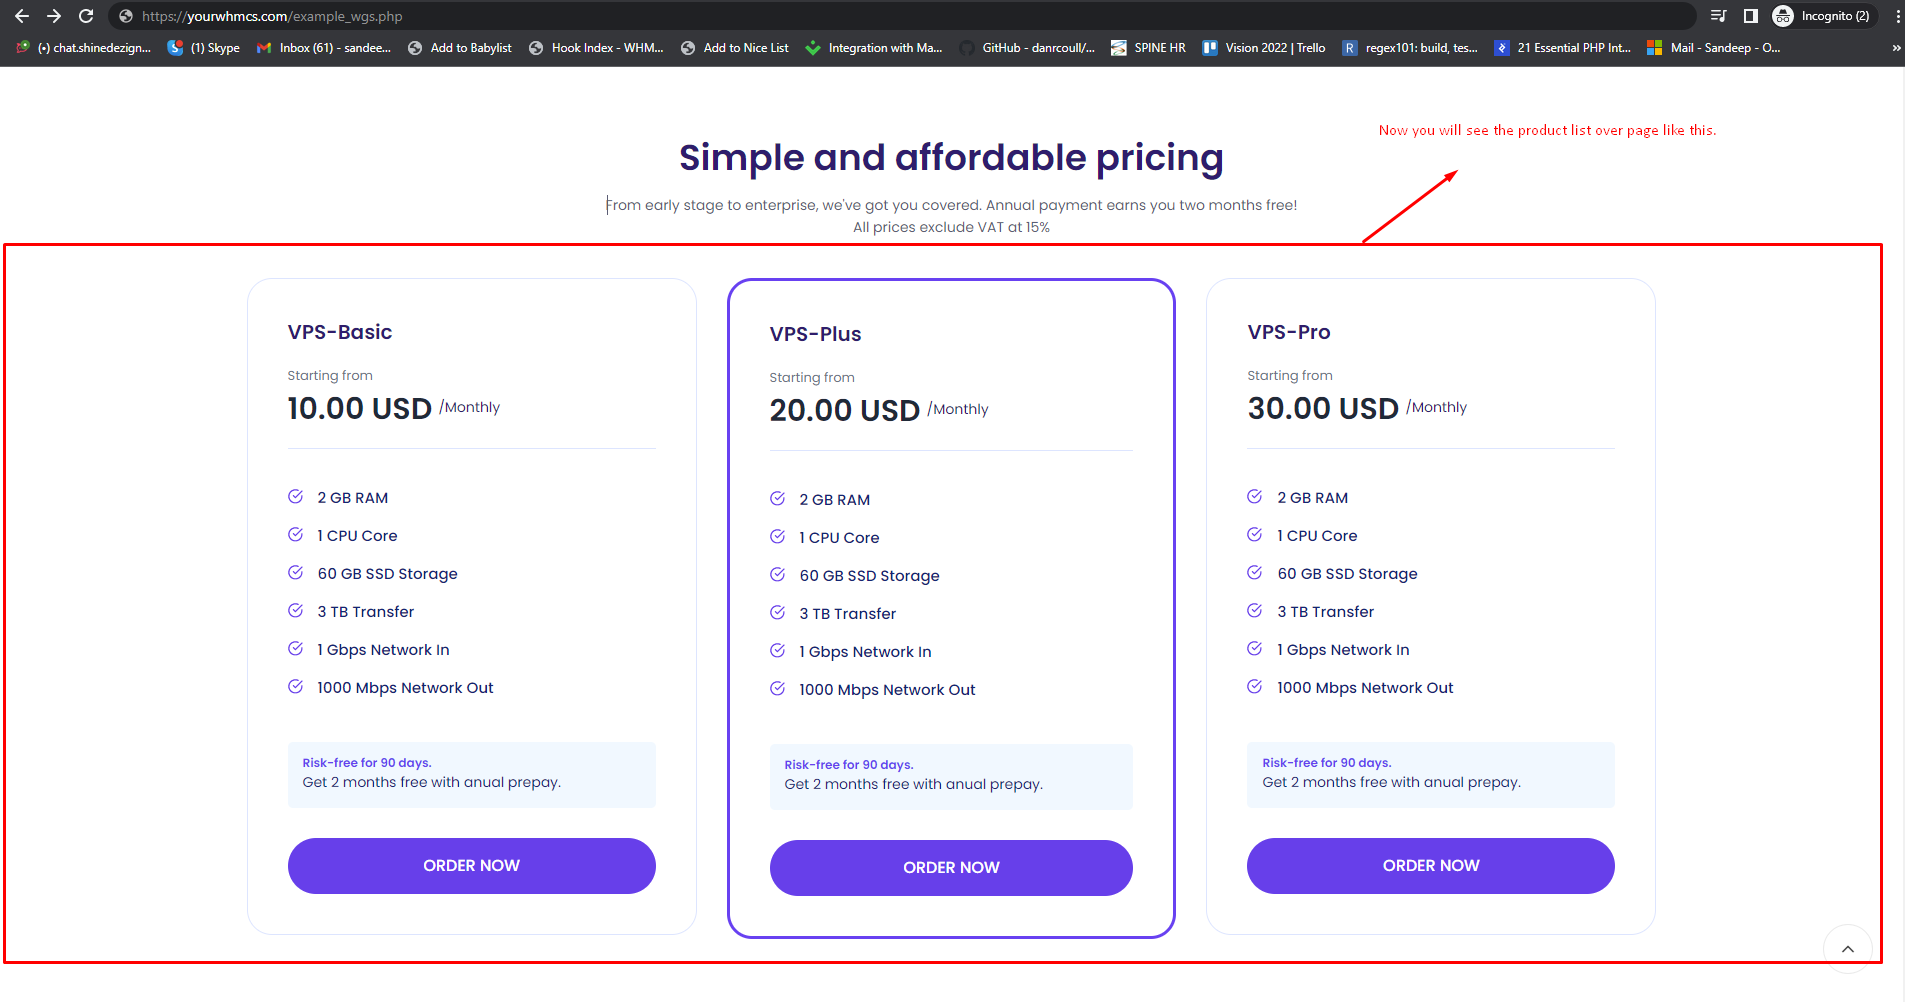
Step 6: Once you selected the required products and clicked on save, Now you can visit the page that you have created which in this case is (example_wgs.php), you will see the product list over a page like this.