Please note: We assume you have the knowledge of HTML, PHP, and Smarty to carry on this task.
Note: Custom header Options will work perfectly when Top menu bar is enable.
Step 1: Log in to WHMCS Admin
Step 2: Go to Addons > WGS ClientX > Settings

Step 3: After clicking on the setting button you will see the general settings as show in the screenshot below

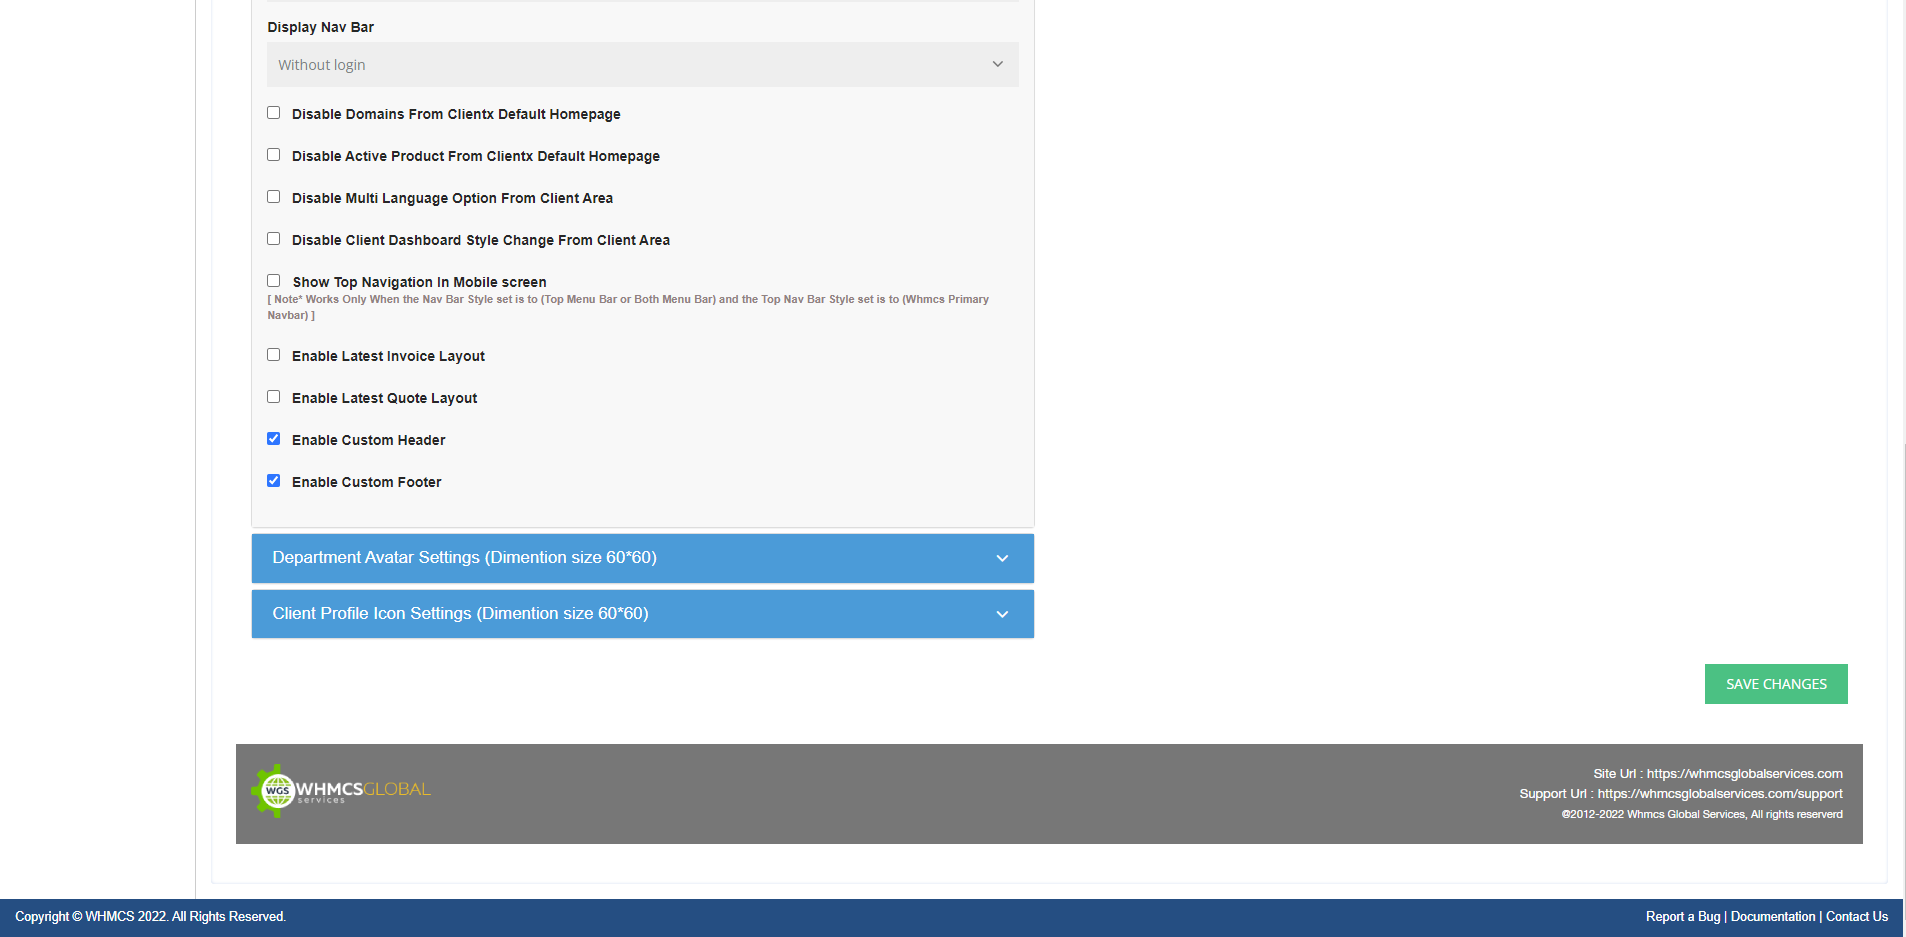
Step 4: In General setting you can see the options from where you can check these two options then click on save changes as shown in the below screenshot.
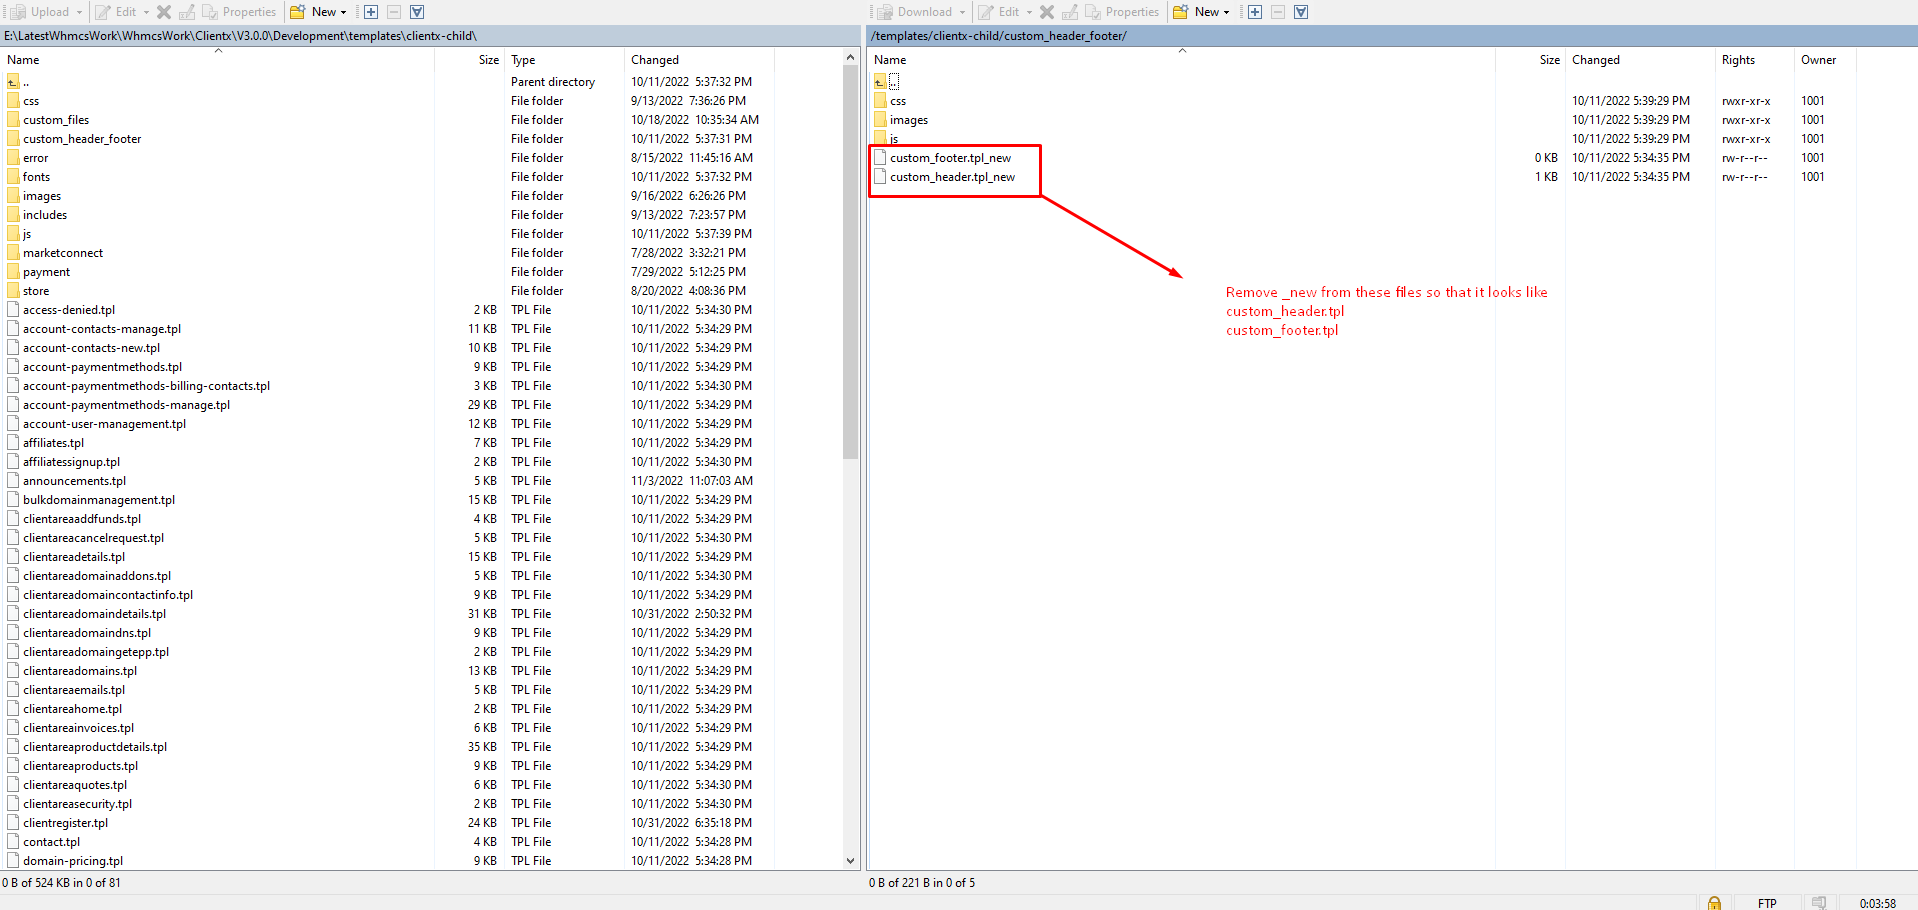
Step 5: Open FTP and go to the follow path (/templates/clientx-child/)
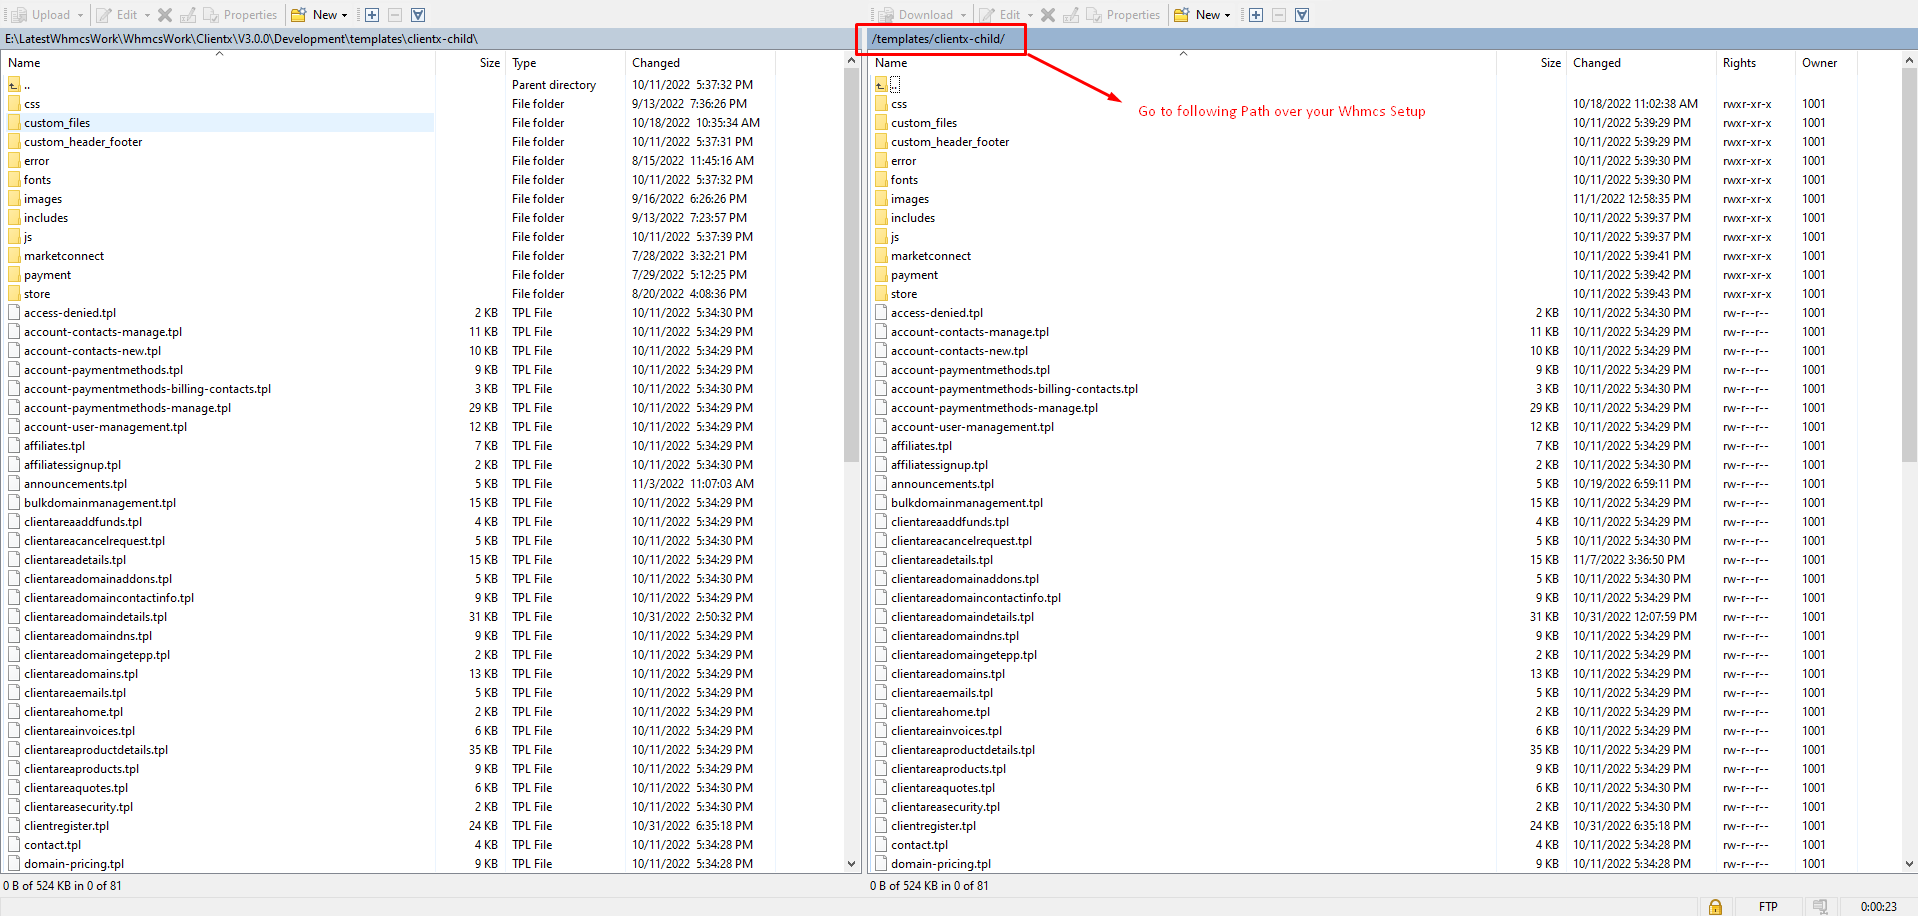
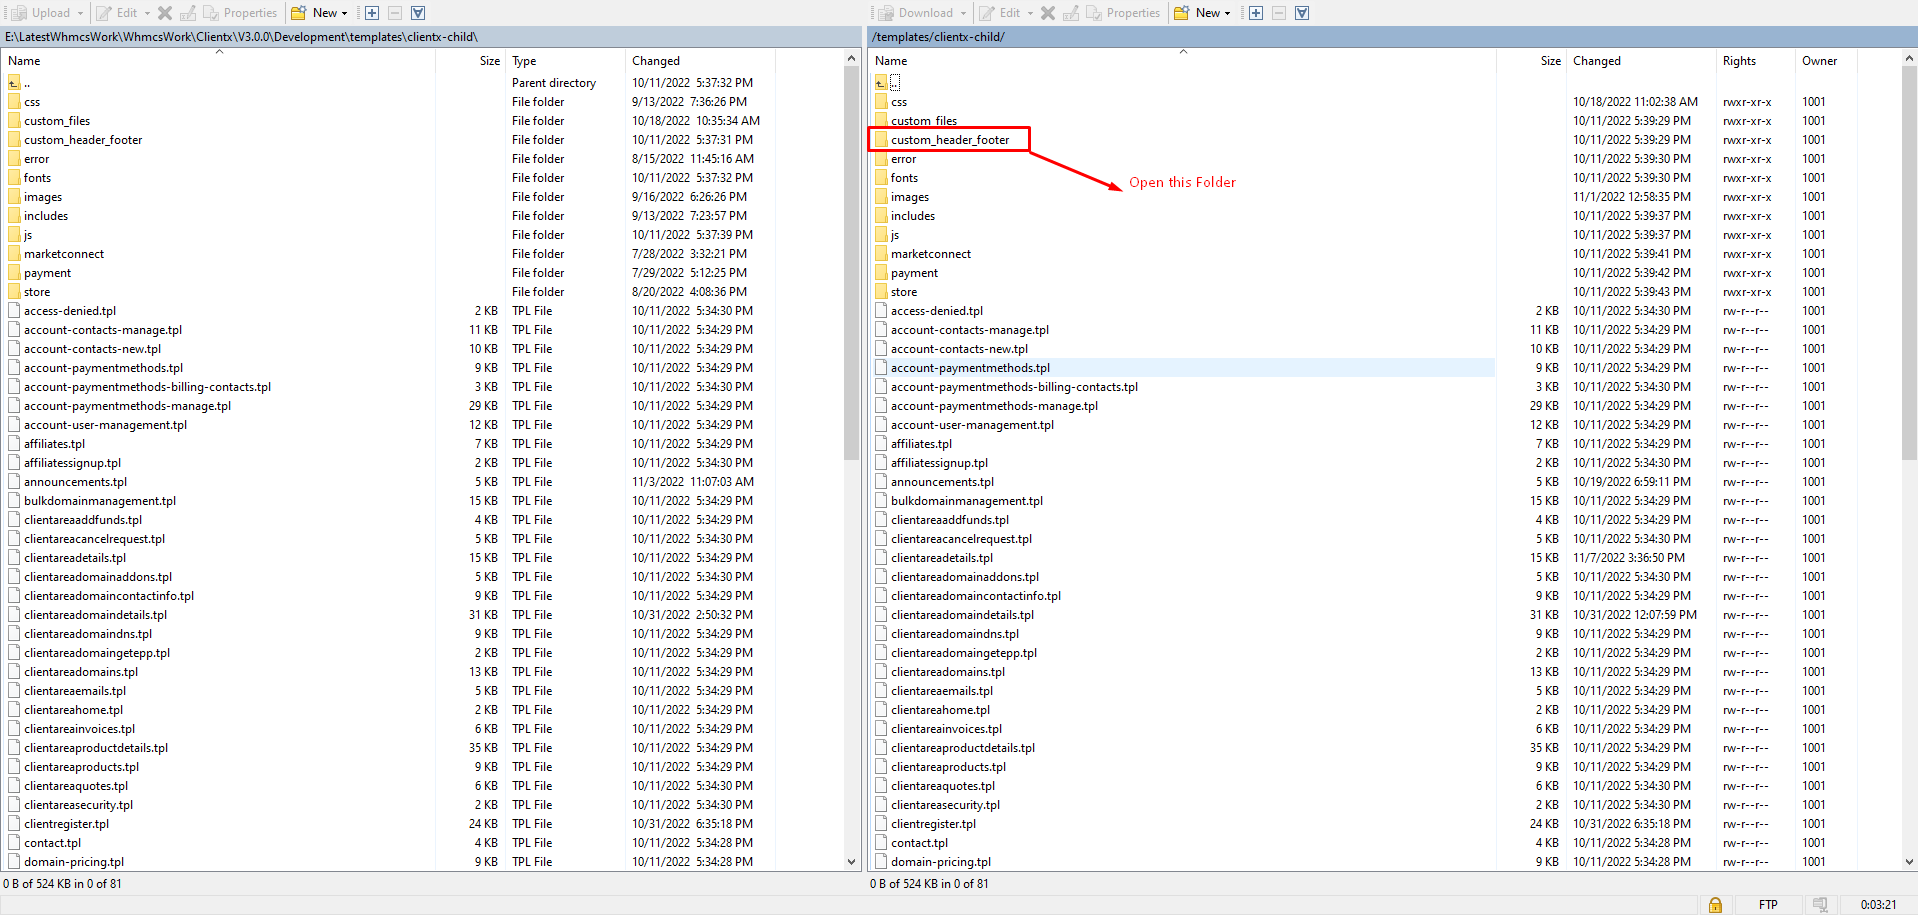
Step 6: Open this folder as shown in the below screenshot
Step 7: Remove_new from these files so that it look like custom_header.tpl and custom_footer.tpl
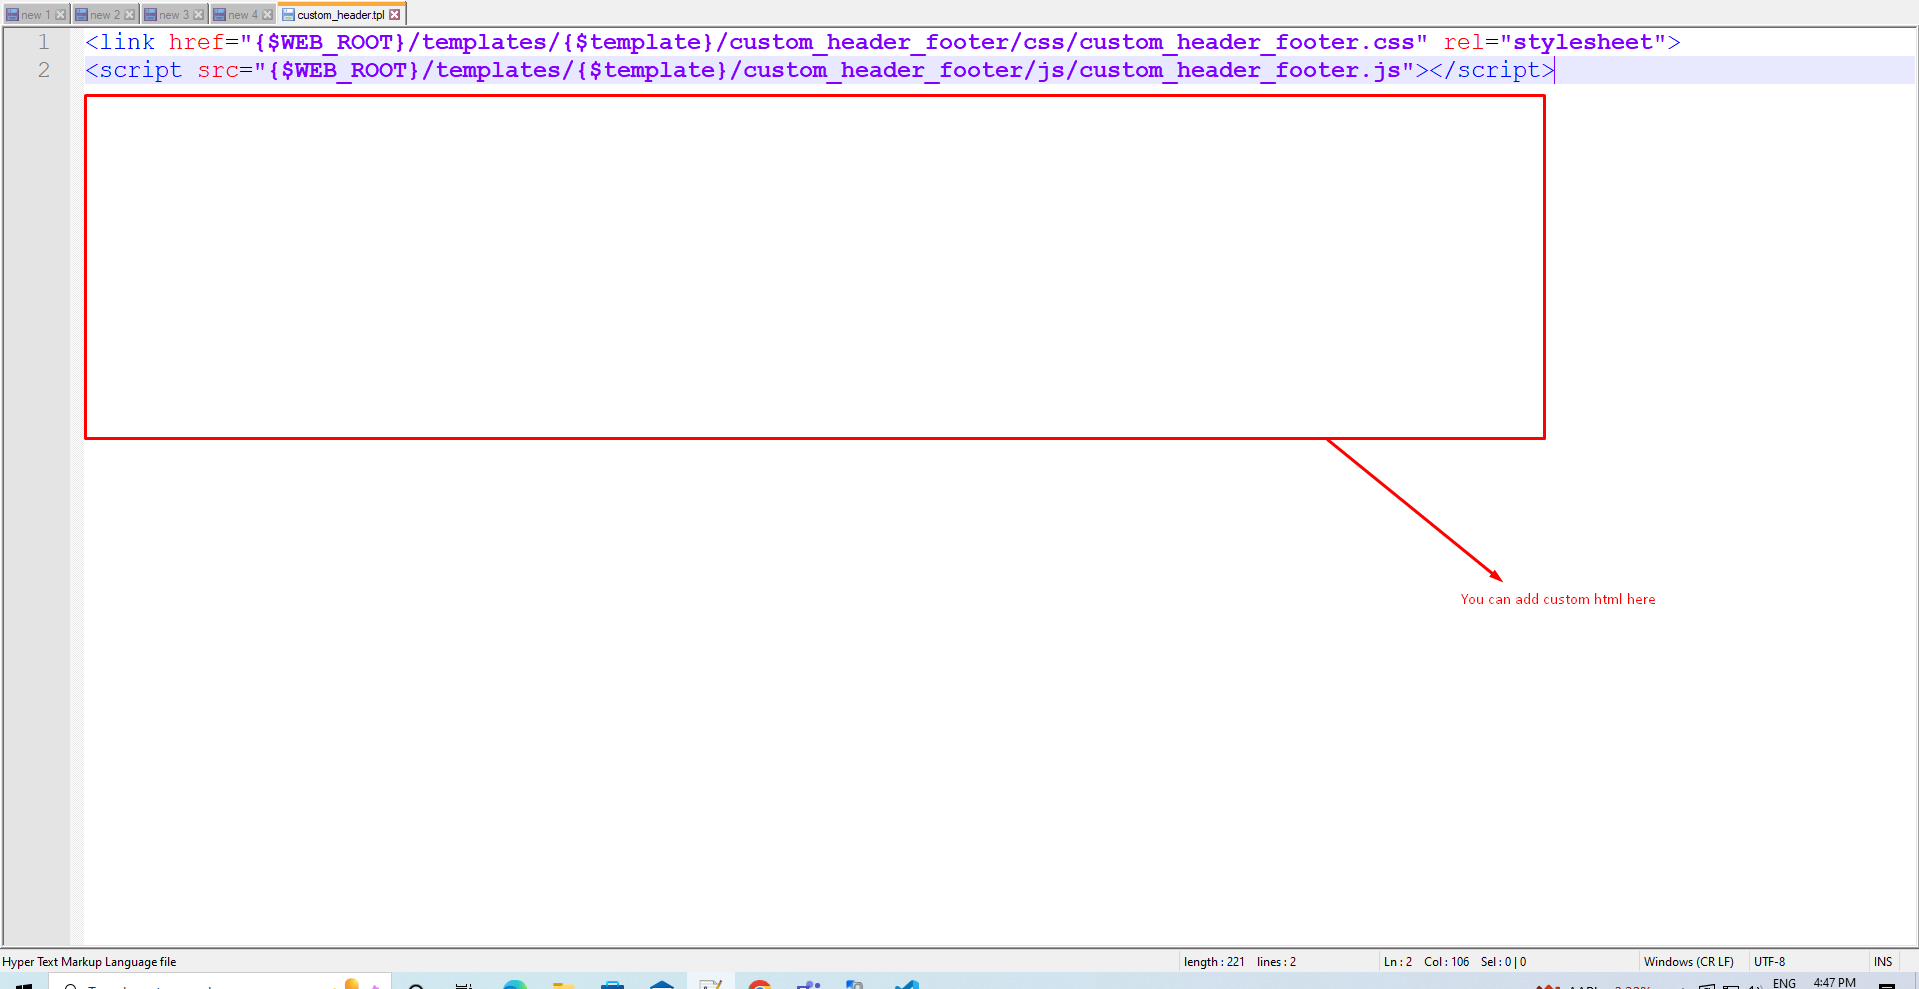
Step 8: Now you can open custom_header.tpl and add your html here
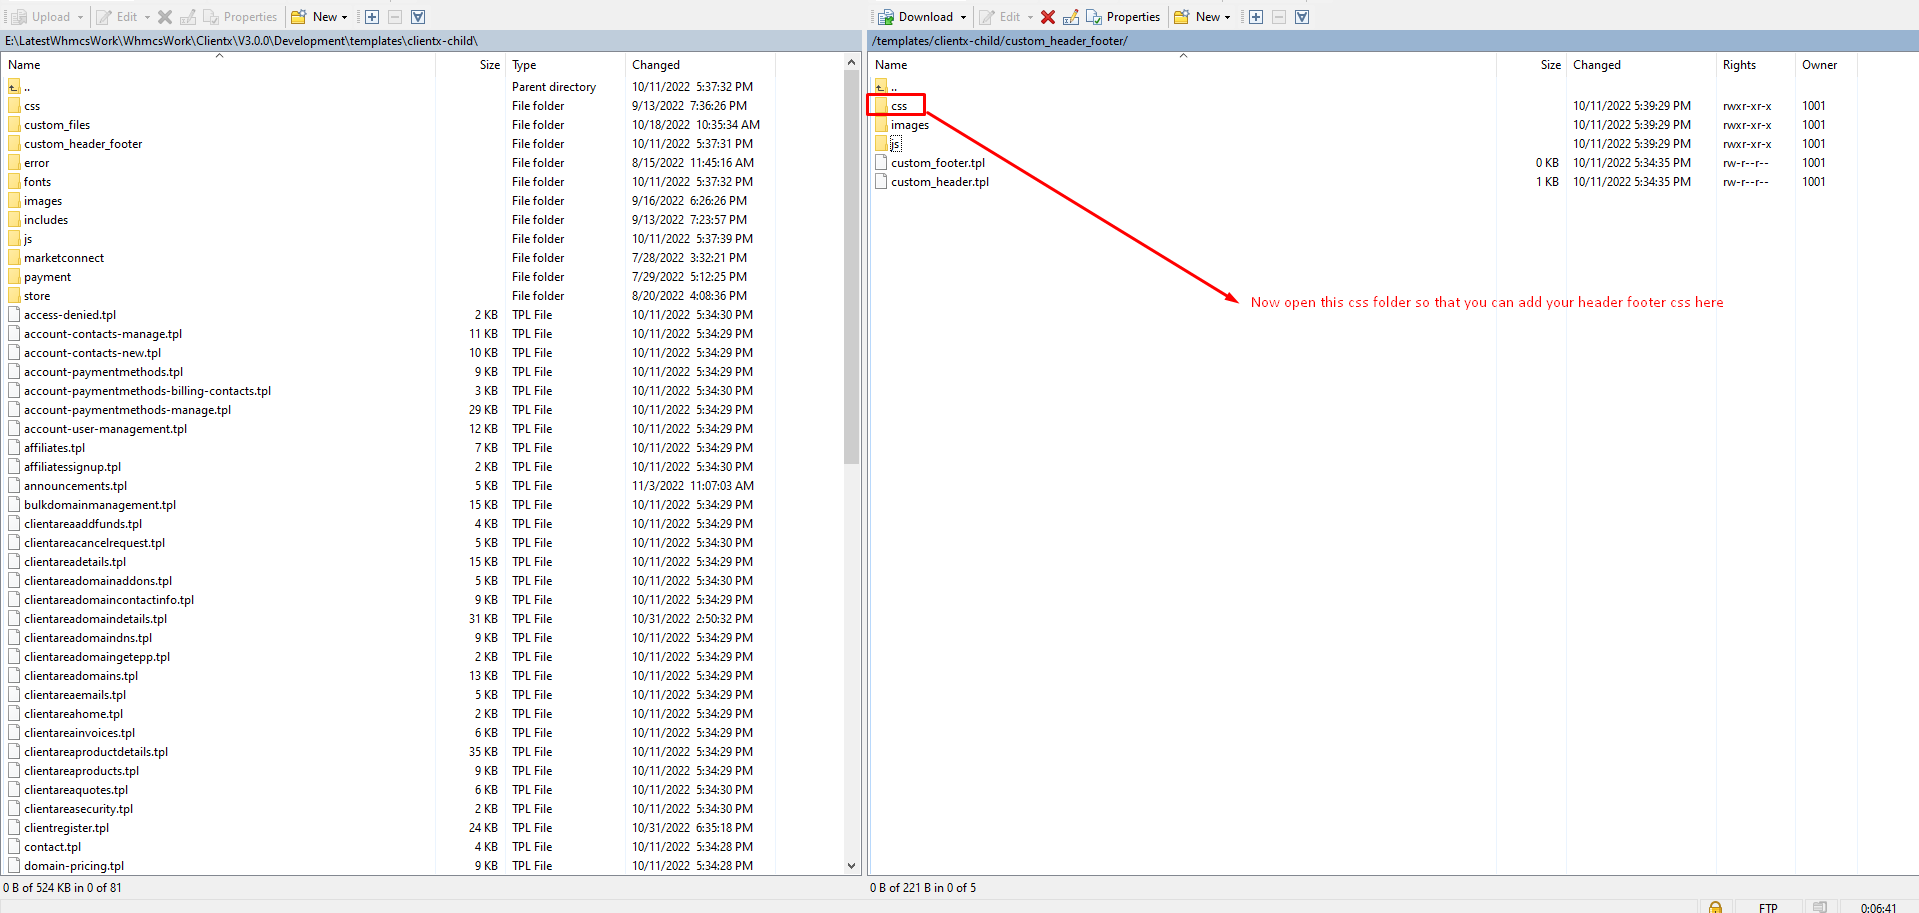
Step 9: Now open this CSS folder so that add your header footer CSS here
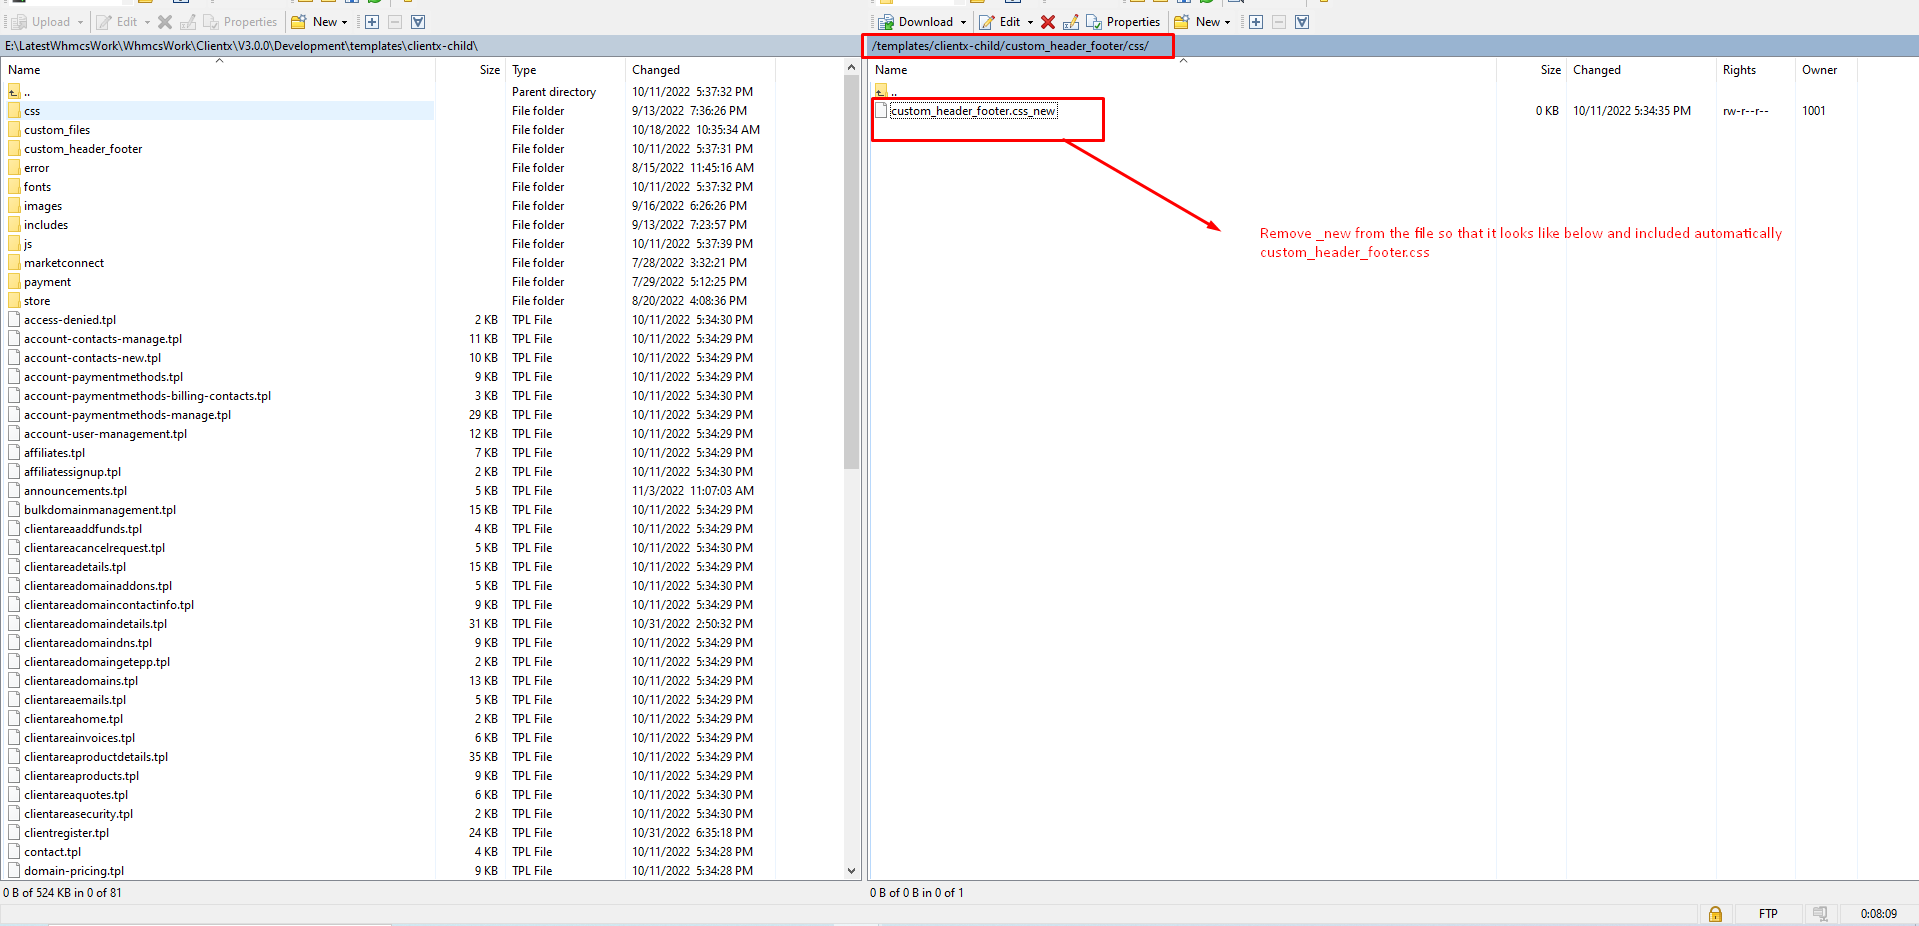
Step 10: Now remove_ new from the file so that it look like below and included automatically custom-header_footer.css
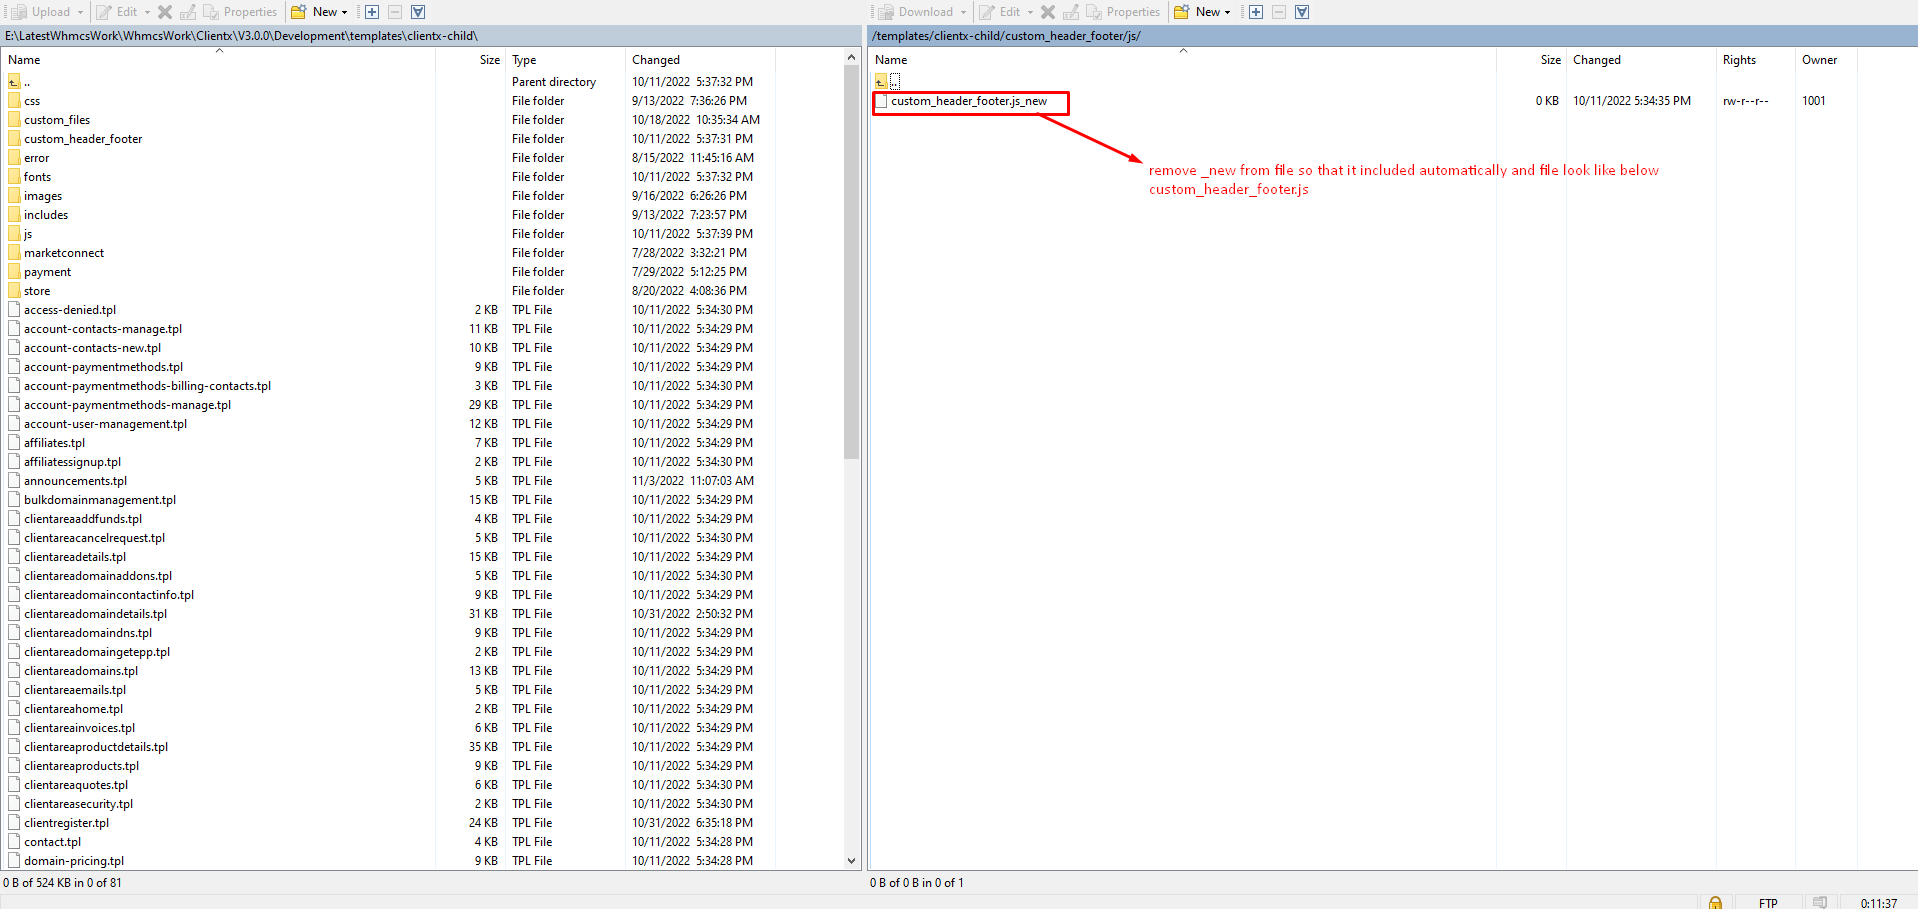
Step 11: Now open this folder to include js file if you need to add some js code

Step 12: Now remove_ new from the file so that it look like below and included automatically custom-header_footer.js
Step 13: Now your frontend will be look like this as show in below screenshot