HostX :
Step 1: Log in to WHMCS Admin
Step 2: Go to Add-ons > WGS HostX >Setting
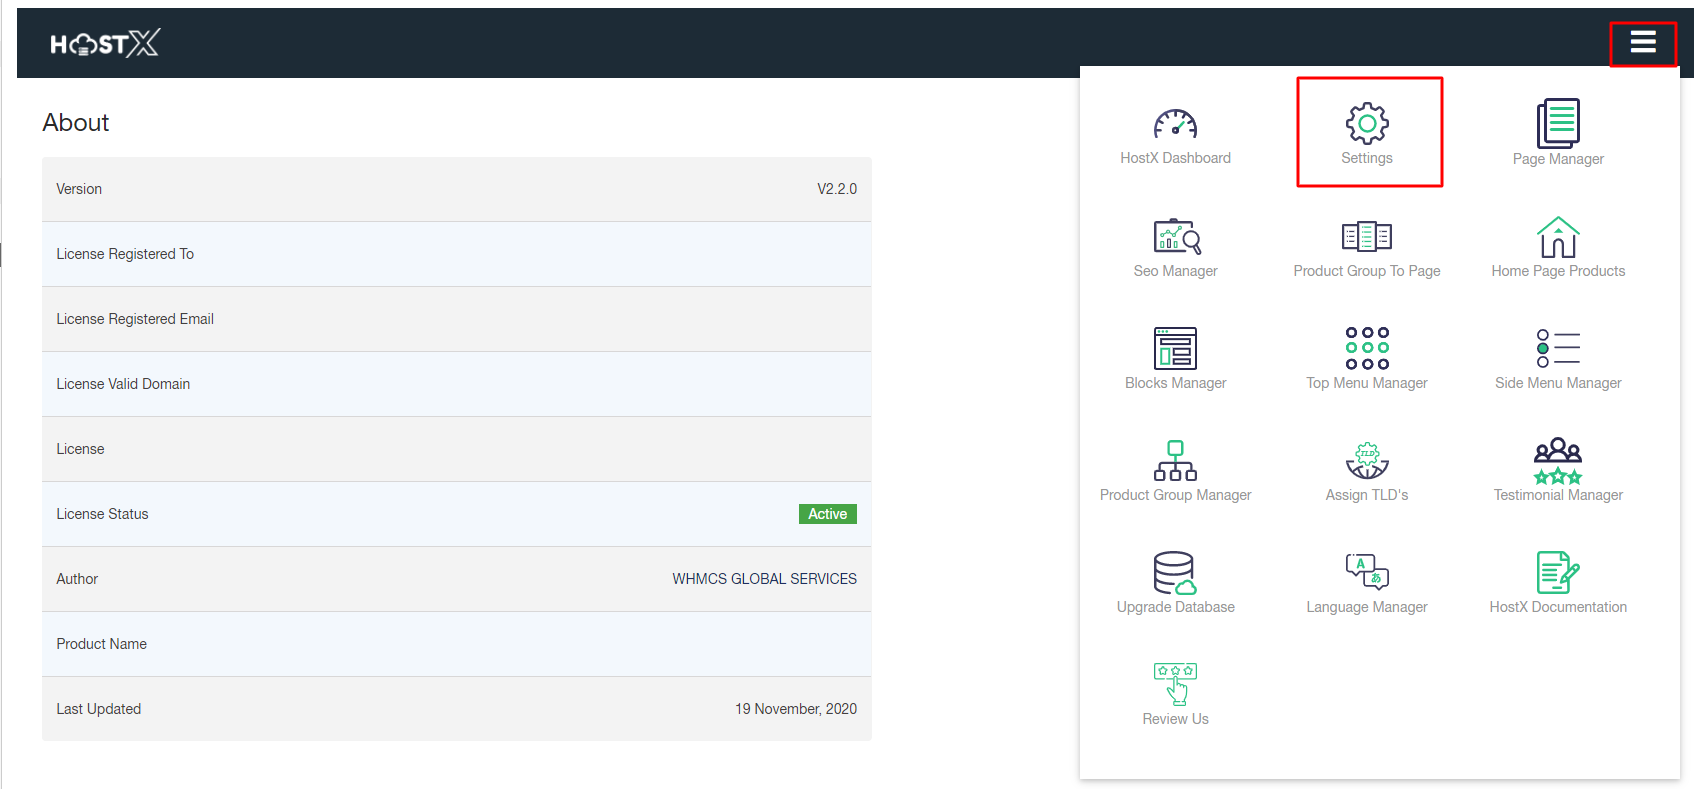
To change the general settings on the client area, click on the General Settings drop-down menu
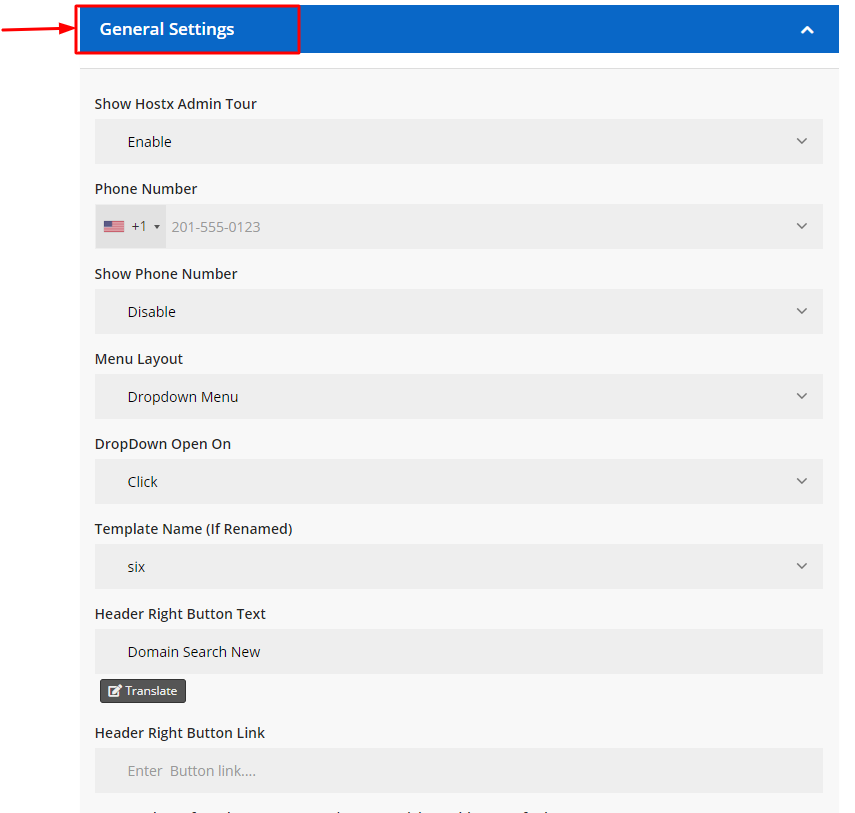
- Show Hostx Admin Tour: Enable this option if you want to enable a guided tour on your HostX panel. You can also disable if a guided tour is not required on your website.
Note: Closing the Admin Tour pop-up window once will block it for the next 24 hours.

- Phone Number: Select your country code and enter the phone number that you want to display on your website.

Note: Setting this option to Disable from the “Show Phone Number” menu will remove your contact number from the website.
- Menu Layout: Here you will get two different layouts for your menus:

- Mega Menu: Selecting this menu type will show everything at a glance and let users visually emphasize relation among main category and sub-categories.
- Dropdown Menu: The drop-down menu can be used to show a solid underlying category on a hover/click.

- DropDown Open On: If you want to open the dropdown on a click, set this option to Click. Otherwise, set this option to Hover and the complete sub-categories list will be displayed just by hovering the main category.

- Template Name (If Renamed): Using this option you can change the name of your main images folder.
If you want to do give your template some customized name, then follow the steps below:
- Log into your Server
- Go to Public HTML >> Templates
- Rename the folder
The renamed folder will be updated automatically in your WHMCS admin panel and you can set the new folder as a template.
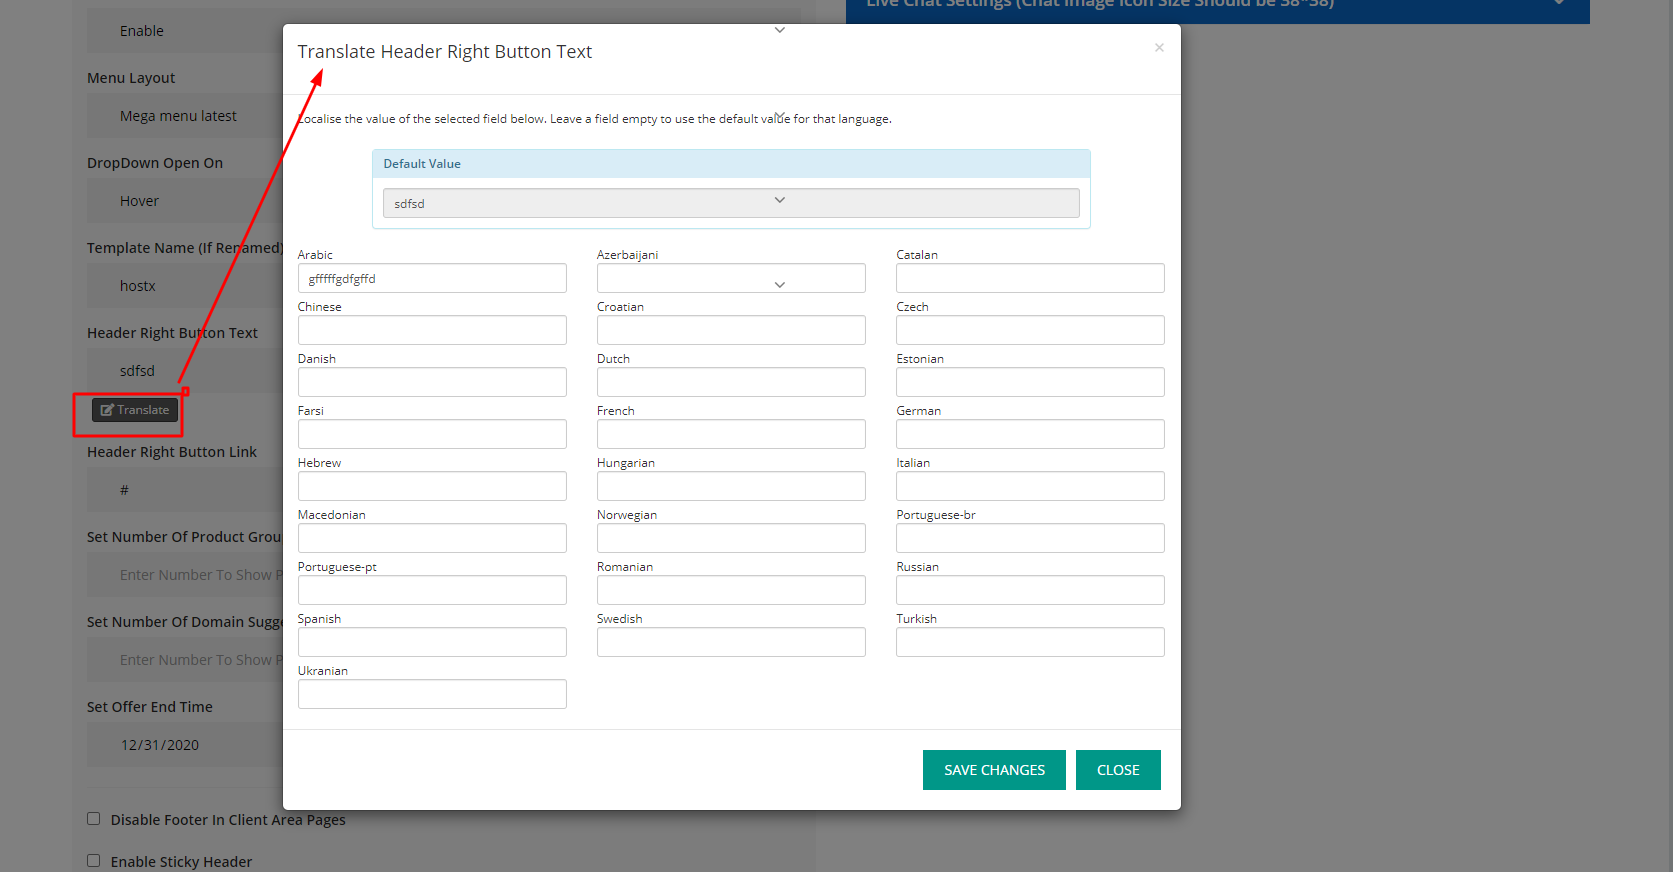
 6. Header Right Button Text: Enter the desired text you want to display in the right header button
Note: You can edit the button content into other languages as per your requirement just by clicking in that tiny Translate button.
- Header Right Button Link: Enter the desired link in this section if you want to redirect users to some other webpage from this button. Or else, leave it blank.
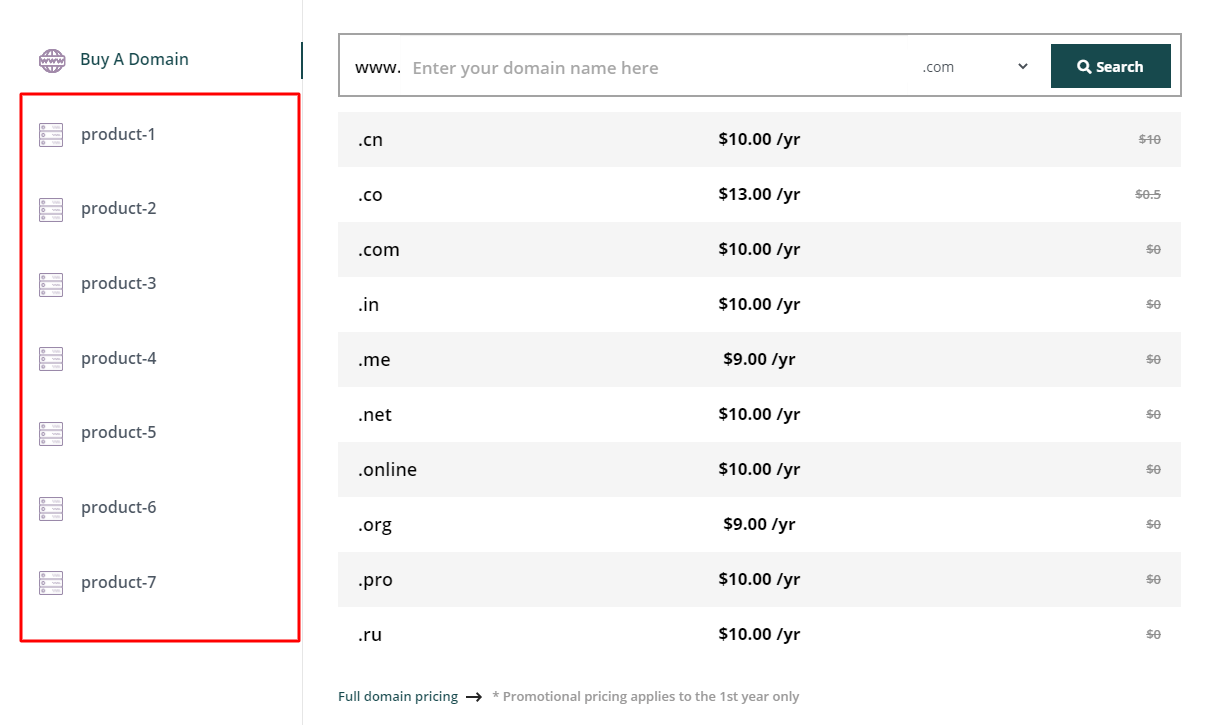
- Set Number Of Product Groups To Show On Pricing
Table V2(Default to 5 Group): Enter the total number of products you want to display on the site.
Note: There is no limit on the number of products you want to display on your site. So, you can set as many products as you want and by default, it will display 5 products (if not entered any number).

- Set Number Of Domain Suggestion To Show On Pricing Table V2 (Default to 5 Domain): In case if the entered domain name is already taken, you can suggest related domains. With this option, you can set a particular number of domain suggestions you want to display on your website.

10.Set Offer End Time: Set a future date and time for the ongoing offer on your website and save the changes. The offer count-down will get started automatically on the website.

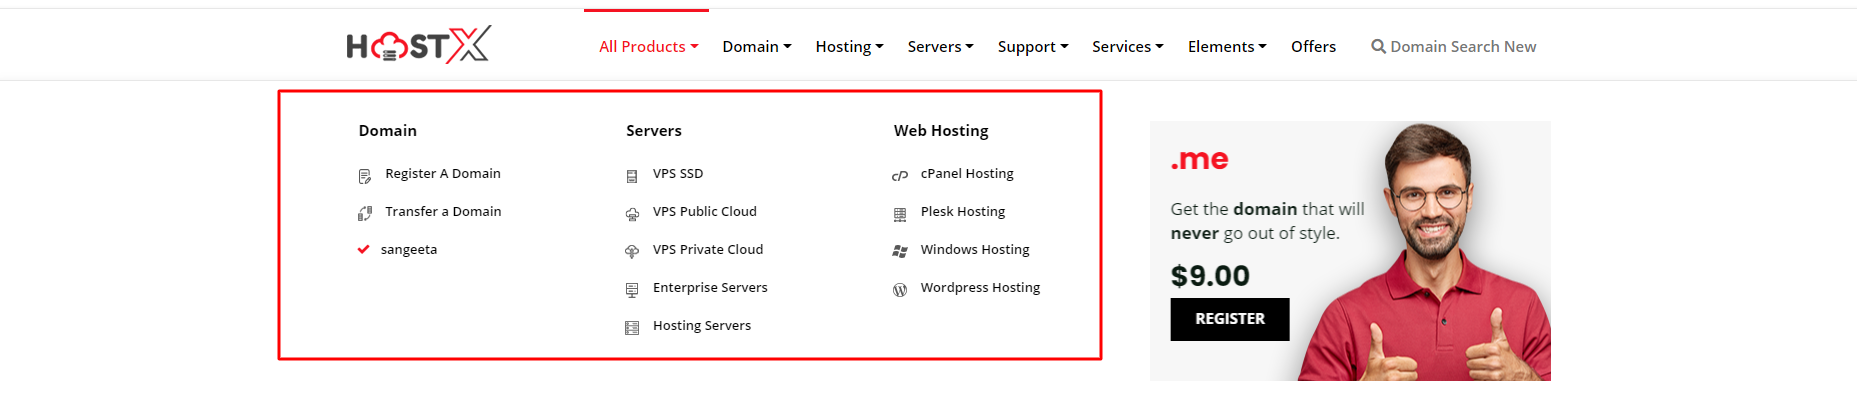
Final Result display like this

11. Disable Footer In Client Area Pages: Check this option to eliminate the footer part from the Client Area webpage.
Note: Keeping it unchecked will enable the Footer part in the Client Area Page.

12. Enable Sticky Header: Check this option to fix the header part in the top portion of your webpage and it will stick on the top while scrolling for quick access to the menu.

Note: Leaving this option unchecked will remove the sticky header from the top of your webpage.

- Enable Multi Currency Option From Client Area: In order to enable Multi-Currency options on the website, check this option.

Note: Keeping this option disabled will not display any particular currency type in the Client Area.

14. Disable Client Area Primary Side Bar: In case you do not want to display the primary sidebar on the client area, then check this option.

Note: Leaving it unchecked will show the primary sidebar on the frontend.

- Disable Client Area Secondary Side Bar: If you want to remove the secondary sidebar from the client area, select this option and save changes to apply effects.

Note: Unchecking this menu will display the secondary sidebar on the client area.
16. Enable Custom Header: You can also create your customized header by checking this option.

17. Enable Custom Footer: You can design your own footer as well for the client area just by enabling this option.

Note: You must be tech-savvy to create a custom header and footer as you need to create header and footer file templates on WHMCS Admin Panel.
