
Note : You need to take a backup of the customized files before starting the upgrade procedure.
Step 1: Take a complete backup of your WHMCS Instance DB backup , clientx addon module files and clientx theme files also recommended(Highly Recommended)
Step 2: Download the files from the WGS Client area
Step 3: Extract the new files
Step 4: Open the extracted folder in your FTP client while connecting to your WHMCS setpup.
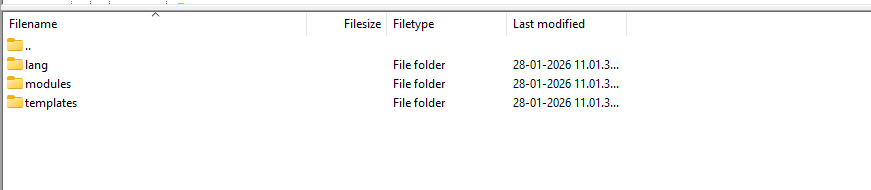
Step 5: Double click on the extracted folder to get into the dircetory
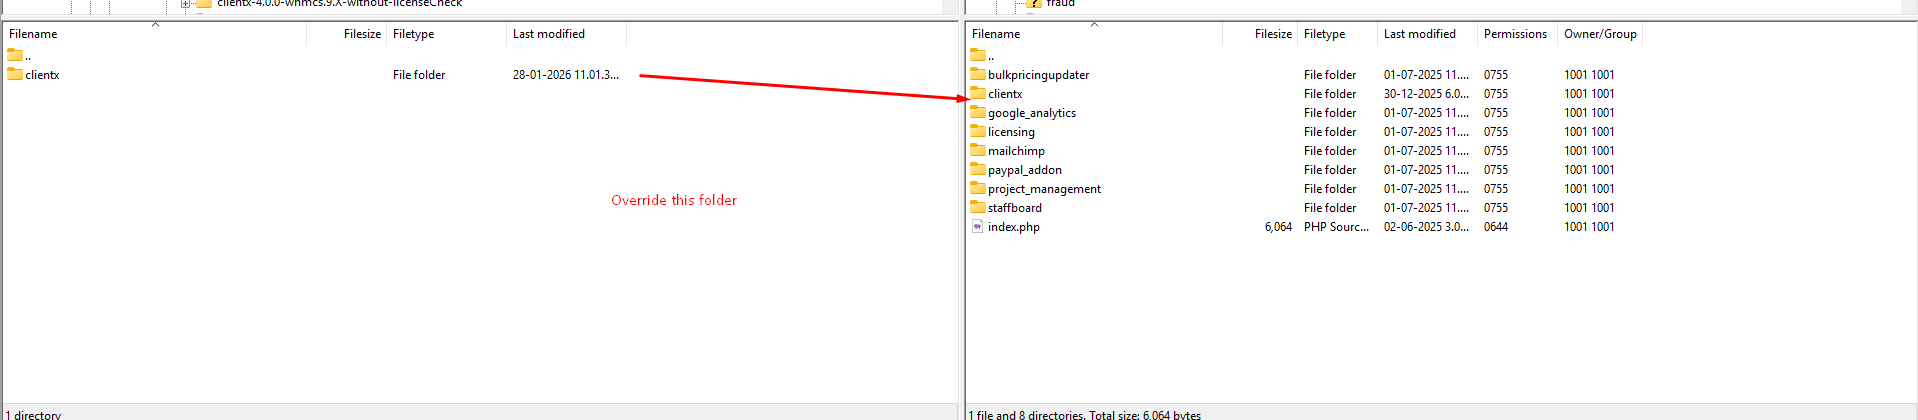
Step 6: Override the modules folder whmcs/modules/addons
(Please note you need to take a backup of the customized files, after upgrading you can upload the backup files again)
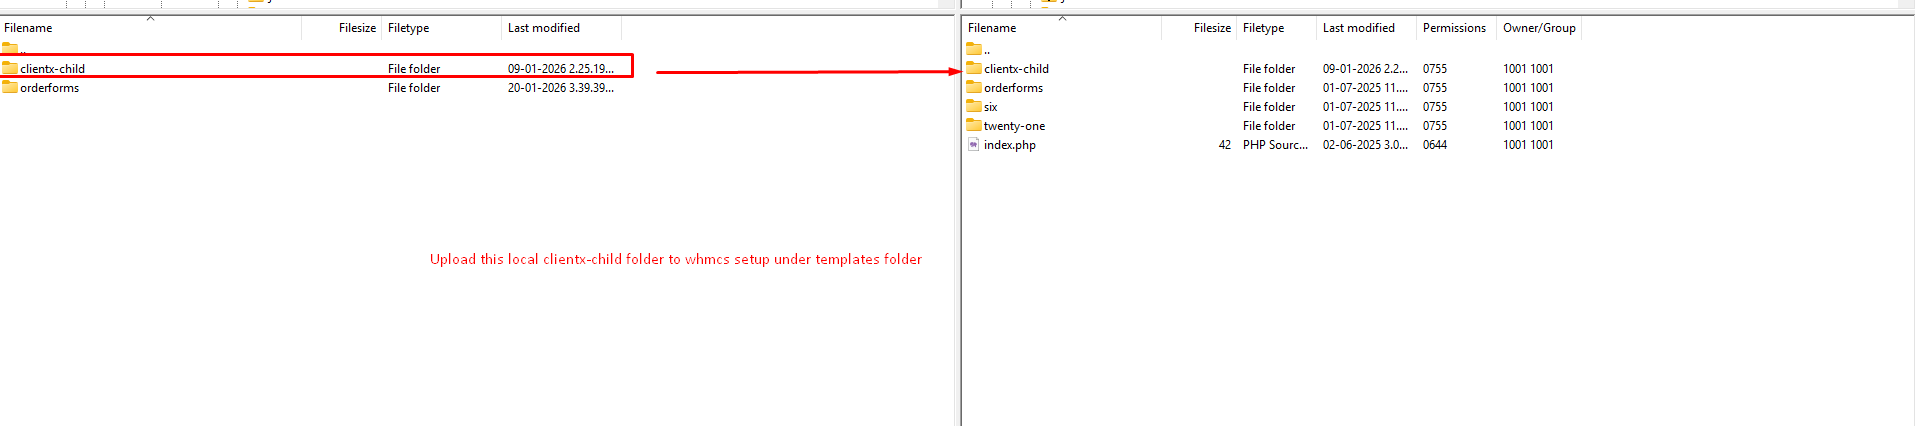
Step 7: Override the templates folder whmcs/templates/
(Please note you need to take a backup of the customized files, after upgrading you can upload the backup files again like if you did any custom CSS in the overrides.css file then take the backup and after upgrading upload this file again.)
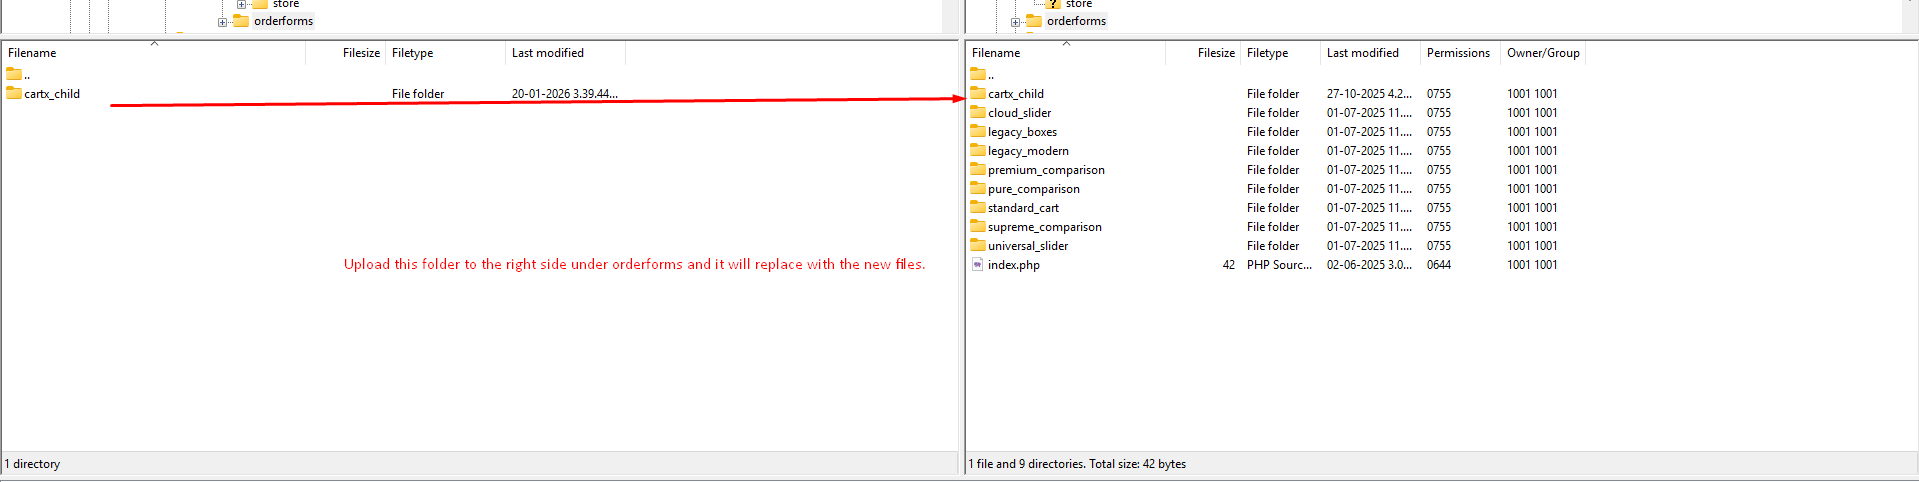
Step 8: Override the orderform folder whmcs dir/templates/orderforms/cartx_child
(Please note you need to take a backup of the customized files, after upgrading you can upload the backup files again)
Step 9: Go to /public_html/whmcs/language/overrides/
(Please note you need to take a backup of the overrides files like if you create your own lang variable then upload these variables after upgrading the folder.)

Note: If you get OOPS error after uploading the Addon Modules in client area, please follow this Link to rectify it.
Lets Set Clientx addon module and update the database
Step 10: For this click on the clientx module under addons 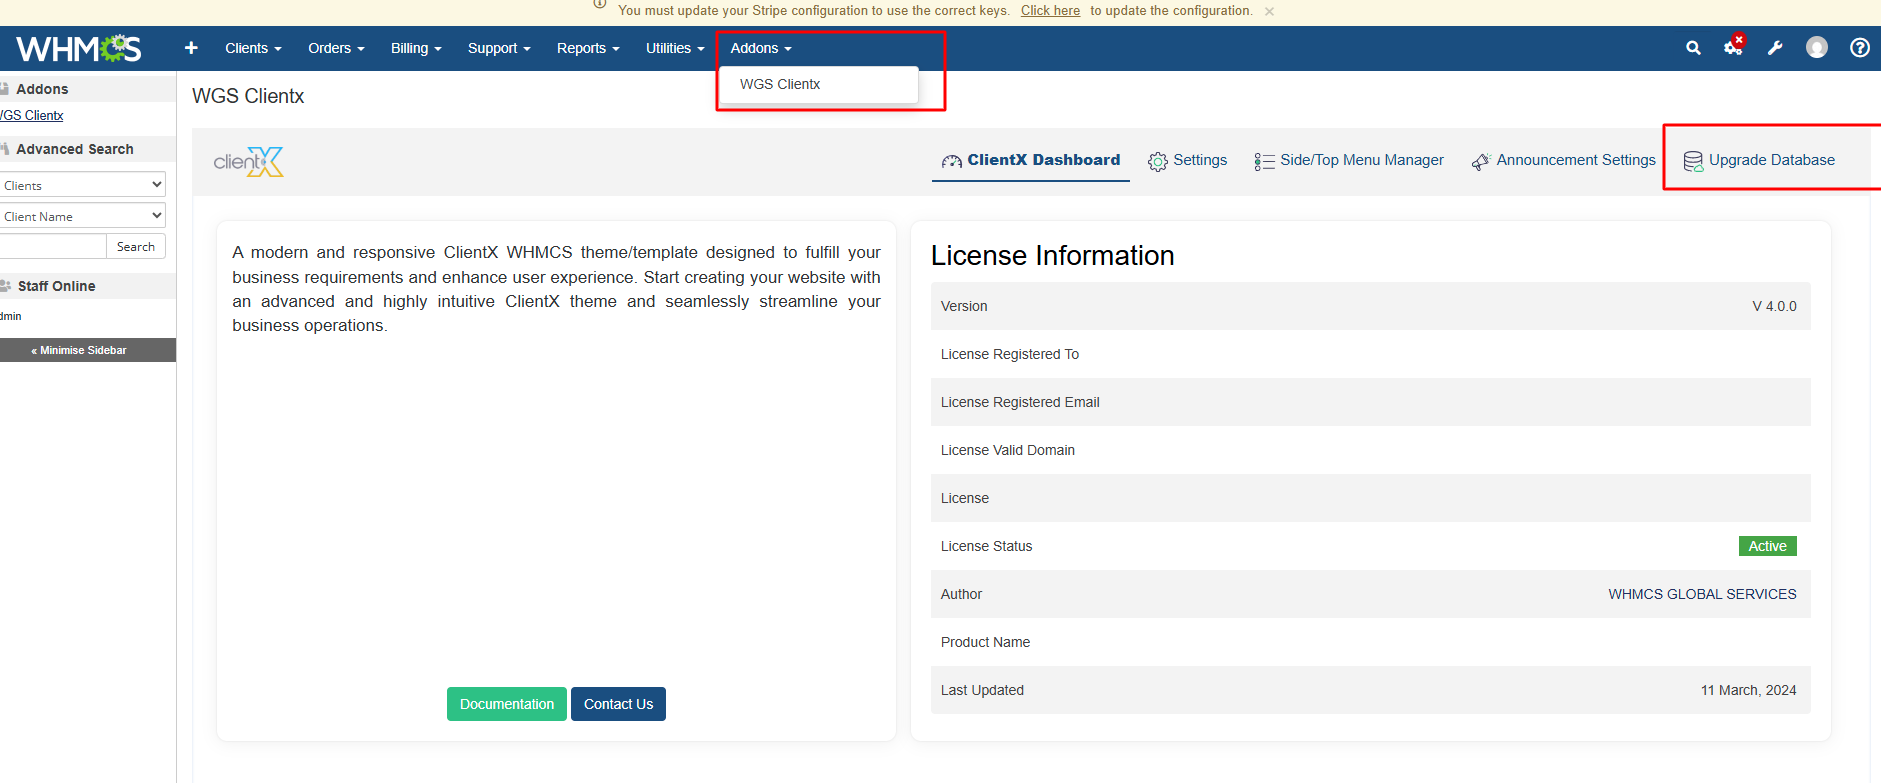
Step 11: Go to Upgrade database menu and after that there is button click on that button. It will upgrade the database.
Note: It is required to upgrade the database otherwise it will show the table related errors on the clientarea. 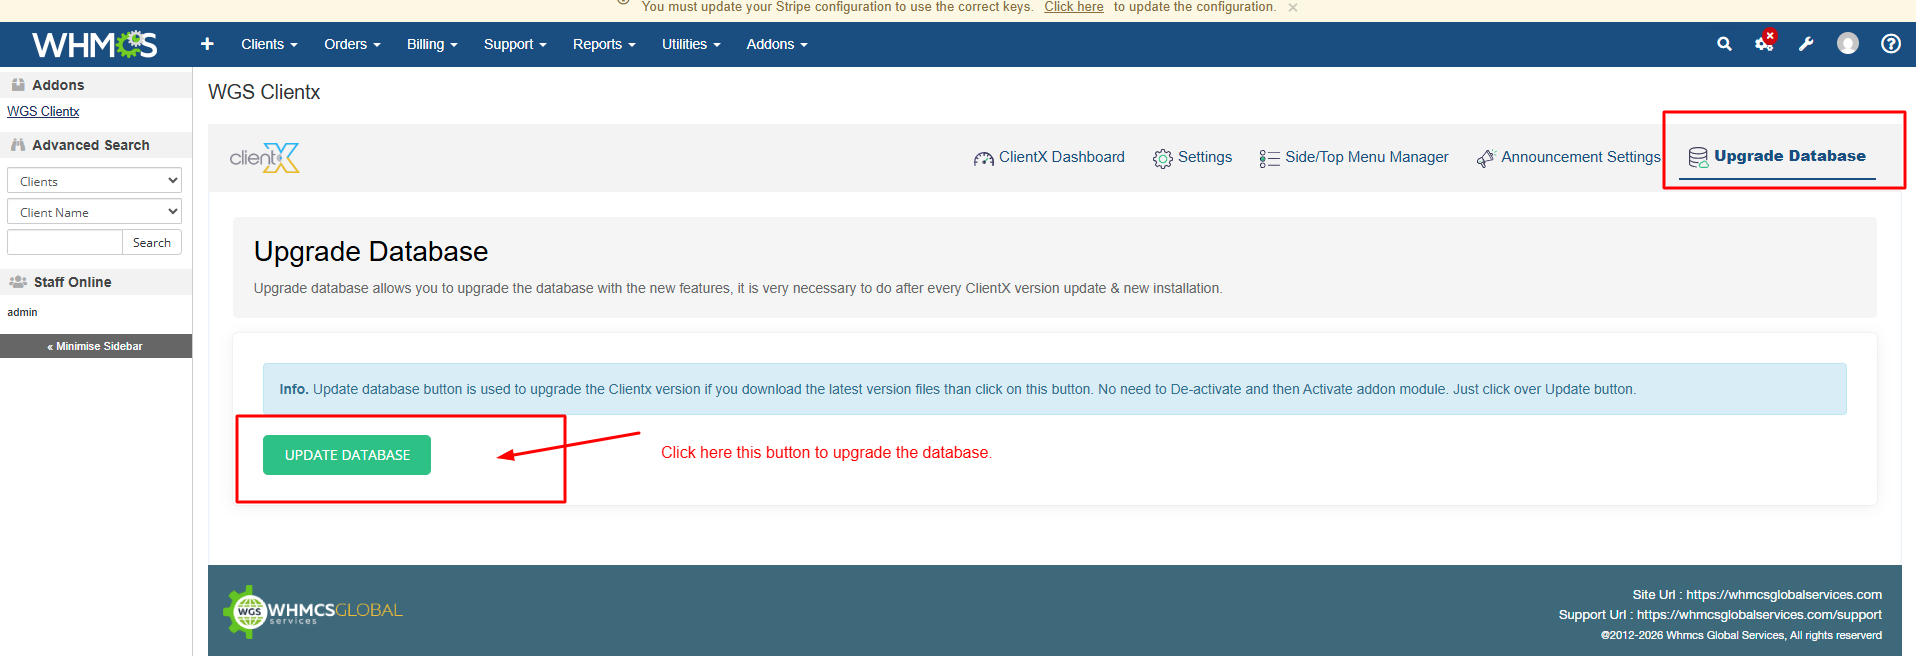
Step 12: After that go to other tabs and change the layout/setting as per your requirements.
Now Clientx is configured you can check client area!!!
