WGS ClientX – Side & Top Menu Manager Guide
Before configuring any of the options below, follow these steps once:
-
Log in to your WHMCS Admin Panel.
-
Navigate to Addons > WGS ClientX > Side/Top Menu Manager.

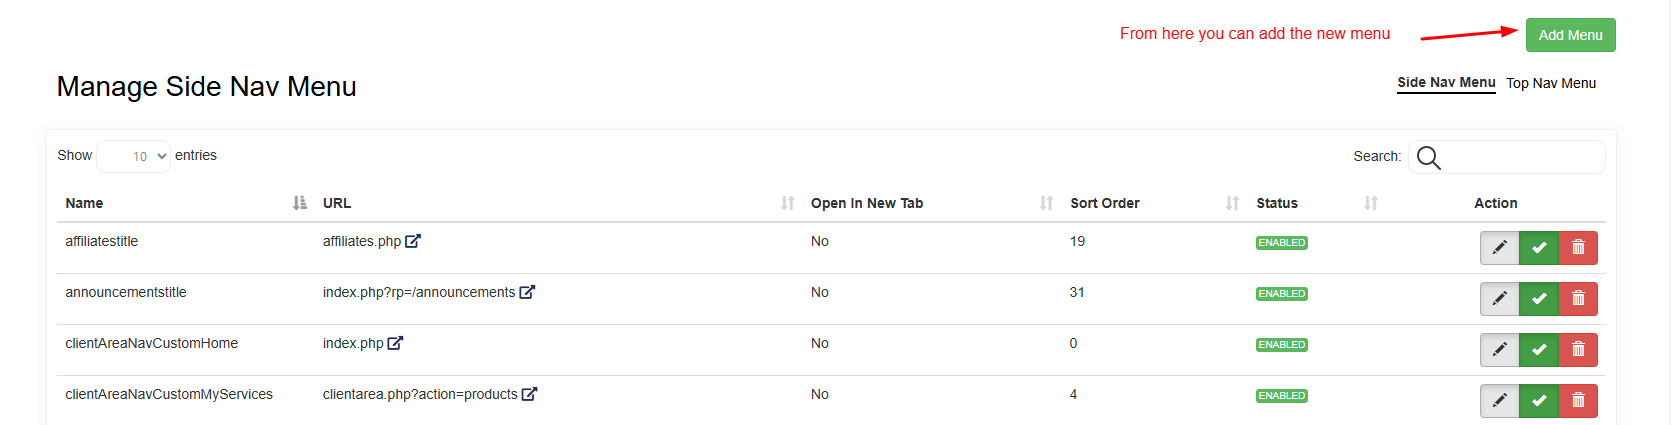
How to Add a New Menu
-
On the Side/Top Menu Manager page, locate the Add Menu option.
-
Click Add Menu.
-
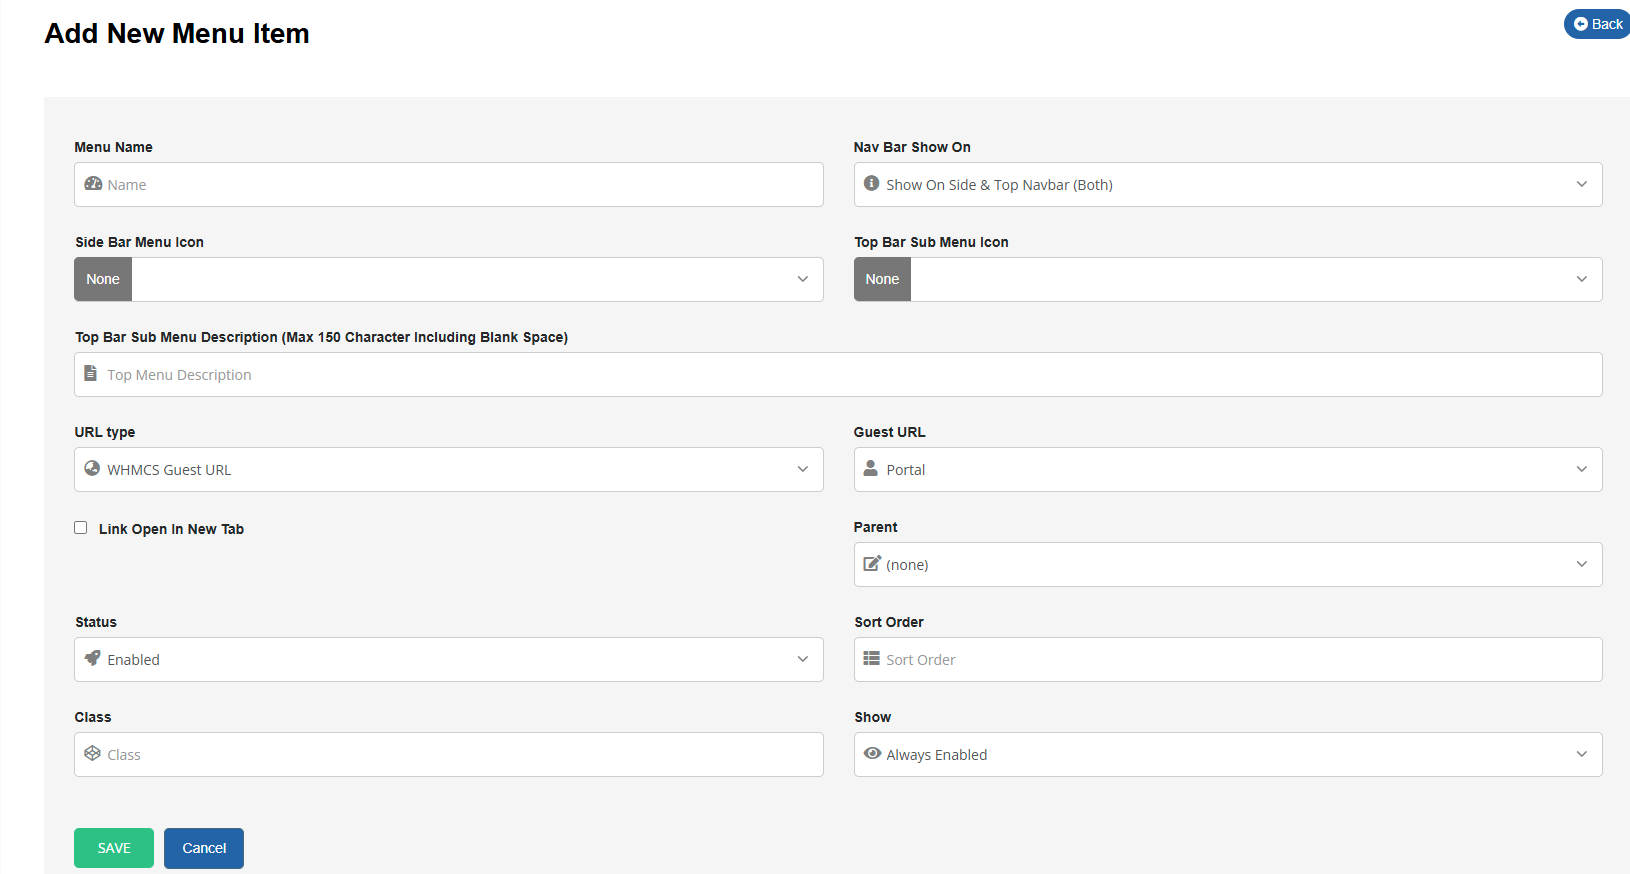
Enter the required menu details (such as menu name, link, position, and visibility).
-
Click Save to create the new menu.
The newly added menu will appear in the Side Menu or Top Menu of the Client Area
How to Edit an Existing Menu
-
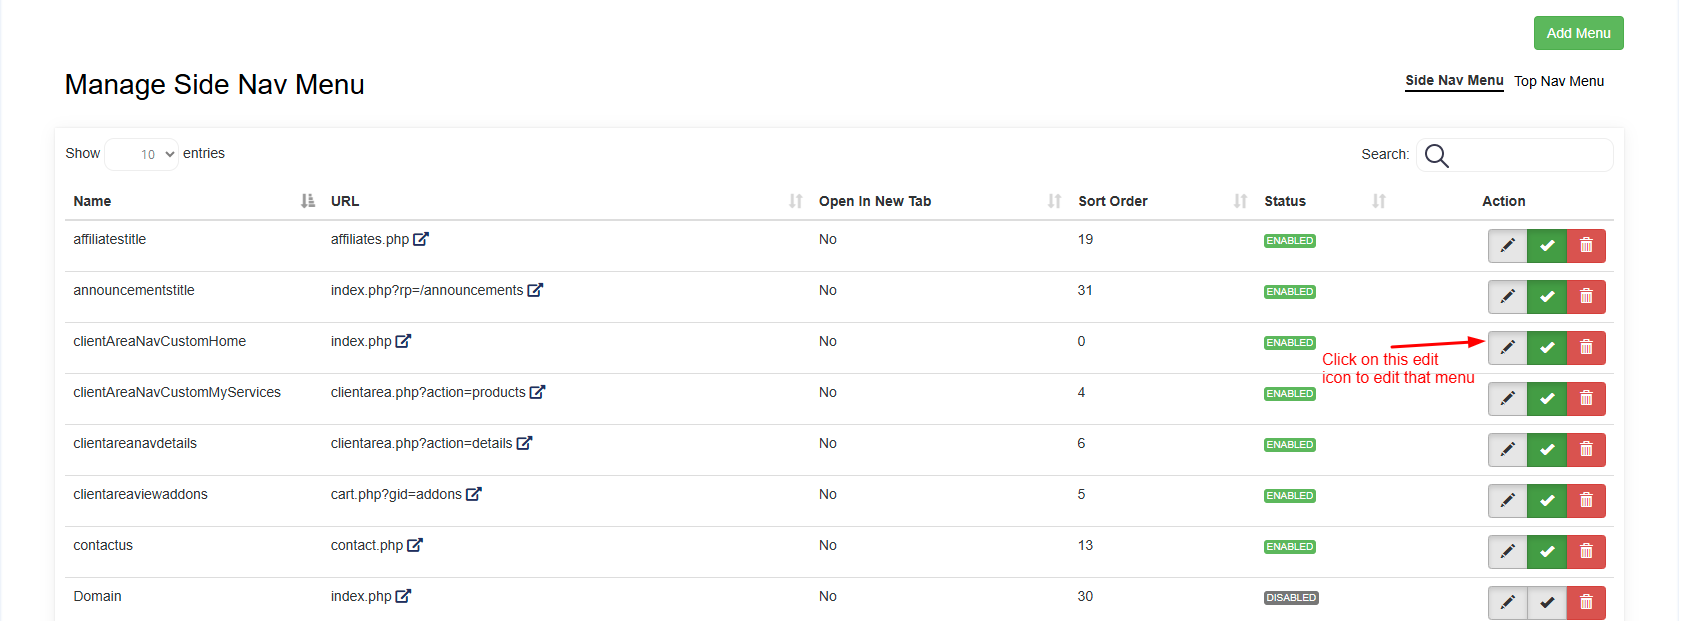
Use the search bar to find the menu item you want to edit.
-
Click the Edit button corresponding to the selected menu.
-
Update the required menu details.
-
Click Save to apply the changes.
The updated menu details will be reflected in the Client Area navigation
How to Delete a Menu
-
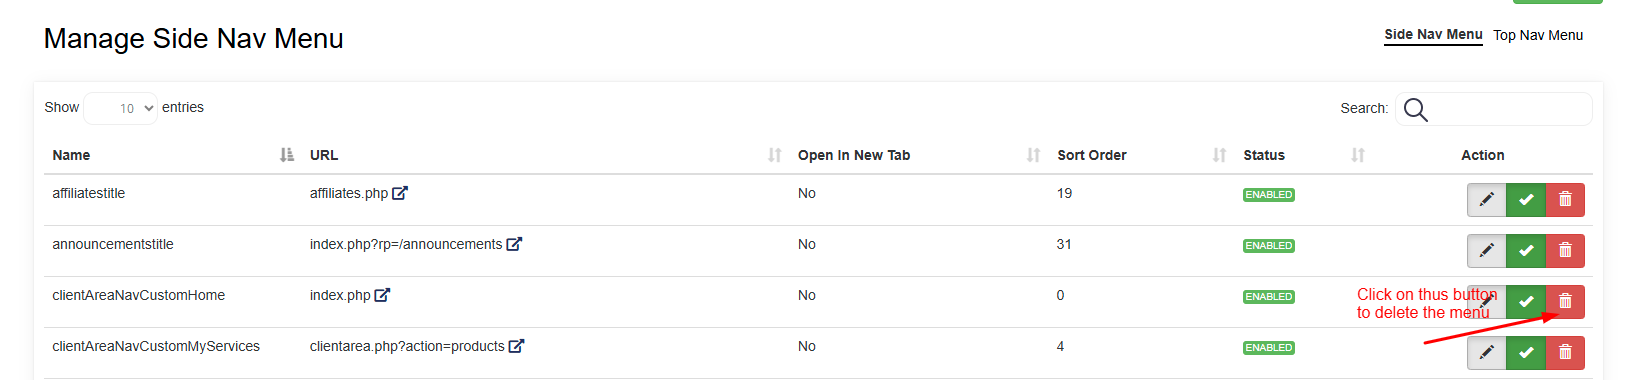
Use the search bar to locate the menu item you want to delete.
-
Click the Delete button corresponding to the menu.
-
Confirm the deletion when prompted.
The selected menu will be permanently removed from the Client Area navigation
How to Enable or Disable a Menu
-
Use the search bar to find the menu you want to enable or disable.
-
Click the status icon (Green Check / Toggle button) next to the menu:
-
Enabled – Menu is visible in the Client Area.
-
Disabled – Menu is hidden from the Client Area.
-

The menu visibility will update instantly based on your selection
