1. Login to portal https://members.whmcsglobalservices.com/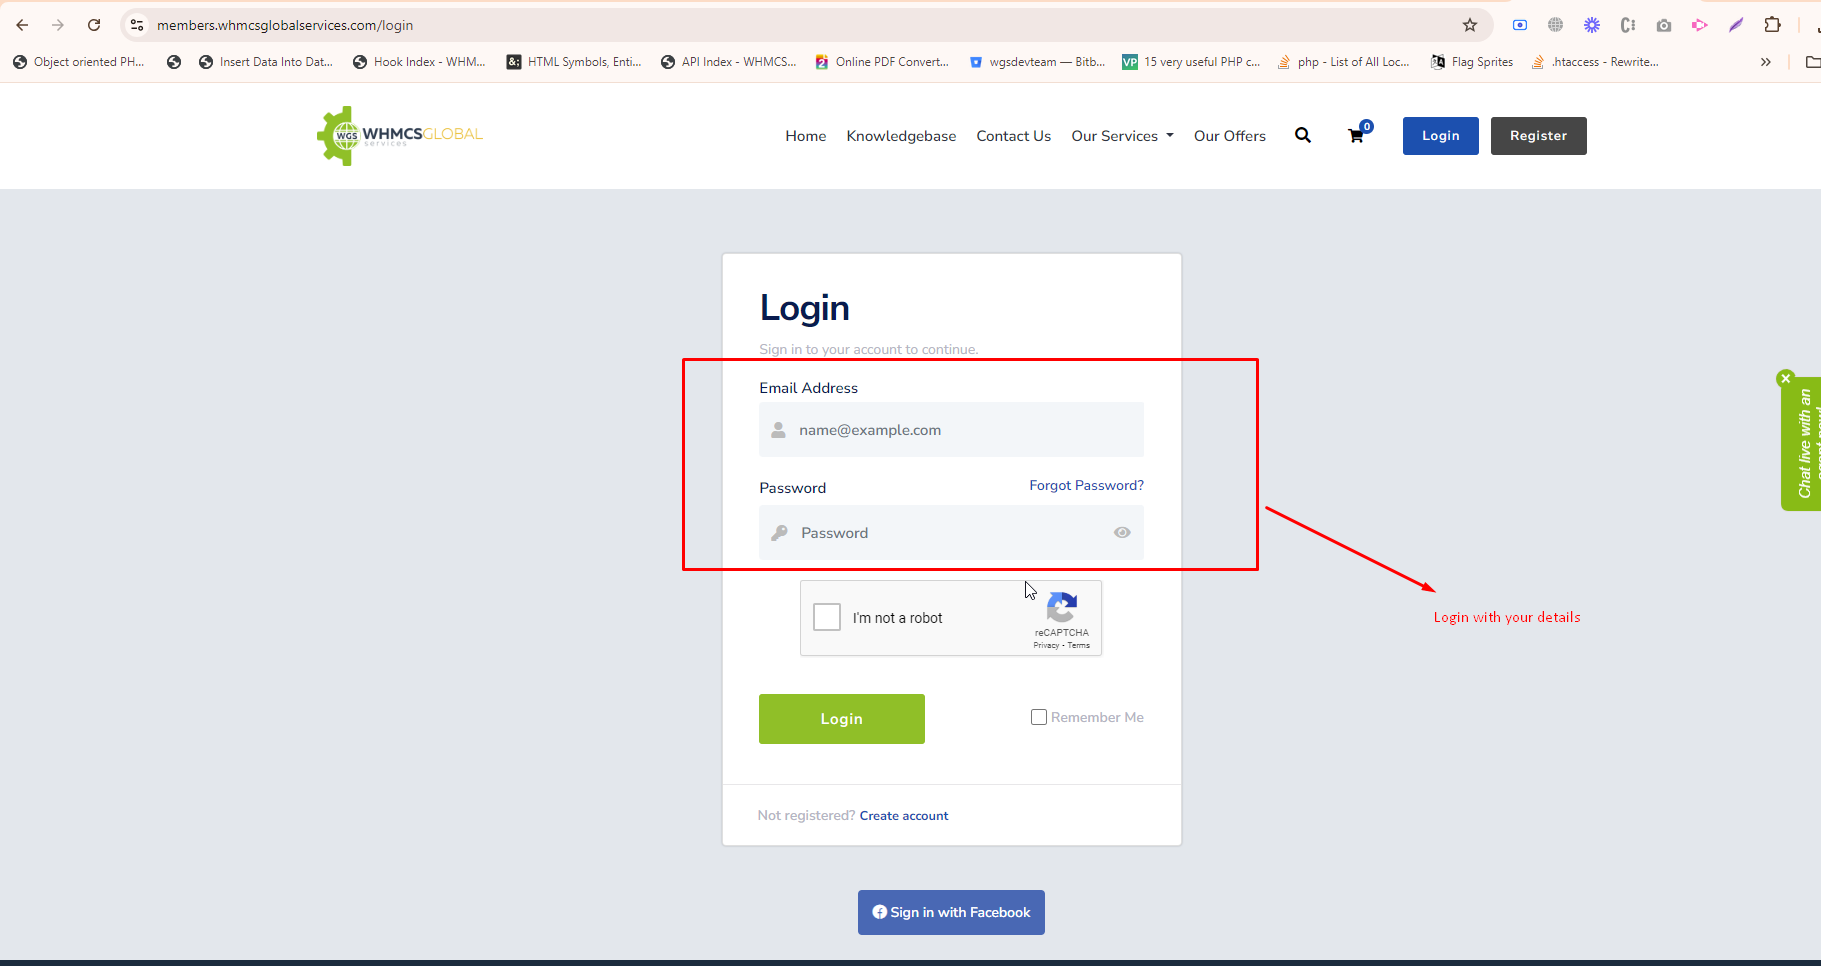
2. Go to your services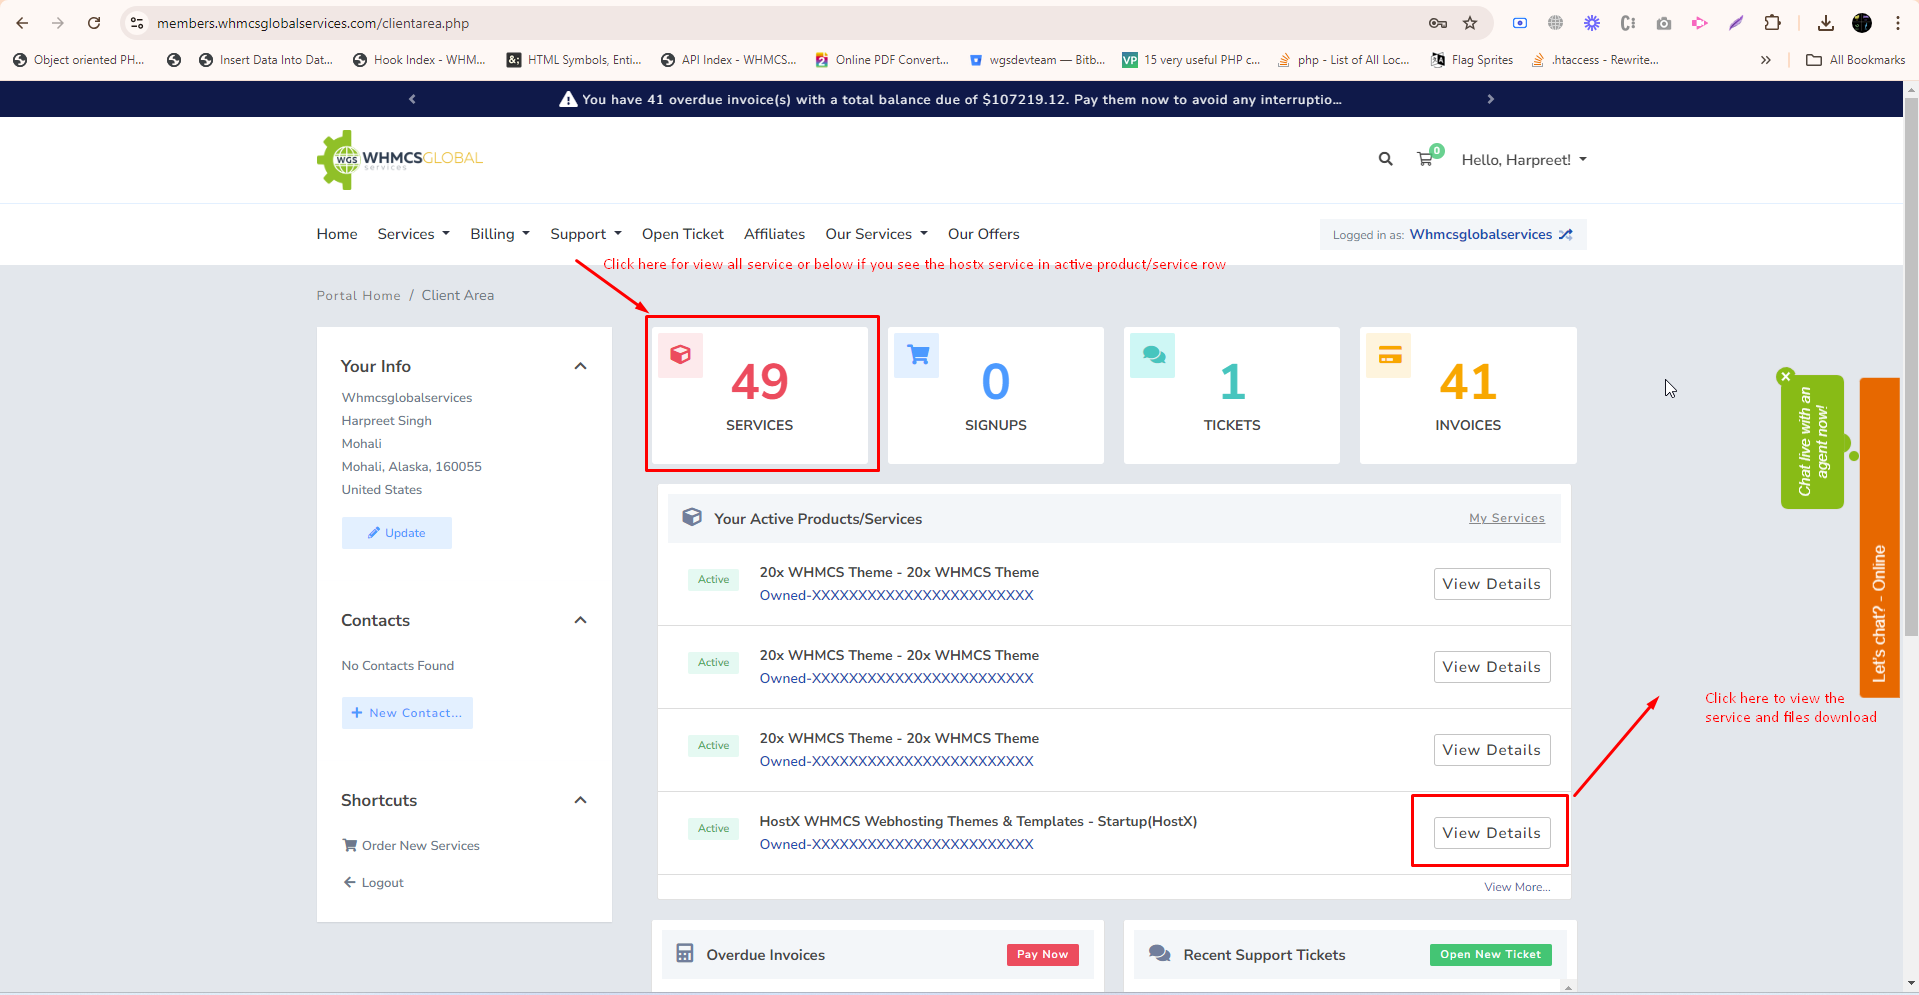
3. Select the hostx service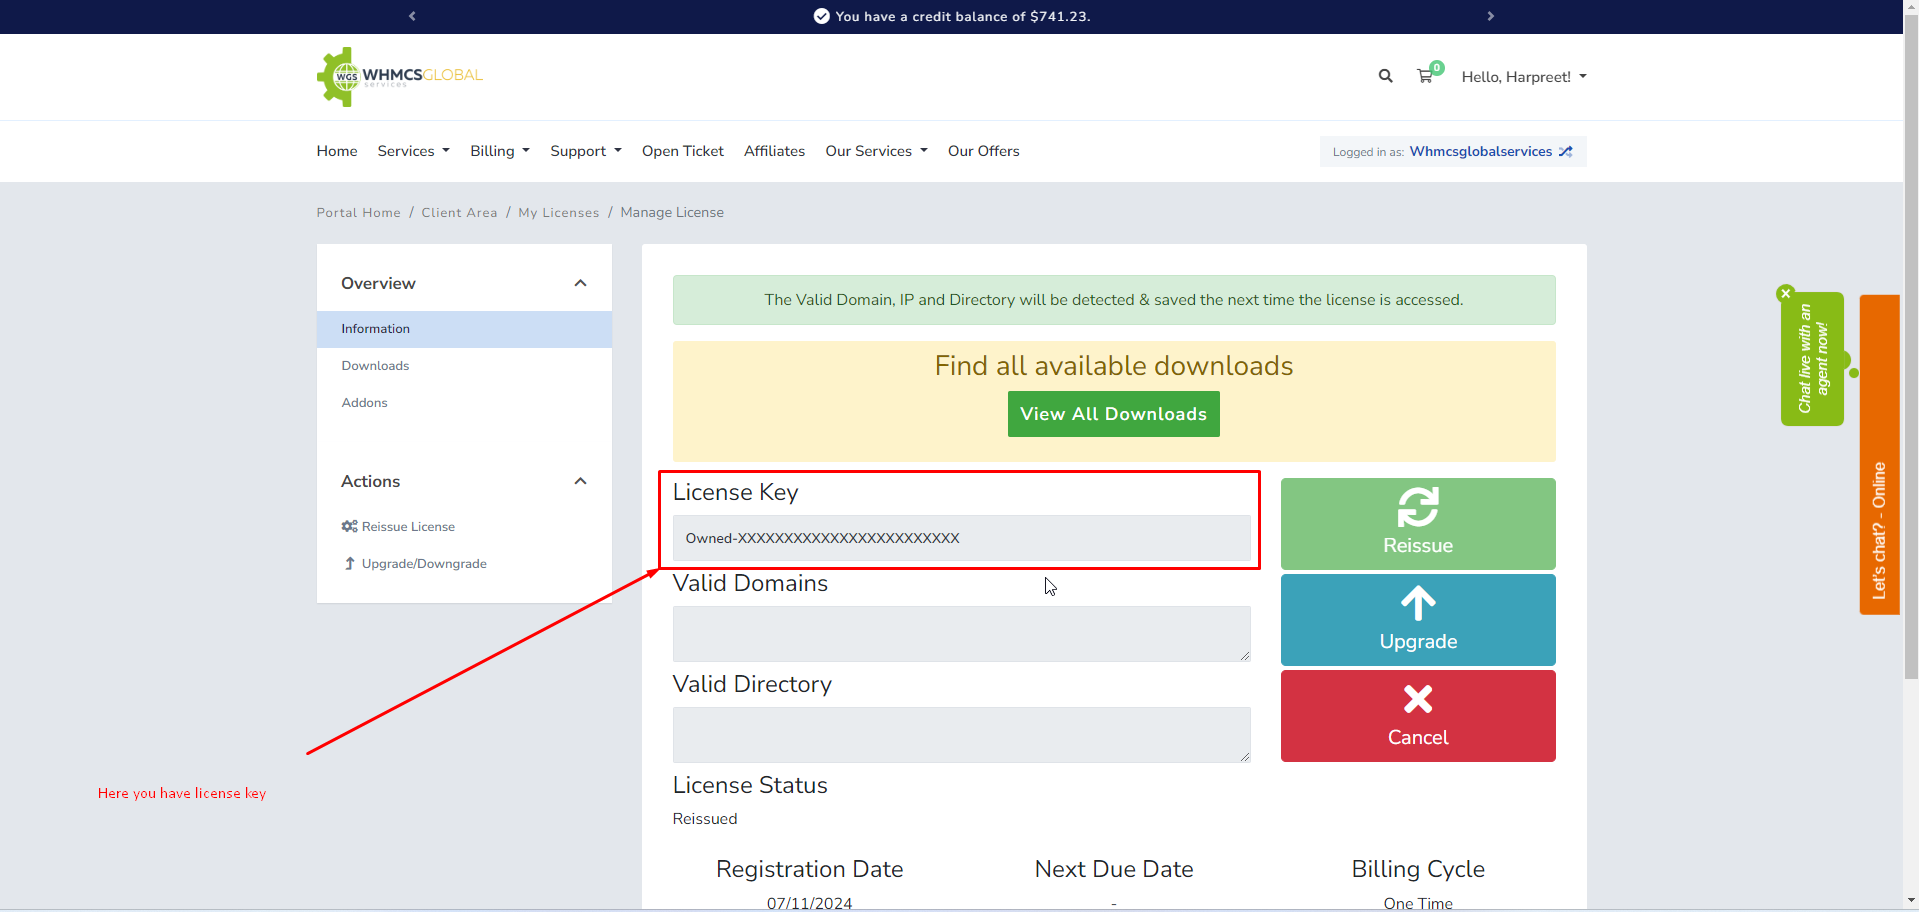
4. Click on download menu on left side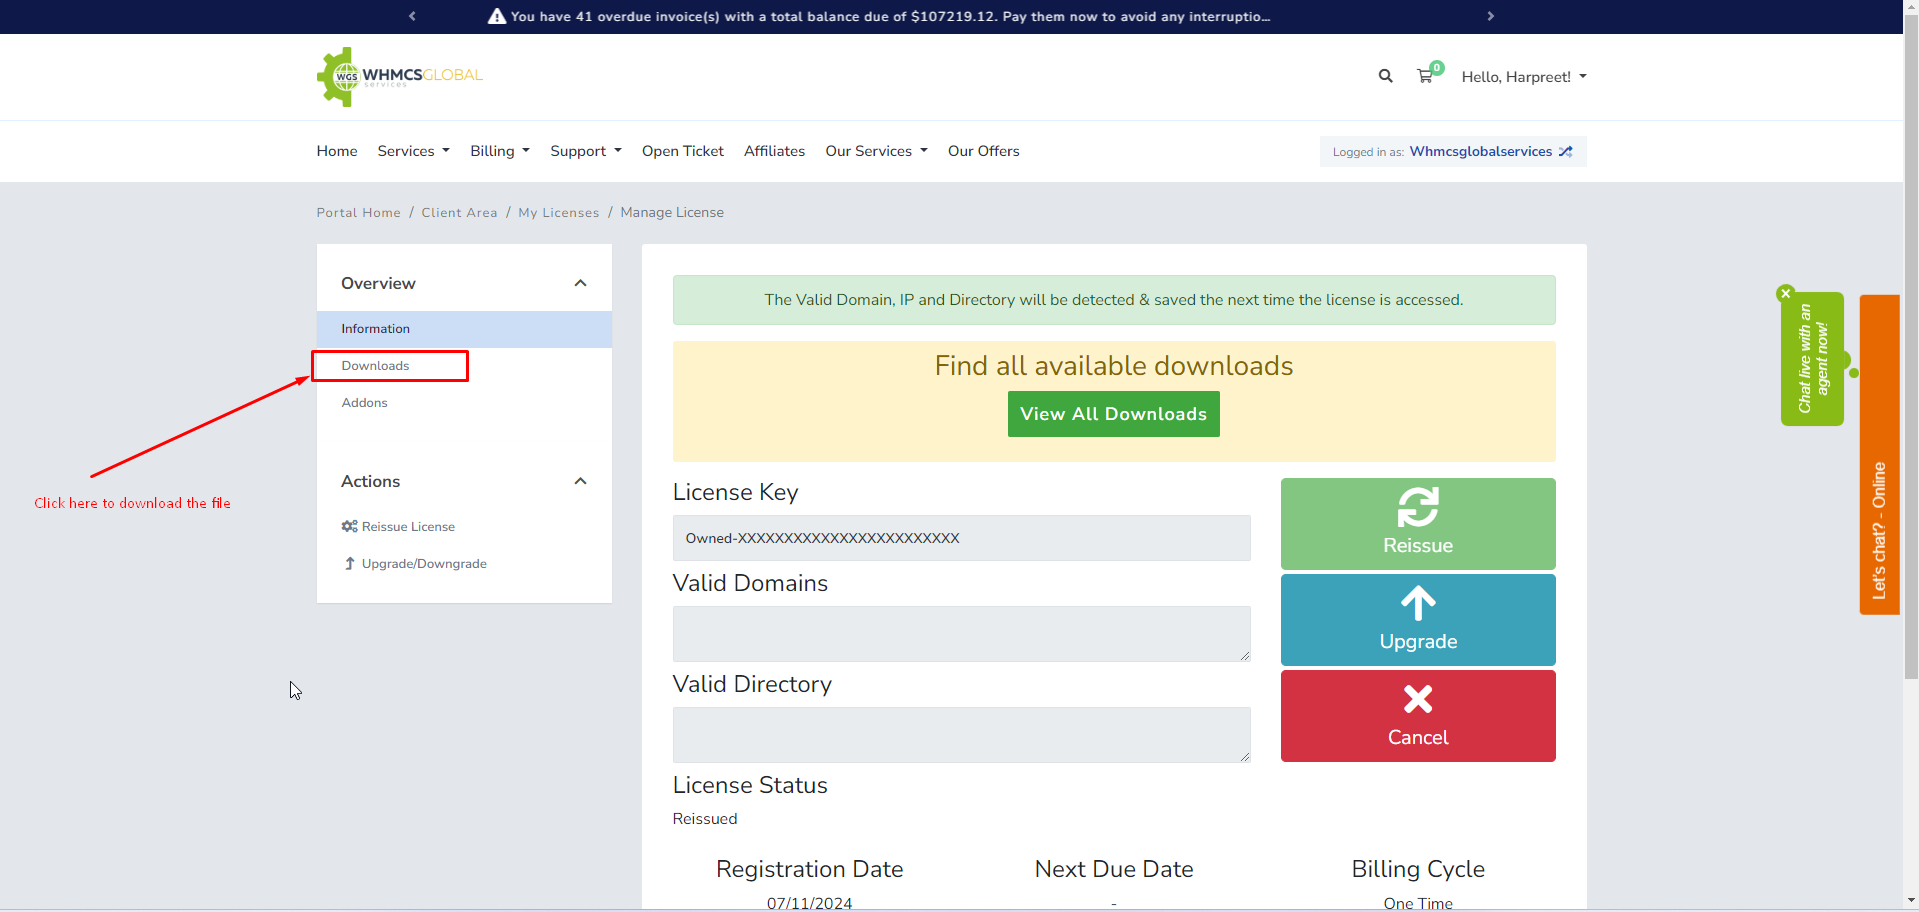
5. Download the build according to your php and whmcs version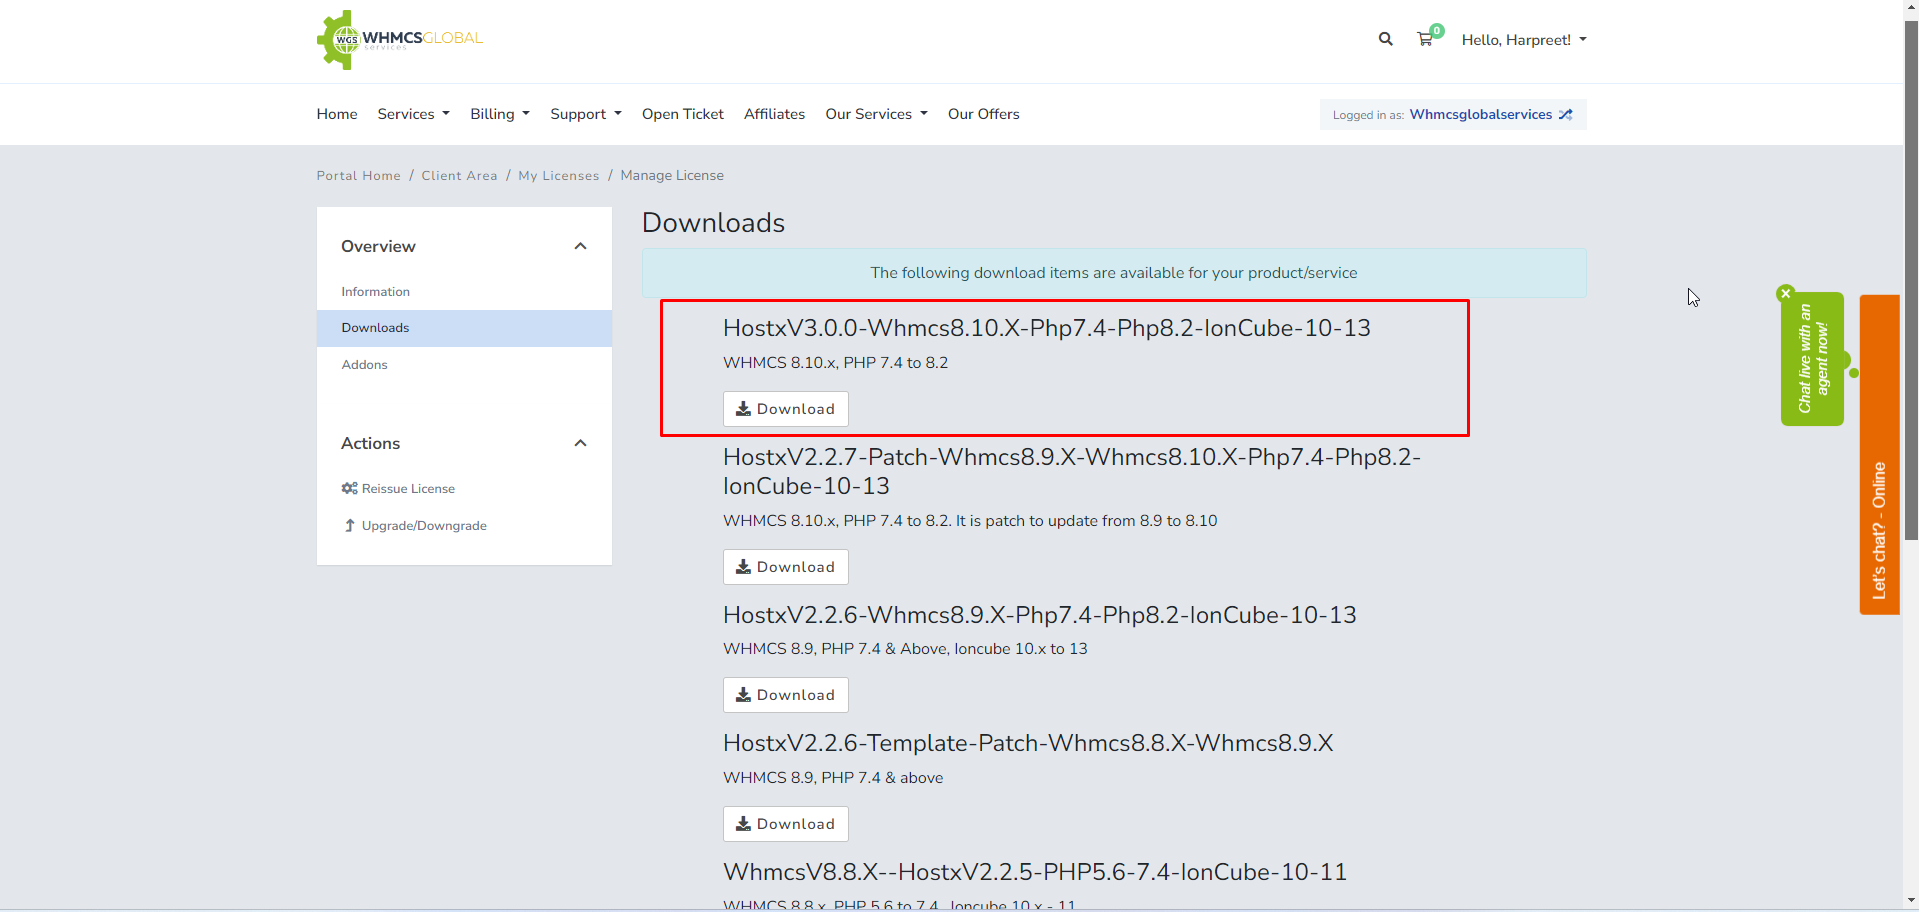
6. After downloading the build according to your whmcs and PHP version extract the build.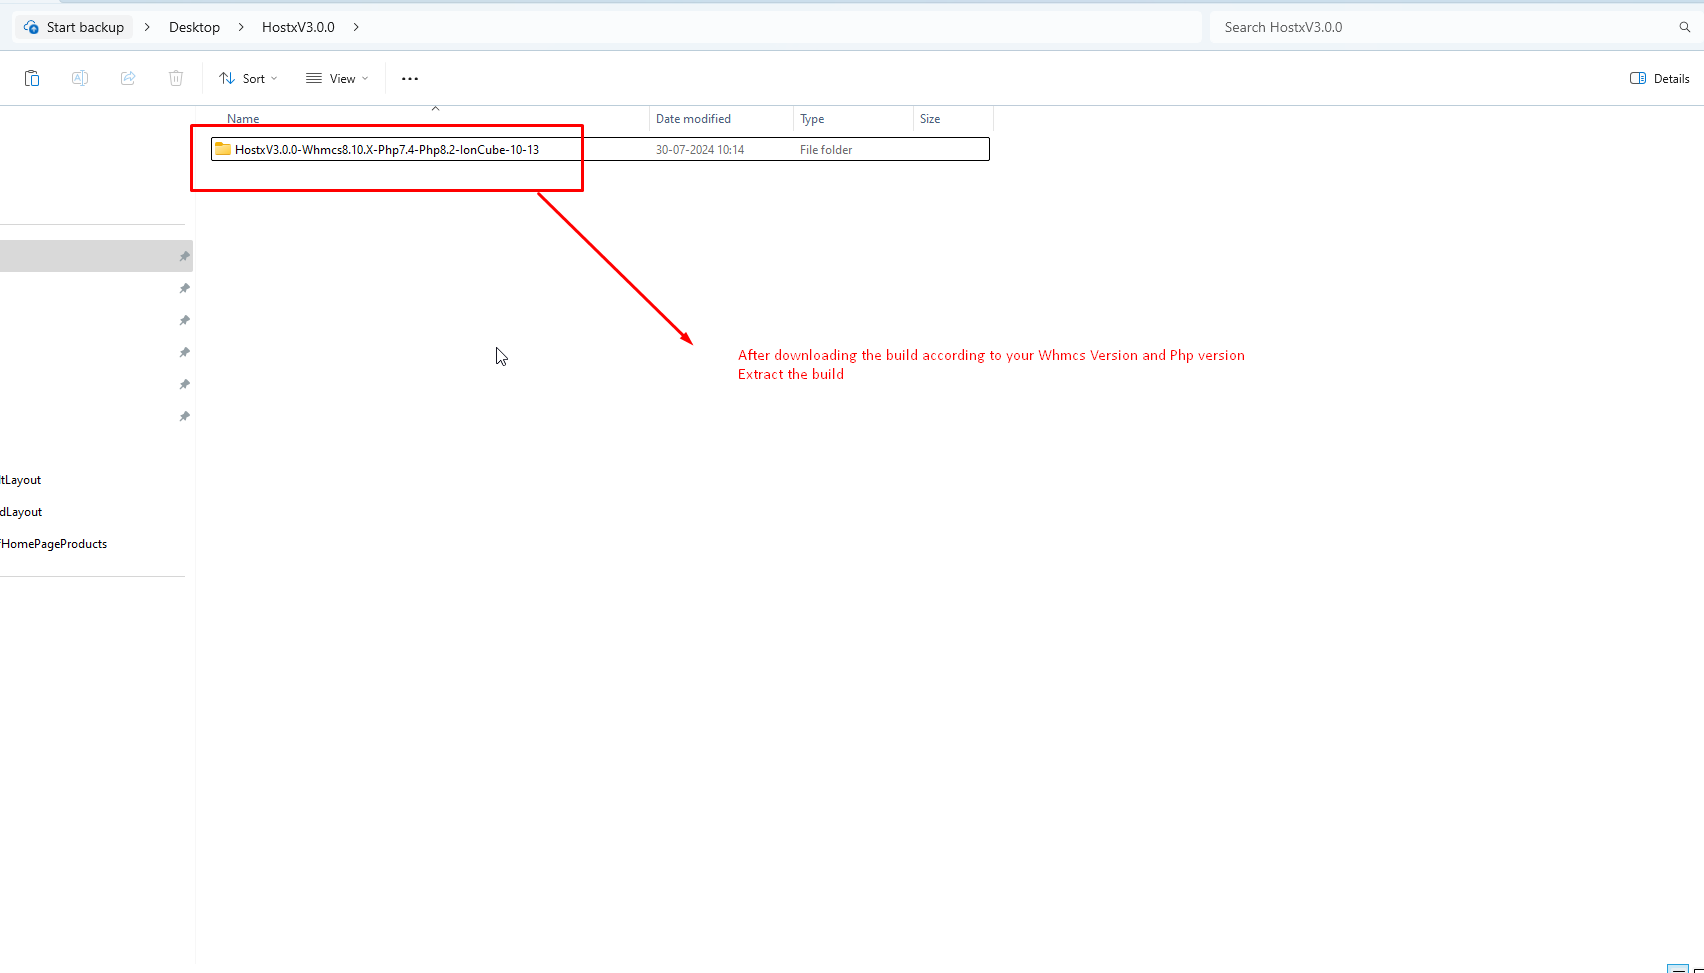
7. Open the following folder.
8. After open the folder you will see the following folders and files.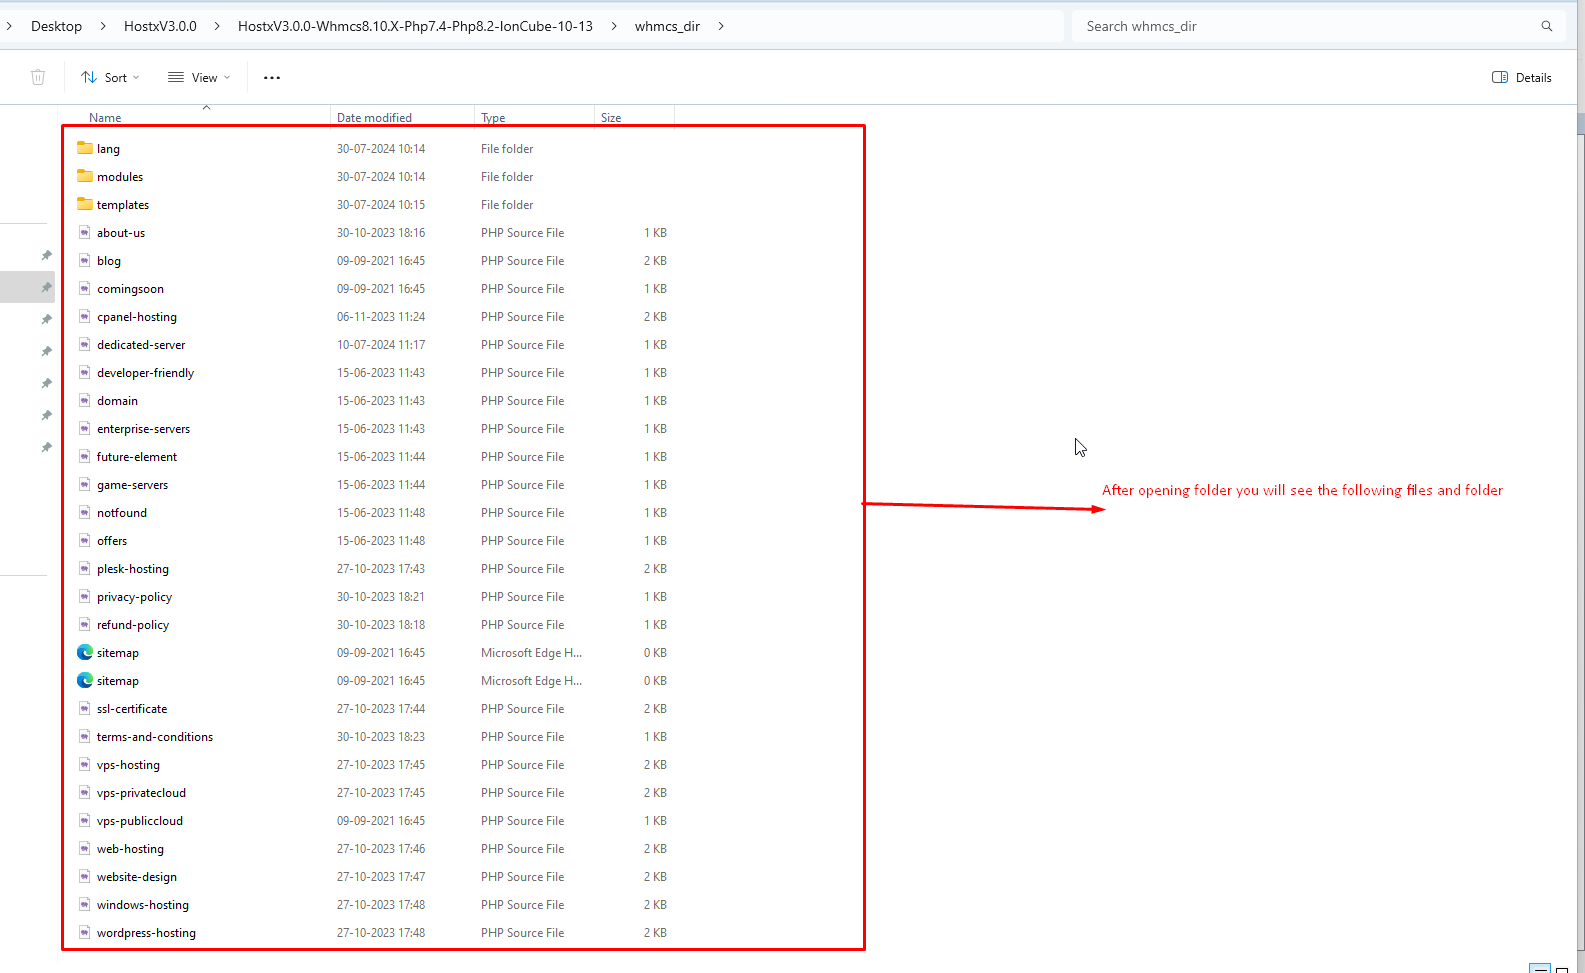
9. Override the existing file custom root file with new one so that new code will be added.
Note: - For custom pages that you have created apart from Hostx Default please follow this article -> (https://members.whmcsglobalservices.com/knowledgebase/517/Custom-Pages-showing-pricing-tables-blank-or-giving-error-after-updation-of-Hostx-V3.0.0.html) Custom Pages showing pricing tables blank or giving error after updation of Hostx-V3.0.0]
10. Go to the following path on both side and extracted the build side.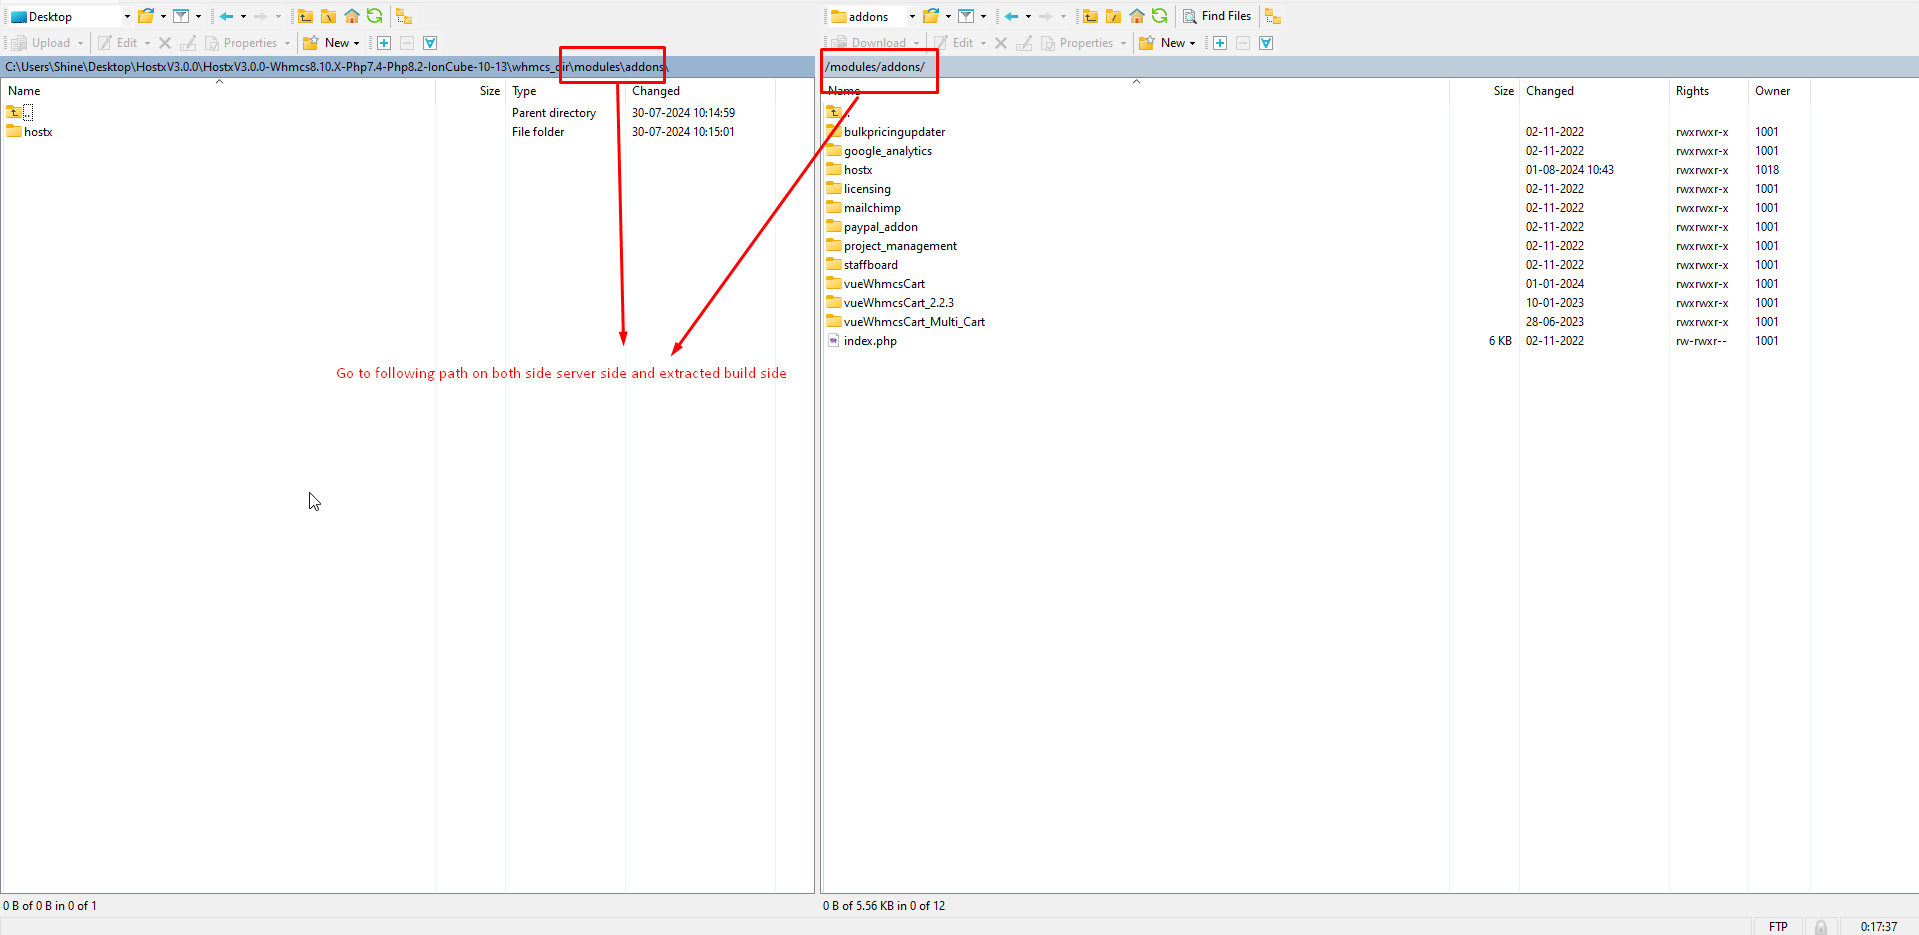
11. Override the hostx with the existing one.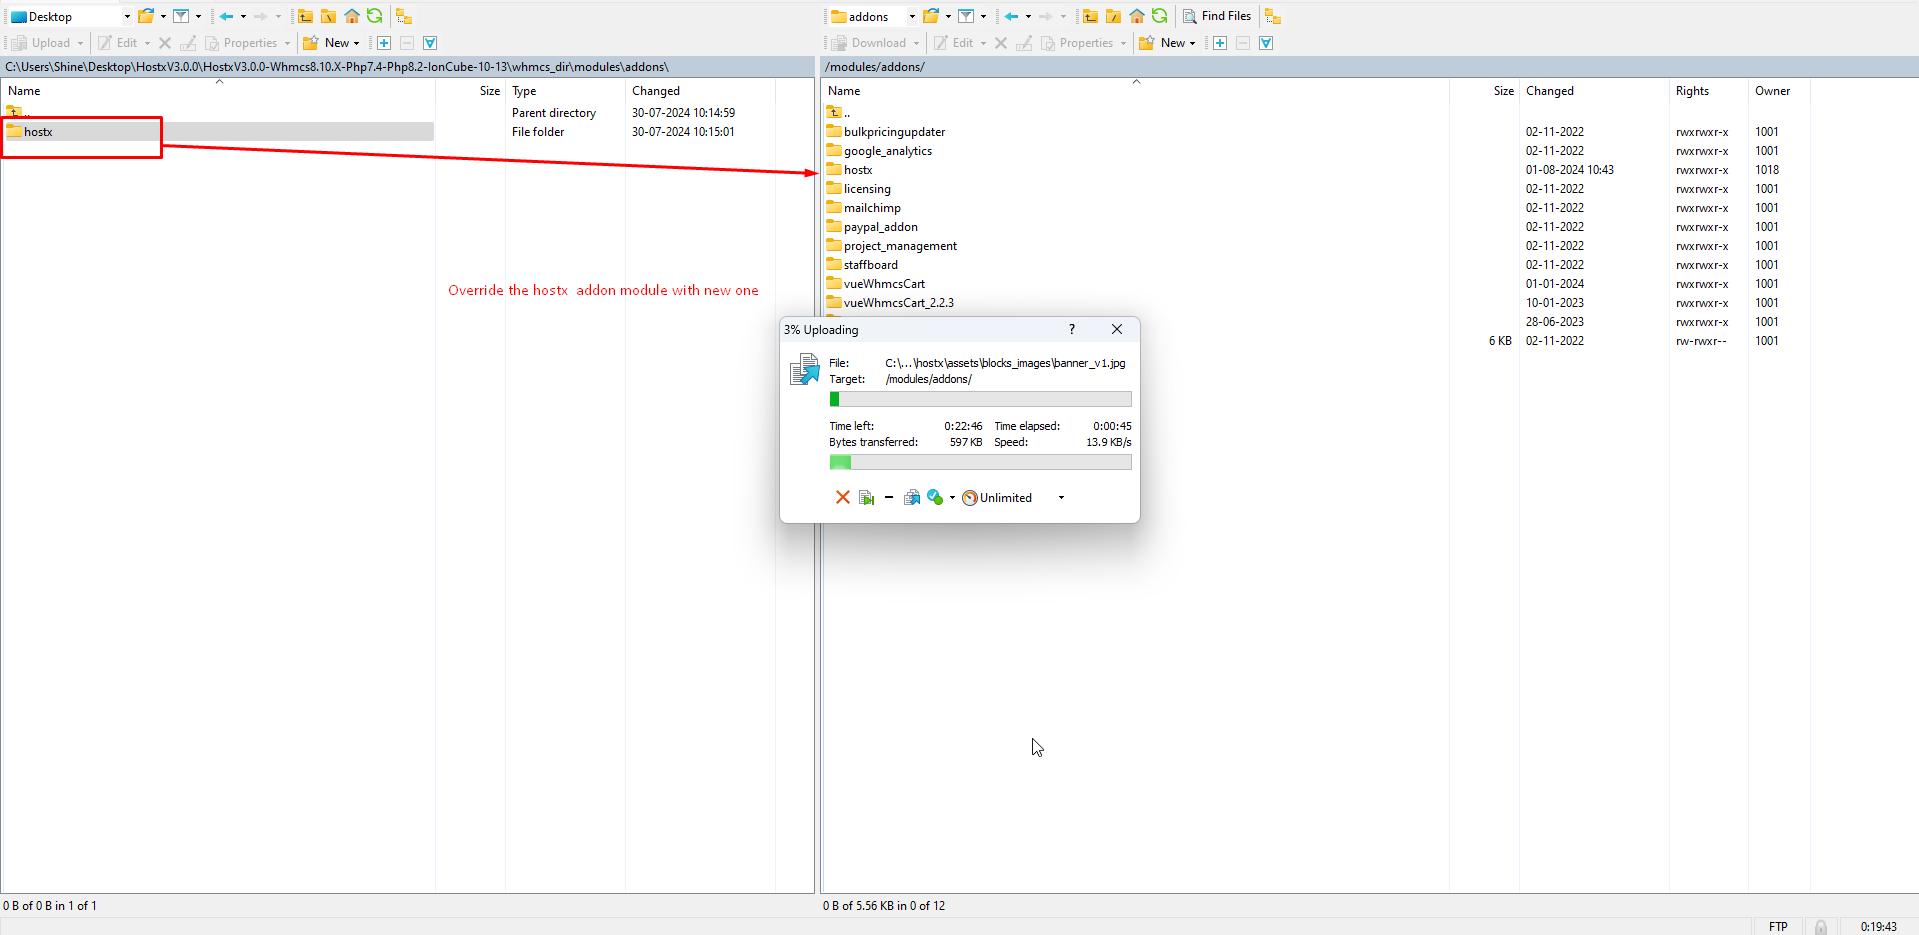
12. open the templates folder on the both sides extracted build and server side.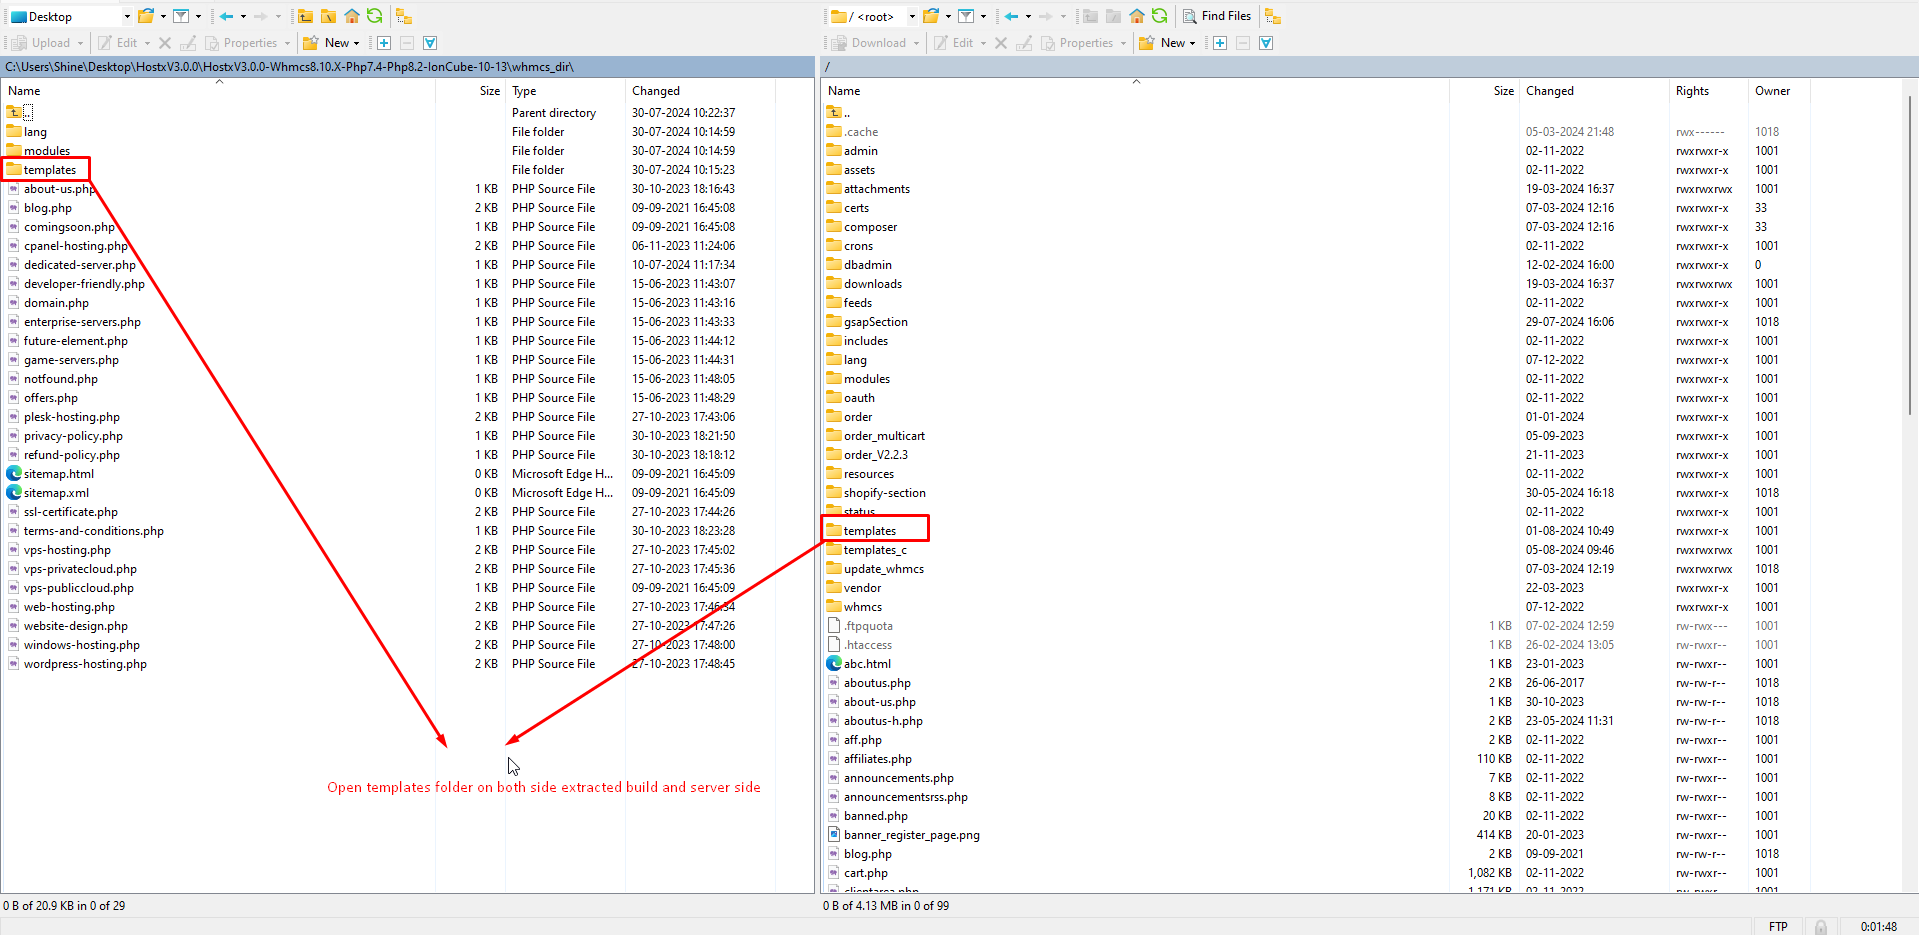
13. Upload the hostx-child template to templates folder. Its child based so it will work sepratly from the old one.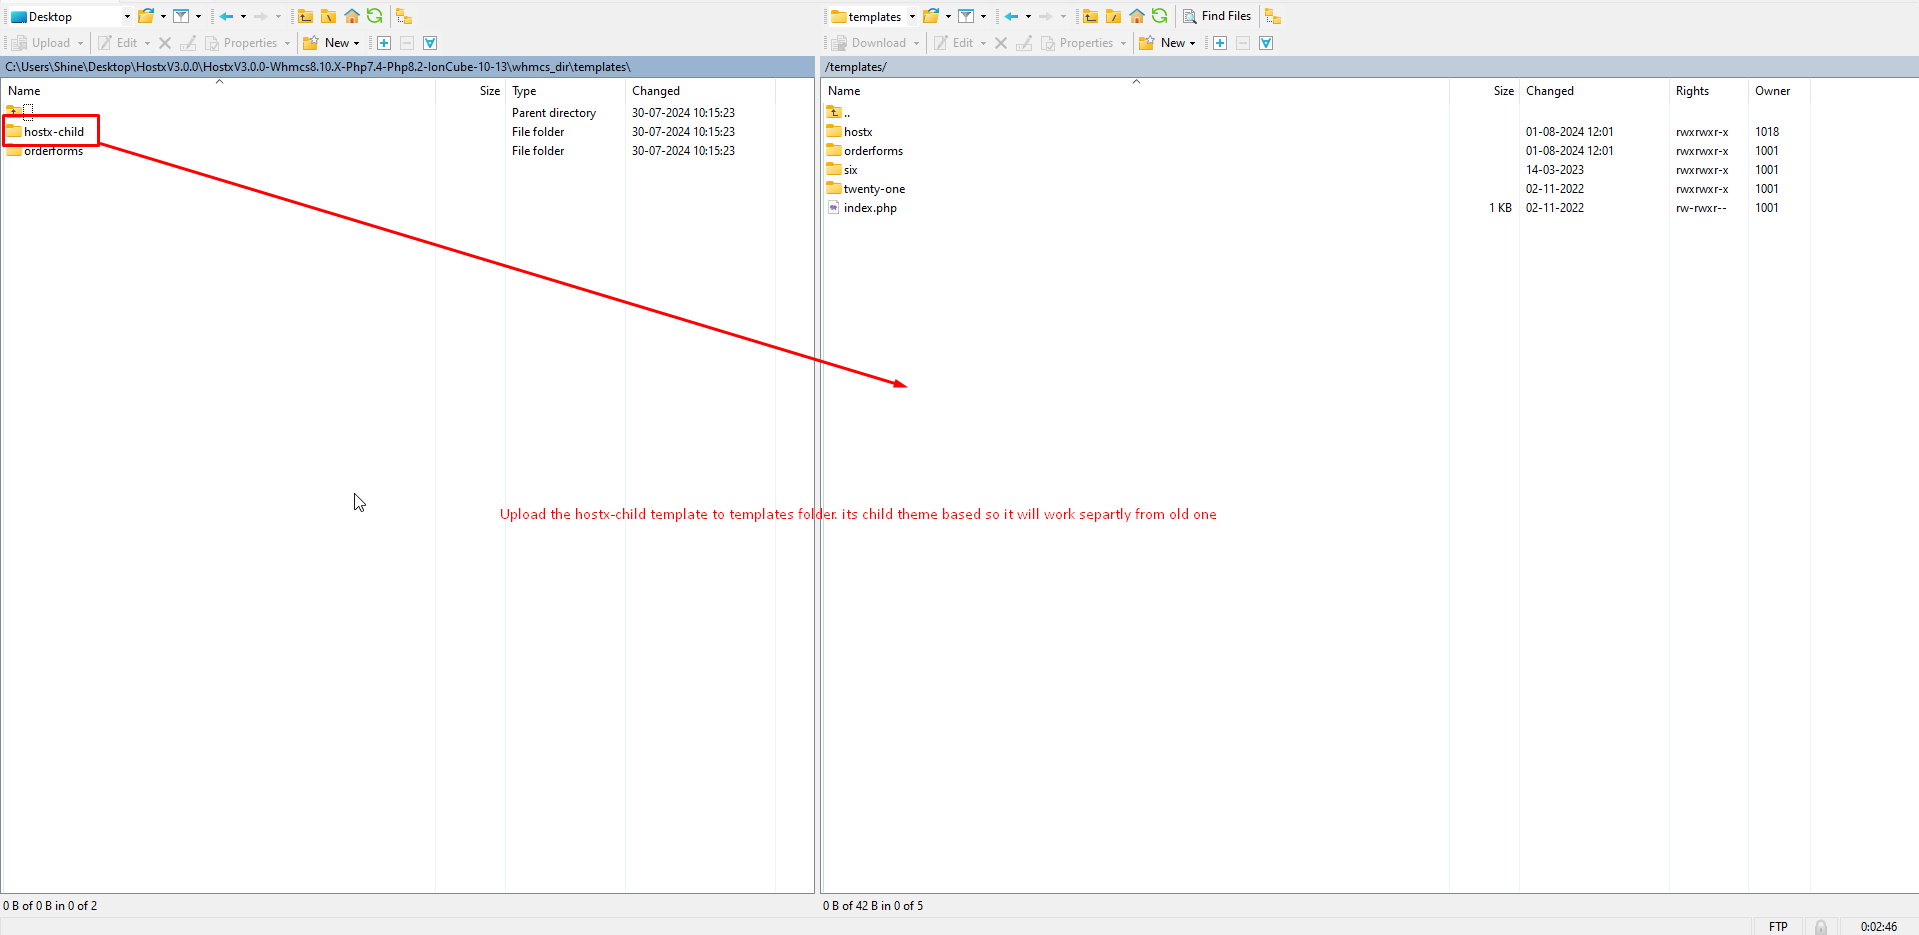
14. Open the oderforms on the both sides.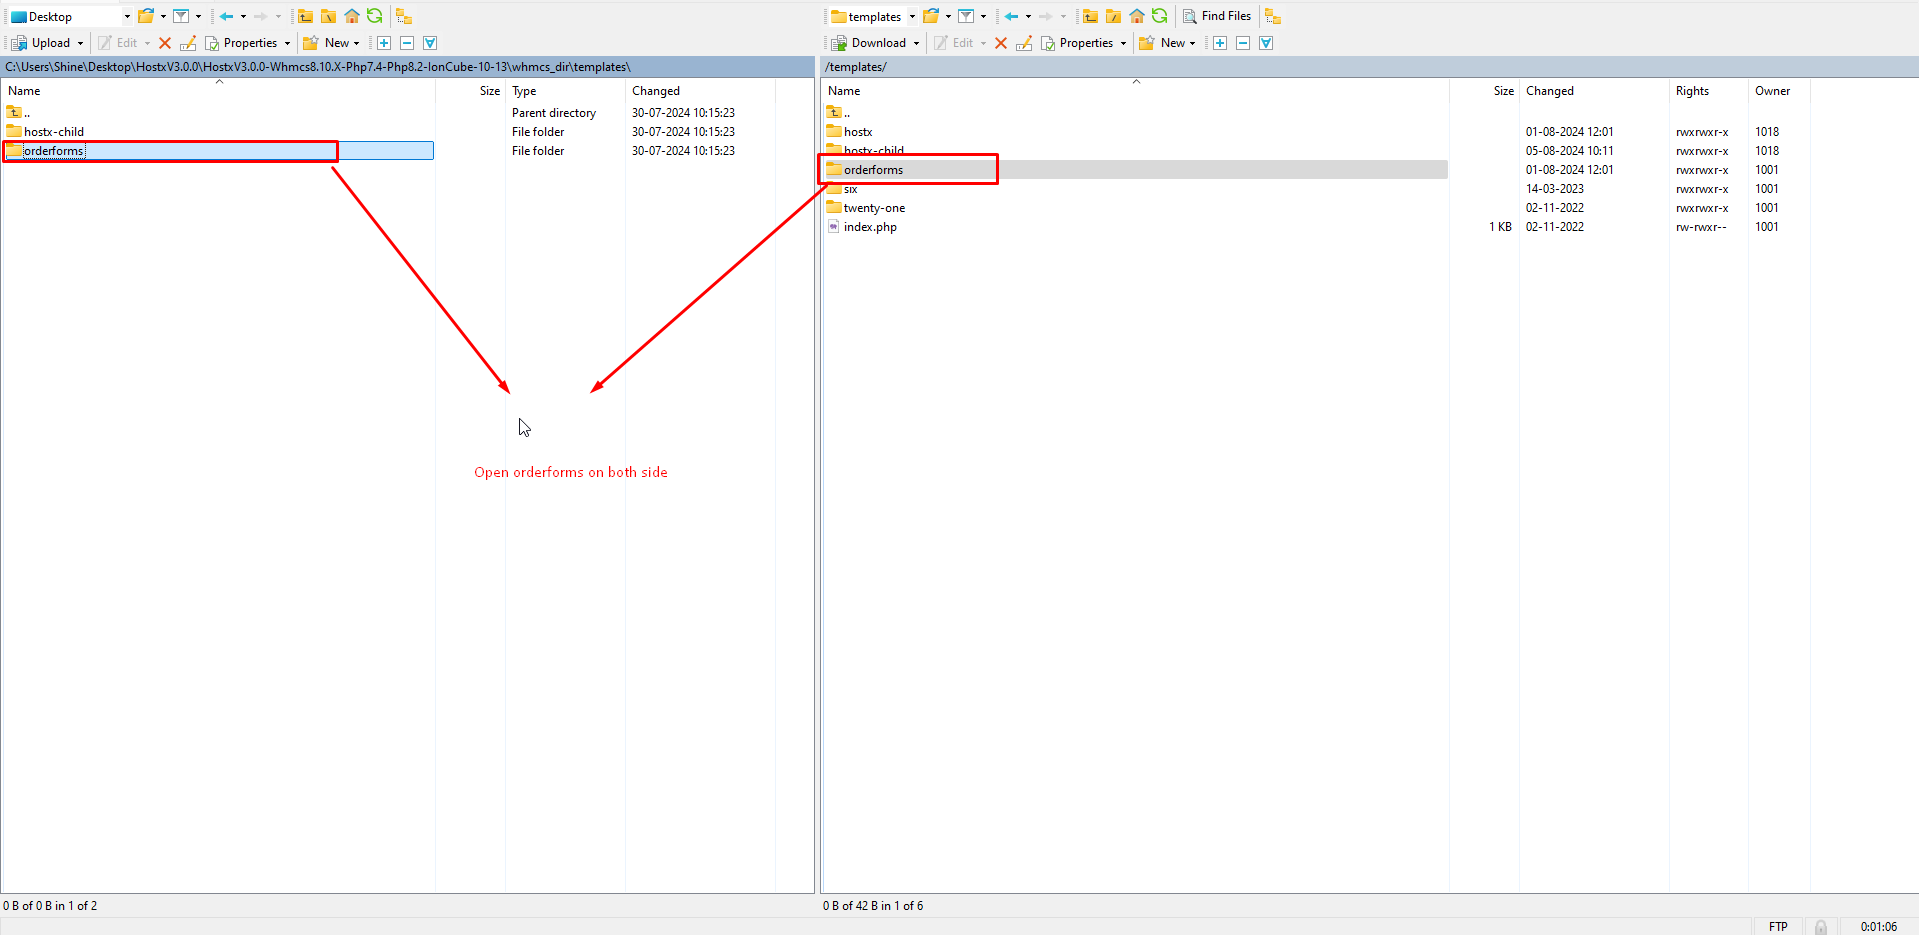
15. Upload the hostx_cart to the orderforms so that new cart will be executed.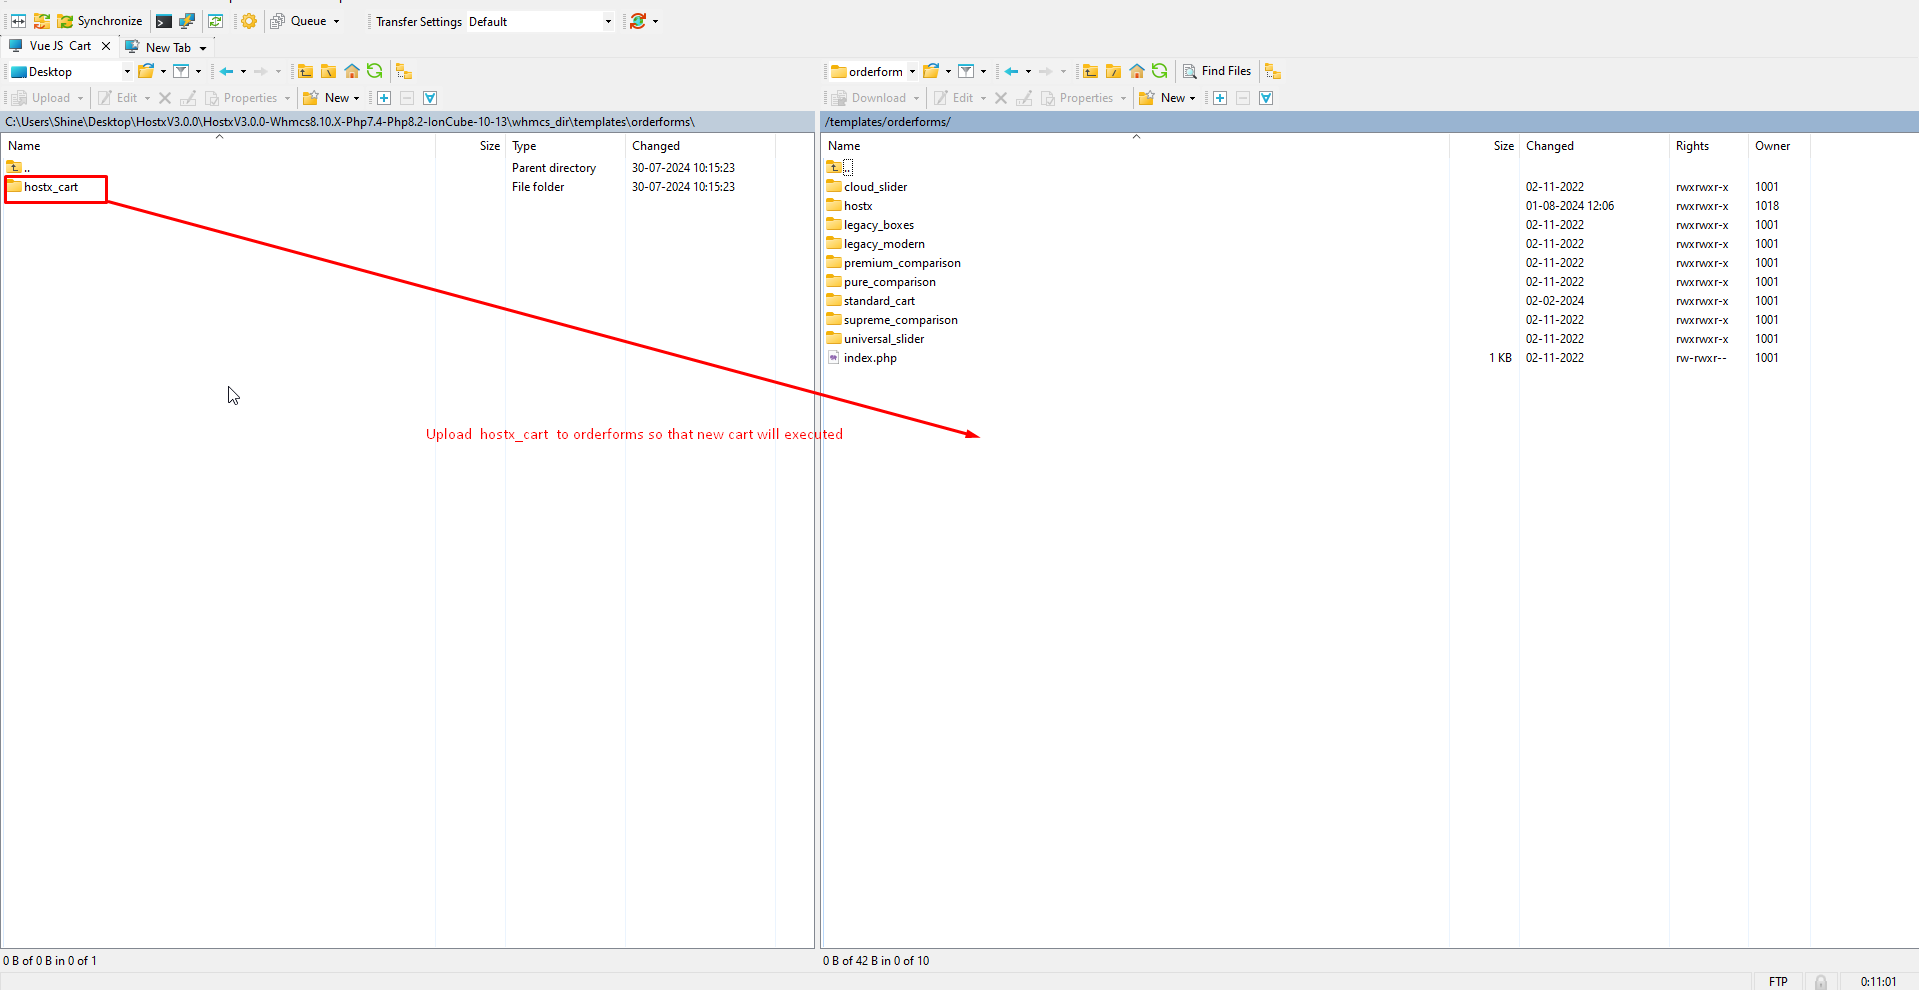
16. Now open the following folder on the both sides as you will see already file exists so don't override directly. we need to just add the extra variable for the hostx V3.0.0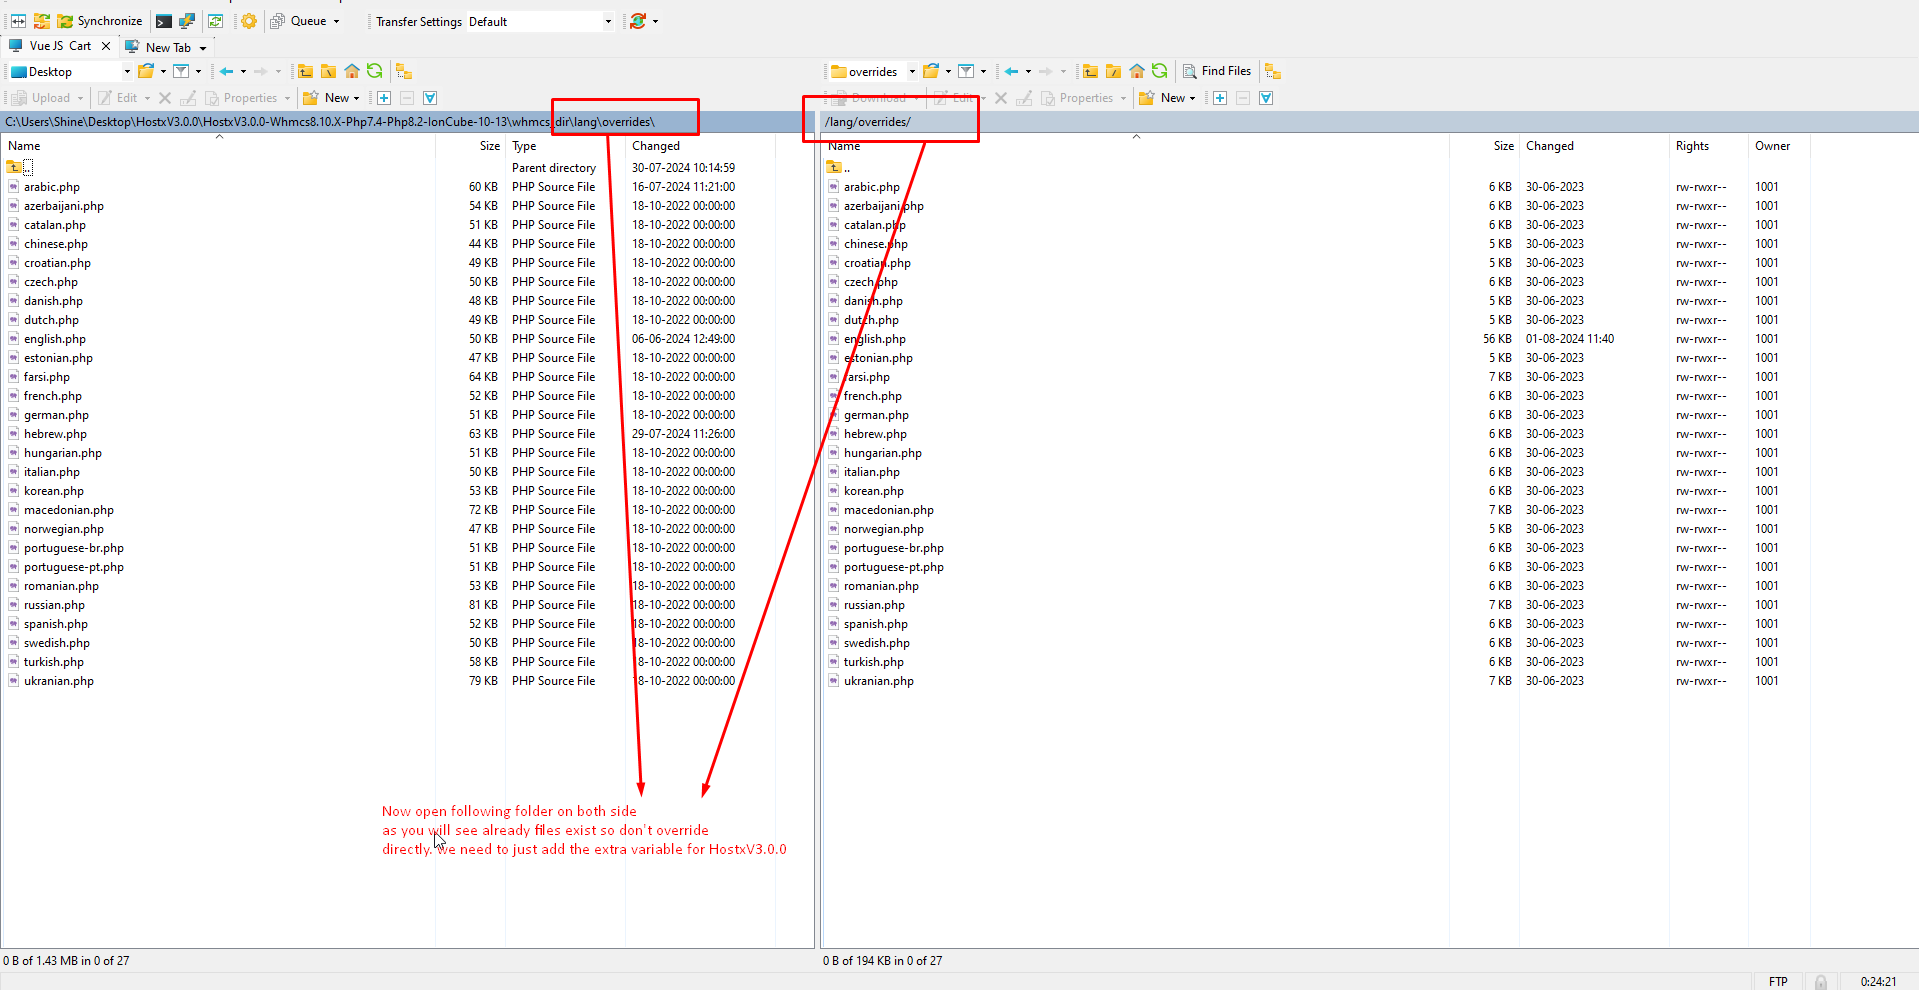
17. Edit the following file and open in any editor.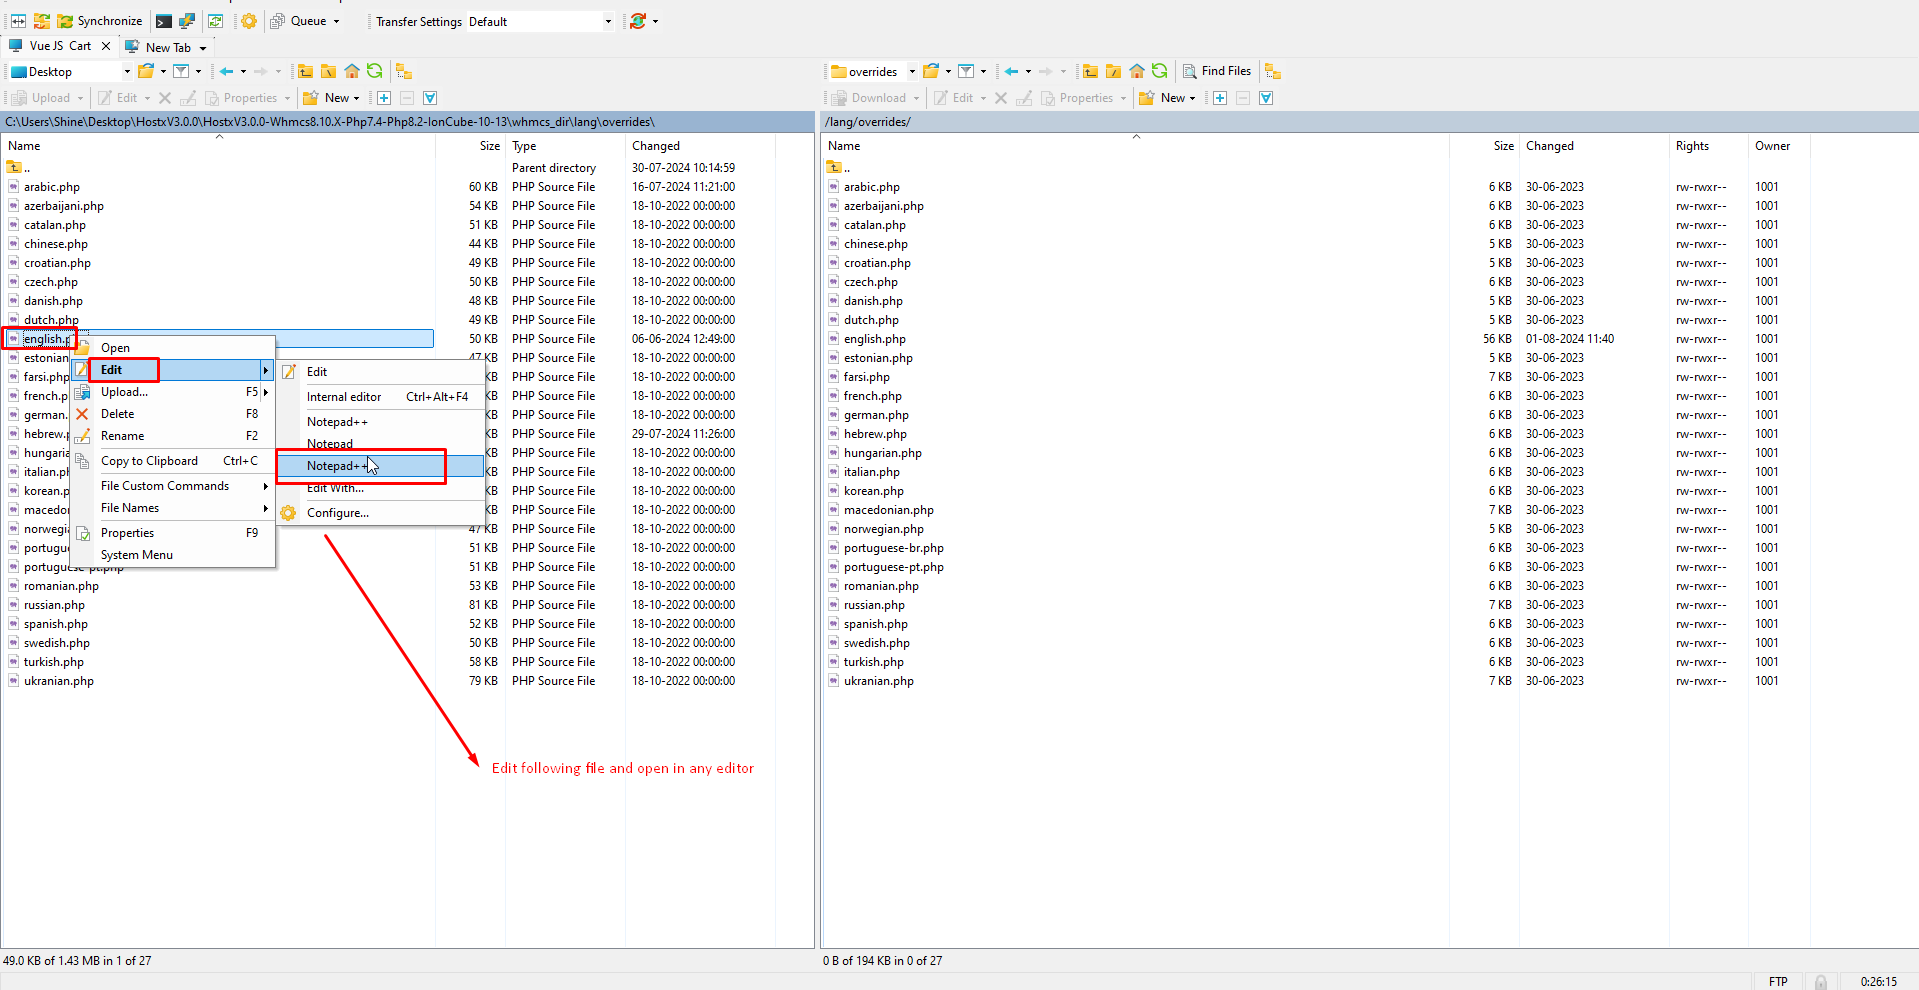
18. You will see this extra content for V3.0.0 you can coy the content and paste in the server site.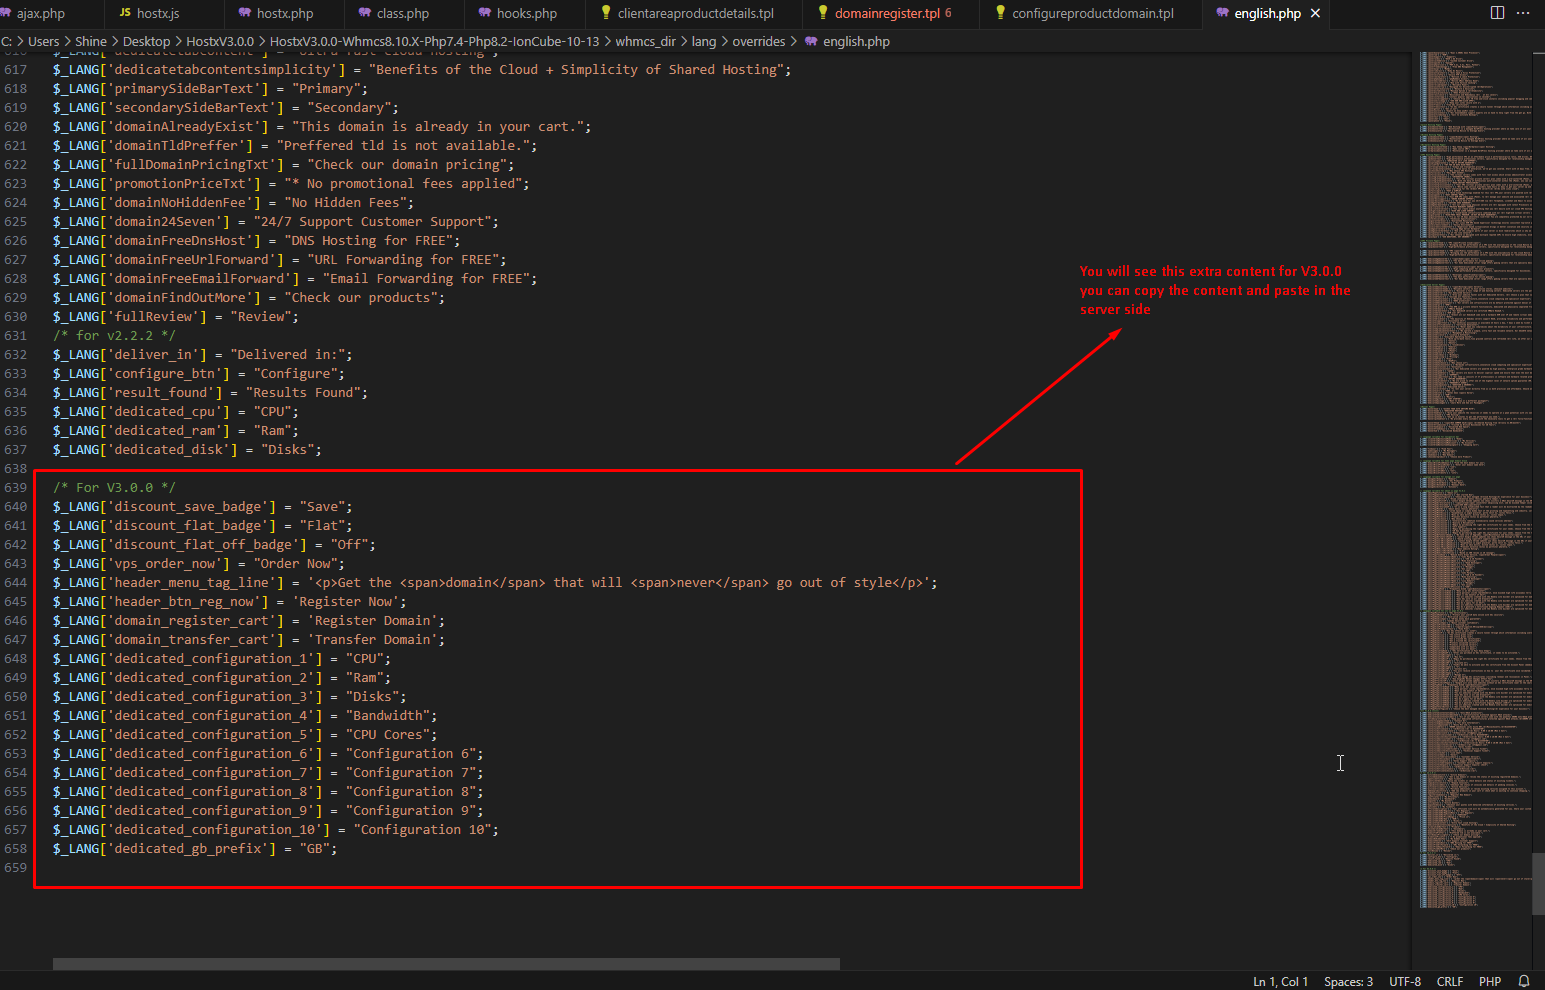
19. Edit and open the file server side to your editor and paste the content that is copied from the new hostx build.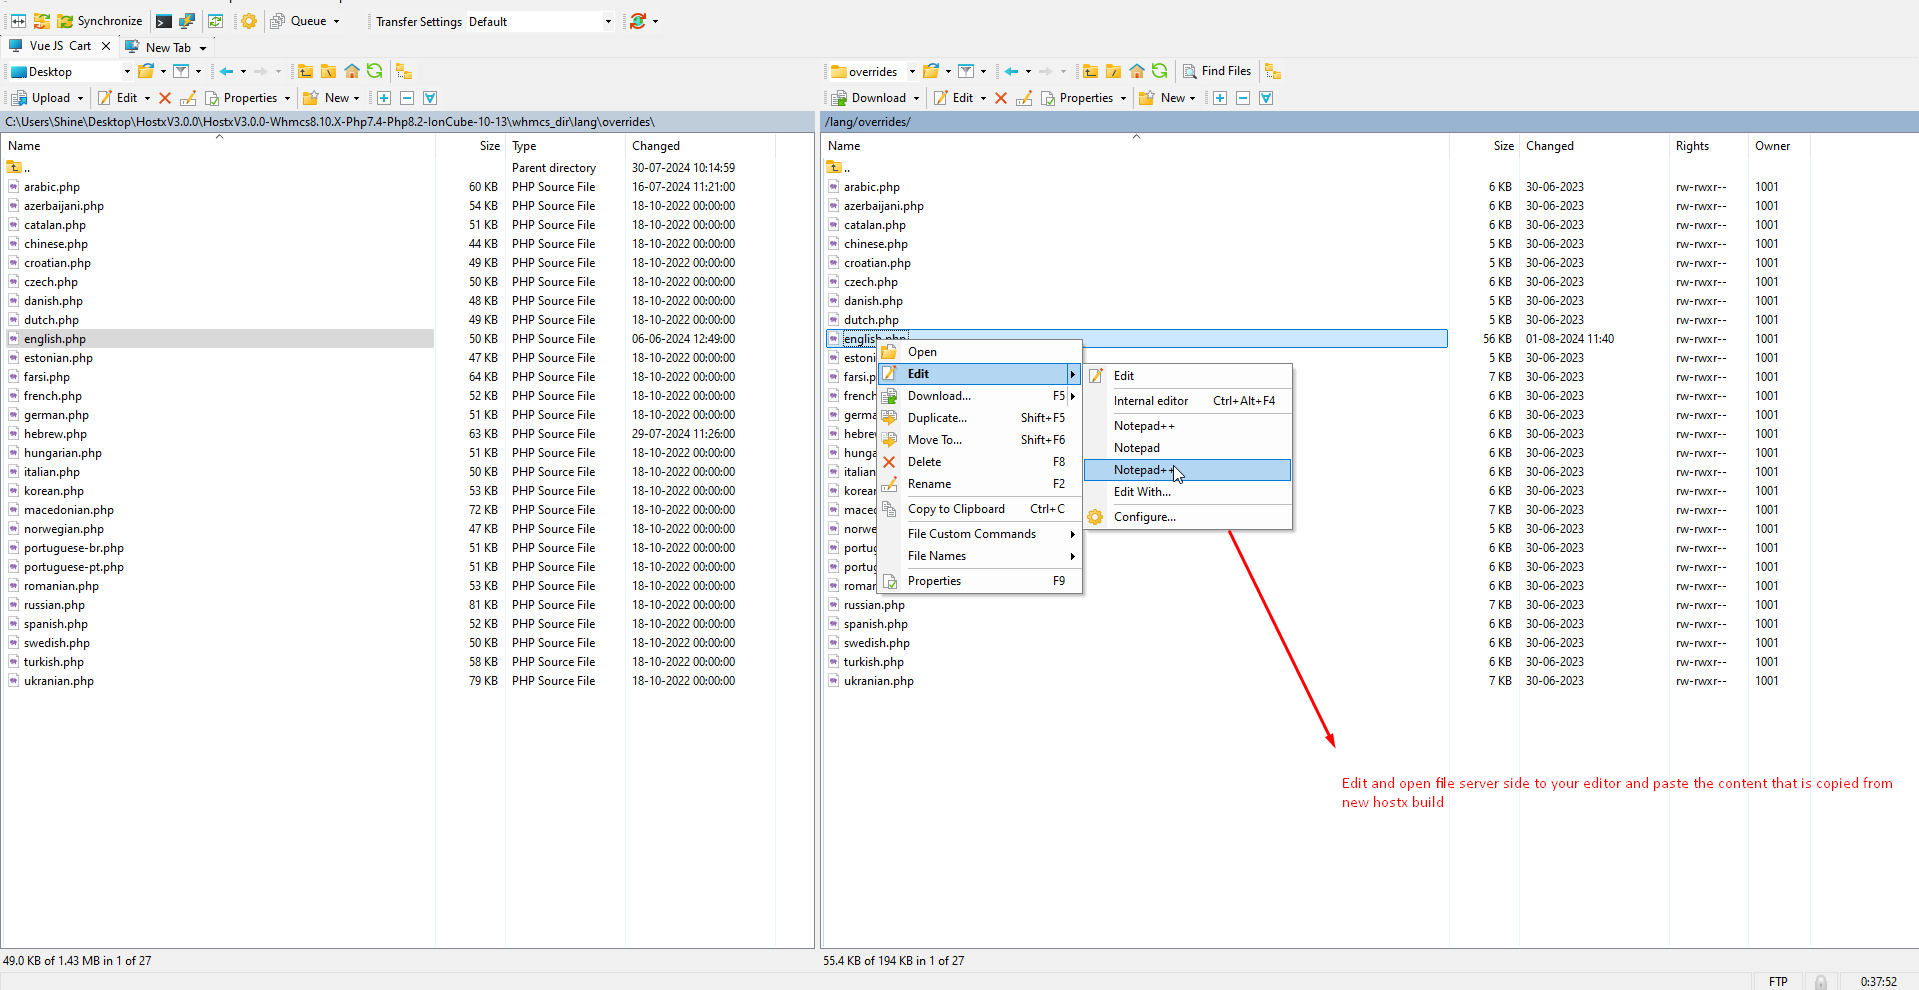 20. Paste here a new variable at the end of the file before the php tag closed if closing tag not there then just paste at the end of the file.
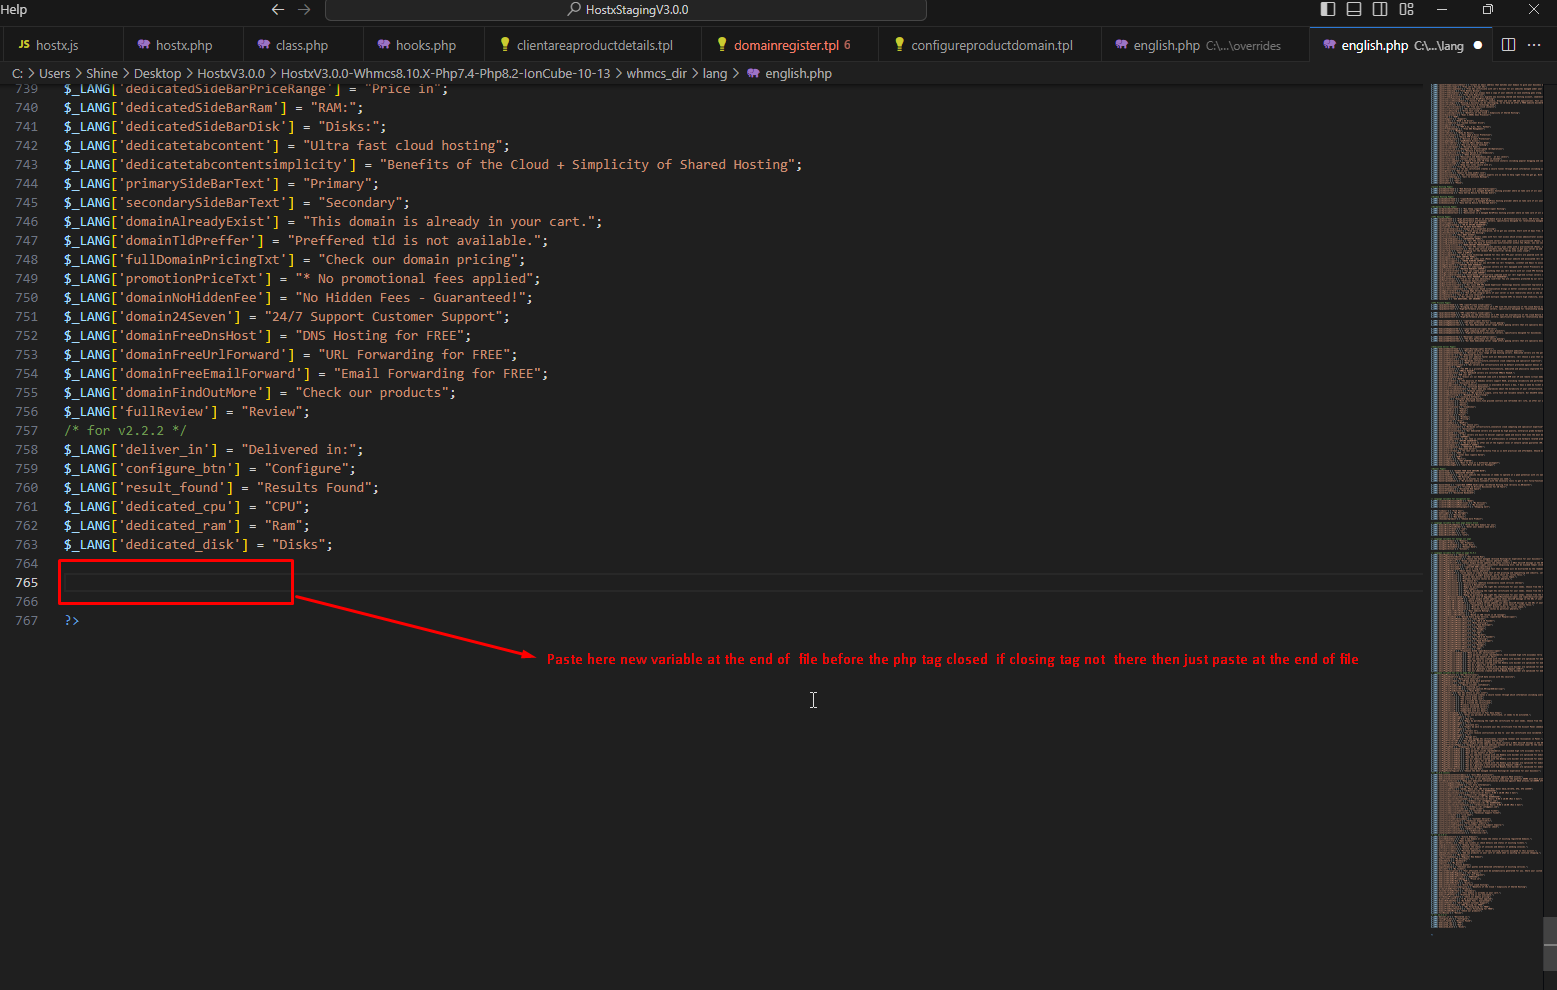
21. As you can see the new code is added for the language file is the same process will be followed for the other language file too.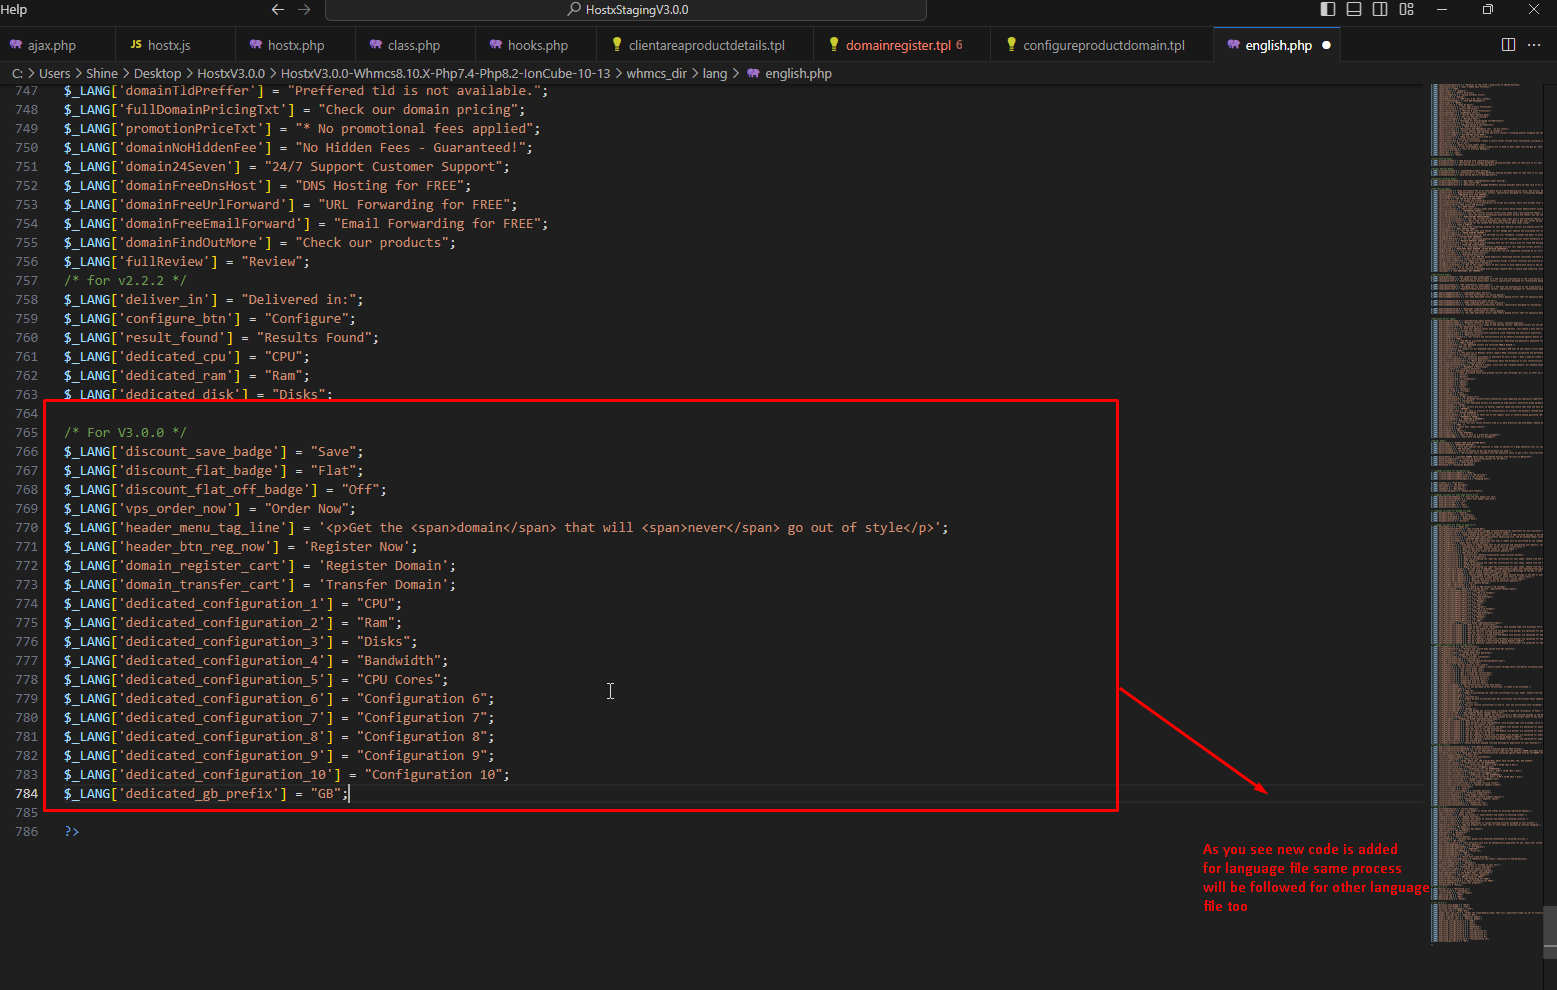
22. You will see the difference in the file as new code is added.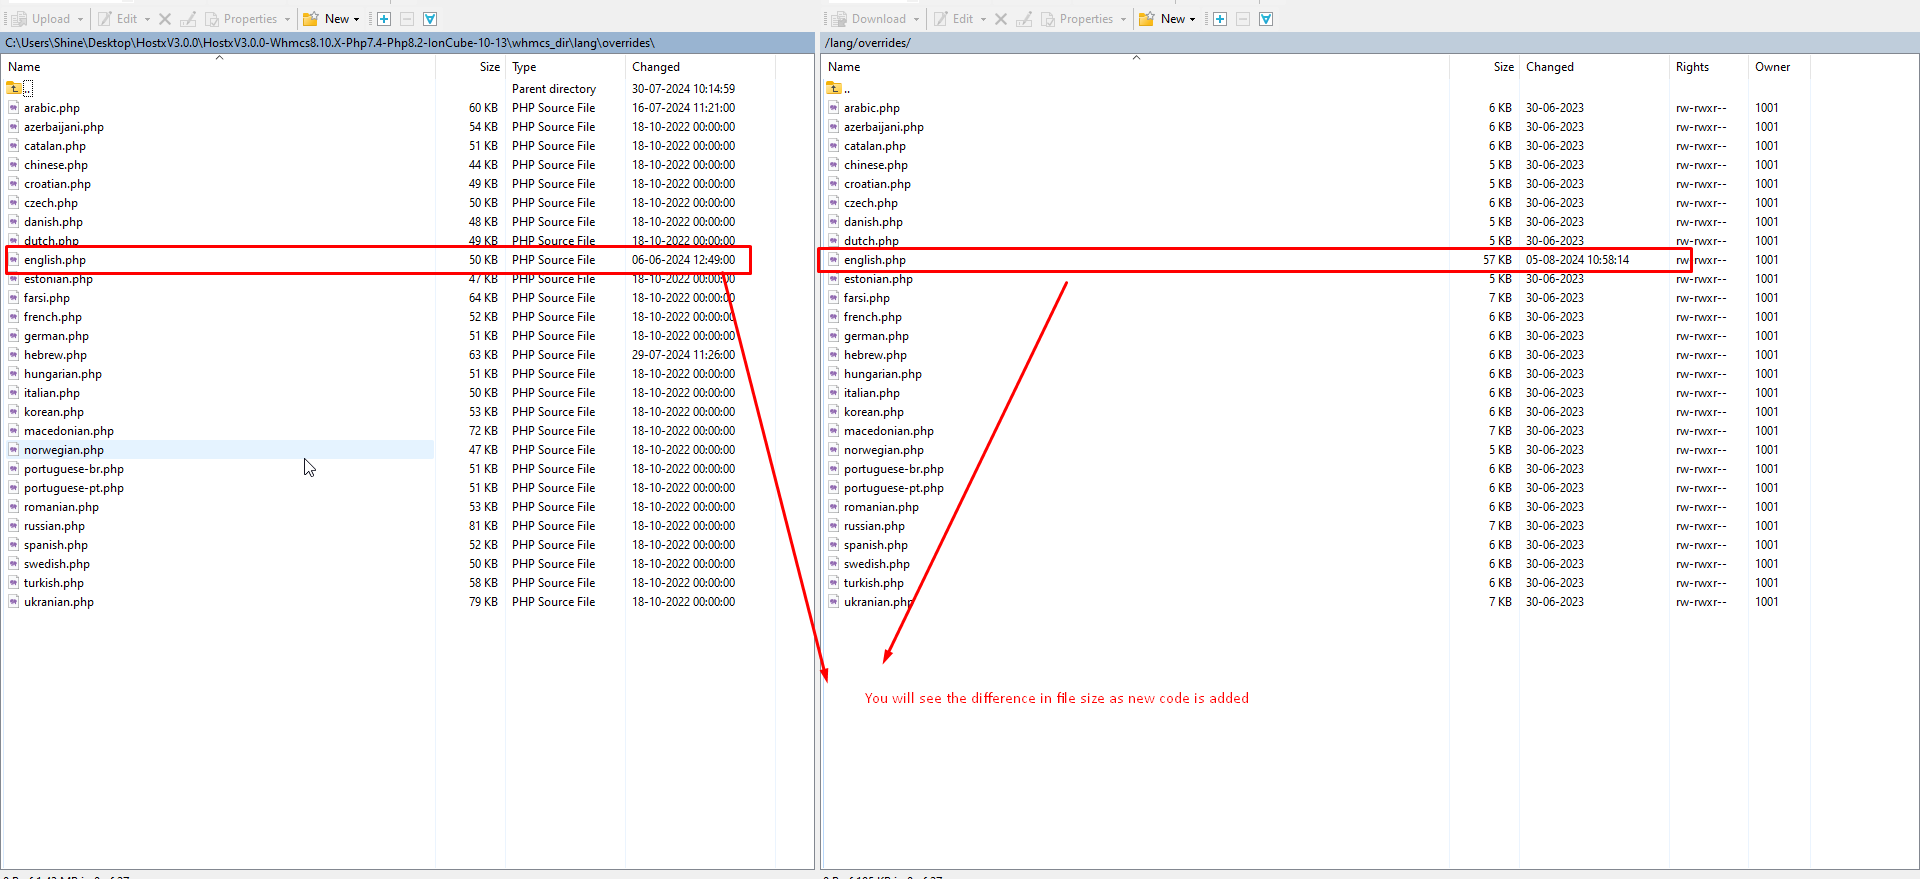
23. Go to the addons and click on the hostx.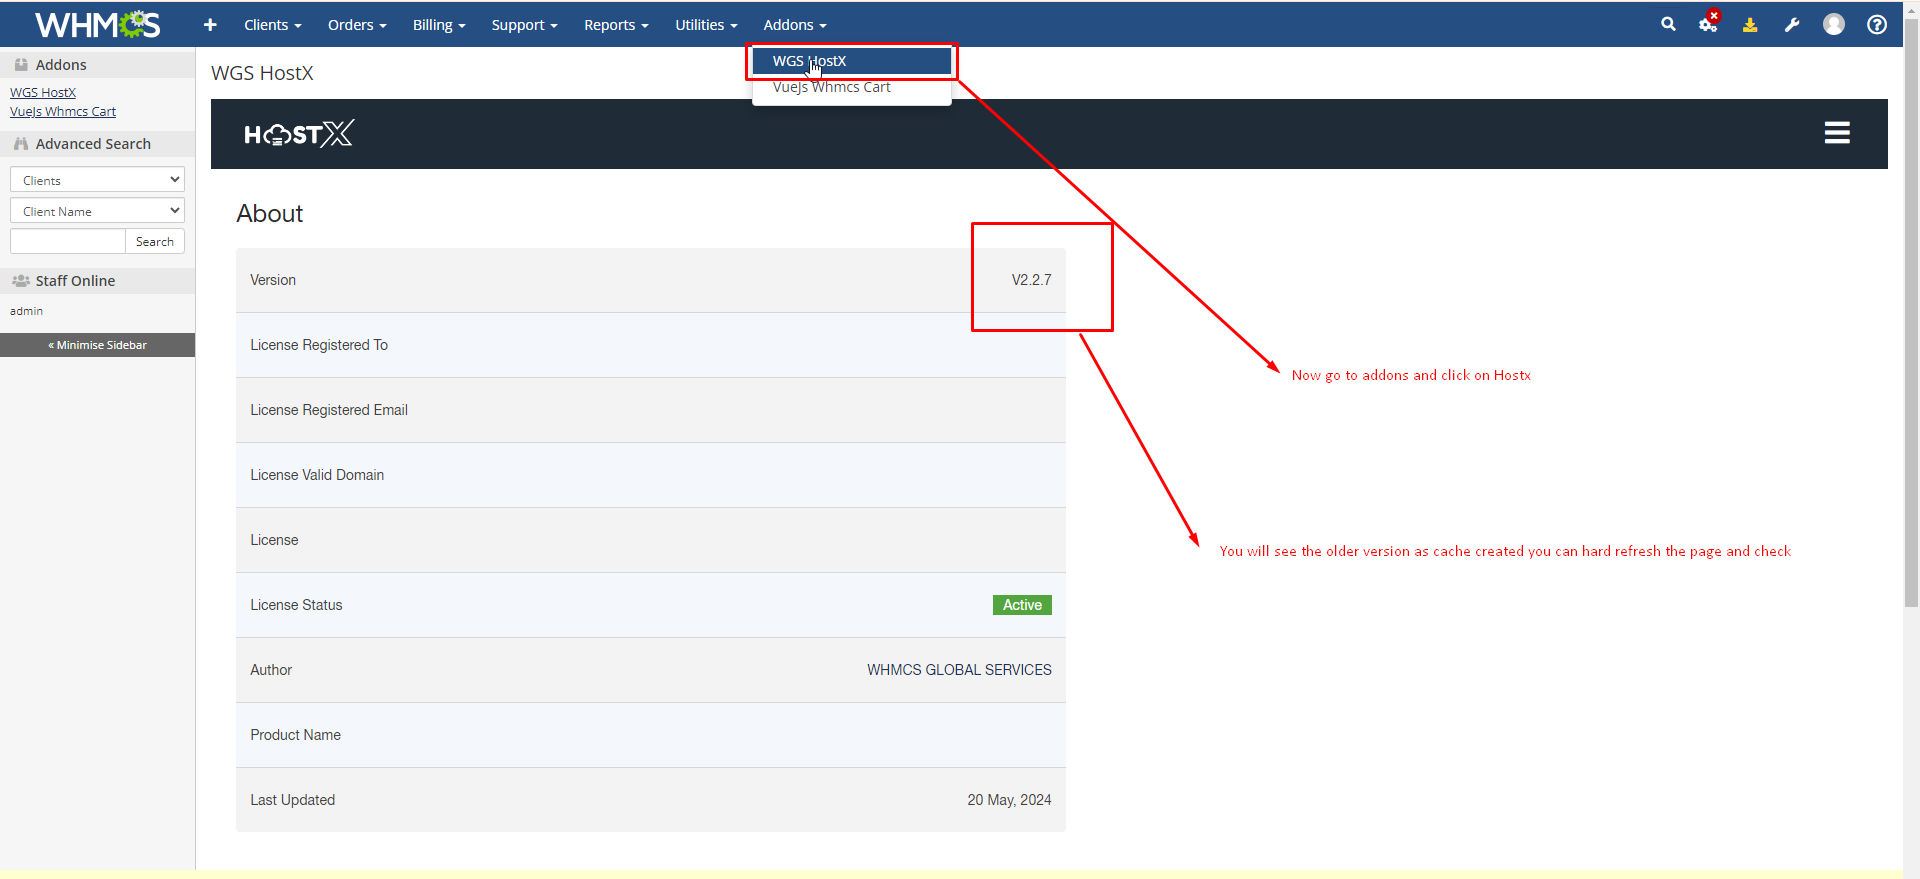
24. After hard refresh you can see the version is updated.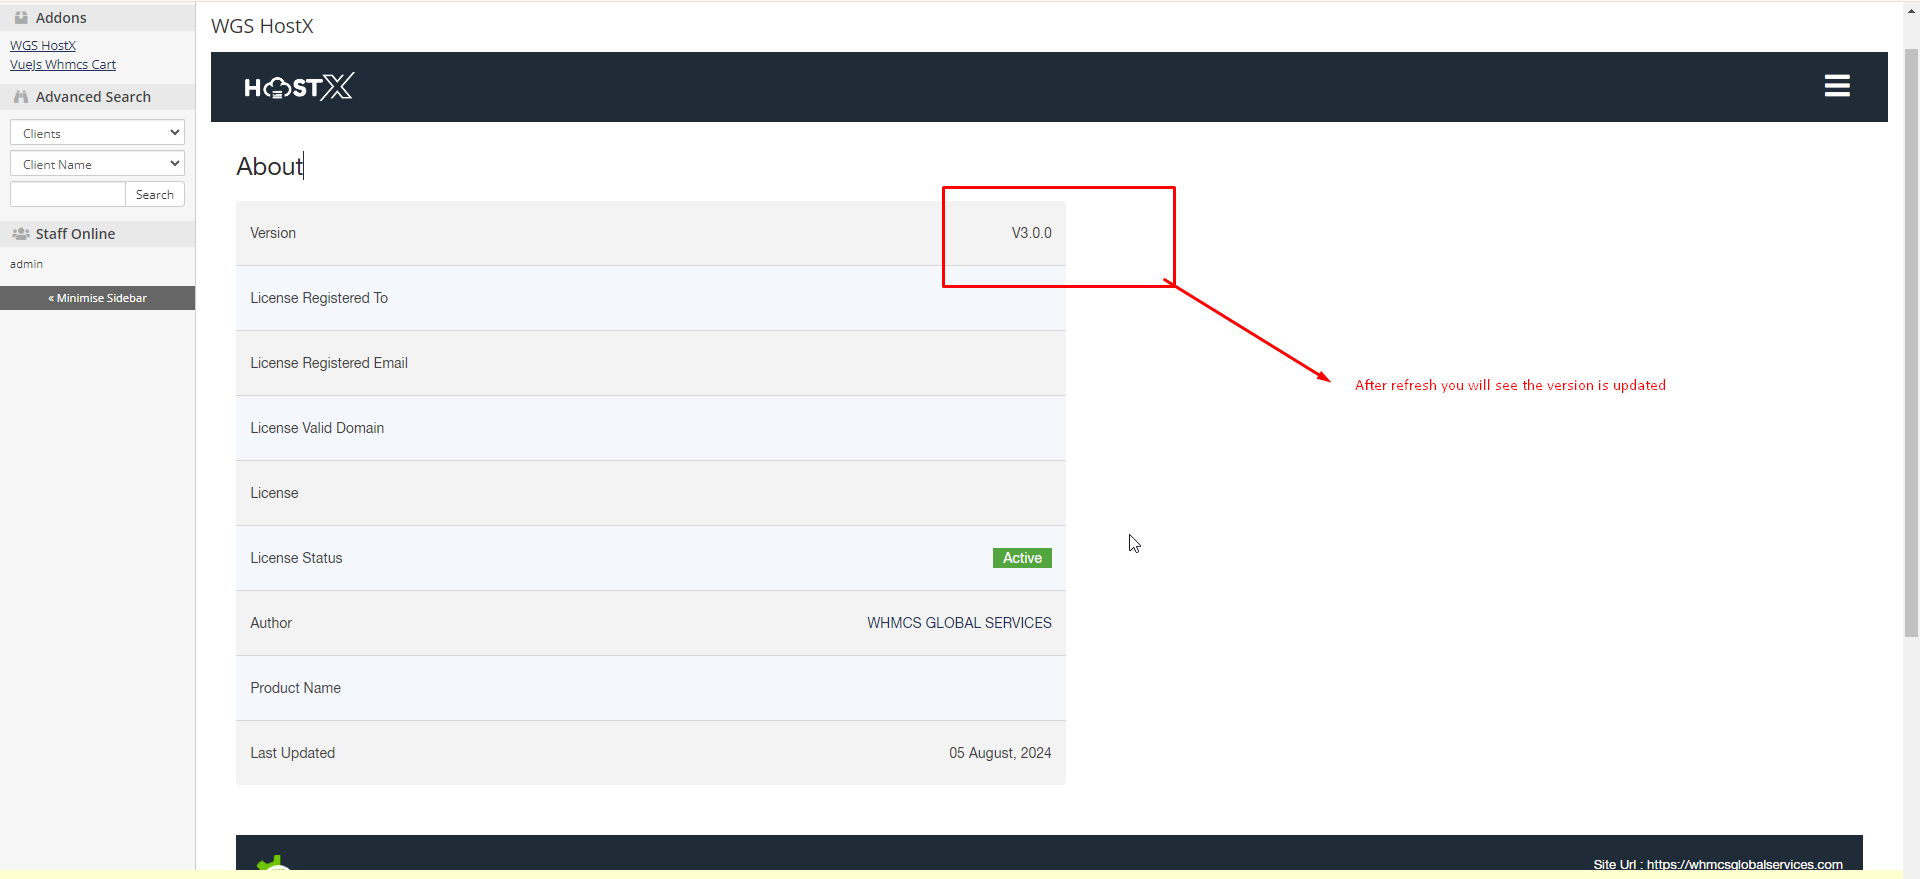
25. Open menu and you will see new feature is added and then click on Upgrade Database menu so that new table and blocks data will be added automatically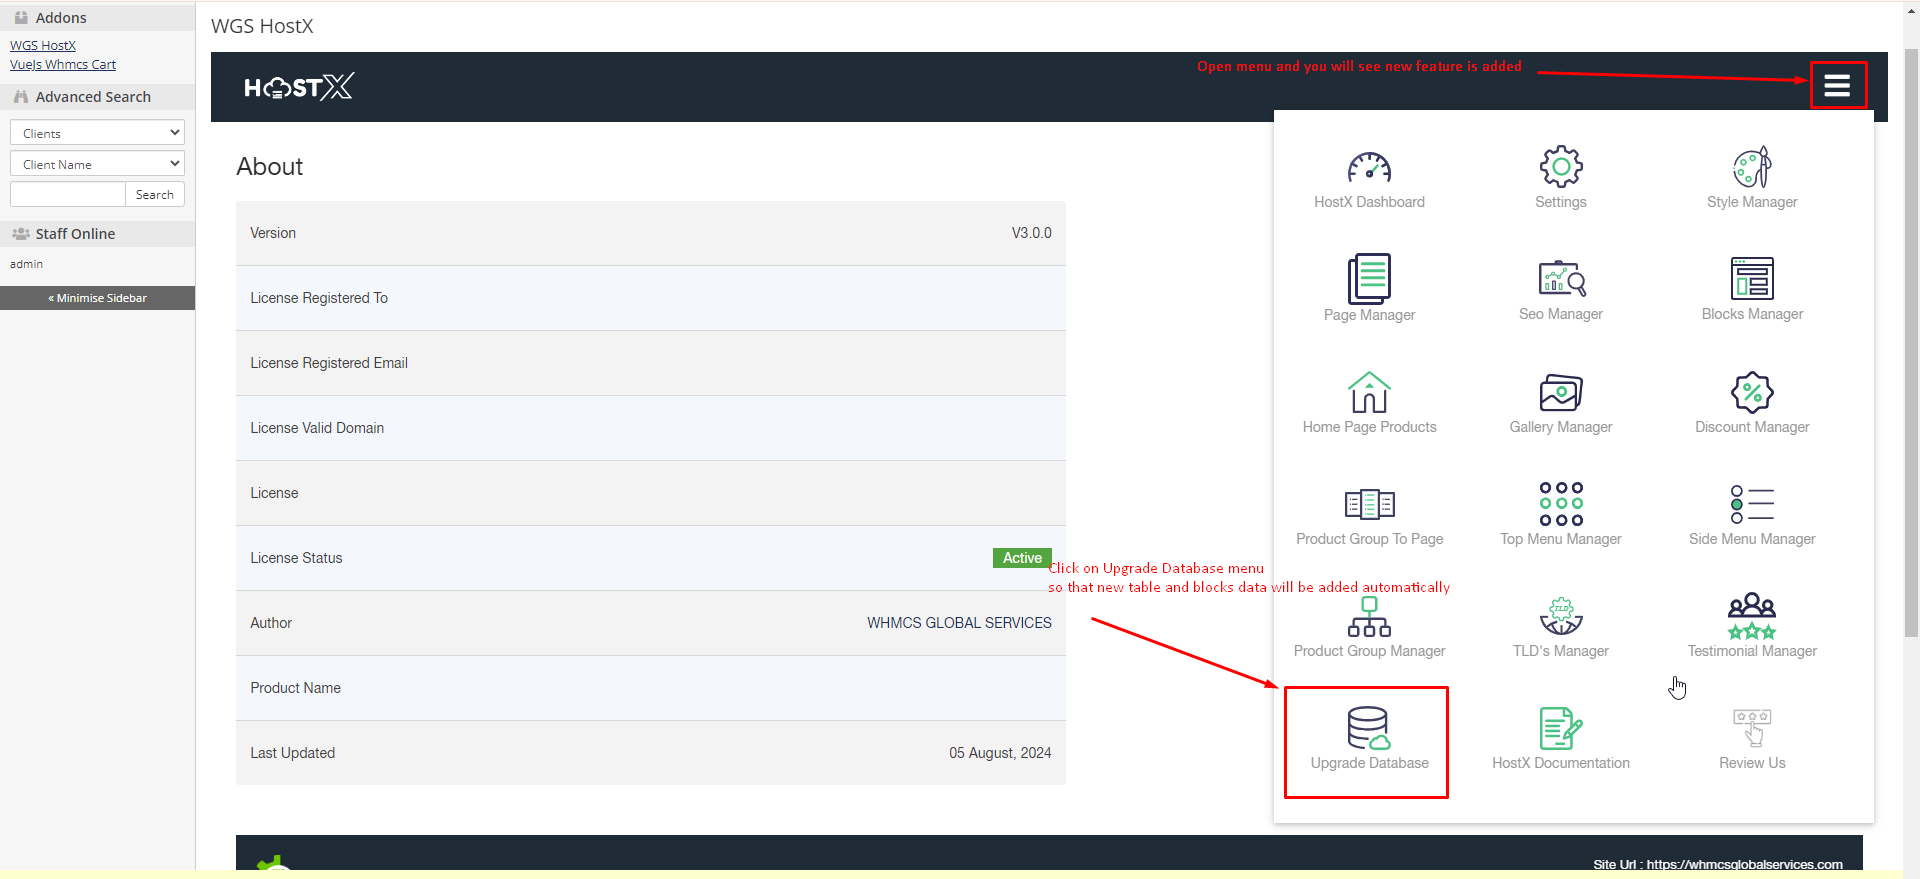
26. Click as given in the picture to update database so that new data will be updated.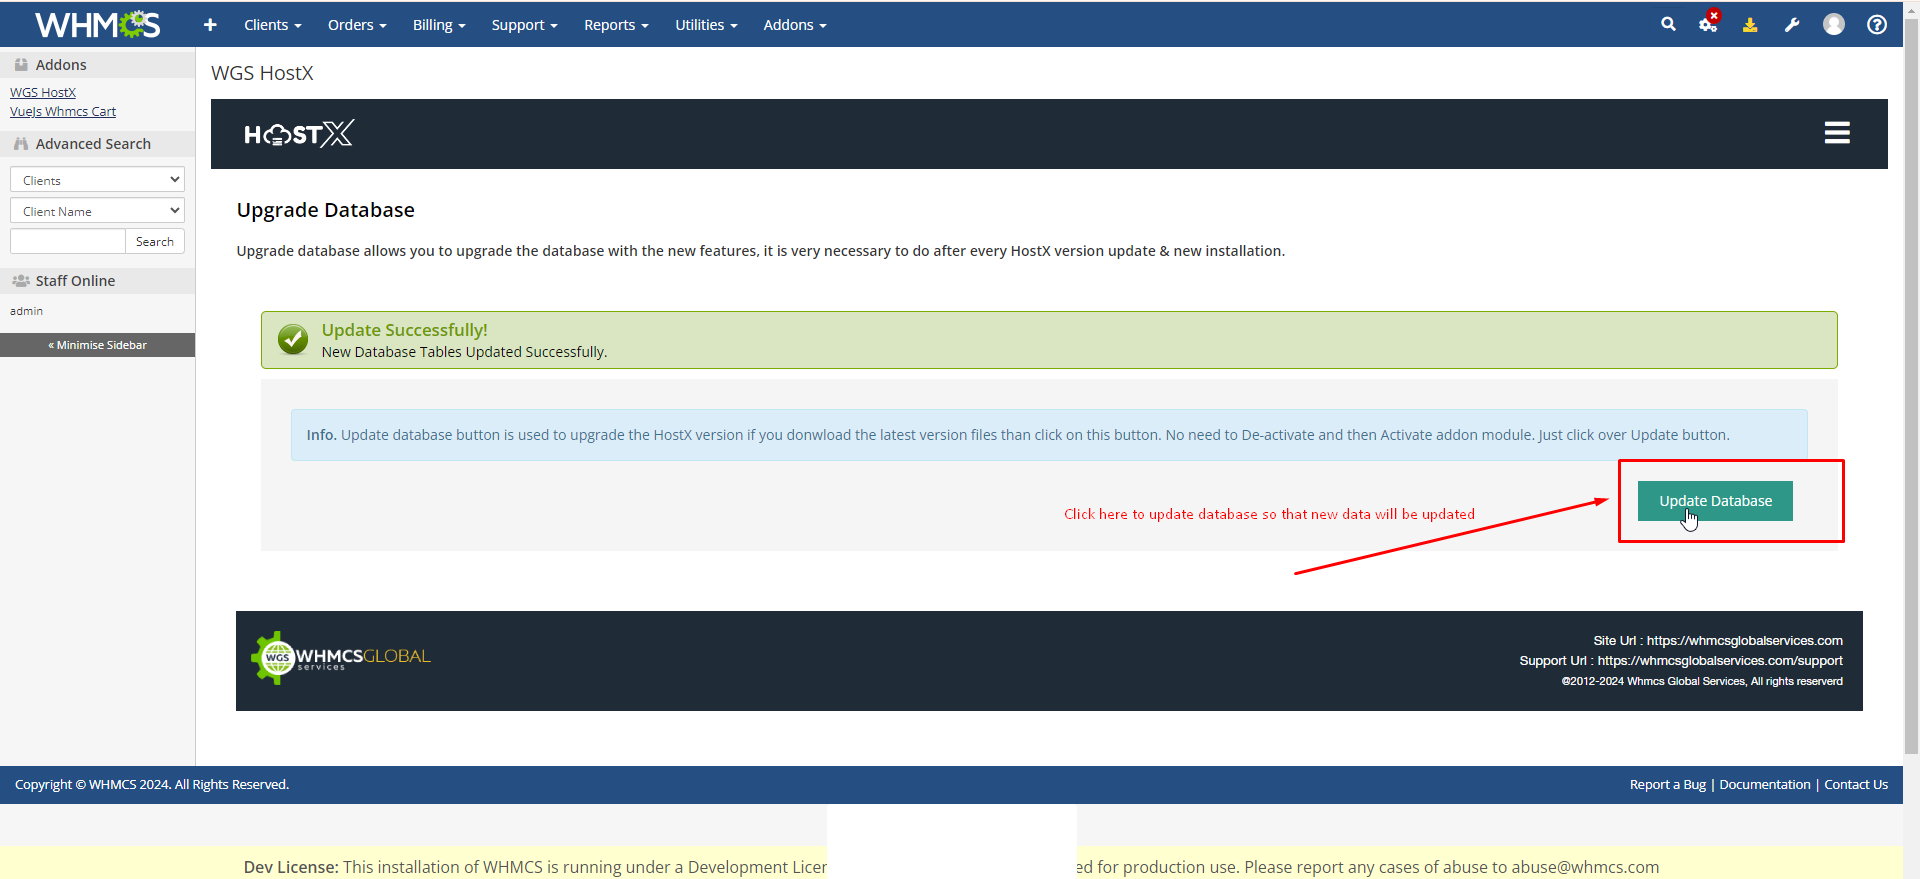
27. Here if you check frontend its still ad host working so you need to activate the new one before activation you can temporary check the new template through query string and move your customization before activated new theme for all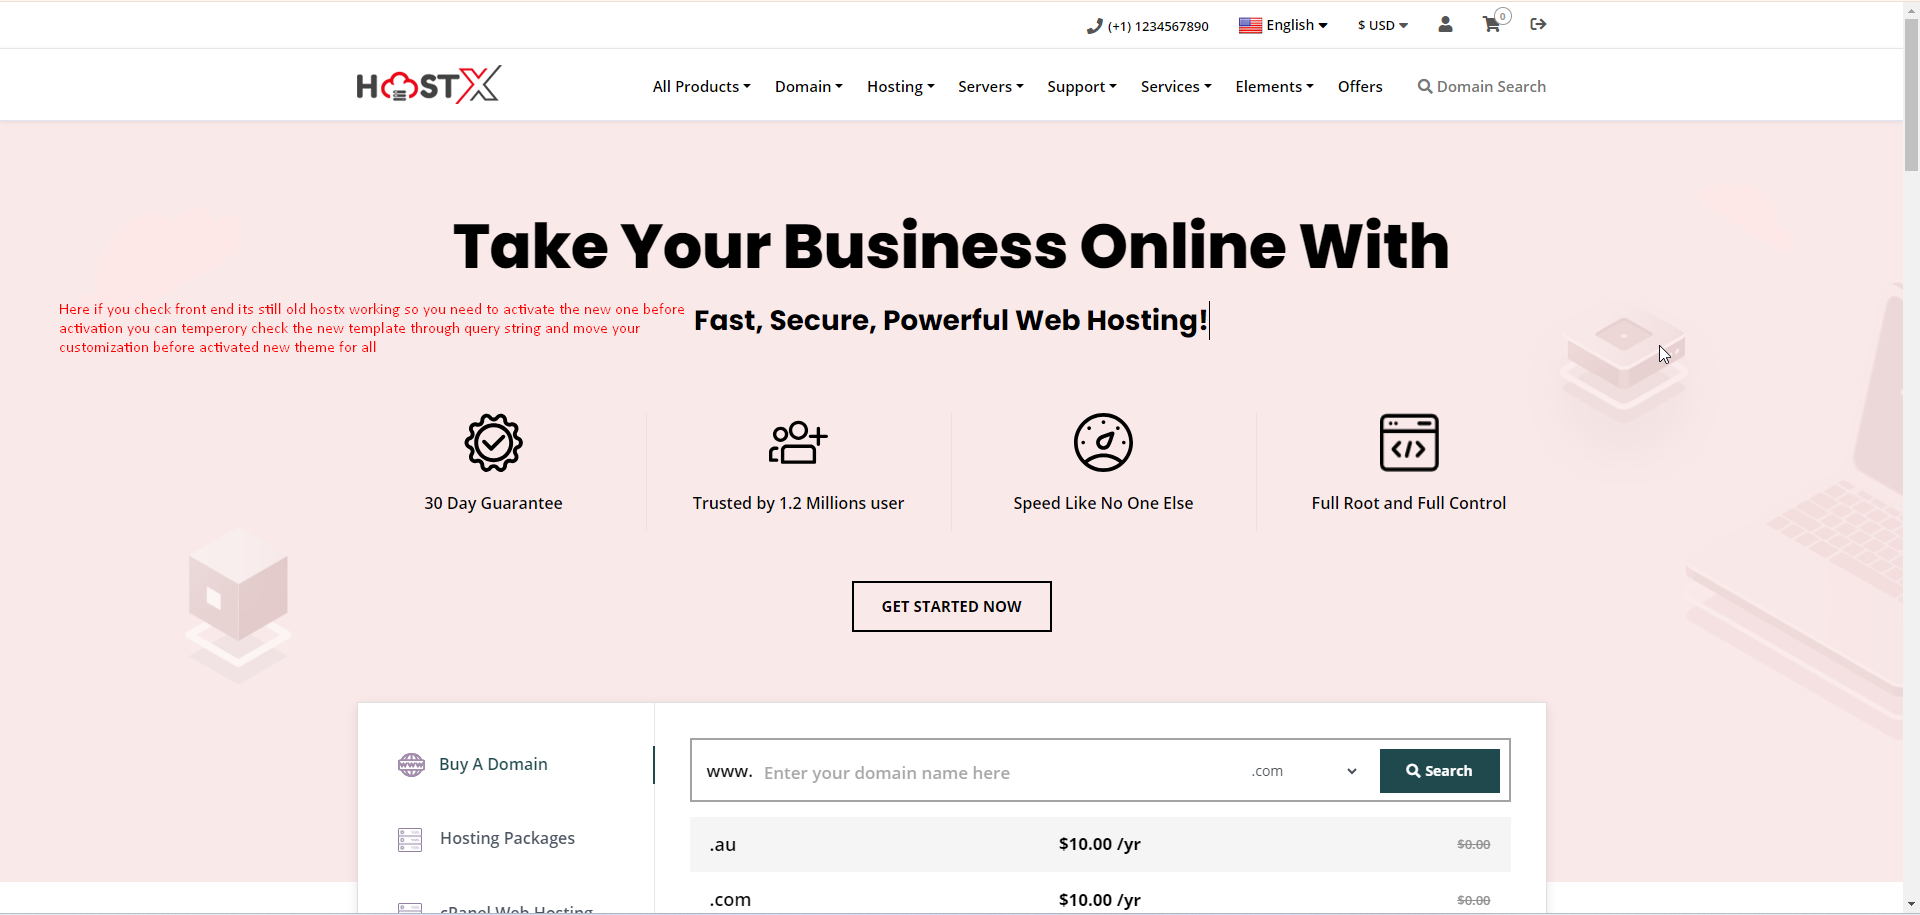 28. You will see new look for theme now you have to just make some small changes. Like you have created custom block and written custom css for that. You have to add that css rule in new template |As structure already has been added to the new theme
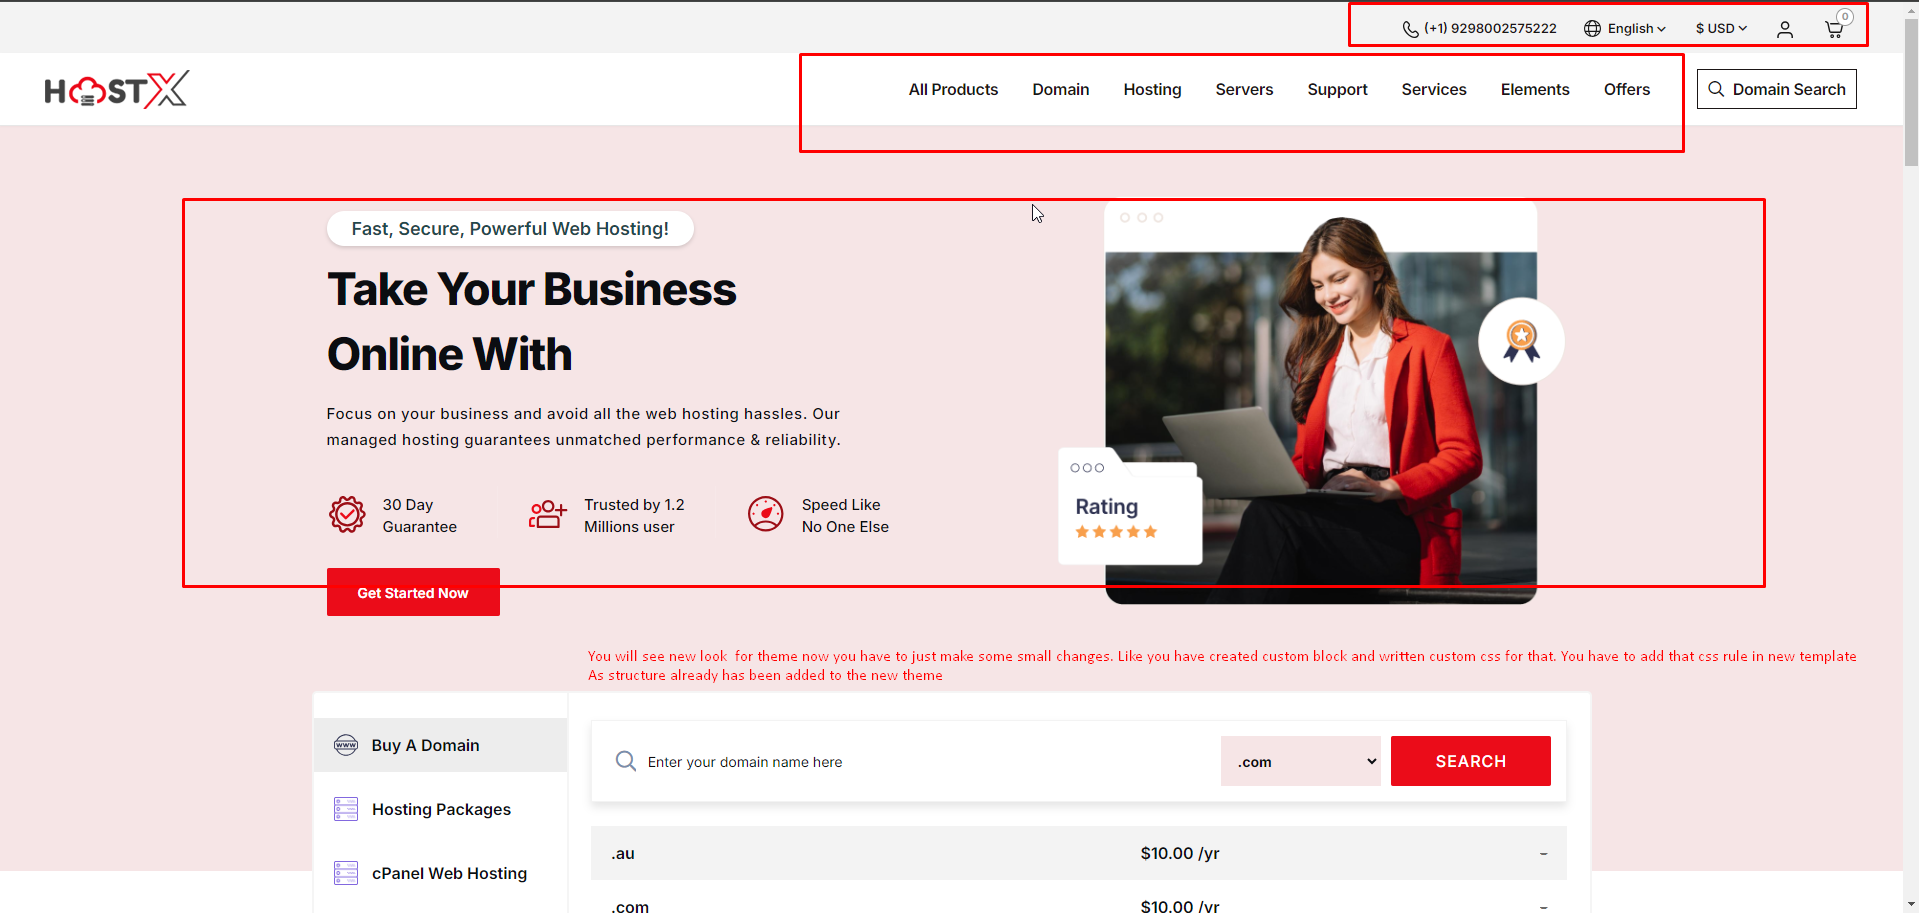 29. Open private window in browser.
30. Hit the following link by updating your whmcs url https://yourwhmcsurl.com/?systpl=hostx-child&carttpl=hostx_cart
Note : For activate new hostx child theme and cart after update please follow link steps : click here
31. Now you will see new theme and cart is activated only for you in private window.
32. Now for customization move to new theme follow next steps.
33. Example this custom block you have created later in old theme50 you have to add css and js if any for this block in new template.
Follow next steps for same.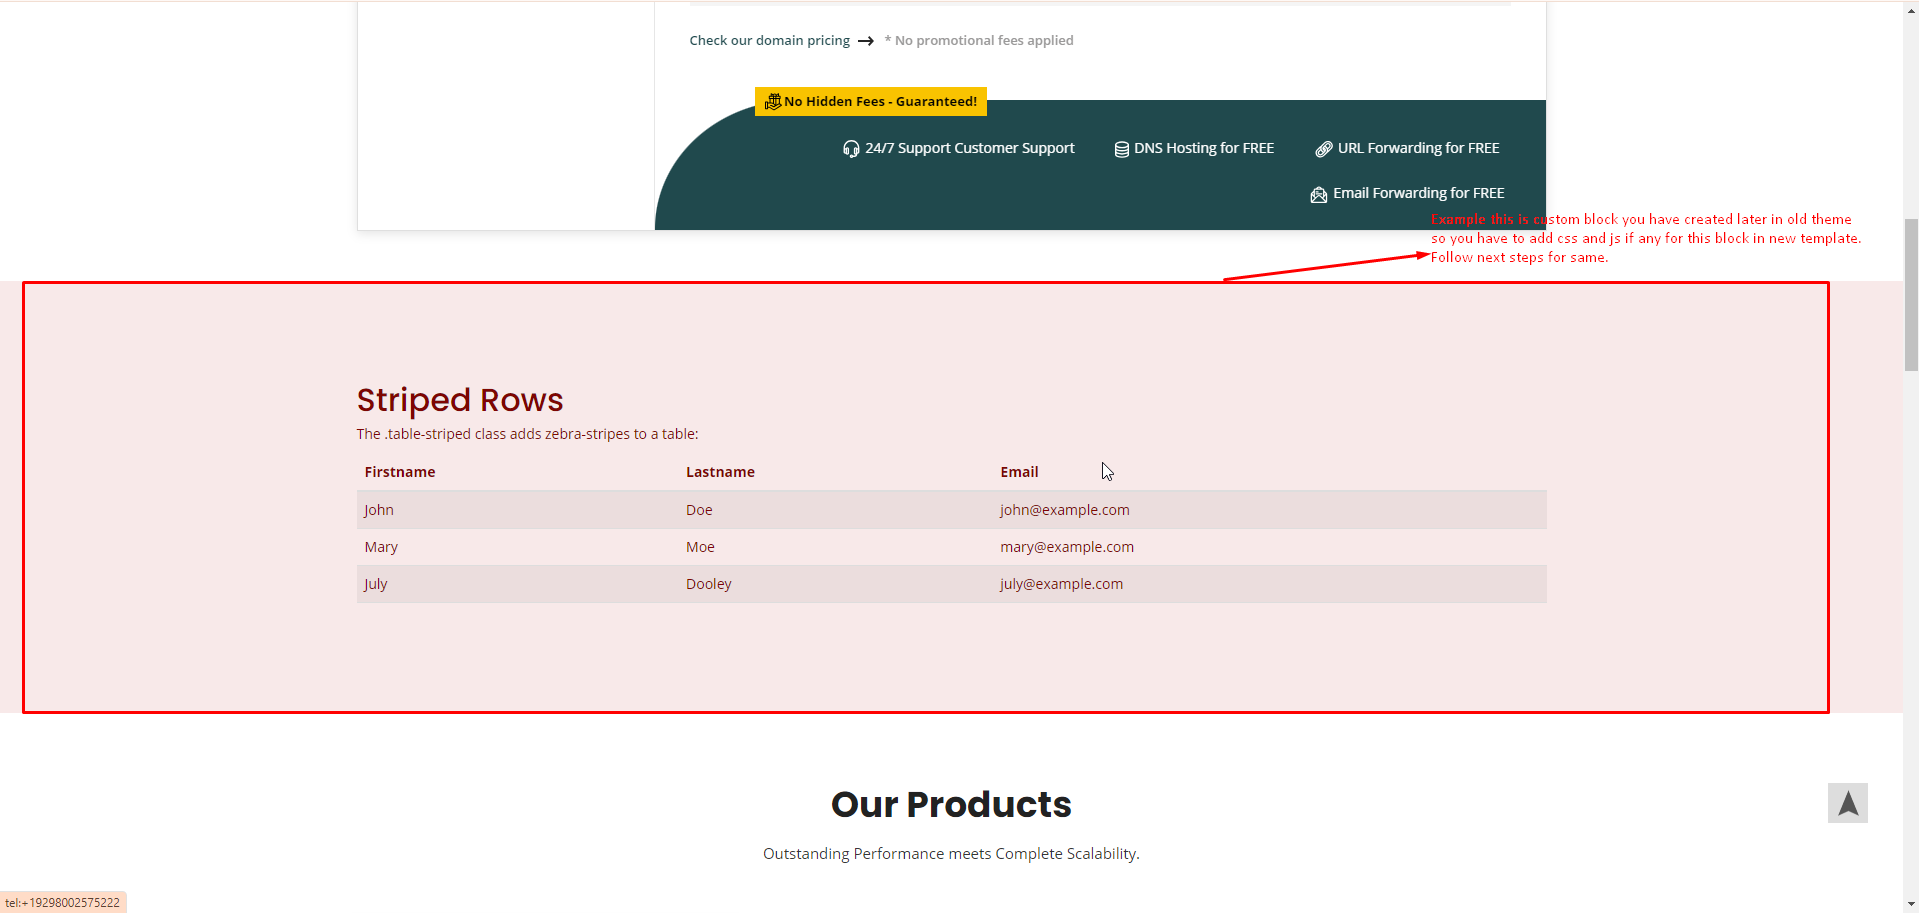
34. Over new theme there is no css for this block. So in next steps we are going to add css for same from old theme to new theme.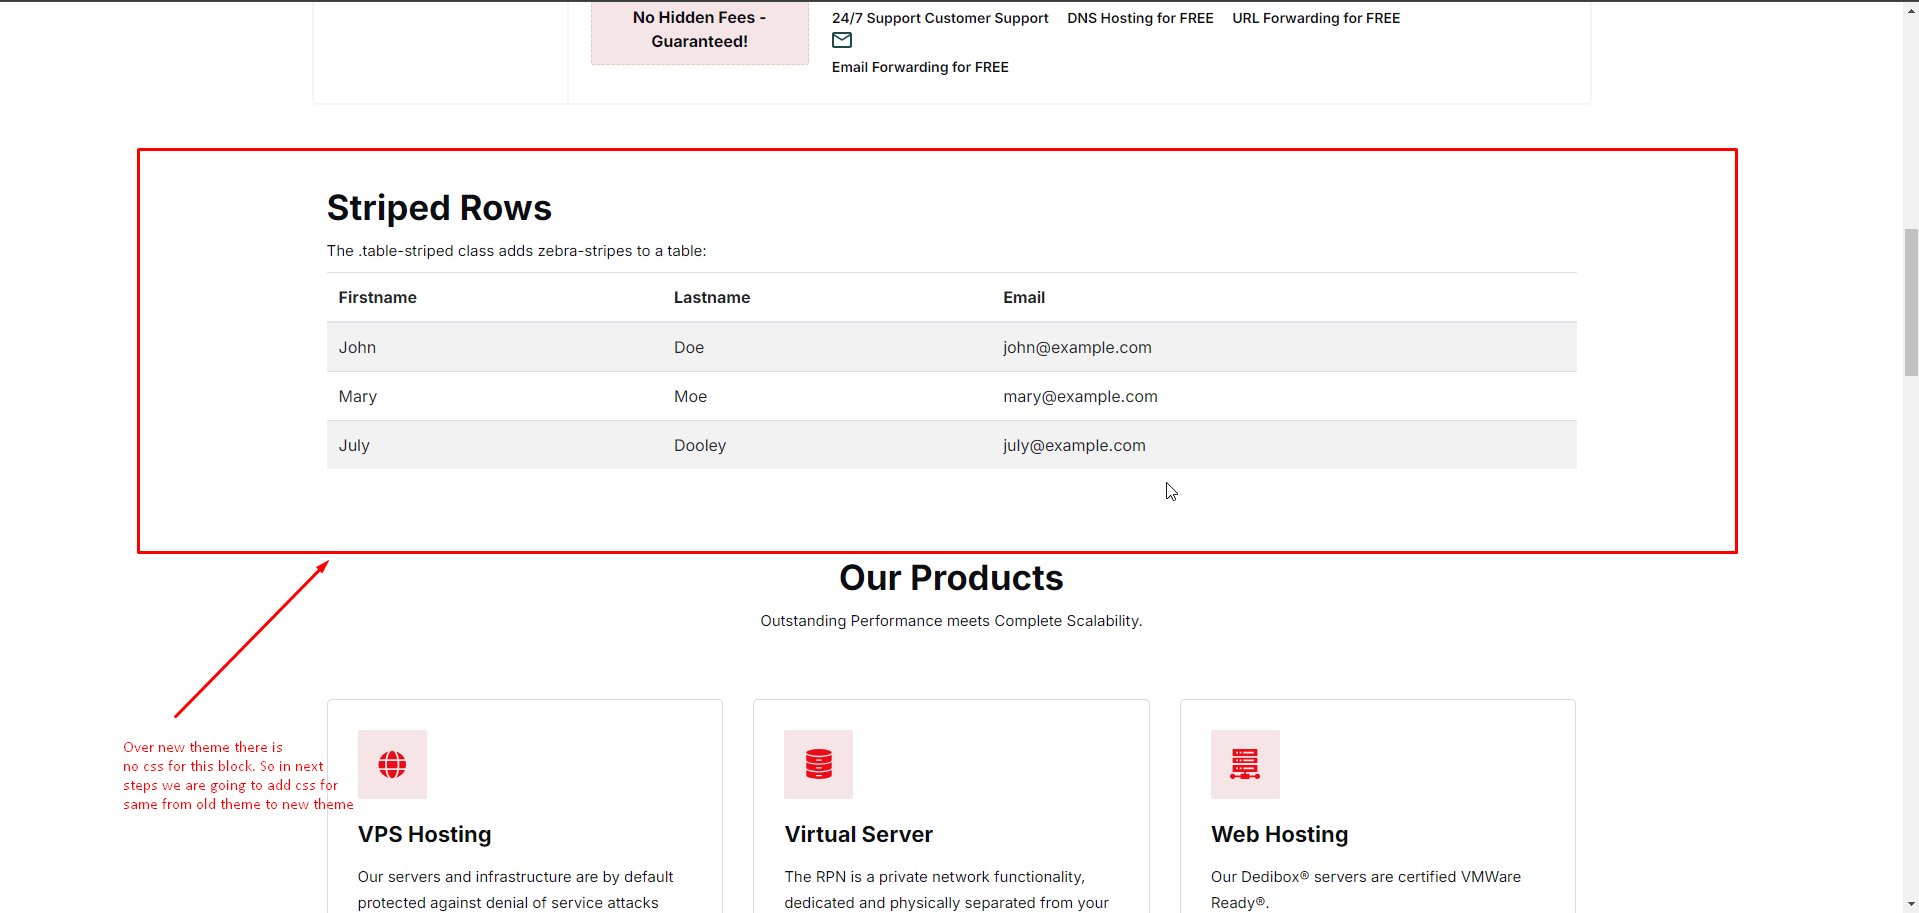
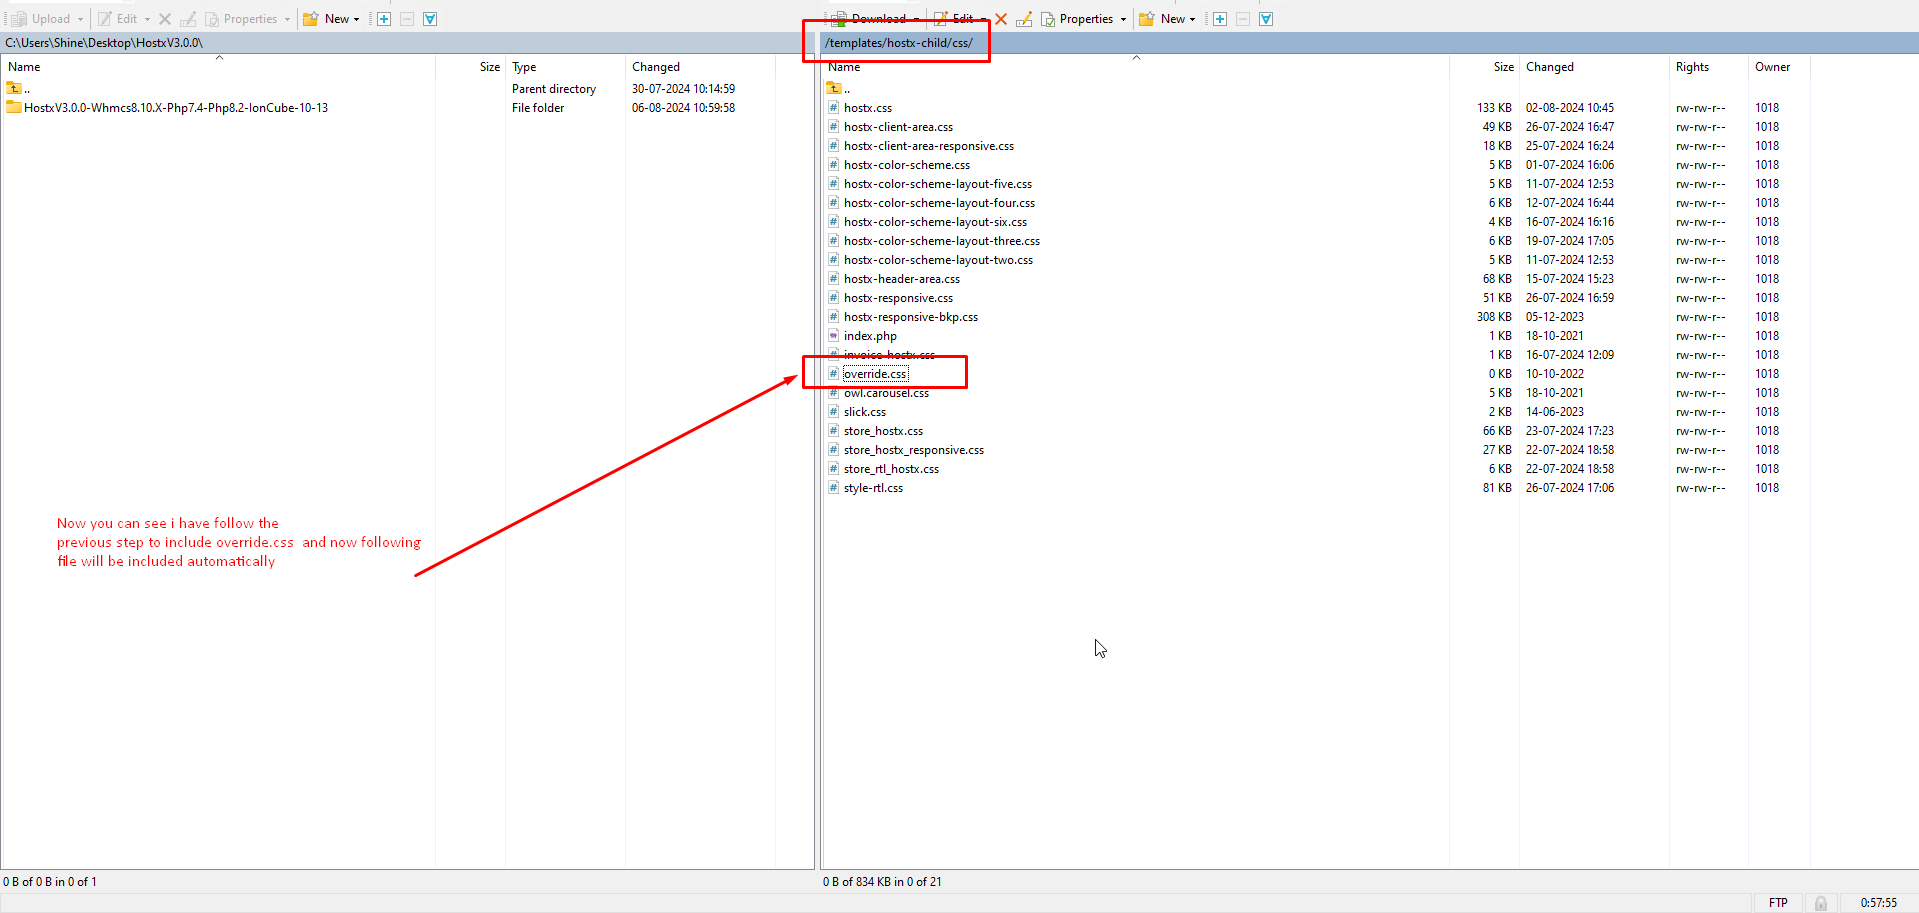
35. Now you can see in the screenshot we have follow the previous step to include override.css and now following file will be included automatically.
36. Now go to the old theme and the file of css of where you have added css rule for your all custom blocks or customization.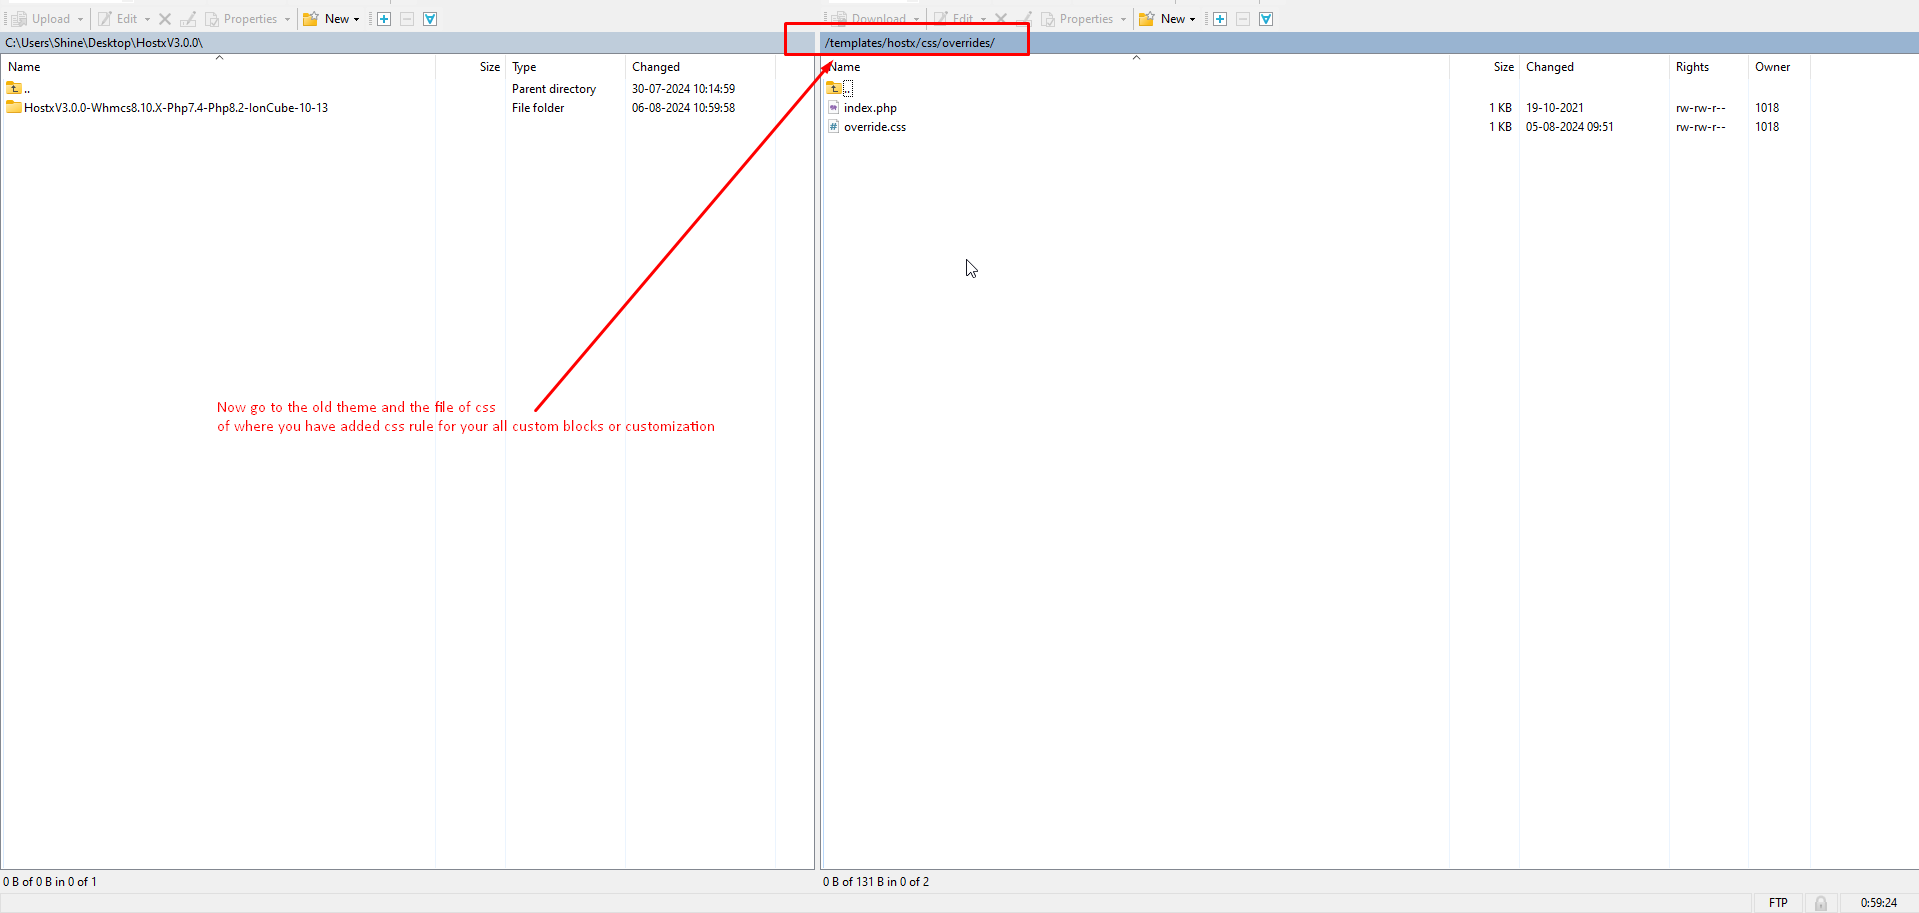
37. Download the file or edit online for same and copy the rule. or you can simply upload the file on new template location=> templates/hostxchild/css/
Note:- we are copying the css rule and paste in new theme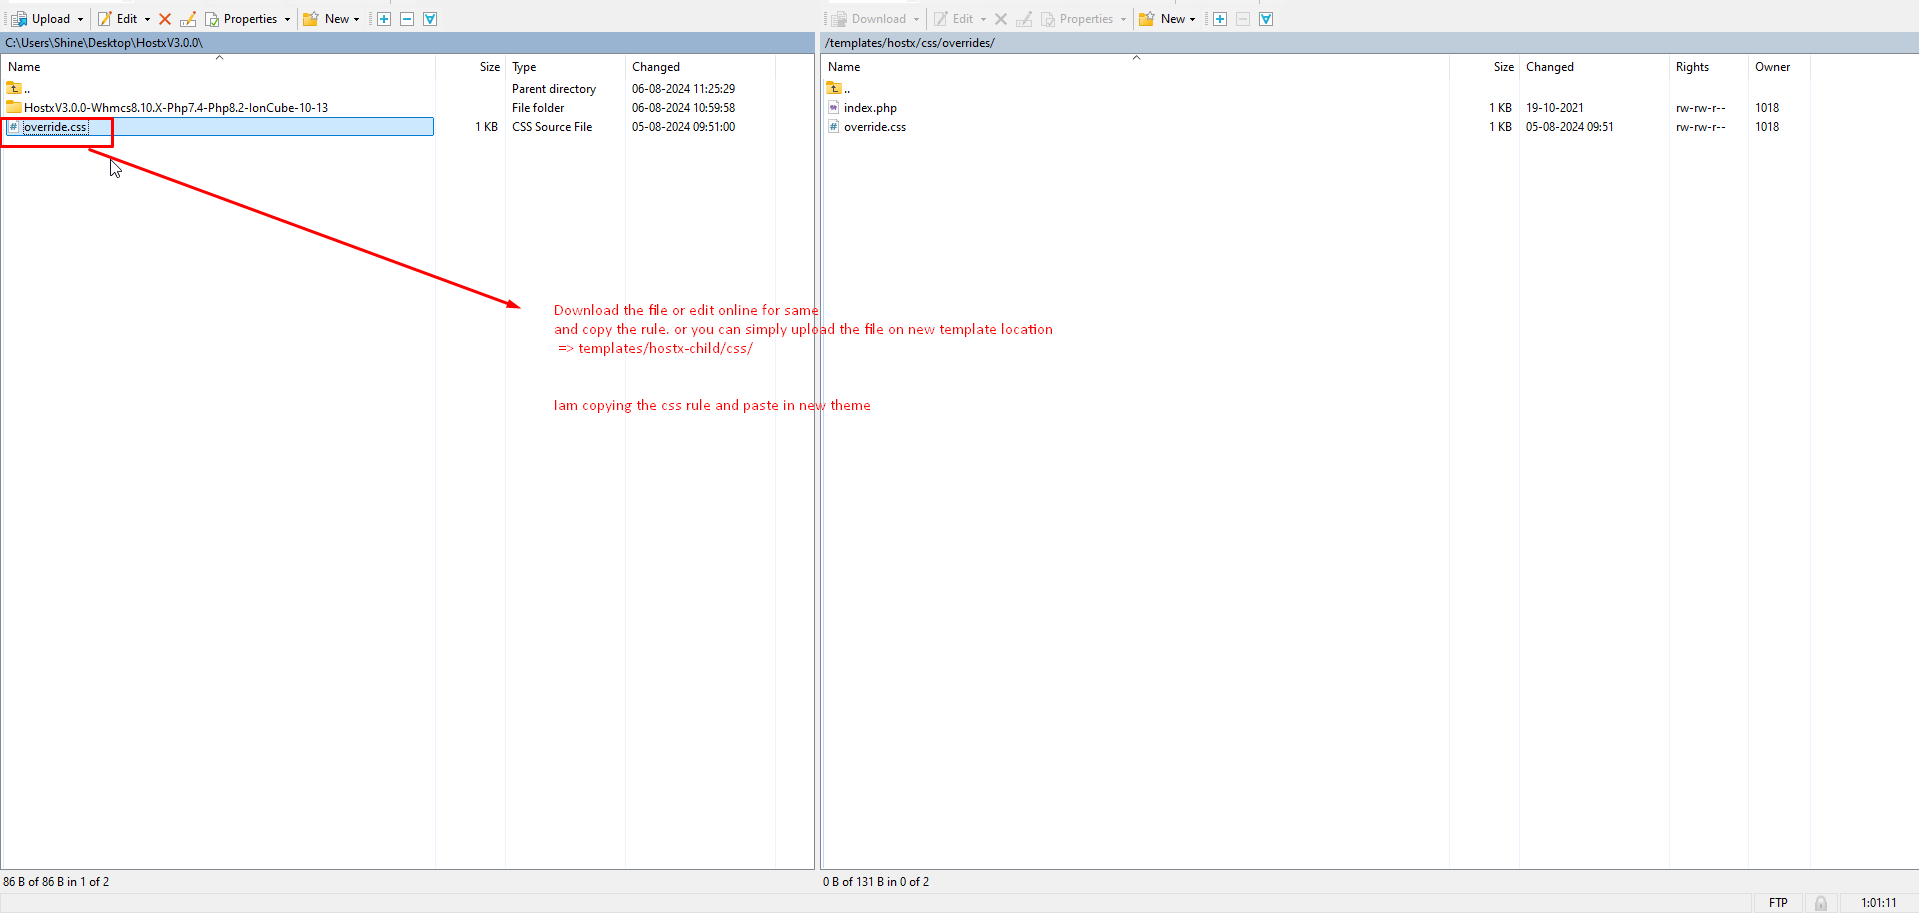
38. Now copy the rule from file and paste in the new template.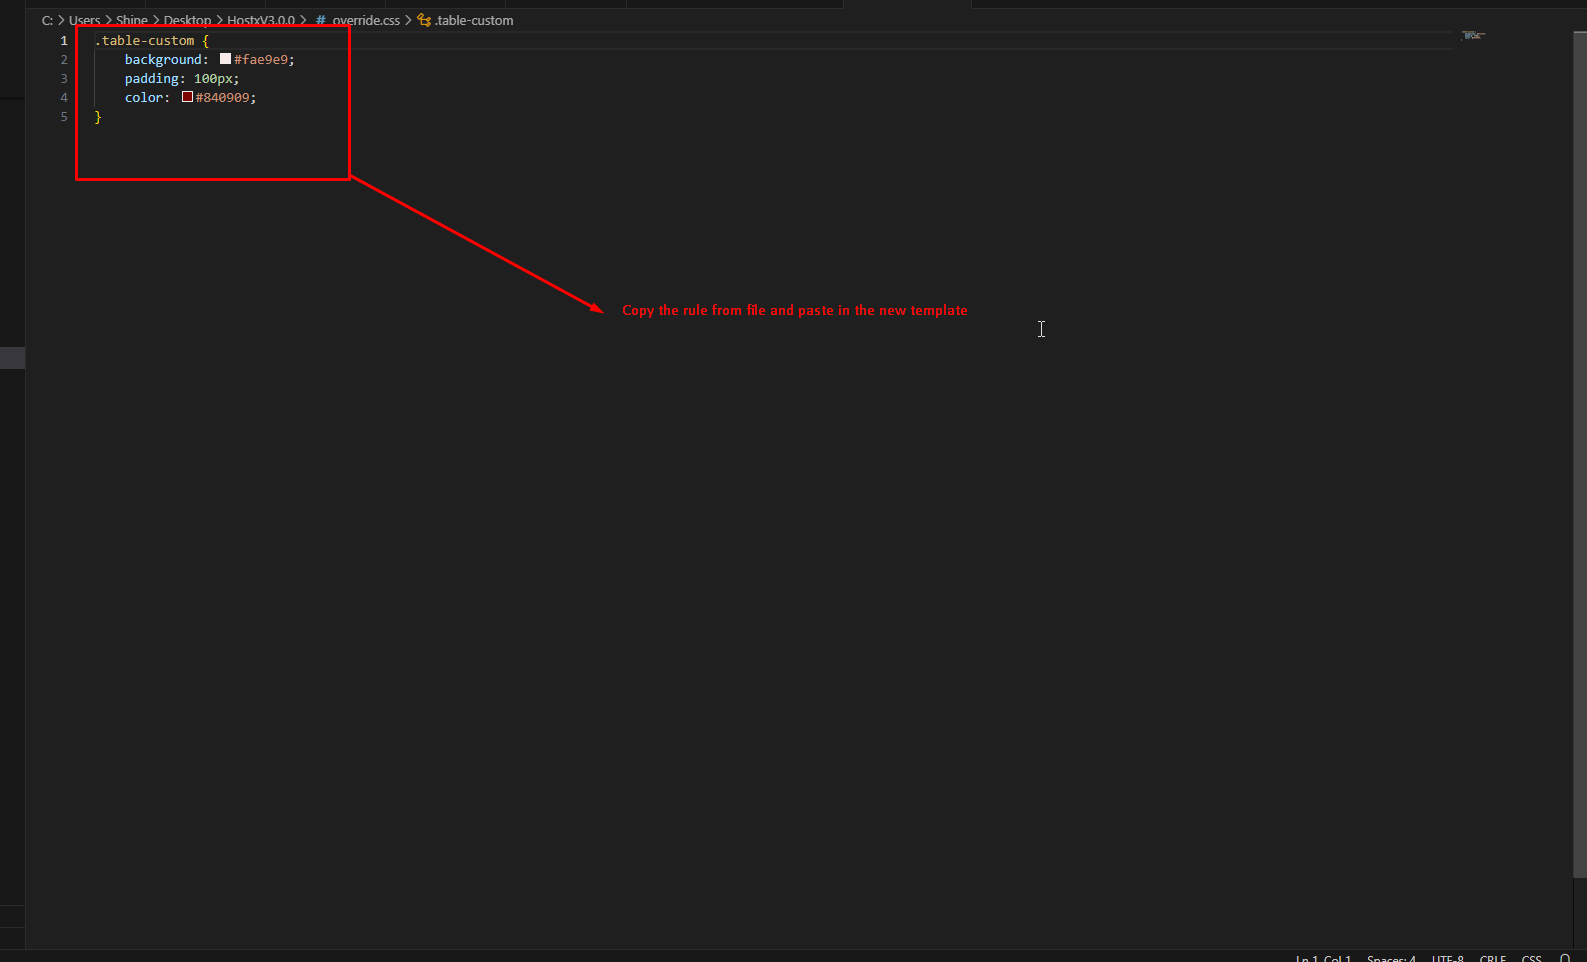
39. Now we have copied the rule from previous template and going to the paste rule in new template css file.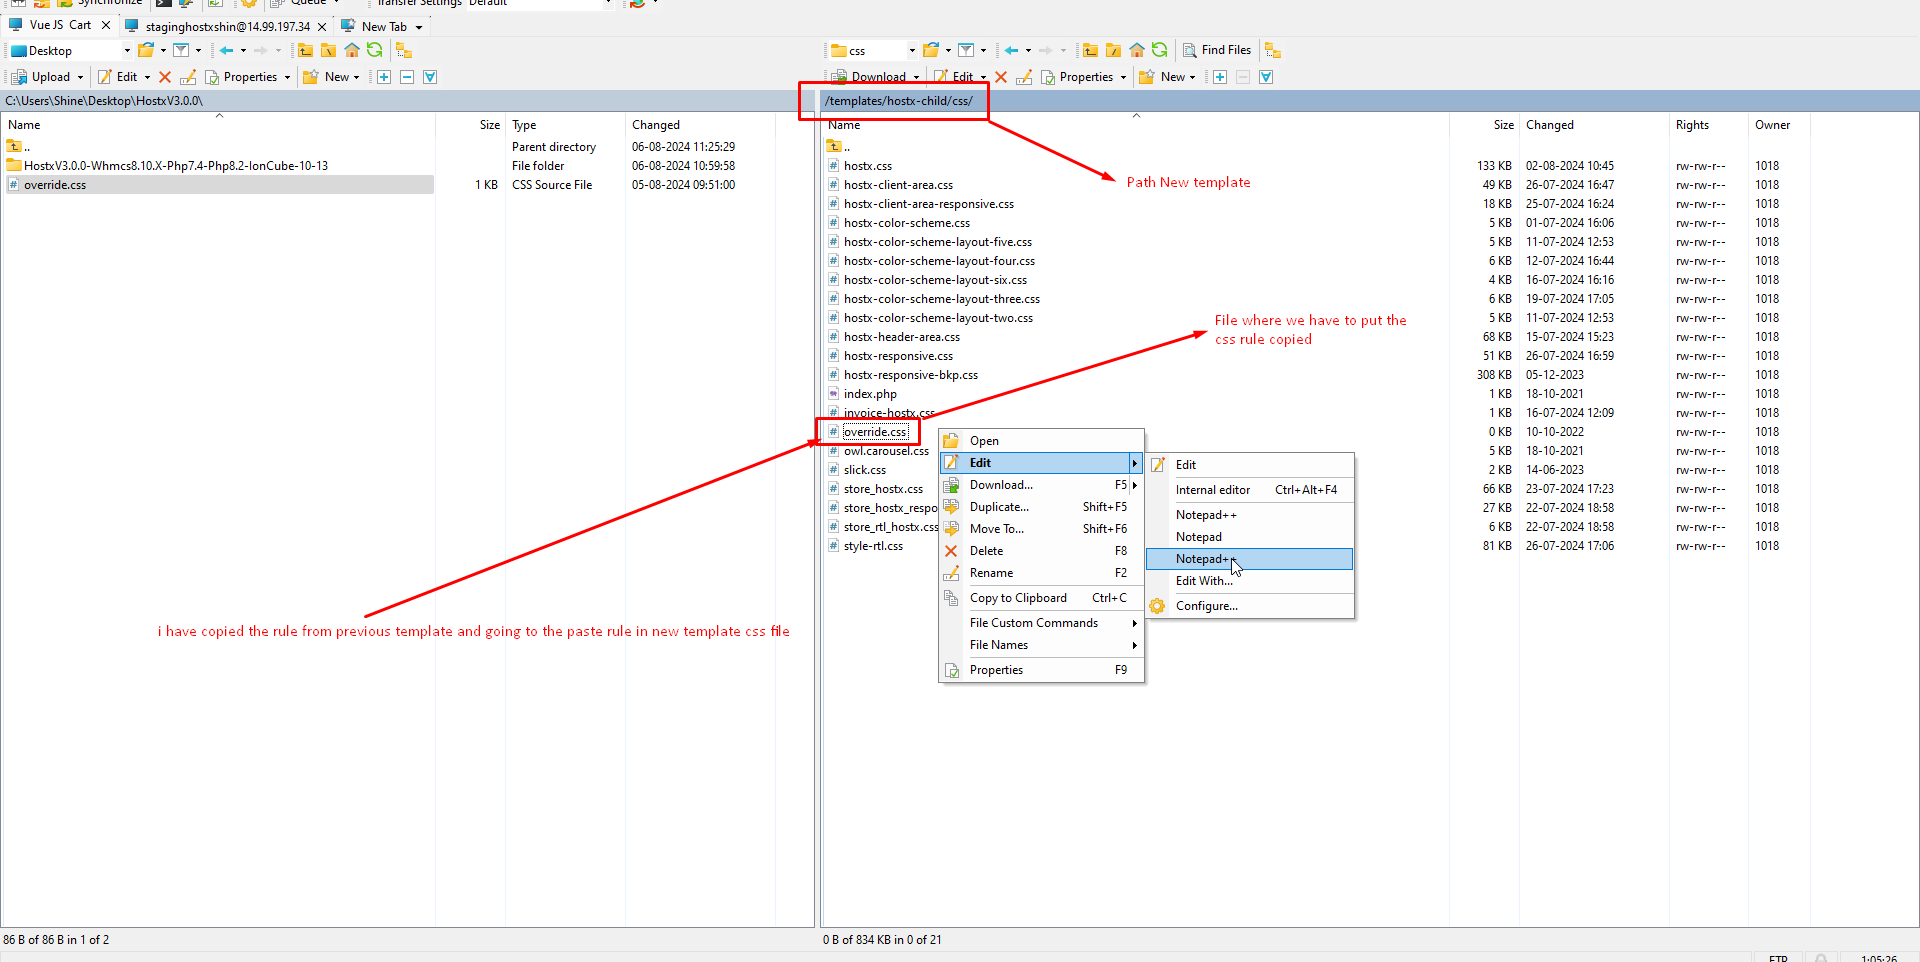
40. We have pasted the css rule here in new template file Save or upload the over server and check.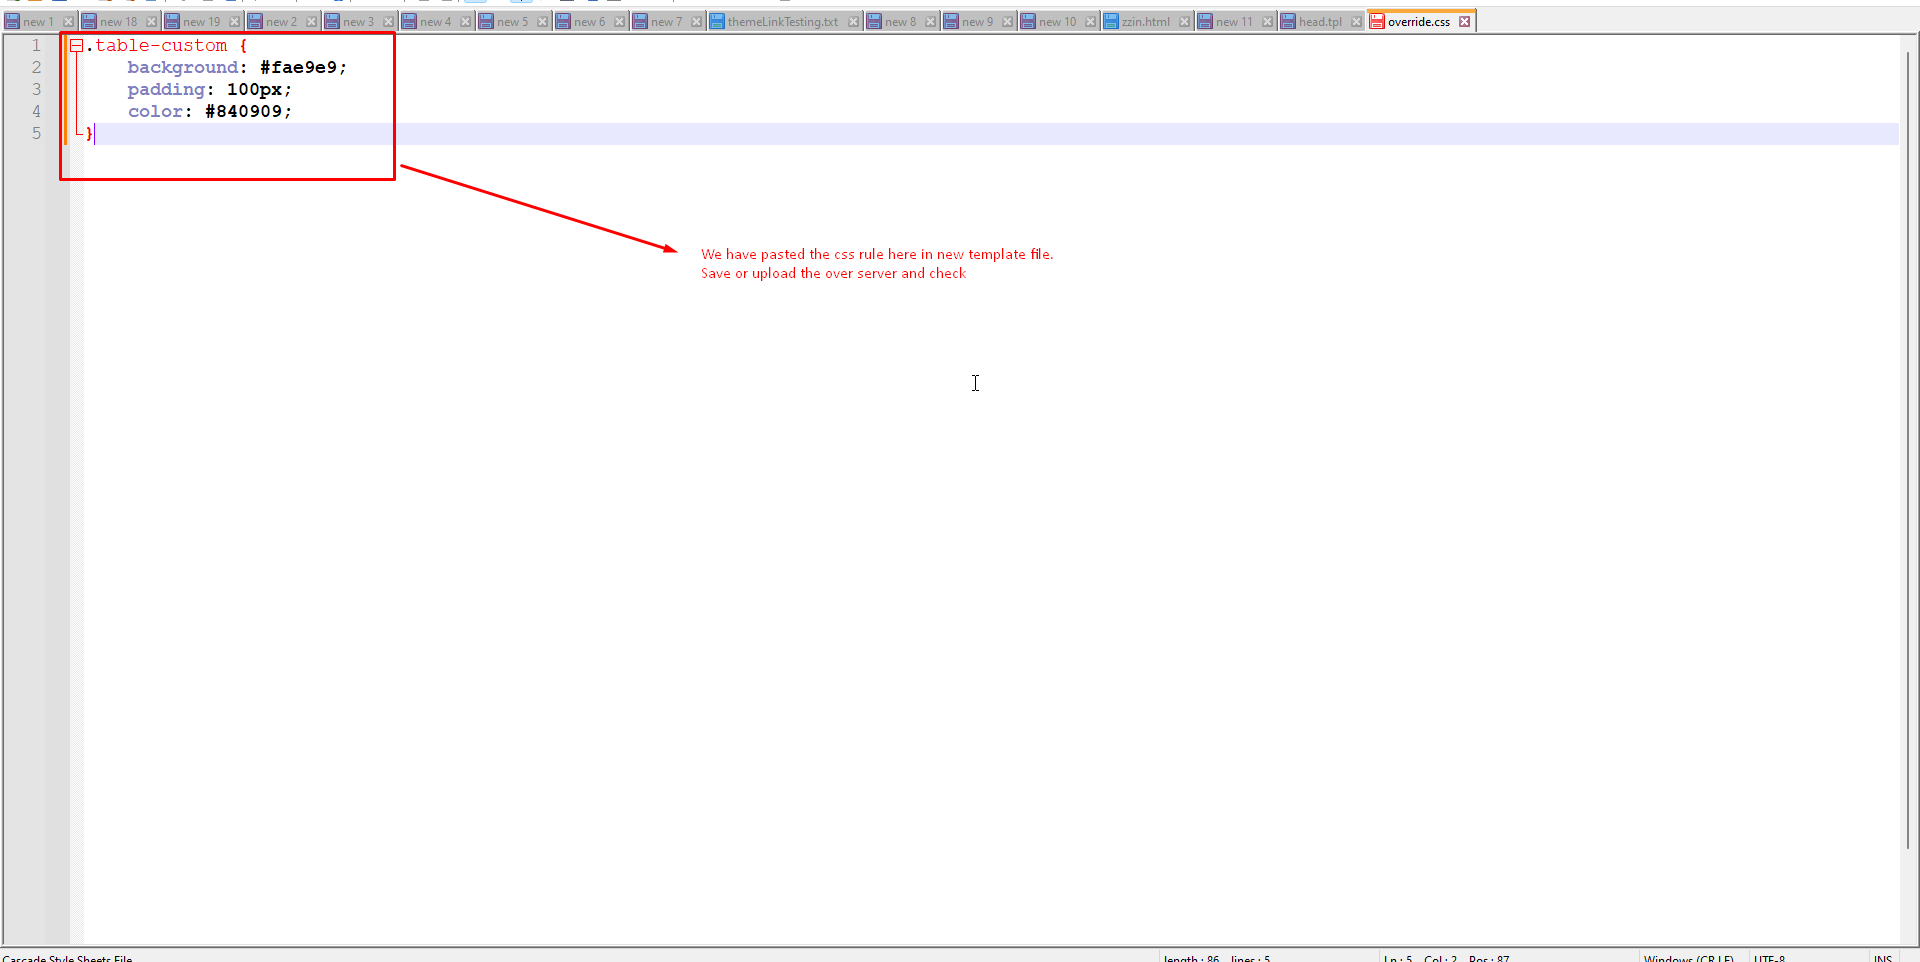
41. Now you can see new code is reflected.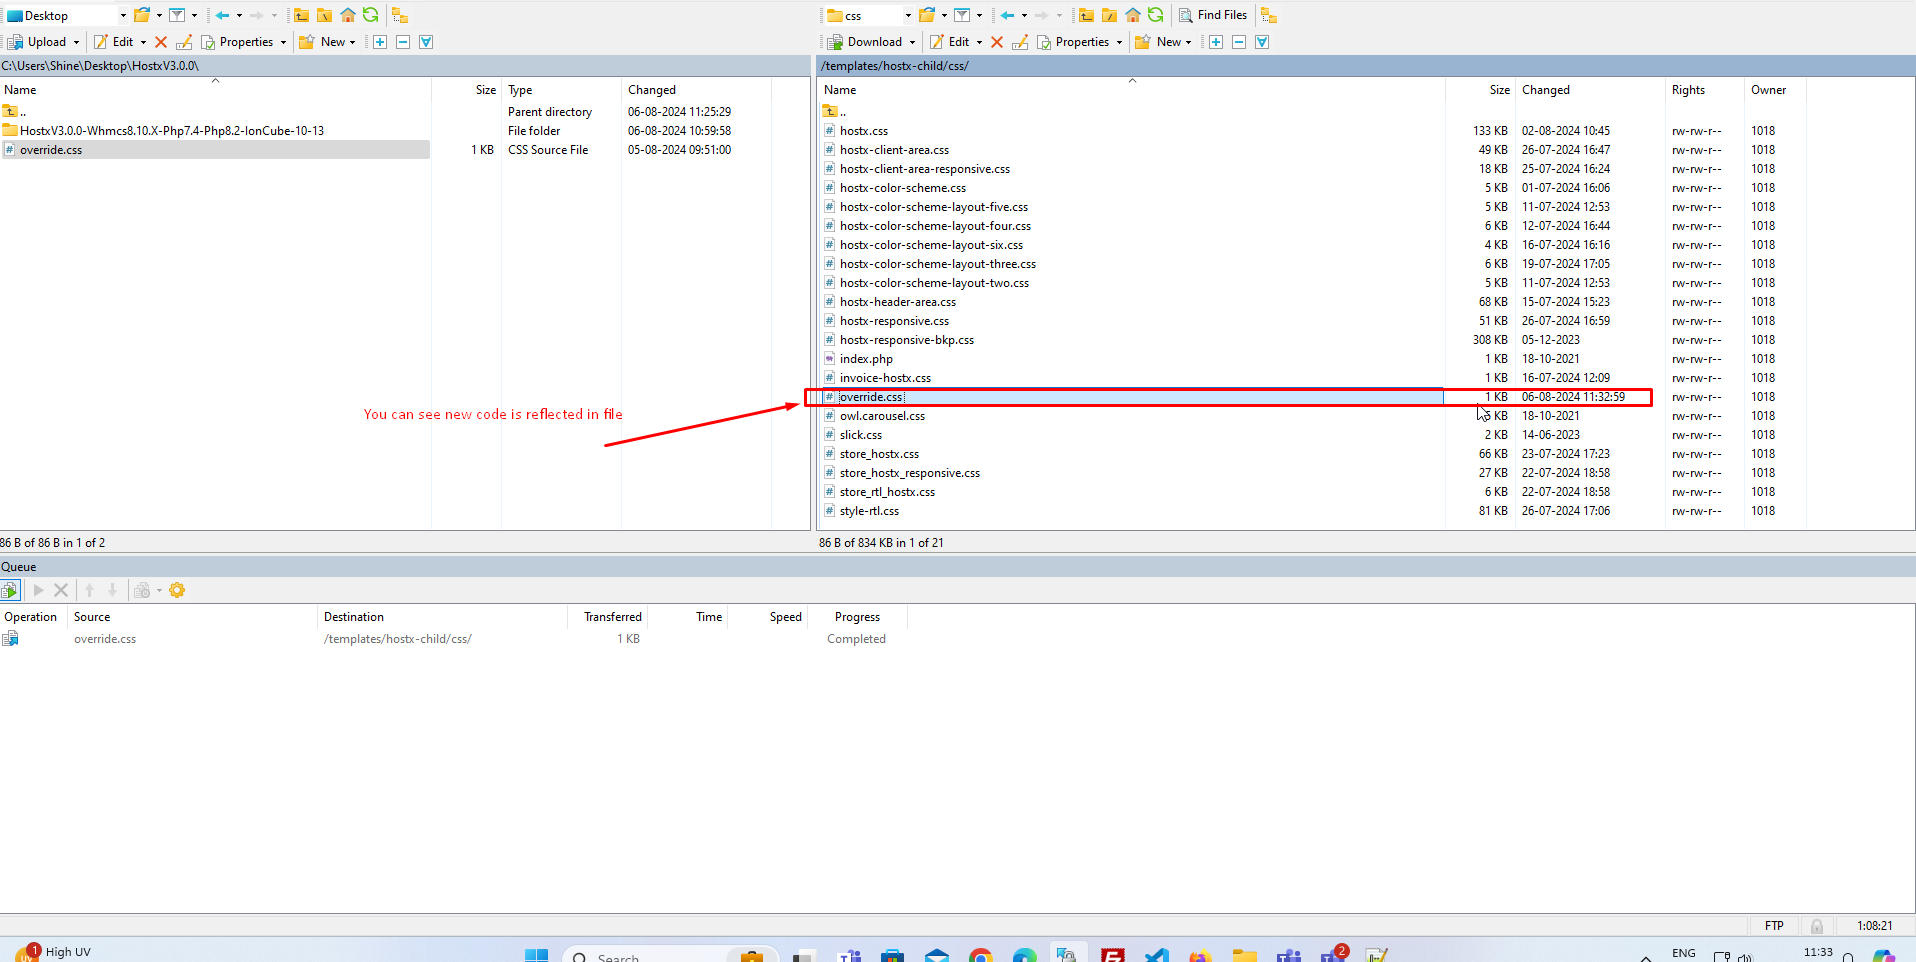
42. Now you can see css rule for block is reflected over block. 43. Please follow this steps so that override.css file will be included and you can paste the css rule for same.
44. We are excepting that you have already perform the action above to include the css. Now follow next step to copy css rule from old template hostx.
