step: - 1. Login to portal https://members.whmcsglobalservices.com/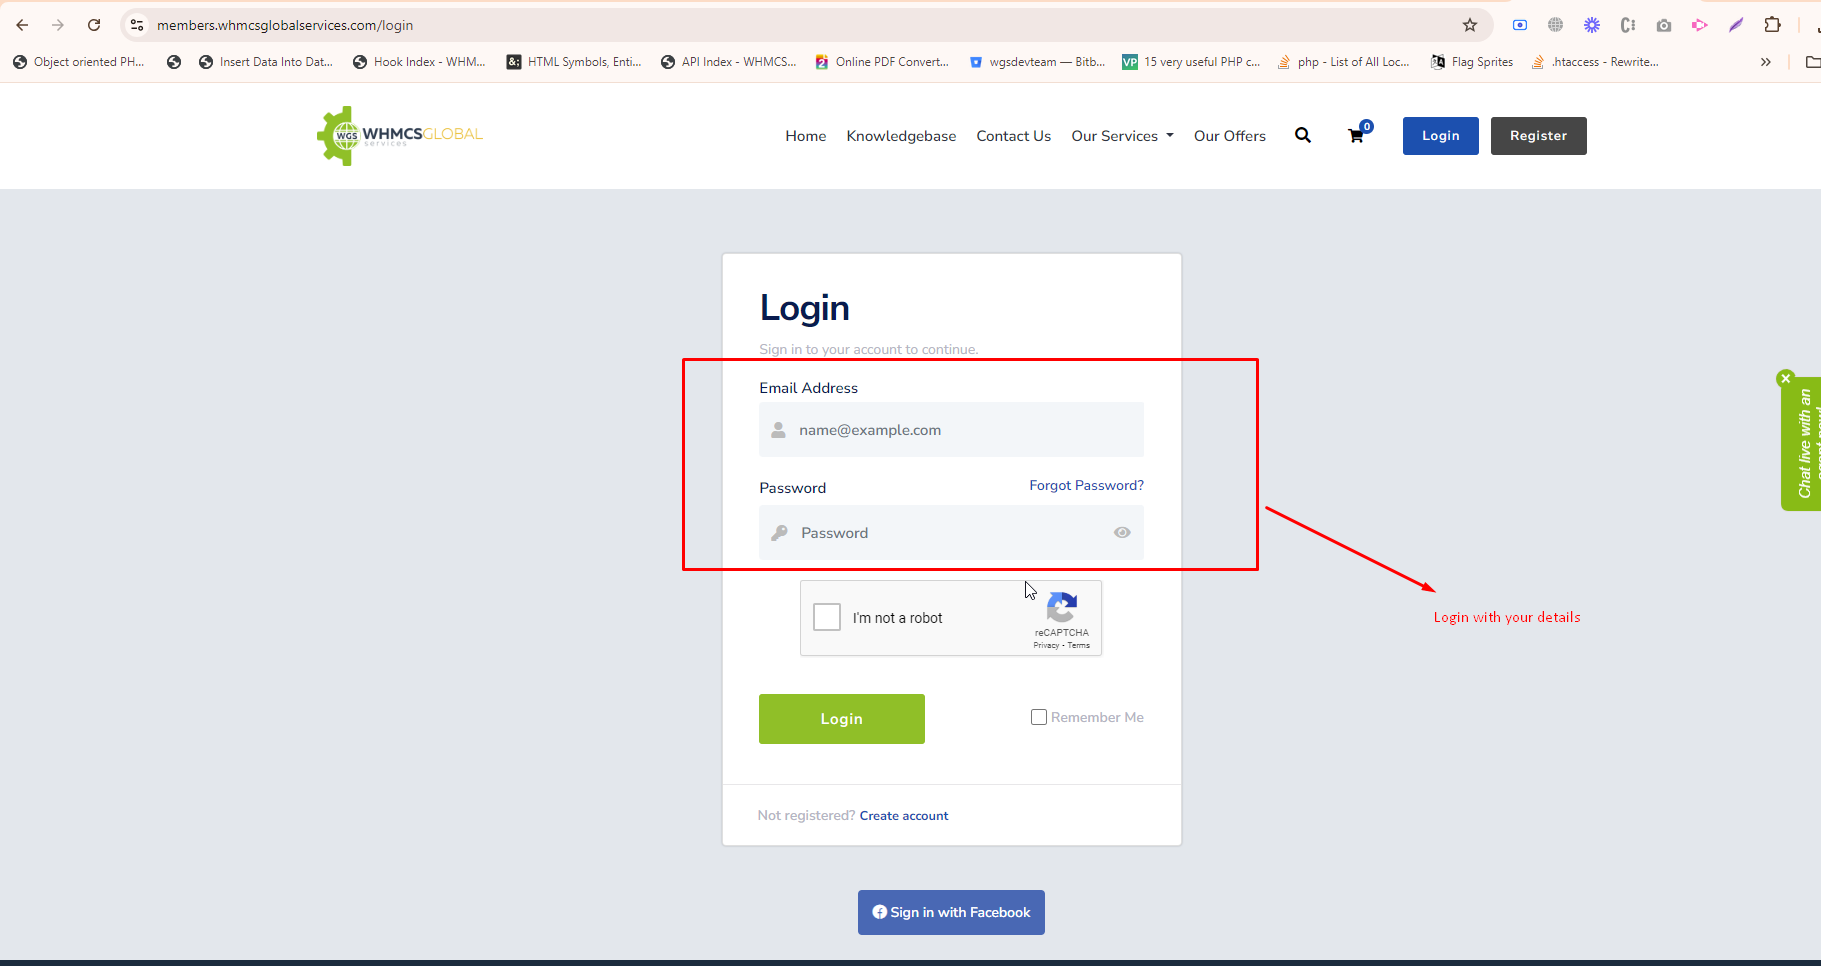
step: - 2. Go to your services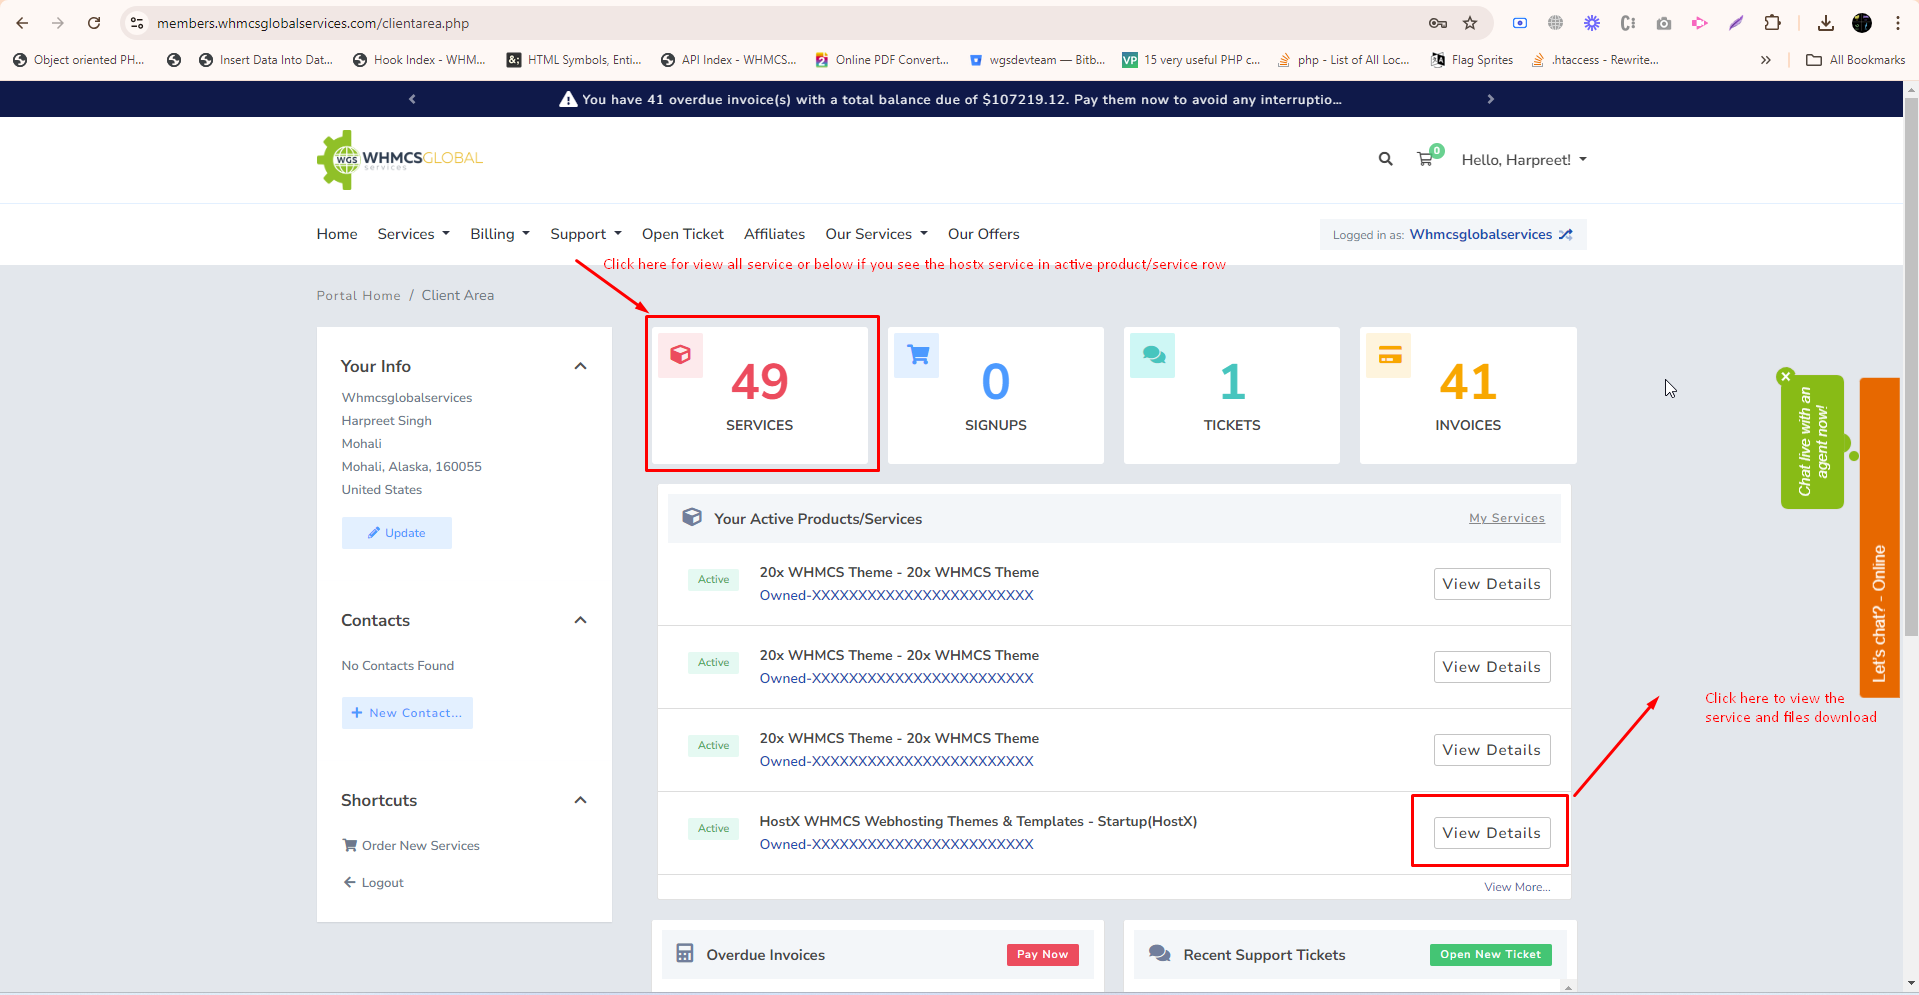
step: - 3. Select the hostx service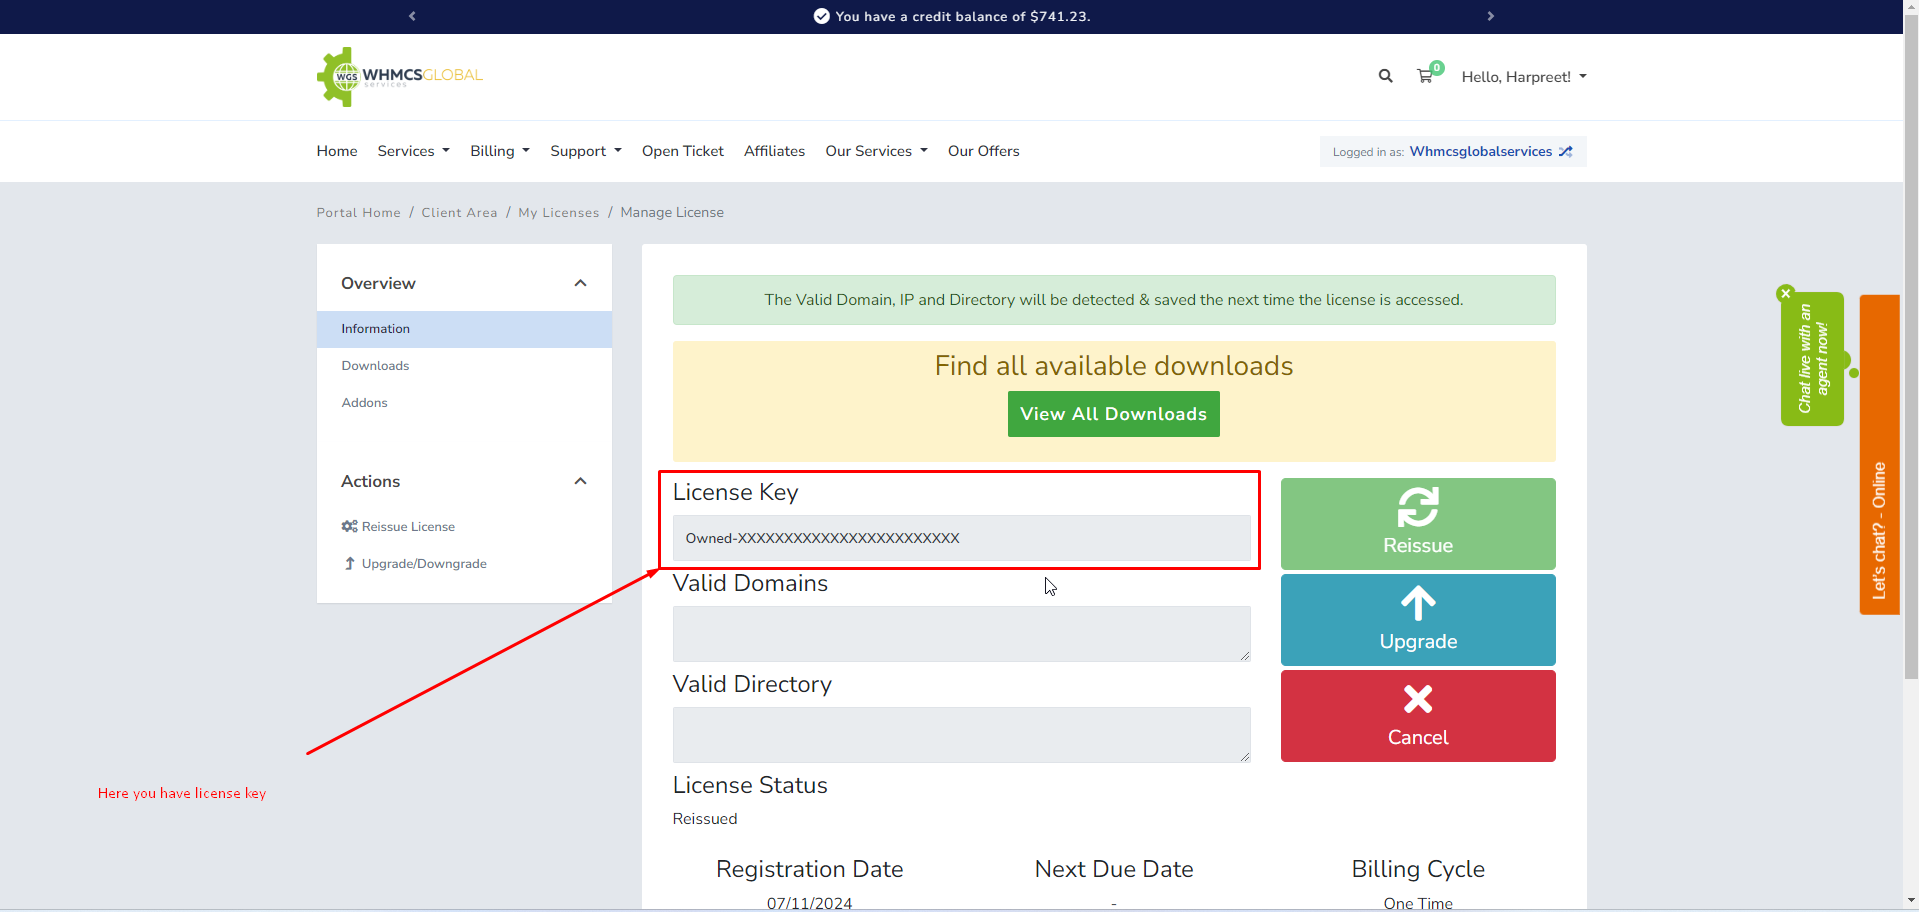
step: - 4. Click on download menu on left side.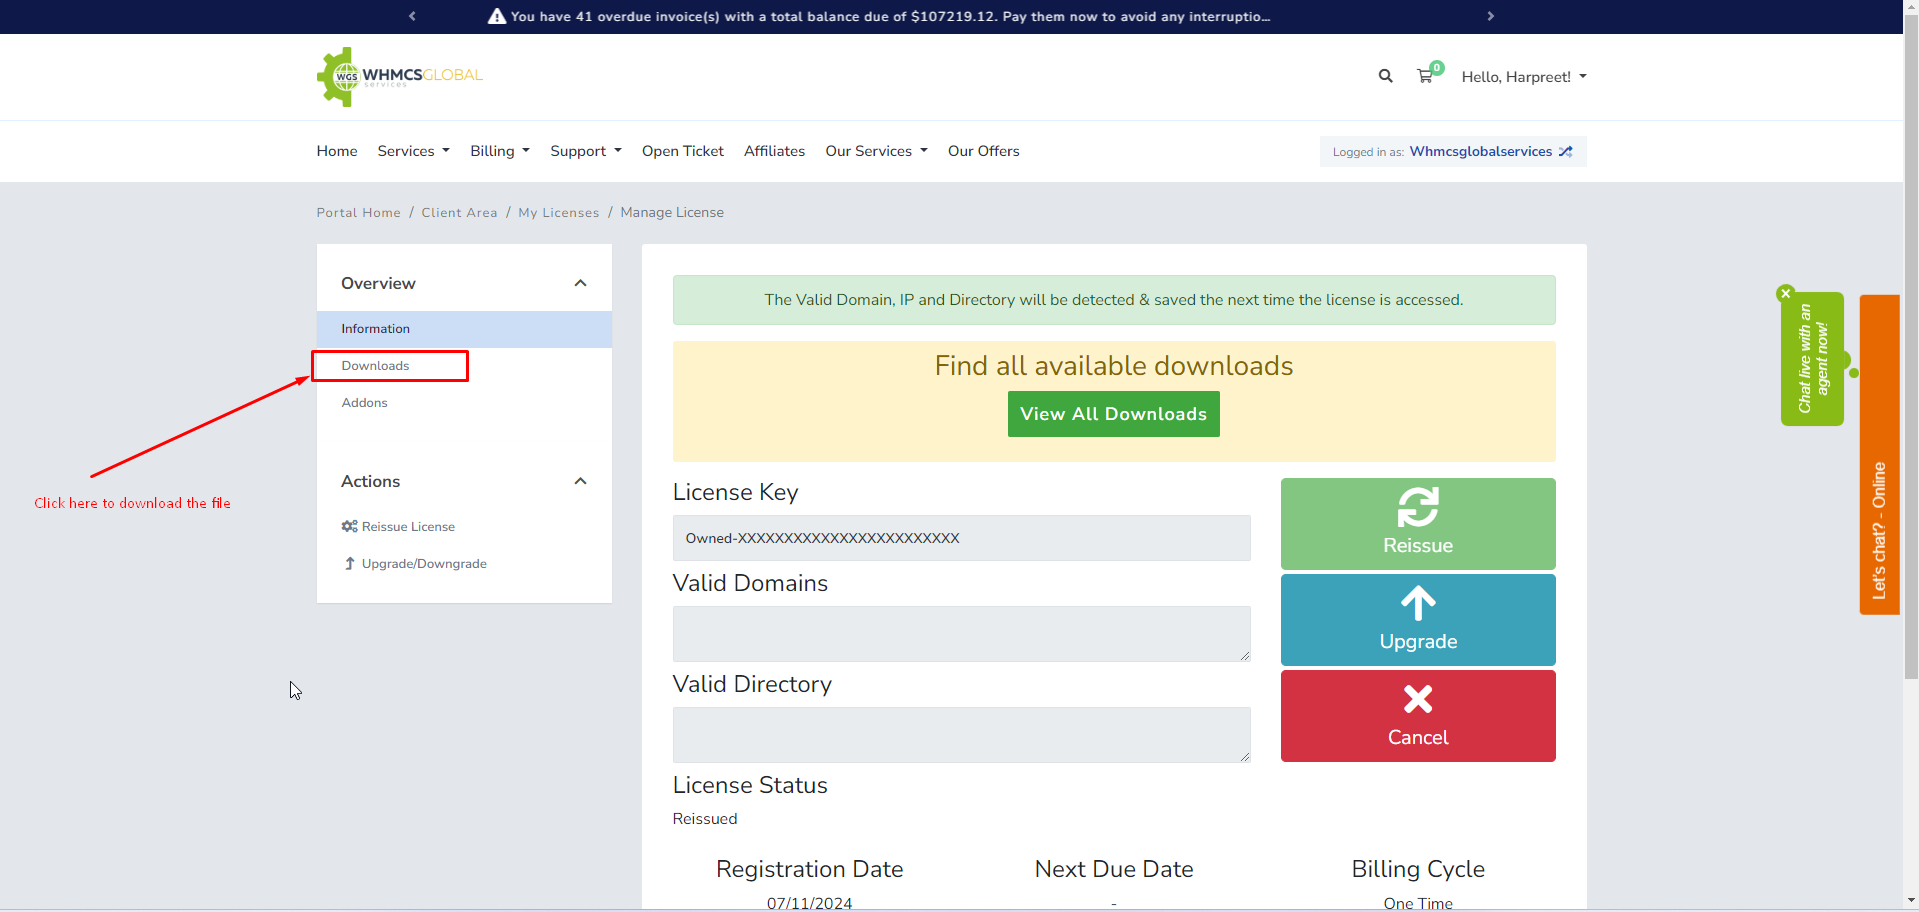
step: - 5. Download the build according to your php and whmcs version.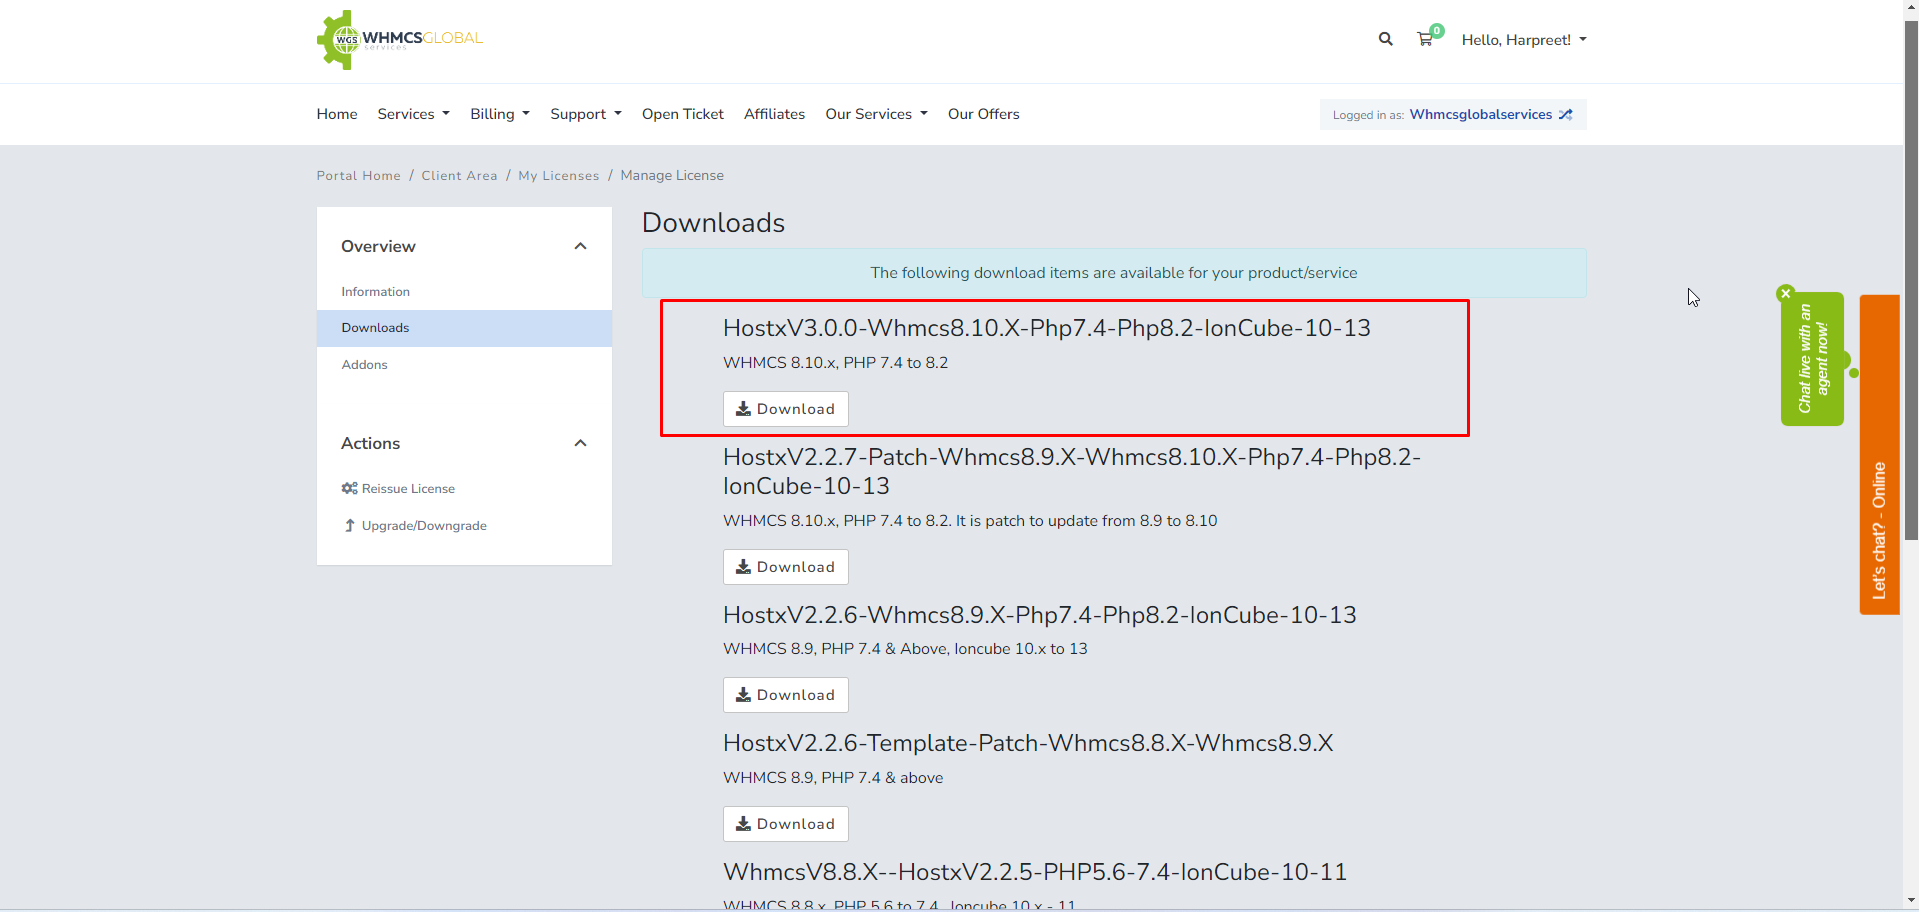
Step:- 6 After downloading the build according to your WHMCS version and PHP version extract the build.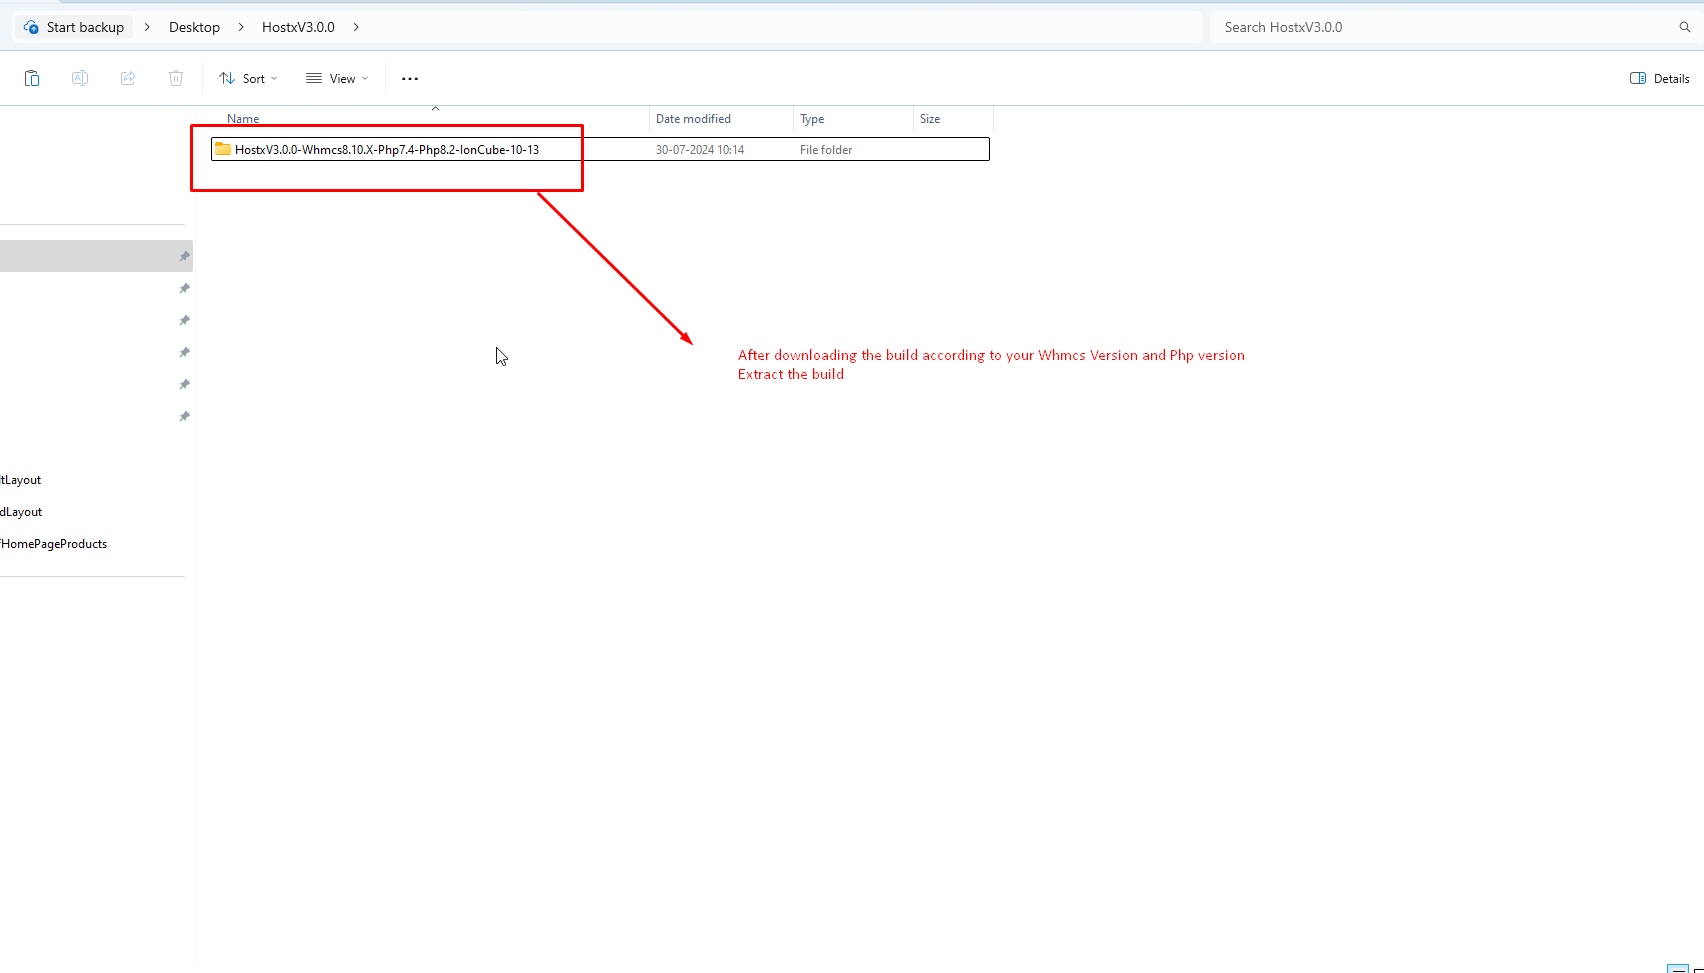
step:- 7 Now open the following folder.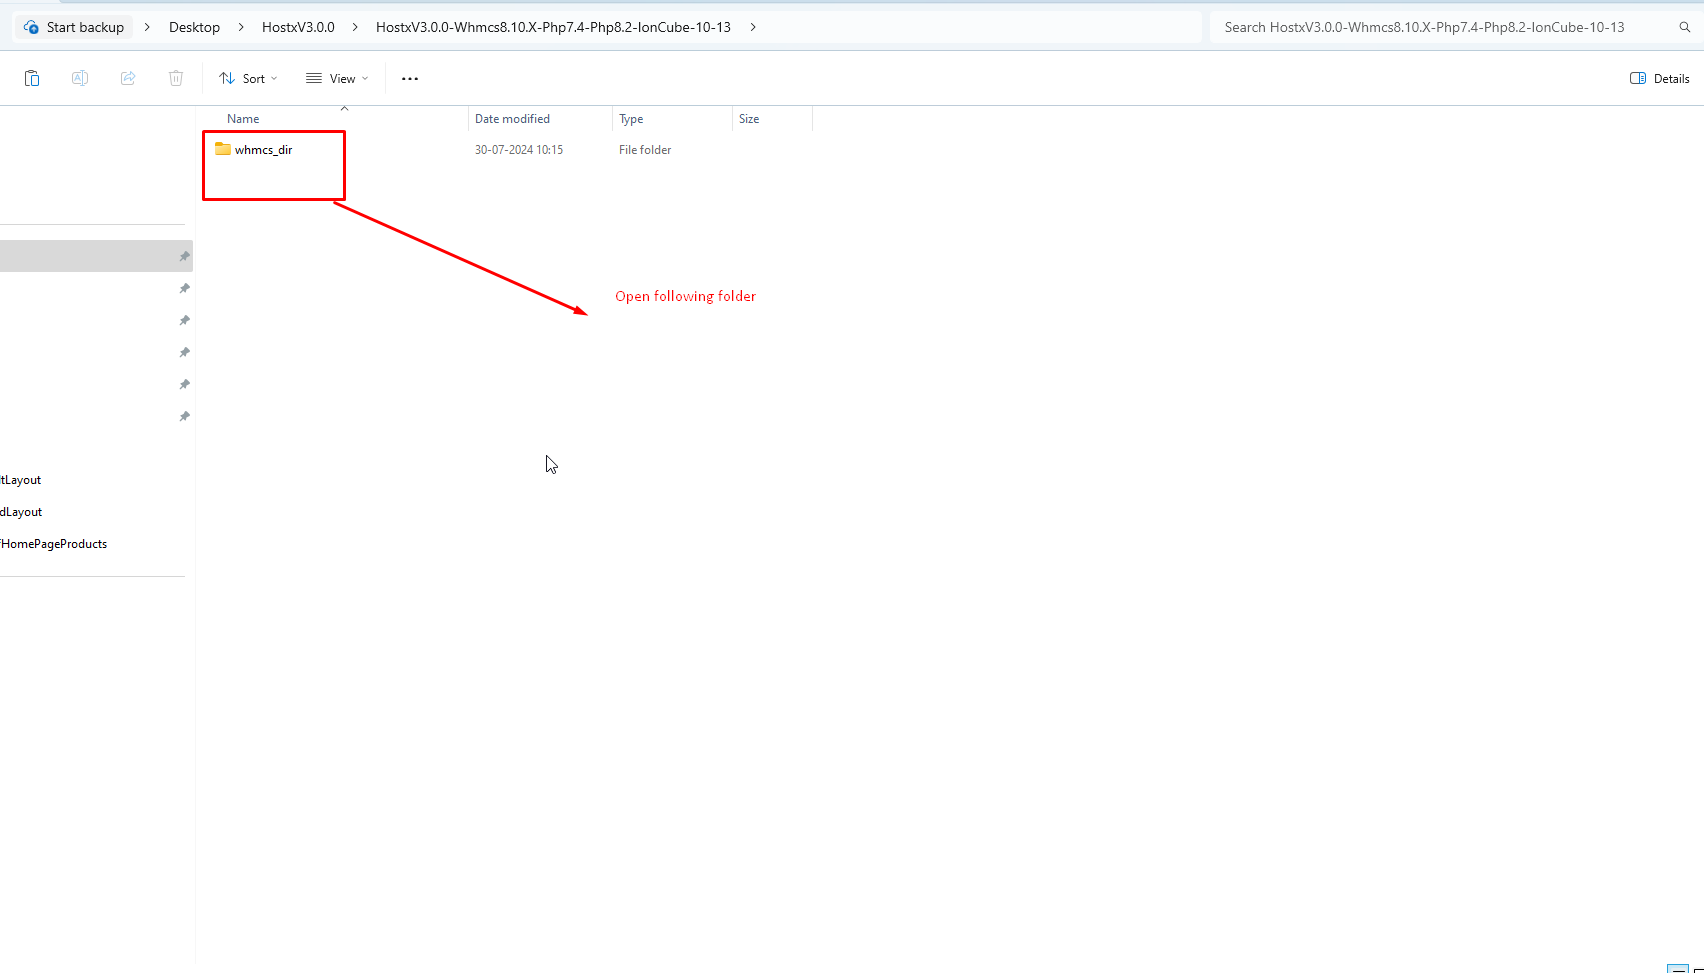
step :-8 After opening the folder you will see the files and folder.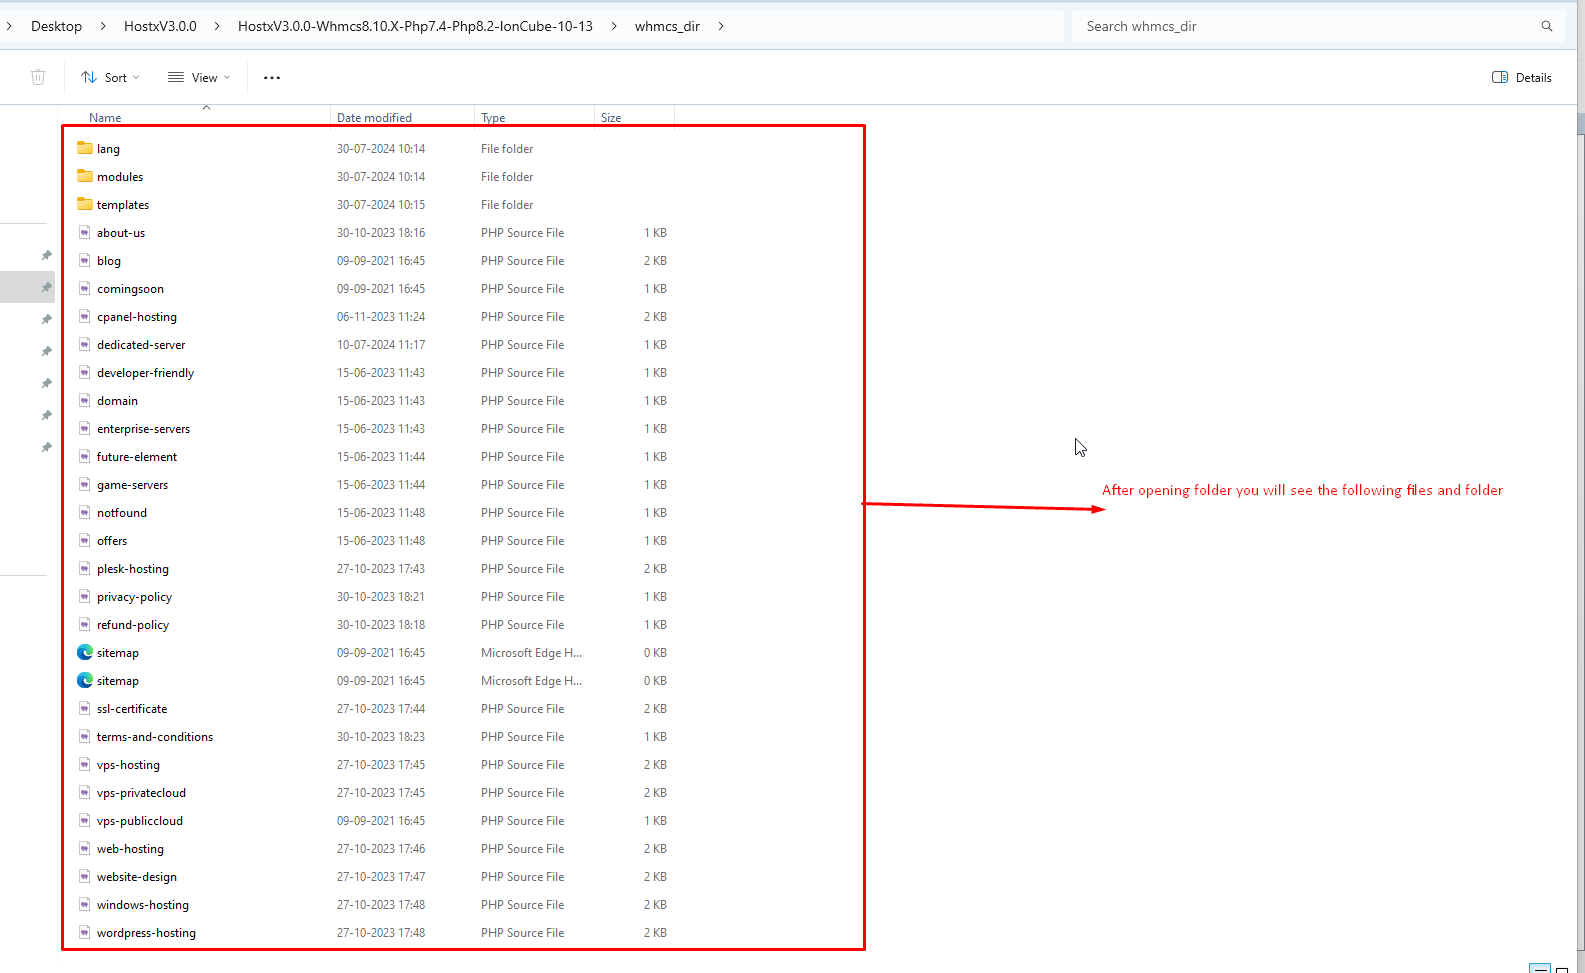
Step :-9 On the one side you can open the extracted build so that you can easily upload the code.
Note:- Now open the FTP/Cpanel and go to the directory where whmcs is installed In our case whmcs is installed over public html path.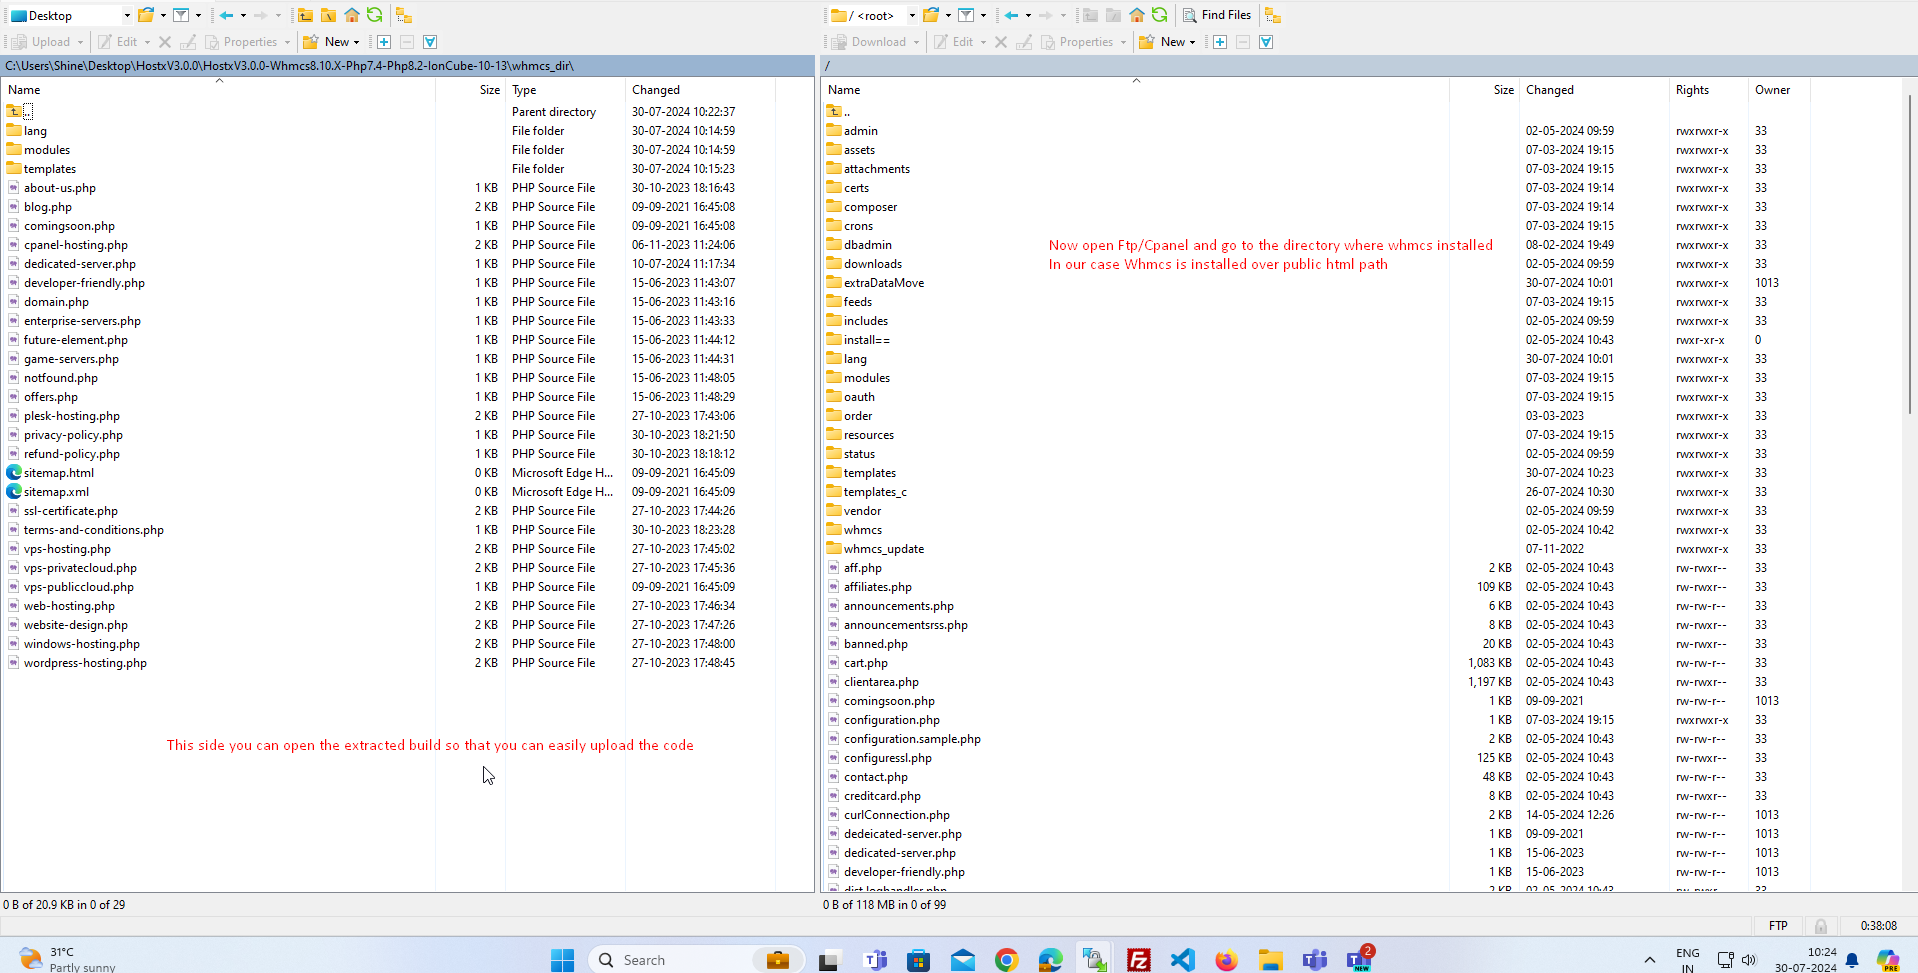
Step :- 10 Now upload the root files to whmcs root directery as given in the screenshot.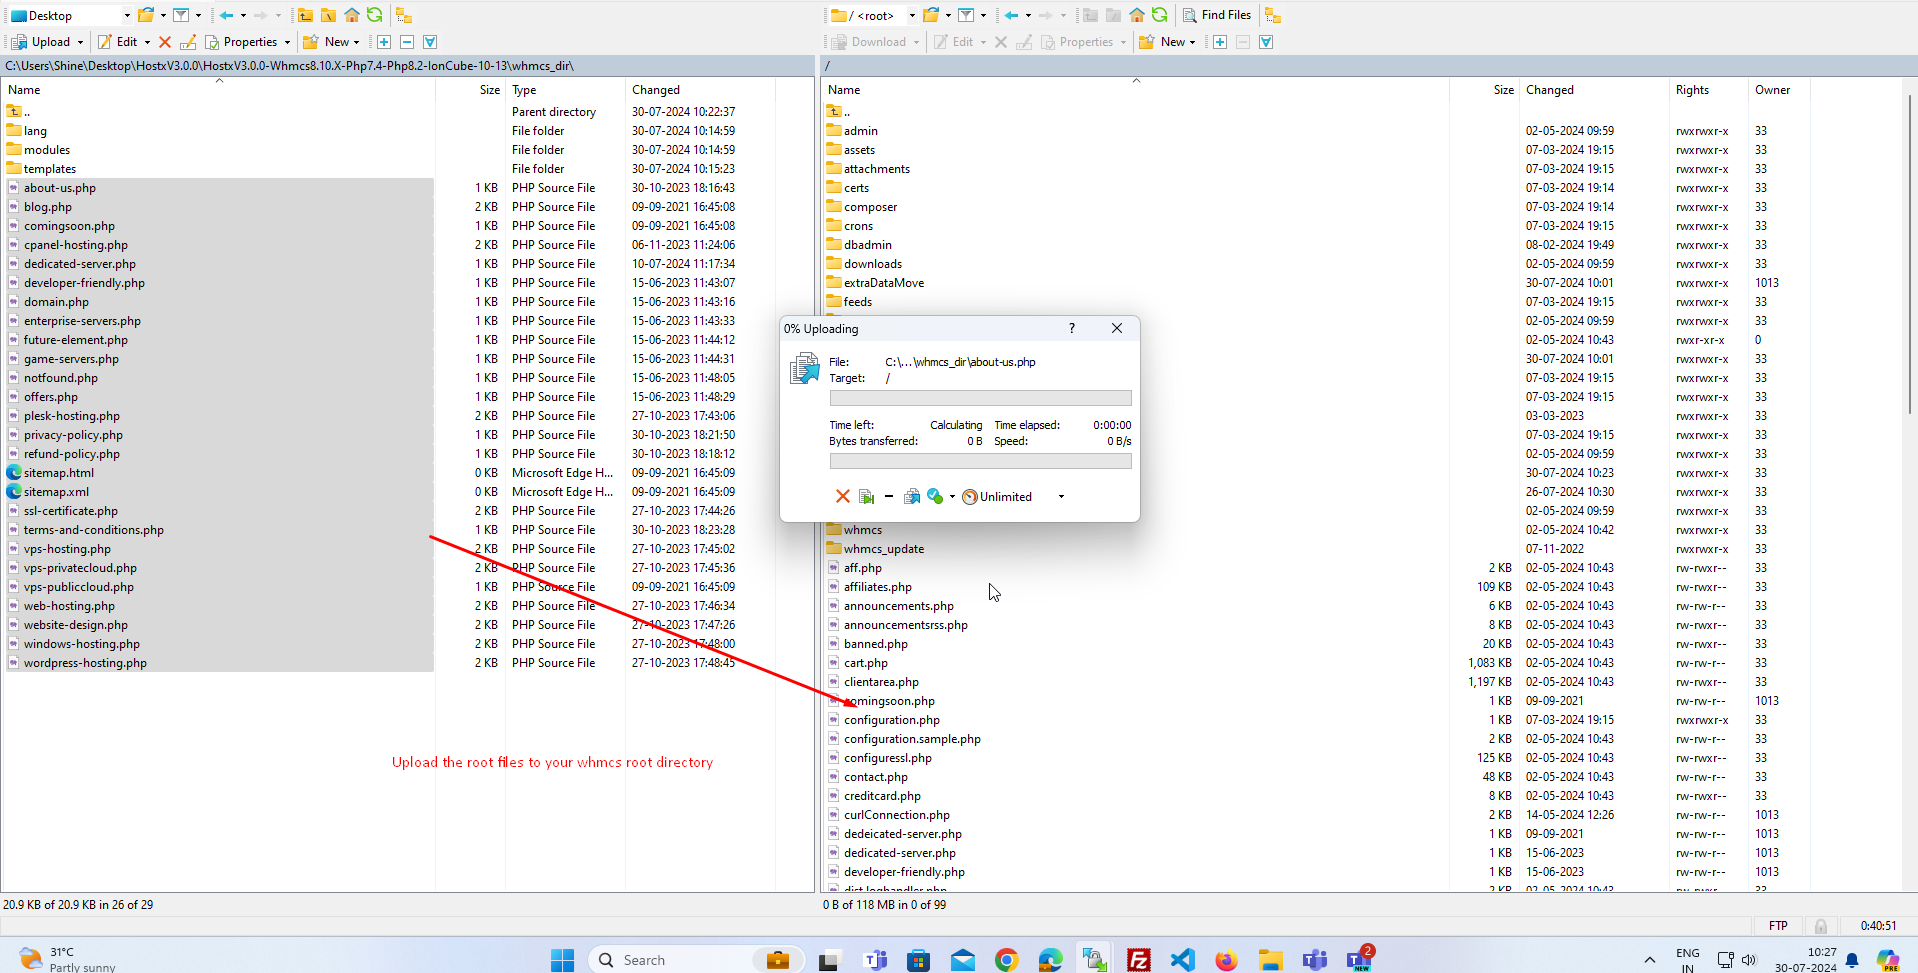
step :-11 Now root files are uploaded in the root directory.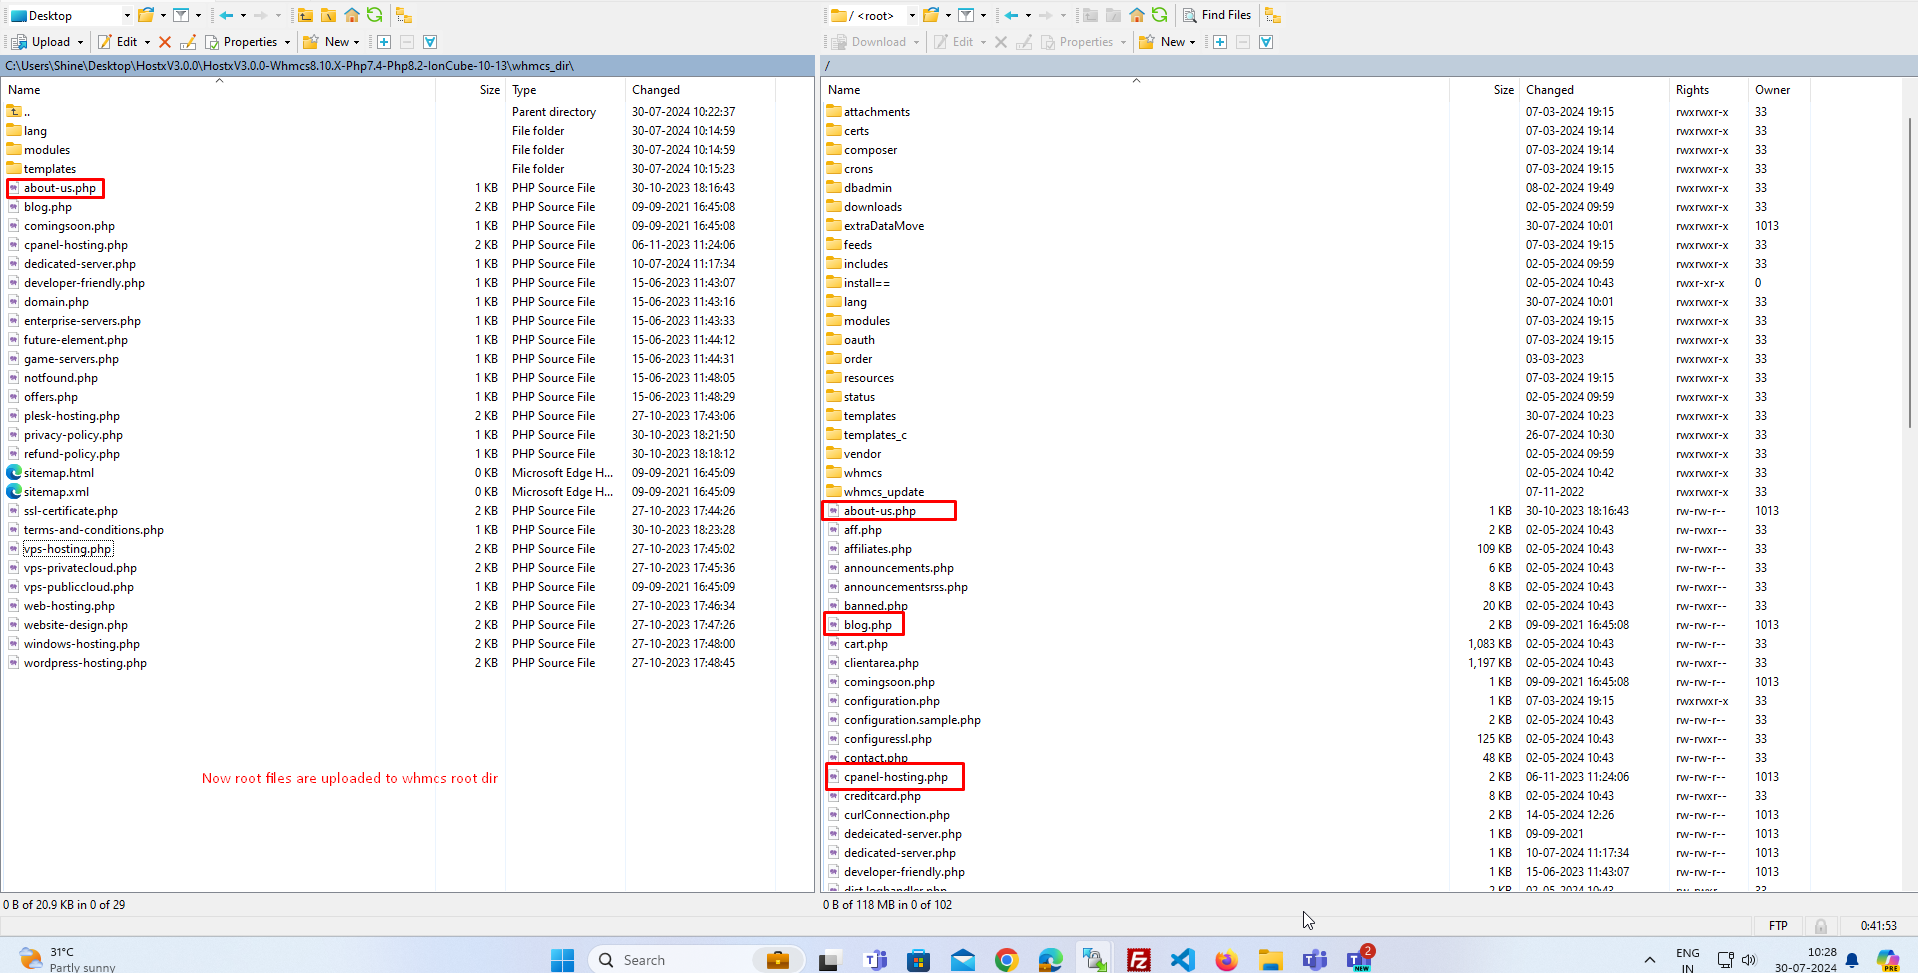
step:- 12 Now open templates folder on both side Local system and server.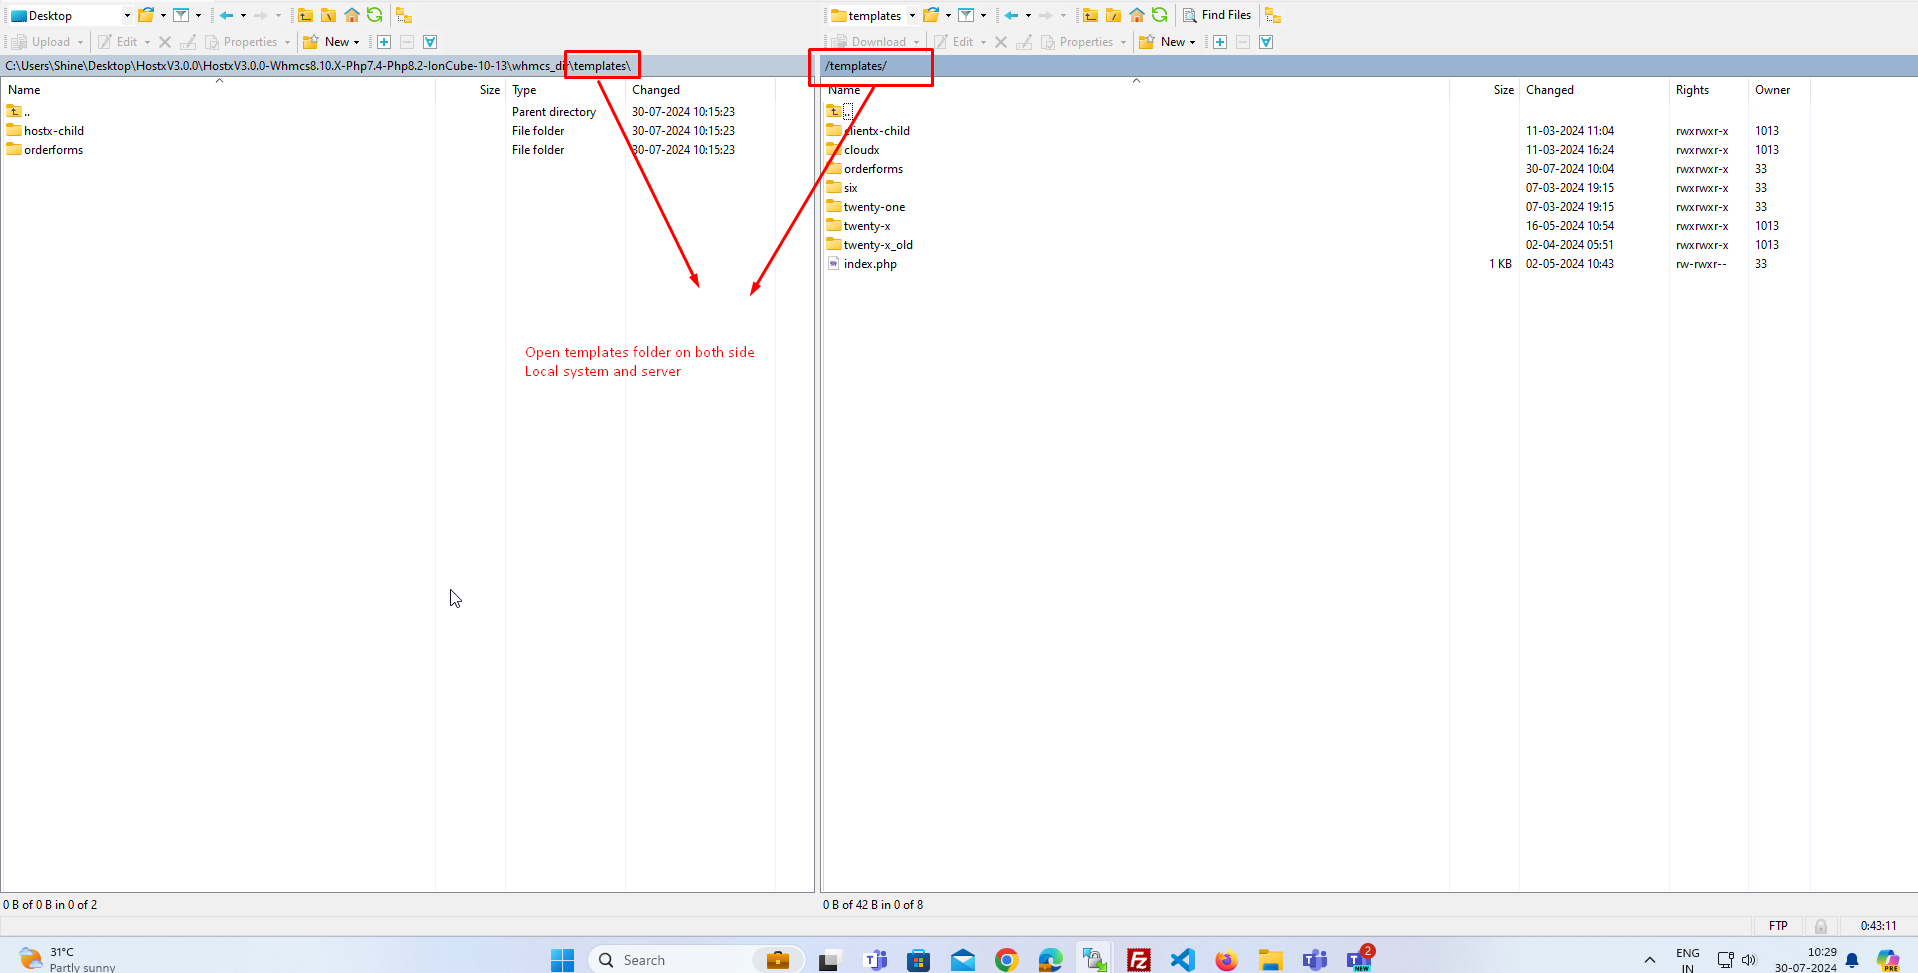
Step:-13 Upload hostx-child directory to templates folder over your server.
Step:- 14 Open orderforms folder on both side host build and whmcs server.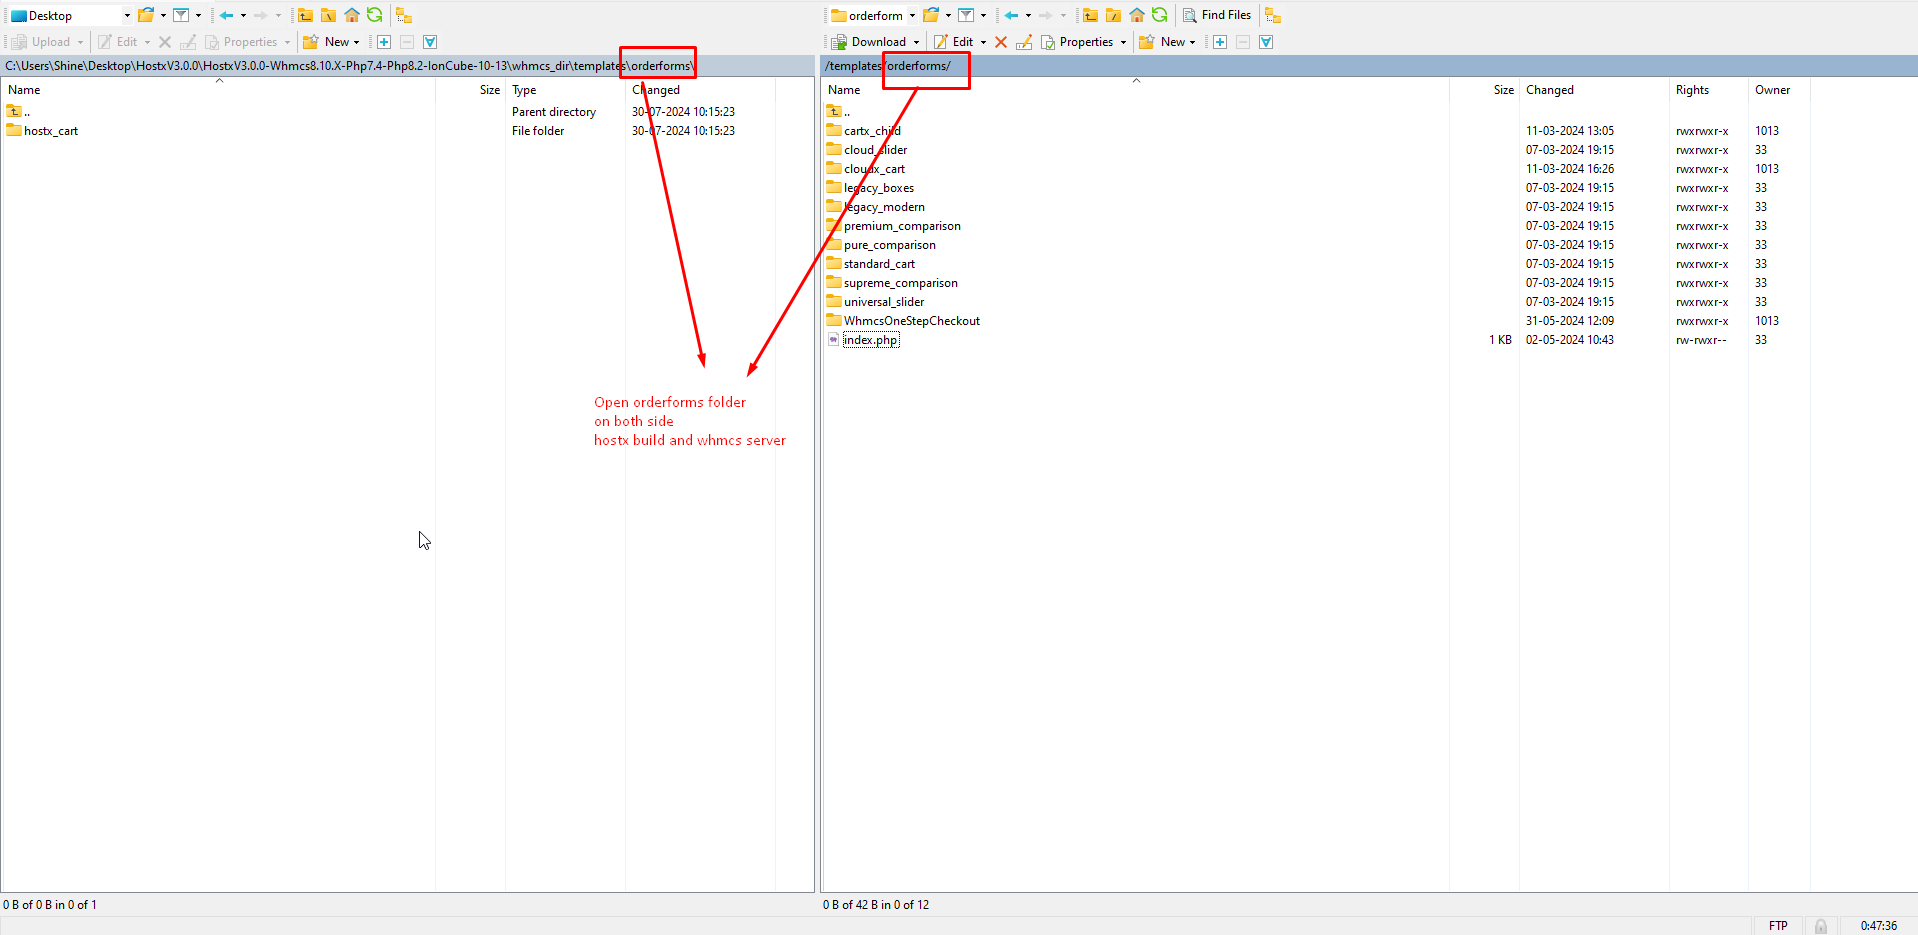
Step:- 15 Now upload hostx_cart over server orderforms folder. 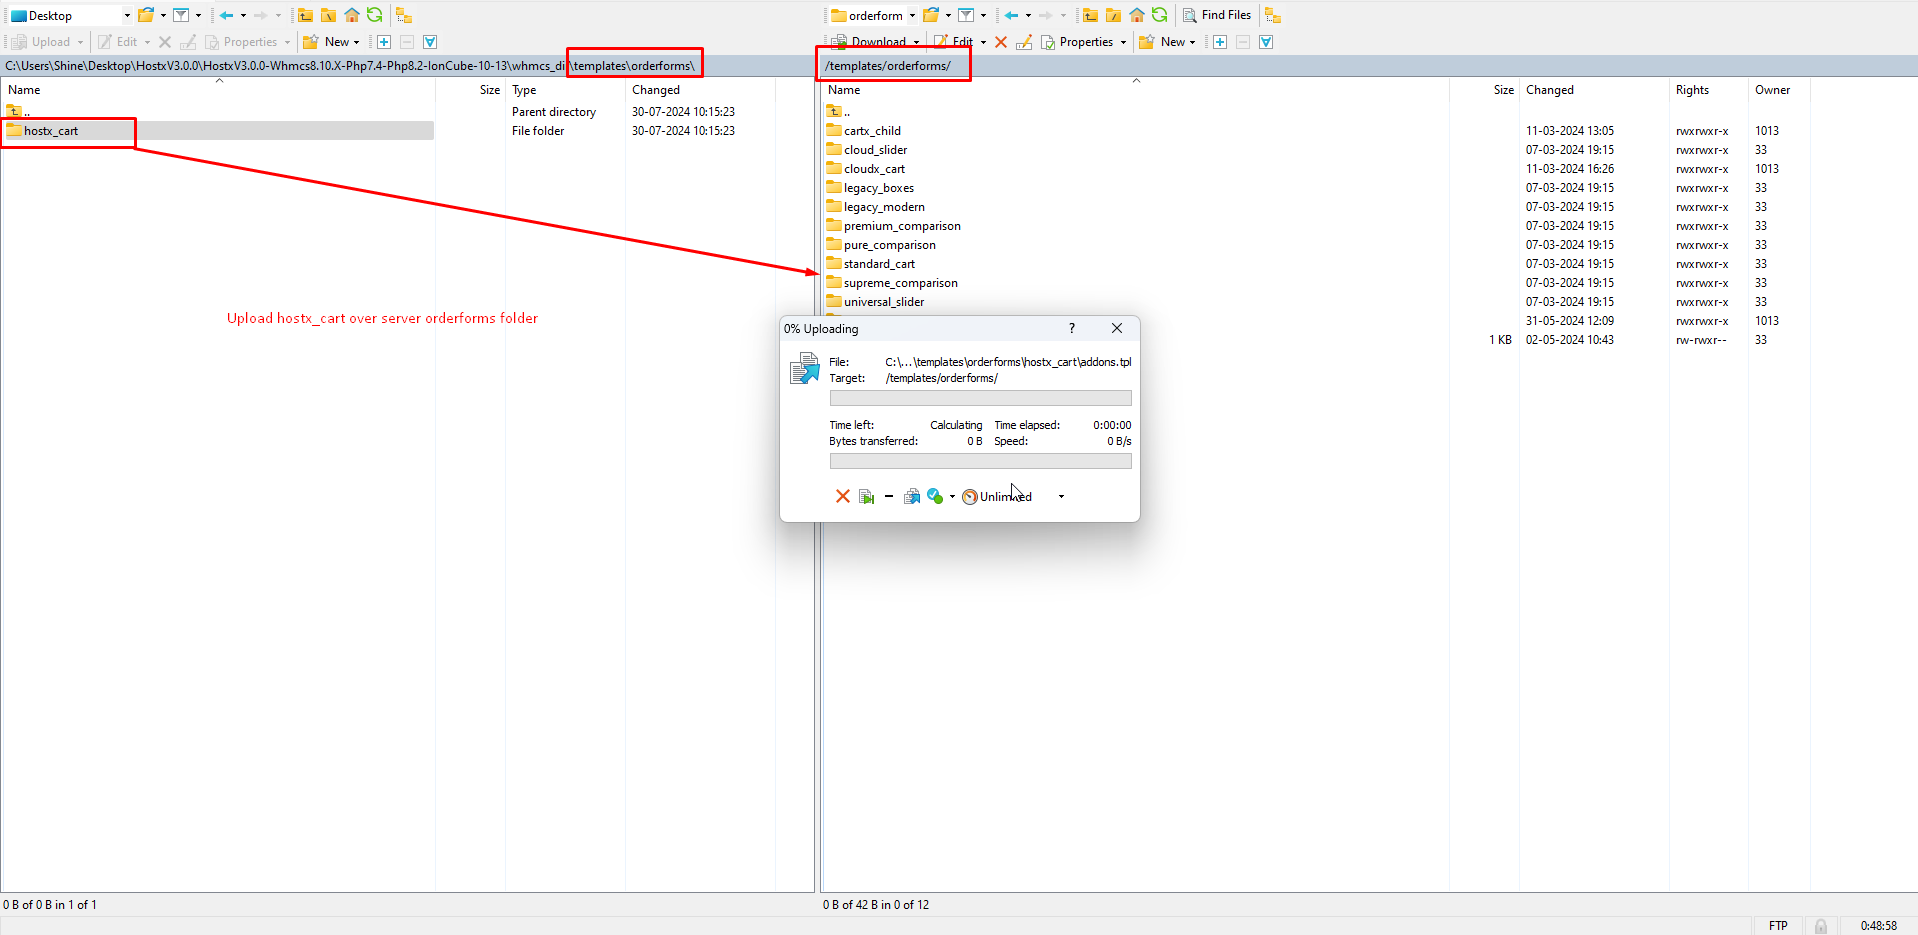
Step:- 16 Open modules folder on both side host build and whmcs server. 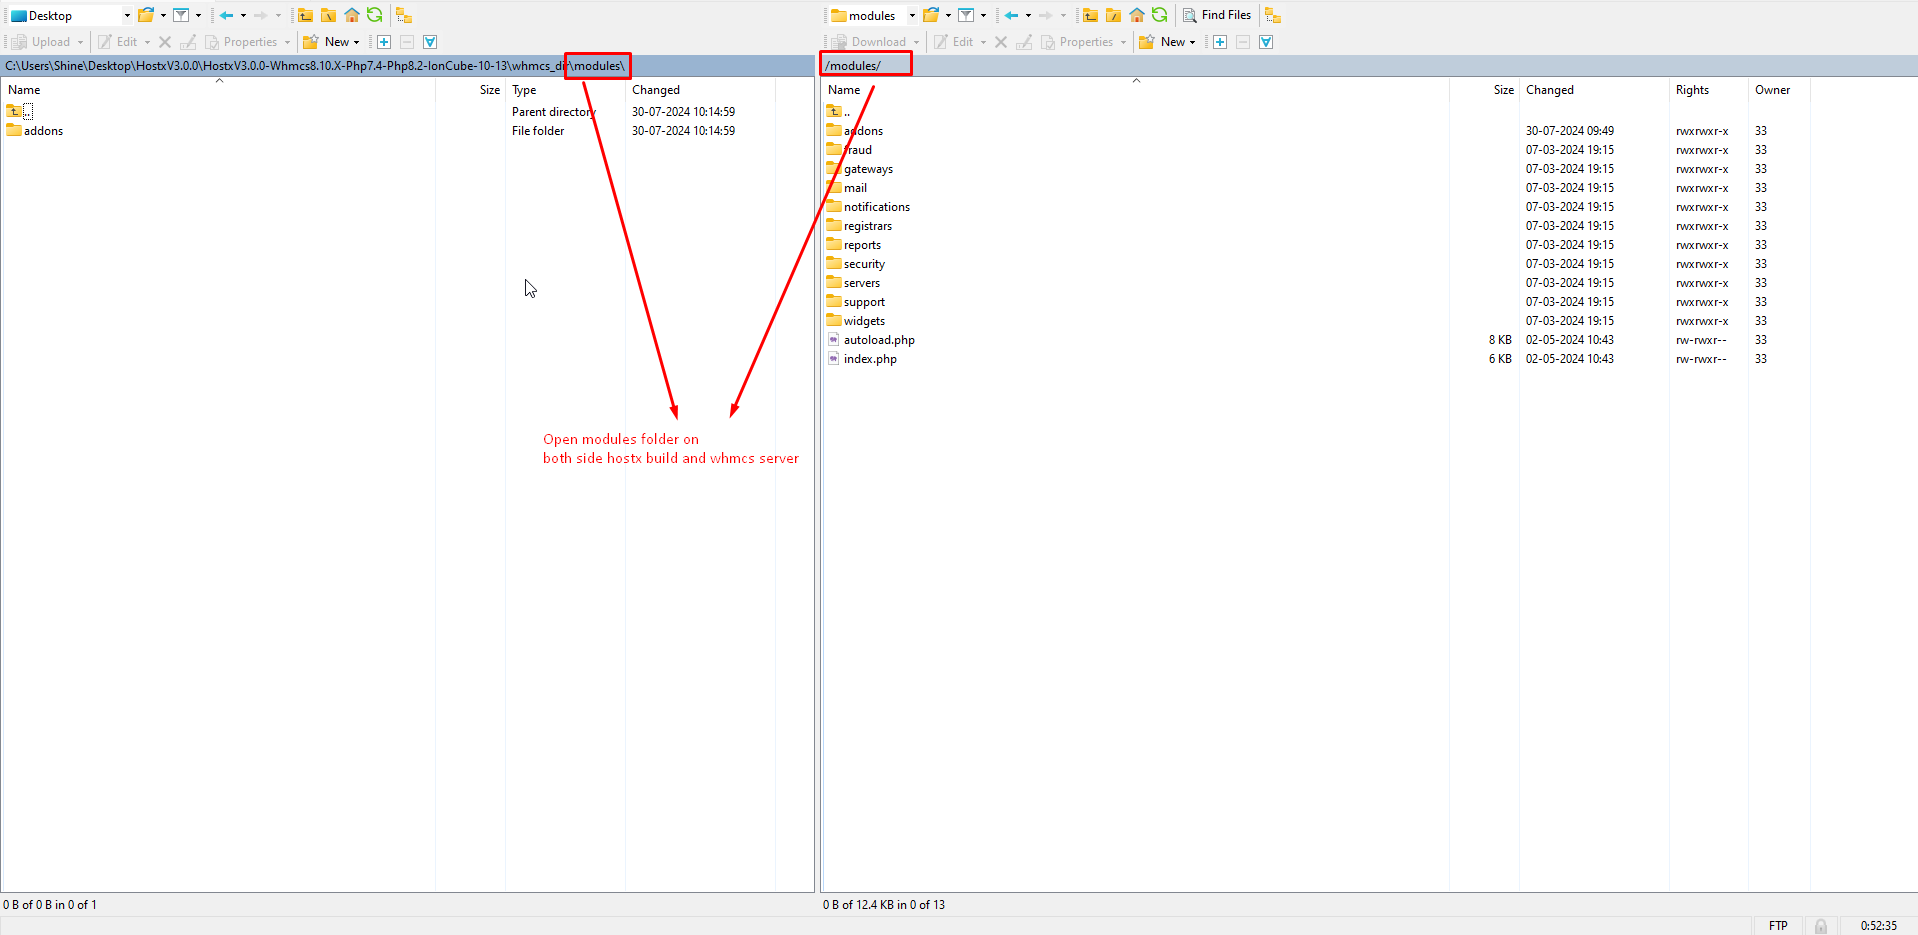
Step:- 17 Open addons folder on both side host build and whmcs server. 
Step:- 18 Upload hostx folder to addons folder of server. 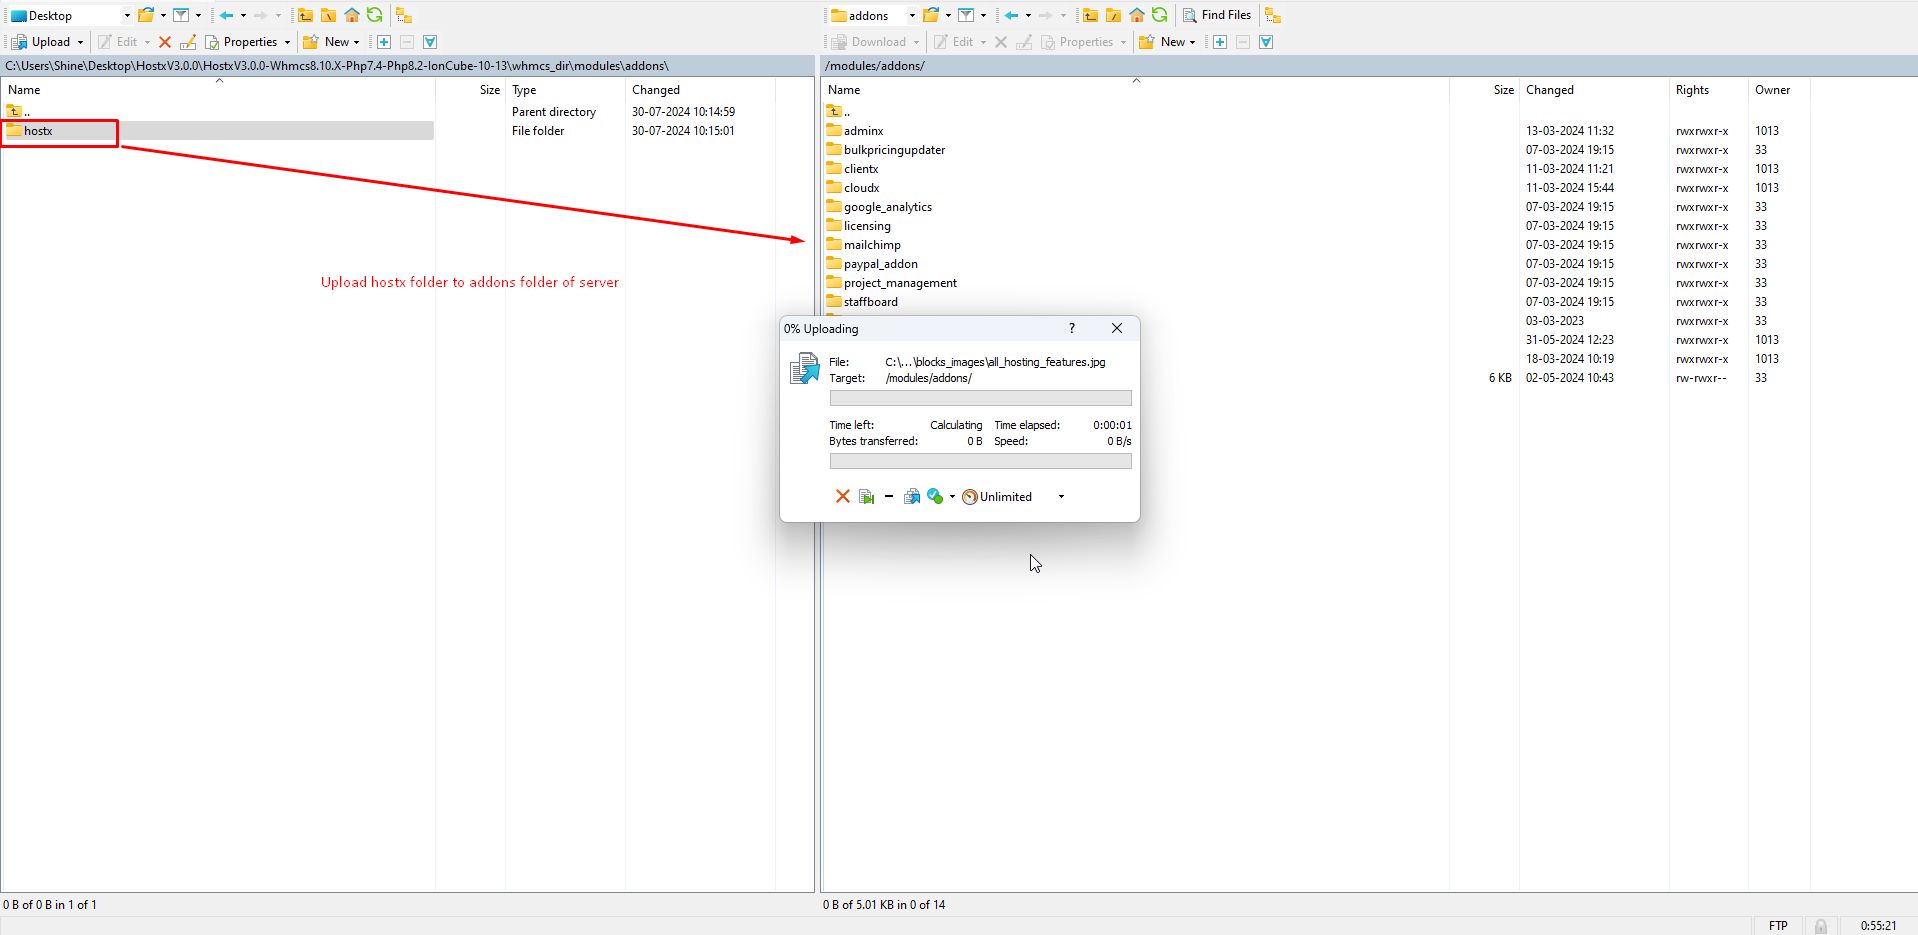
step:- 19 Now setup language open lang folder on both side server side and hostx build side.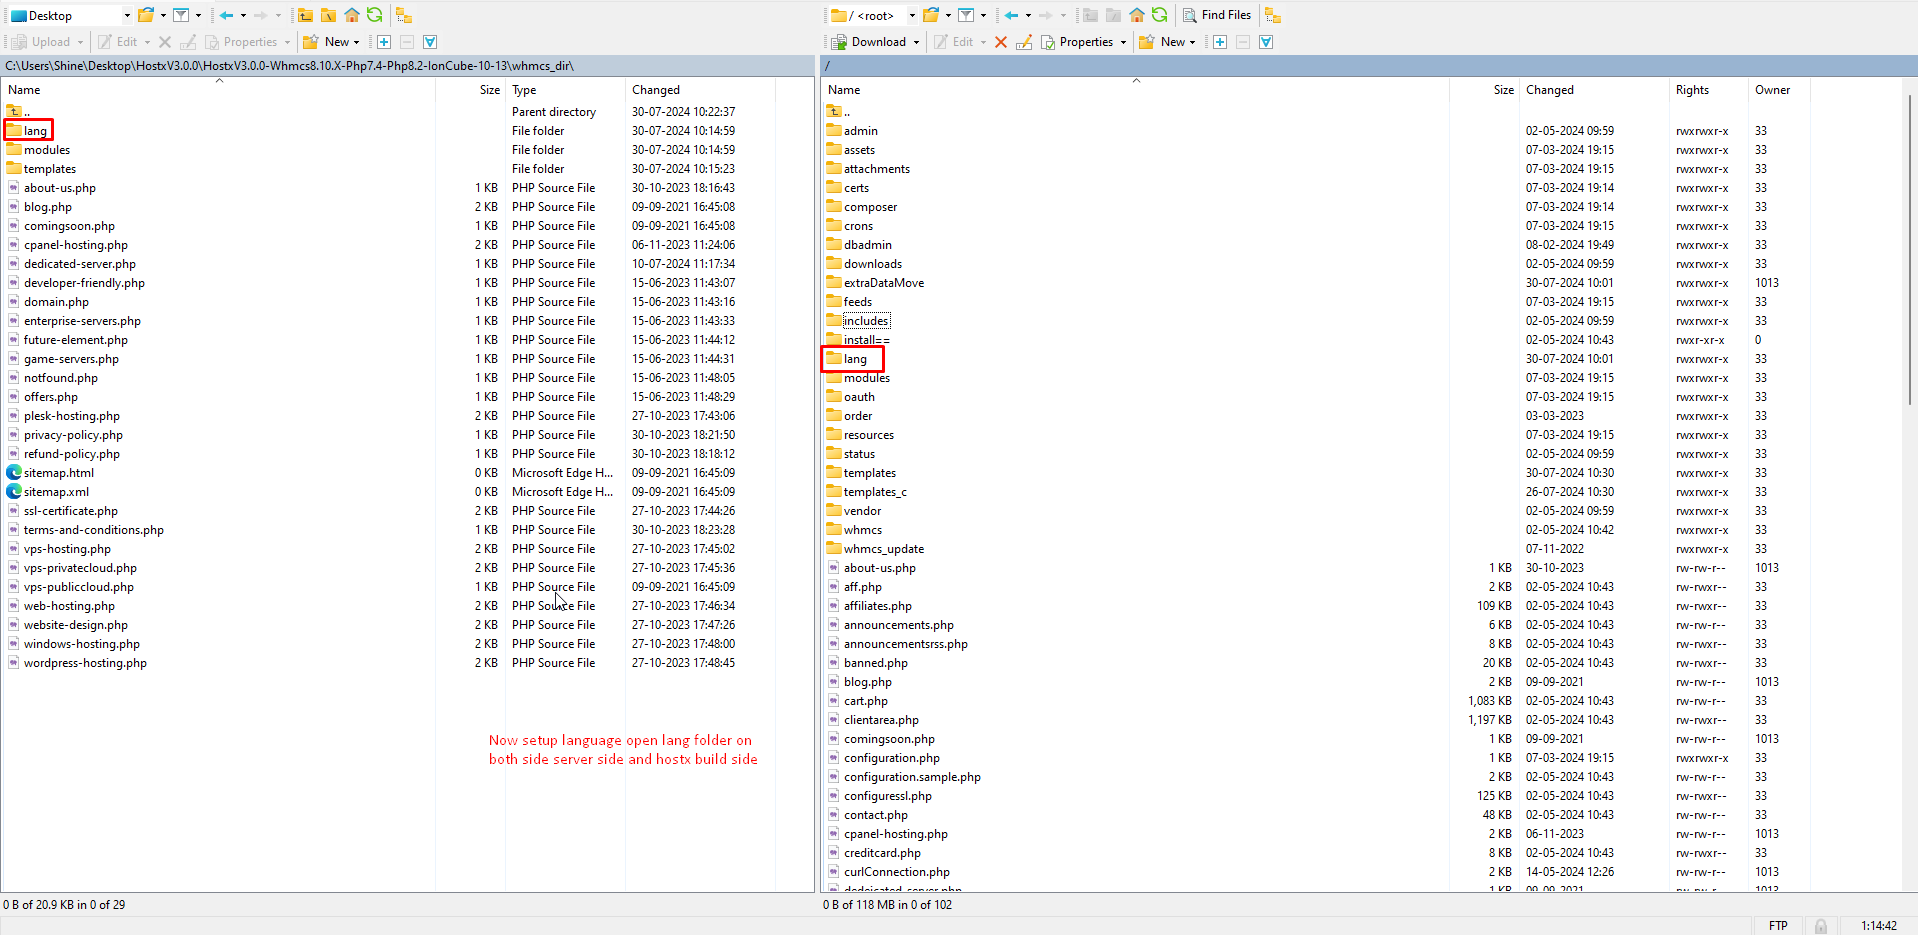
Step:- 20 Open lang folder on both side.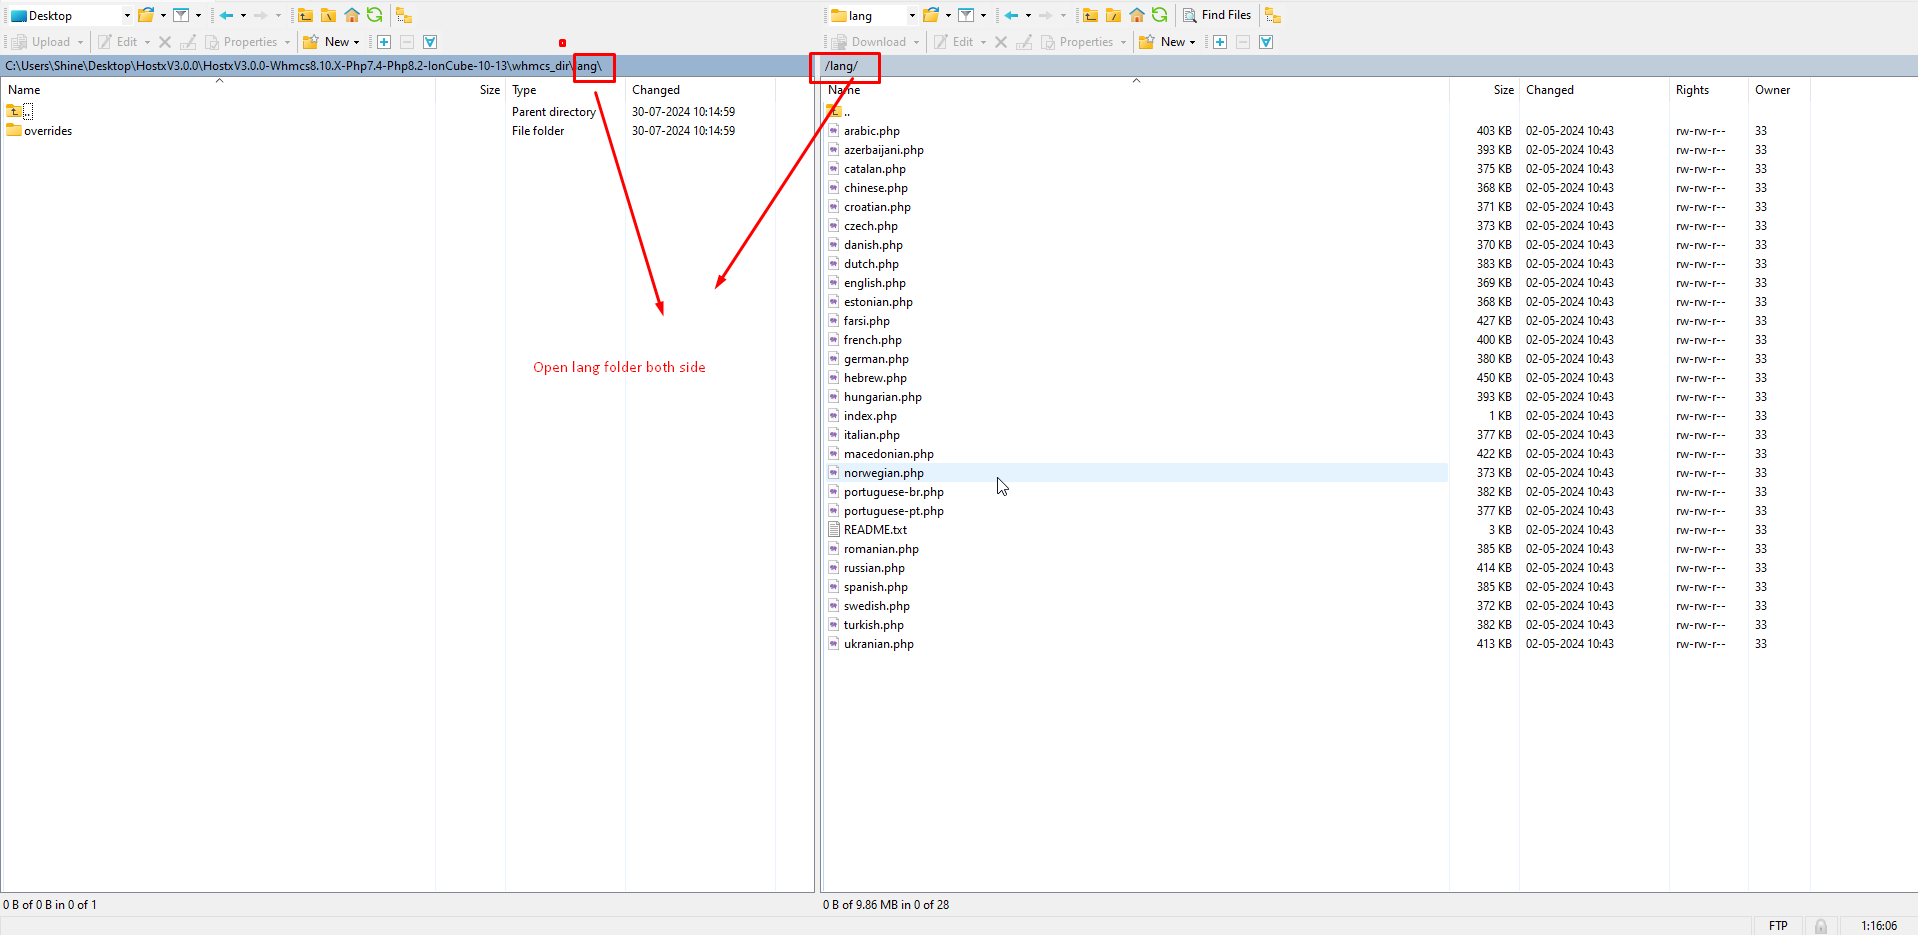
step :- 21 Upload overrides folder under lang folder over server.
step:- 22 Open whmcs admin to configure the hostx.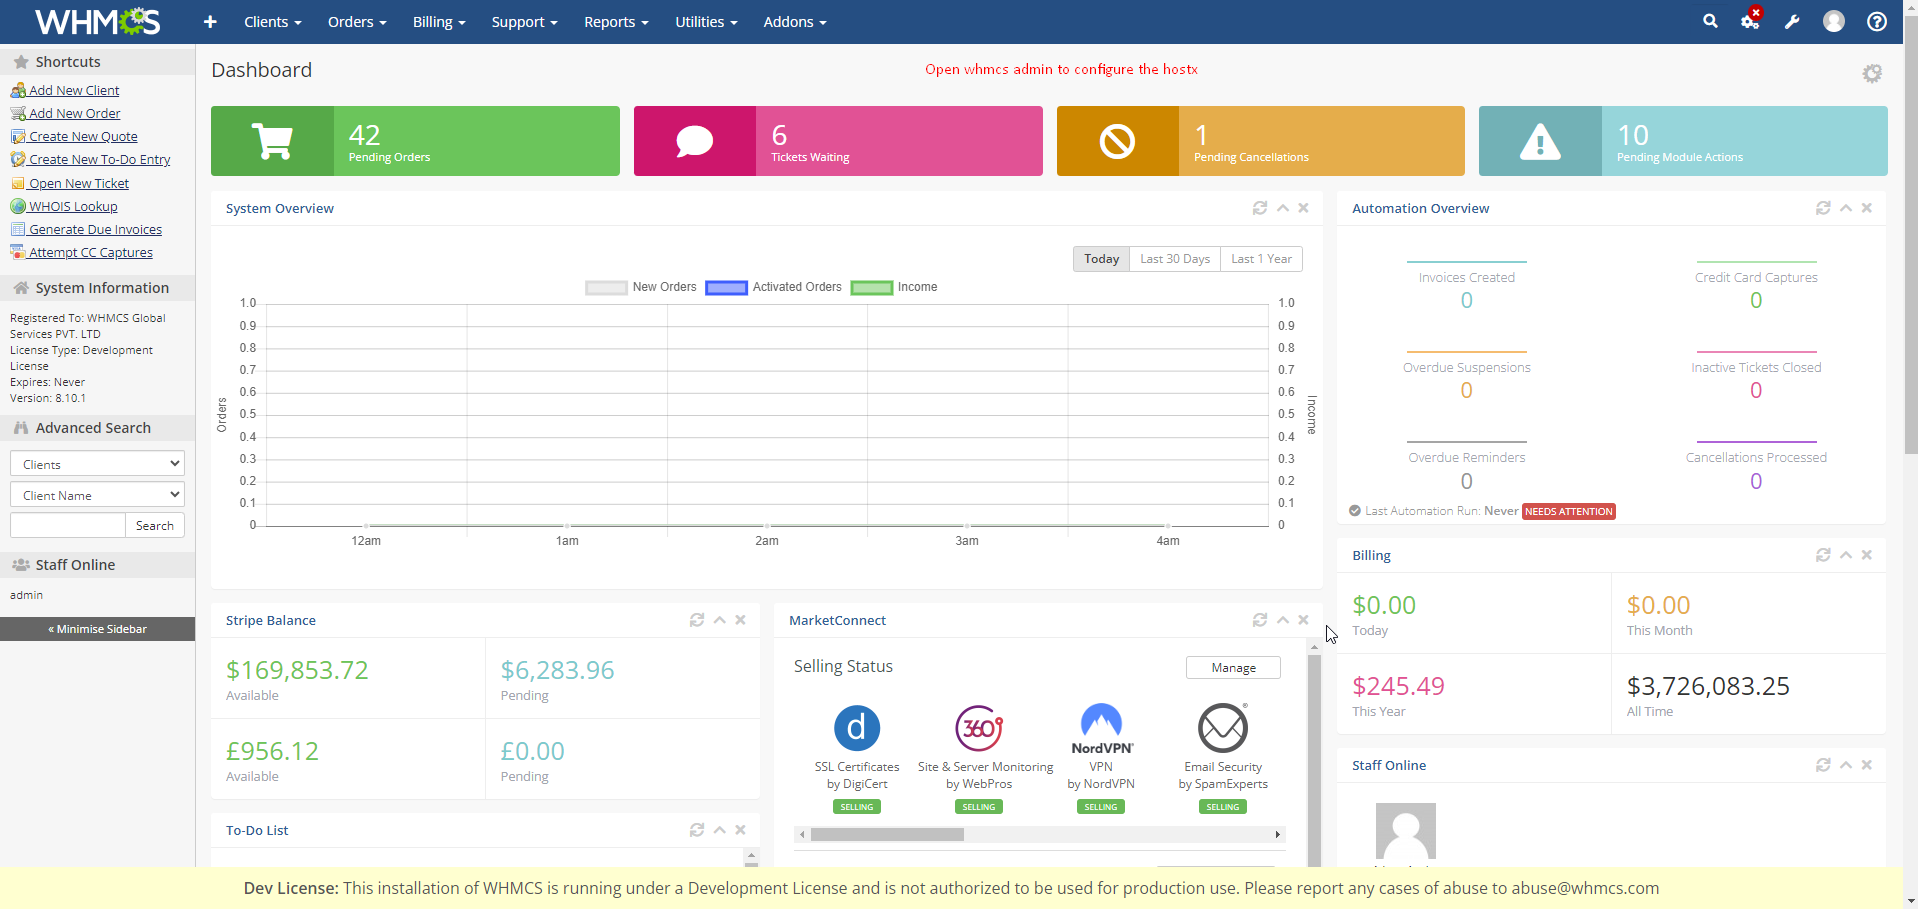
step :- 23 Now All File uploading process is completed lets configure the hostx in admin side.
step:- 24 Go to settings then click on System Settings. 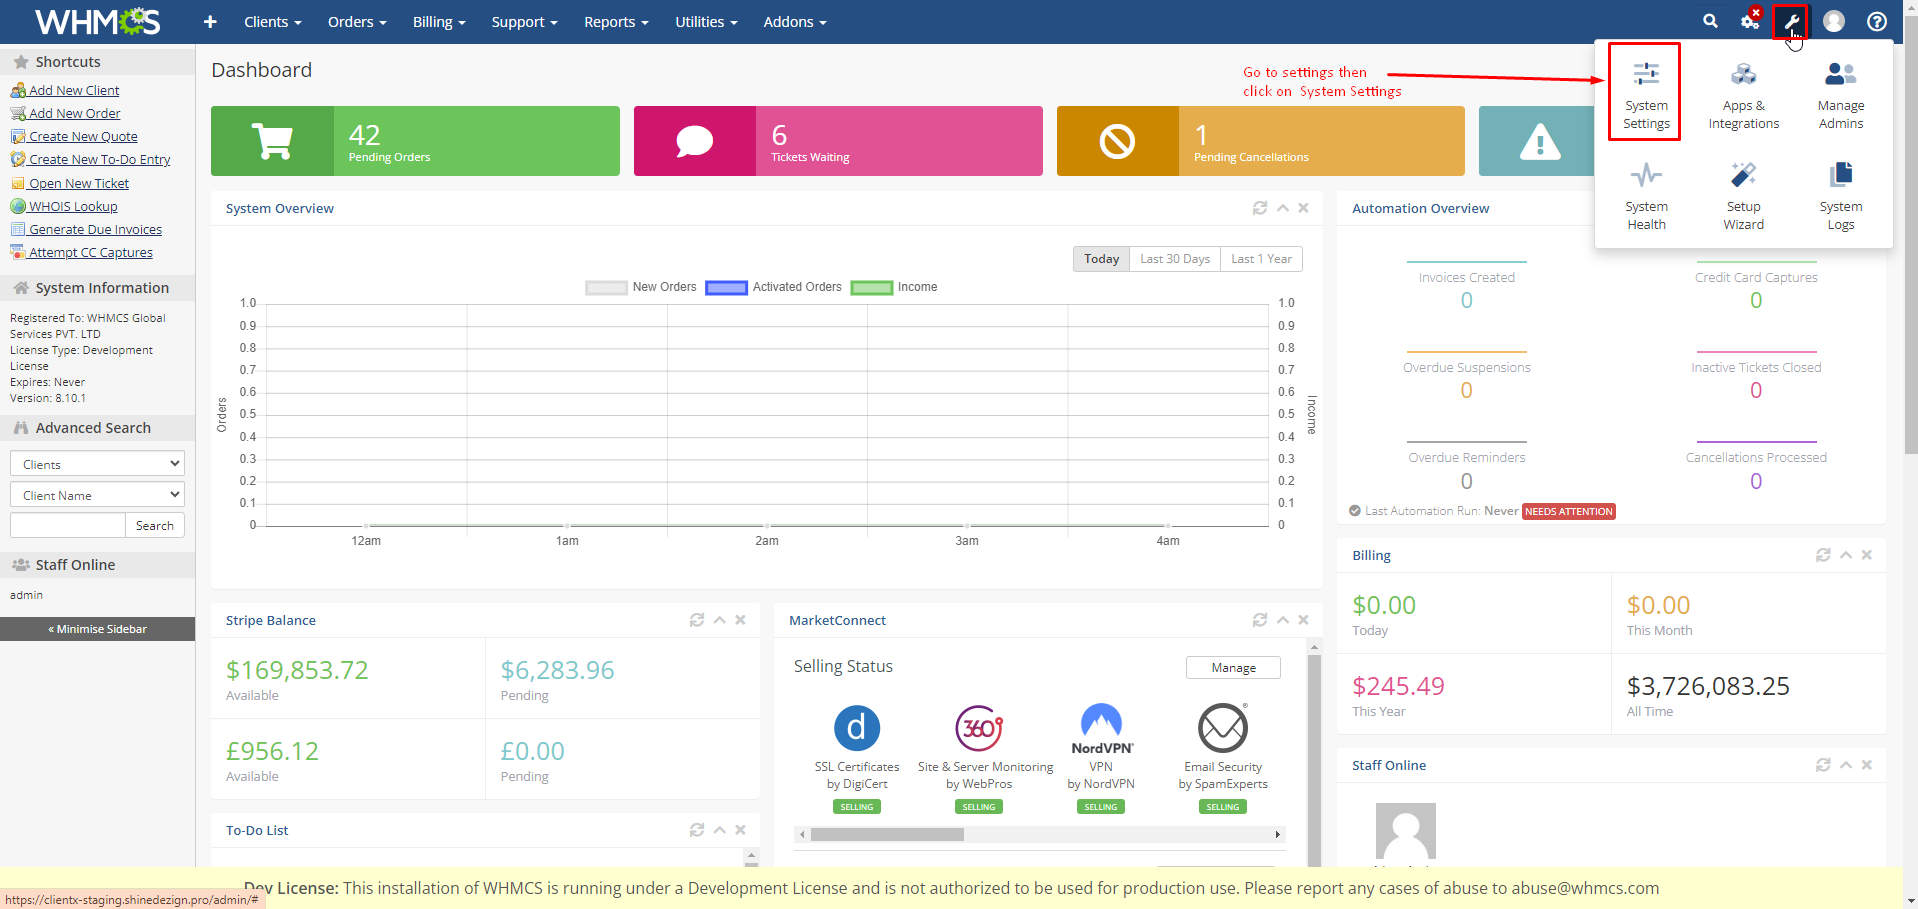
step :- 25 Click on the addon modules.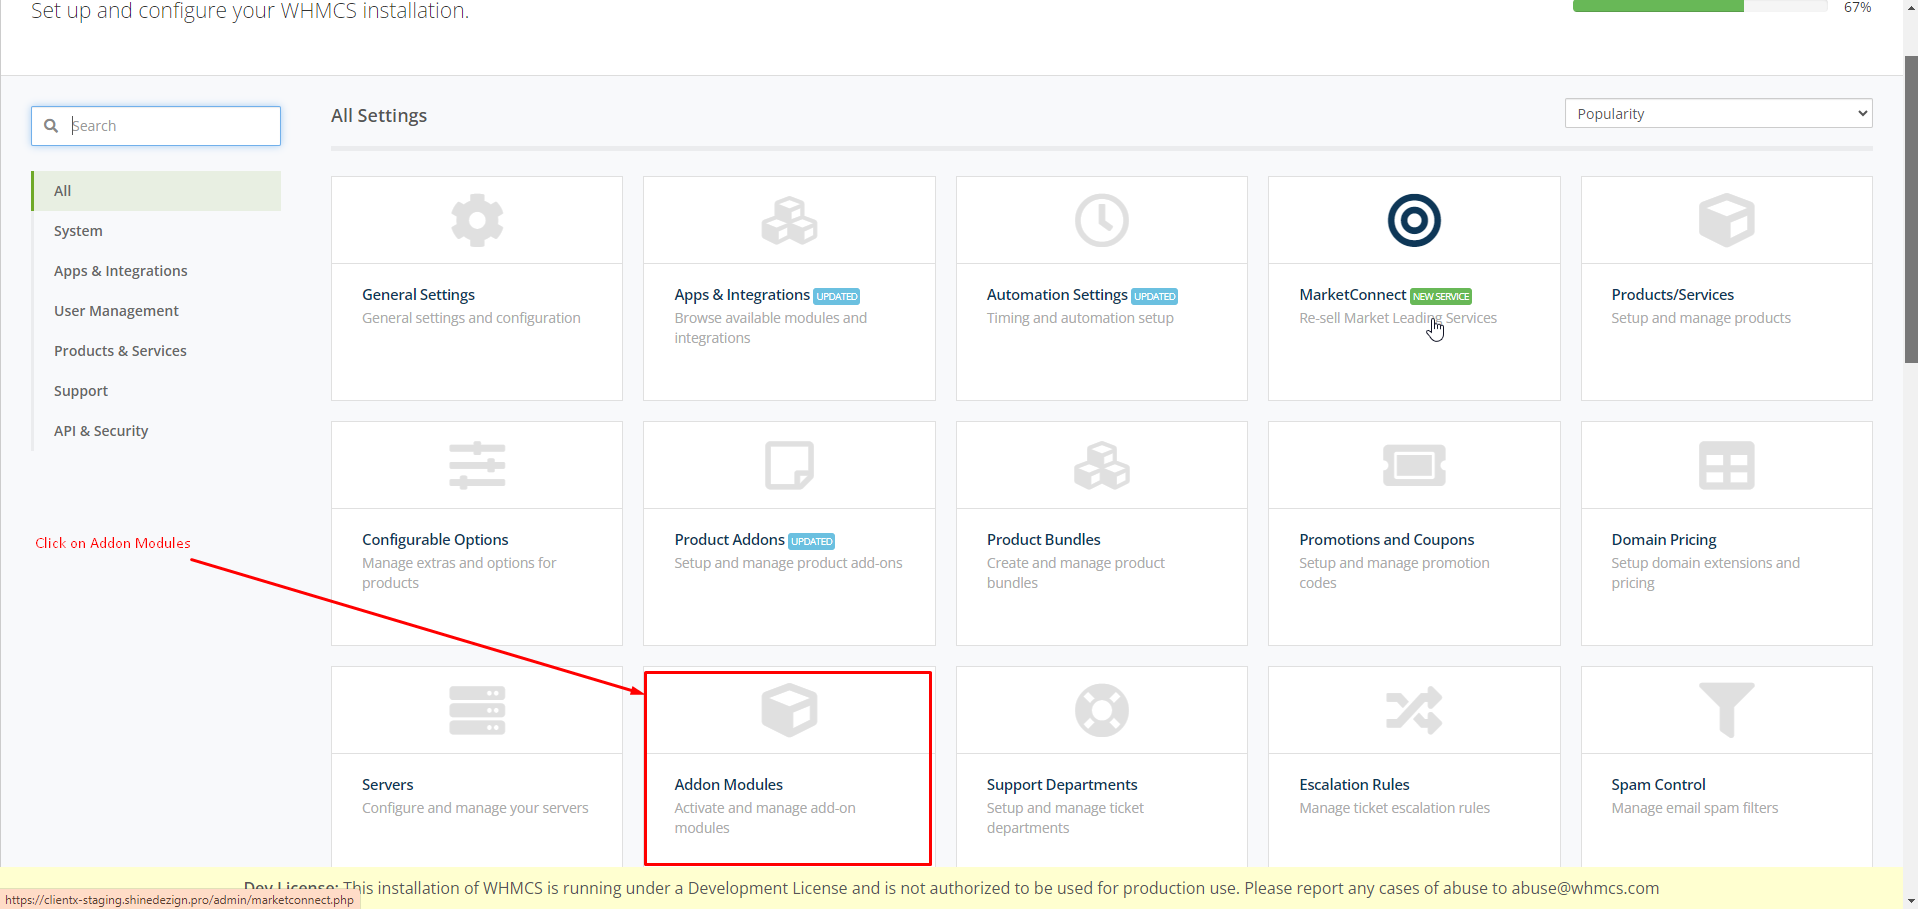
step :- 26 Here you will see the hostx addon module.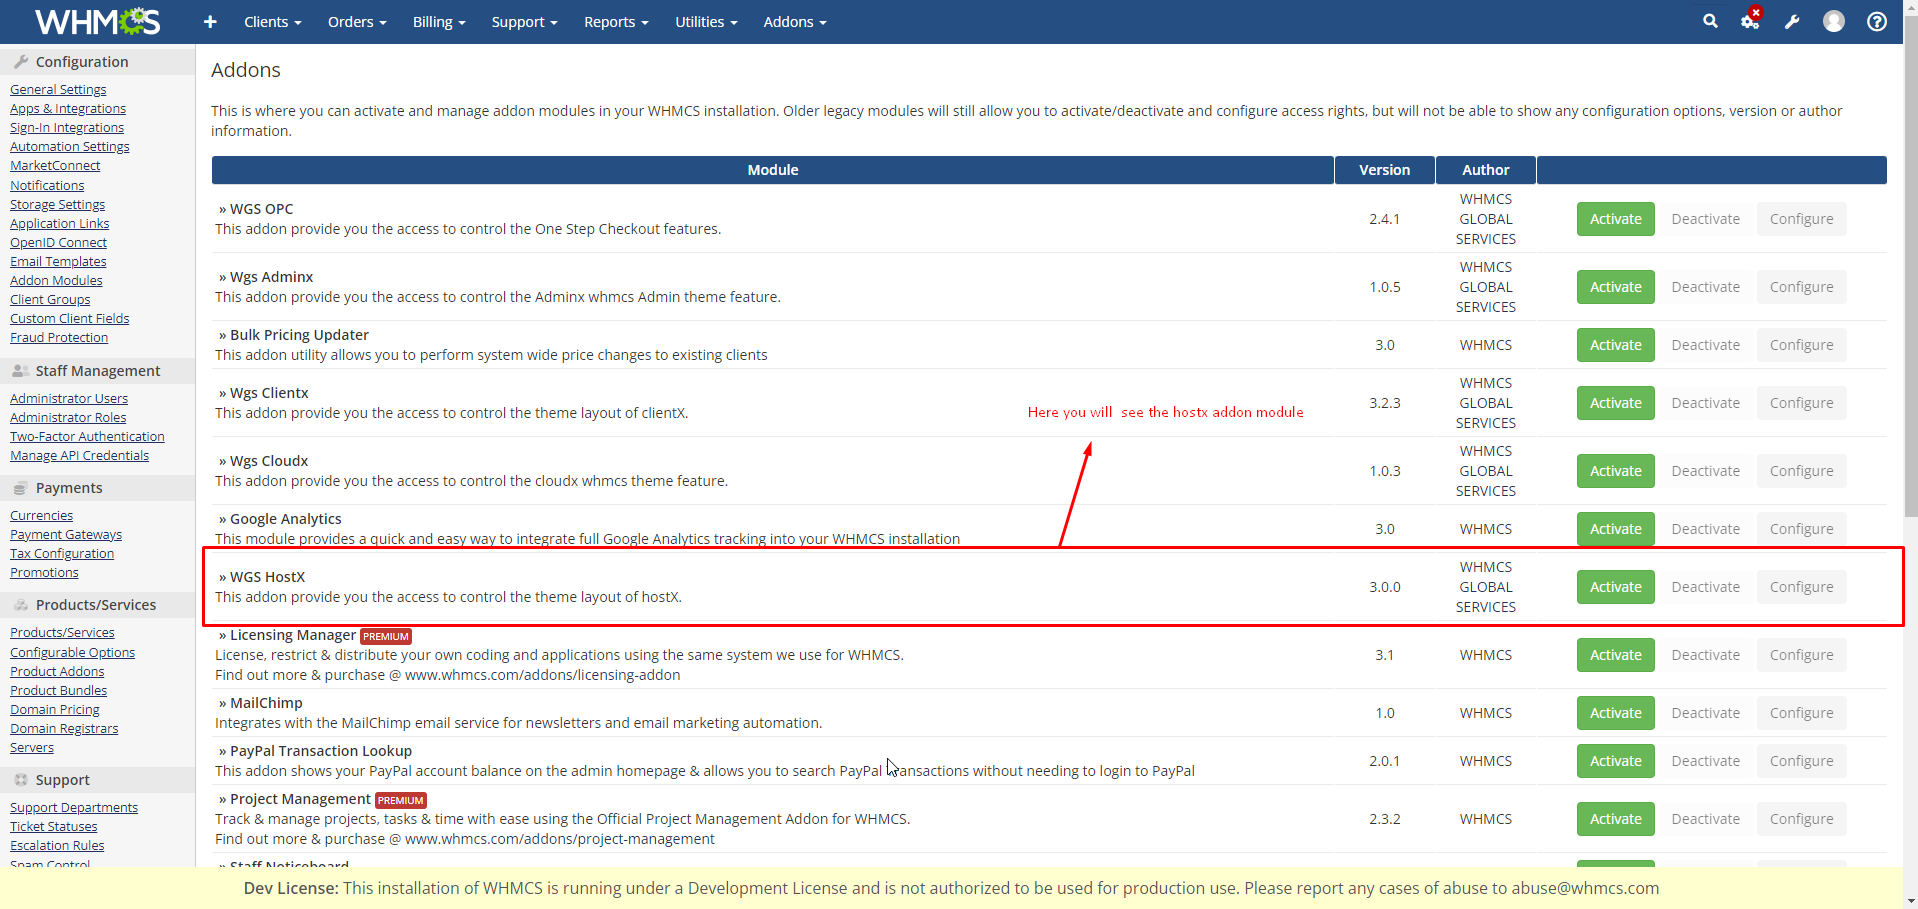
step :- 27 Click on activate button.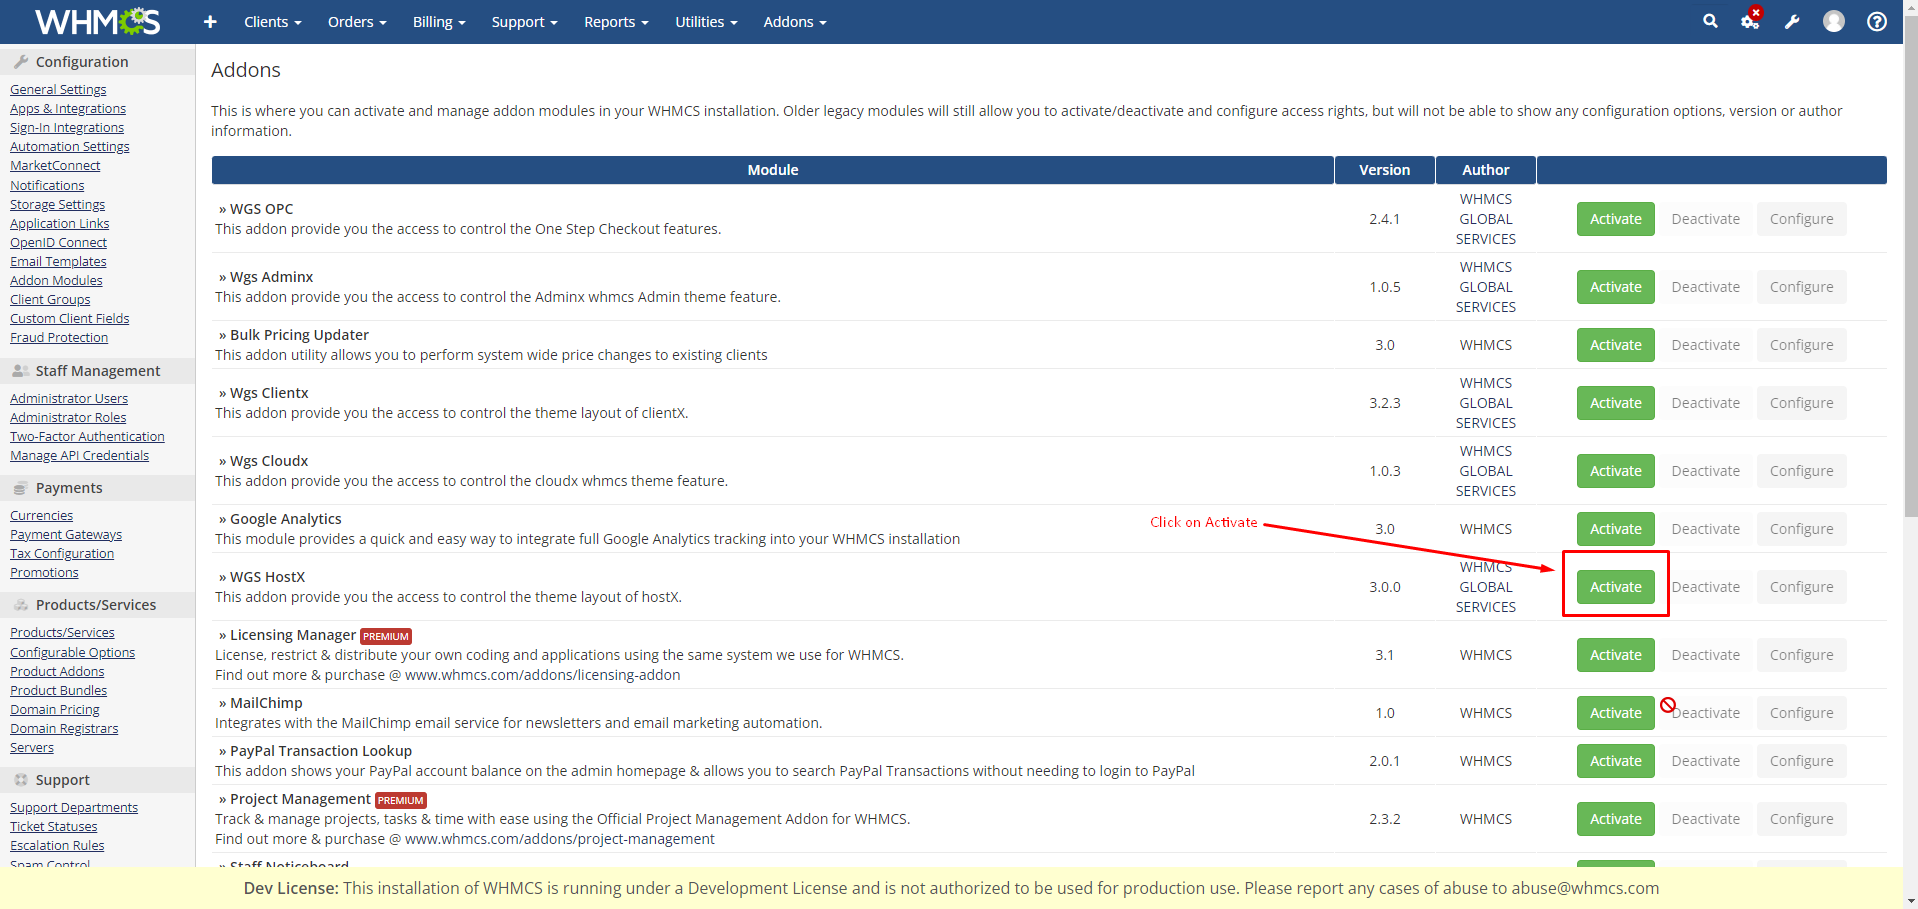
step :- 28 After clicking on activate button now click on configure button.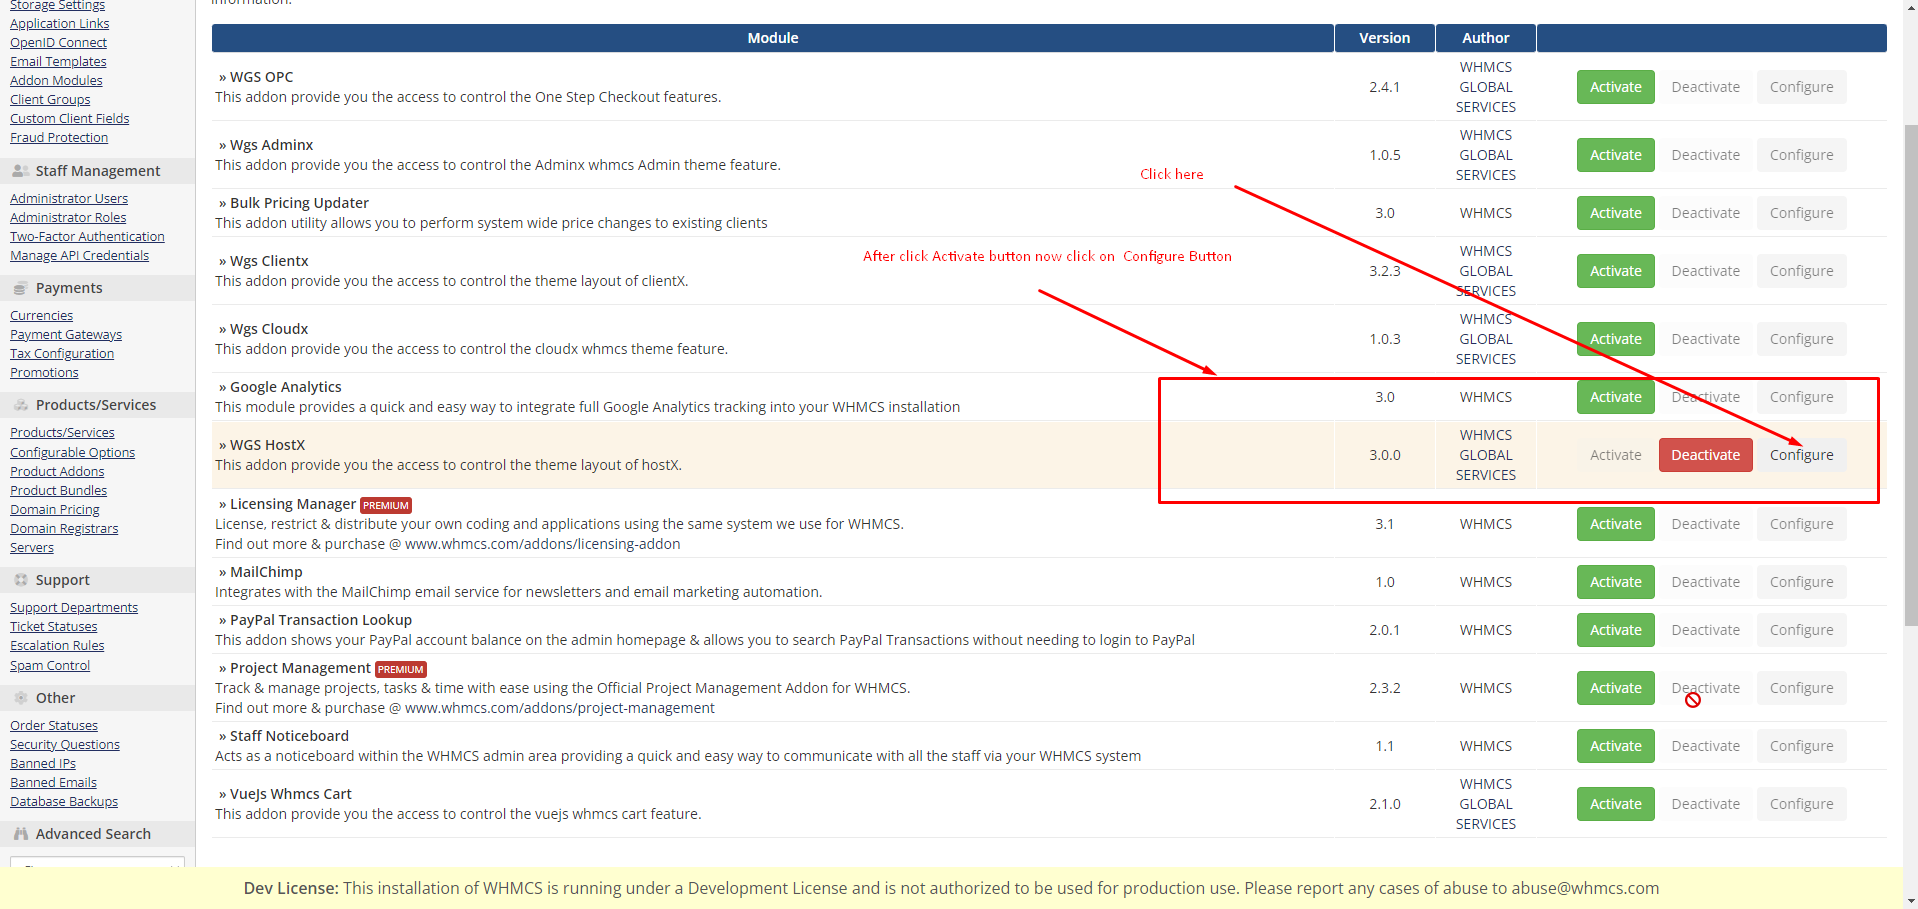
step :- 29 A) Now put license key here you can find the license key over your service page.
B) Give access control to administrator accordingly so that admin can manage settings in the theme.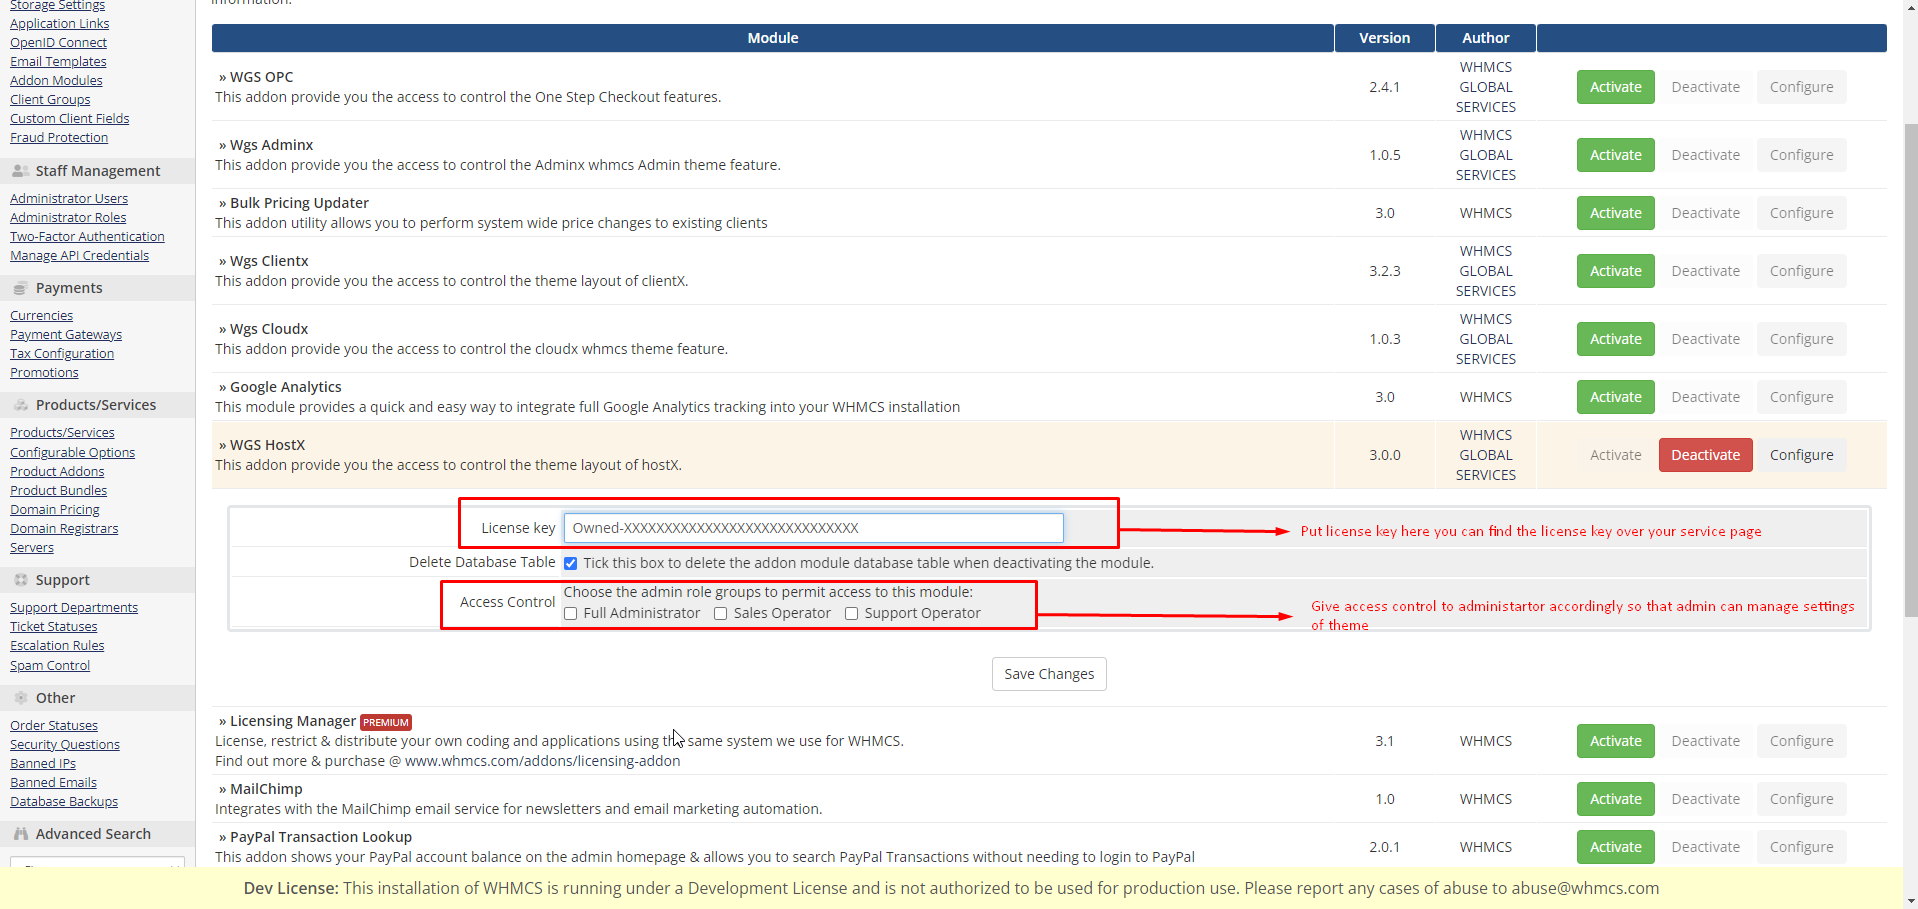
step :- 30 After checking administrator click on the save changes.
step :- 31 Now you can see addon is configure and come in the list.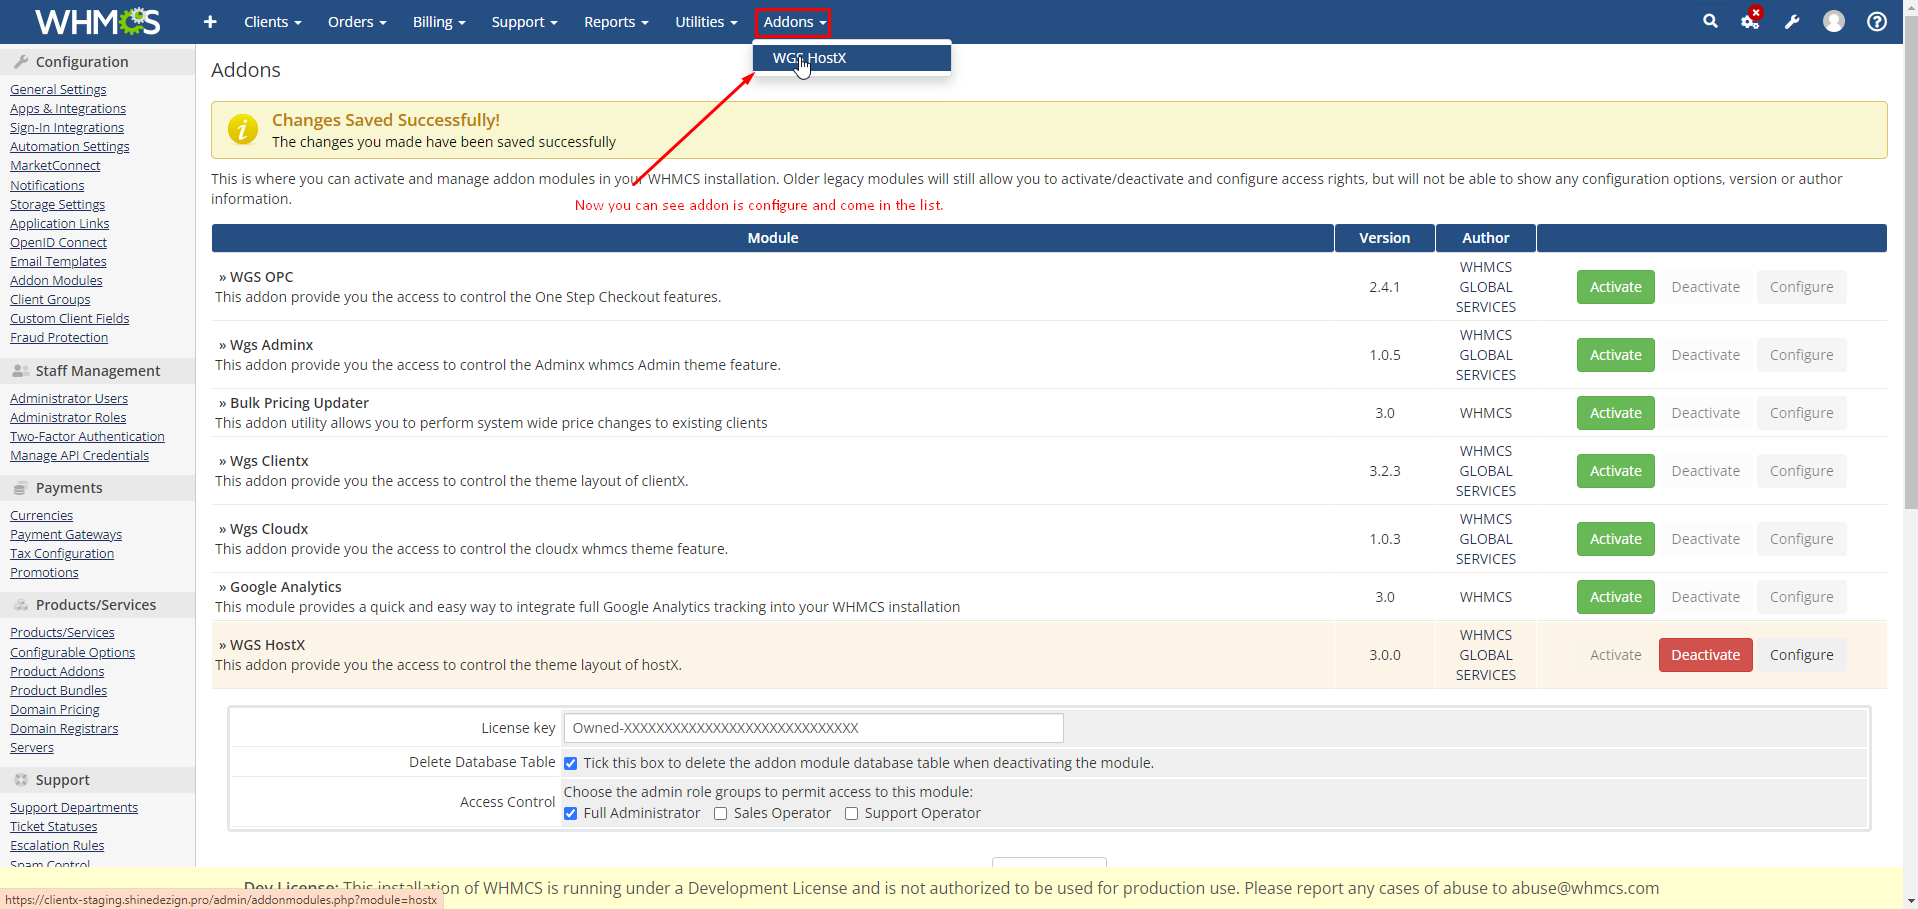
step :-32 Click here to open settings.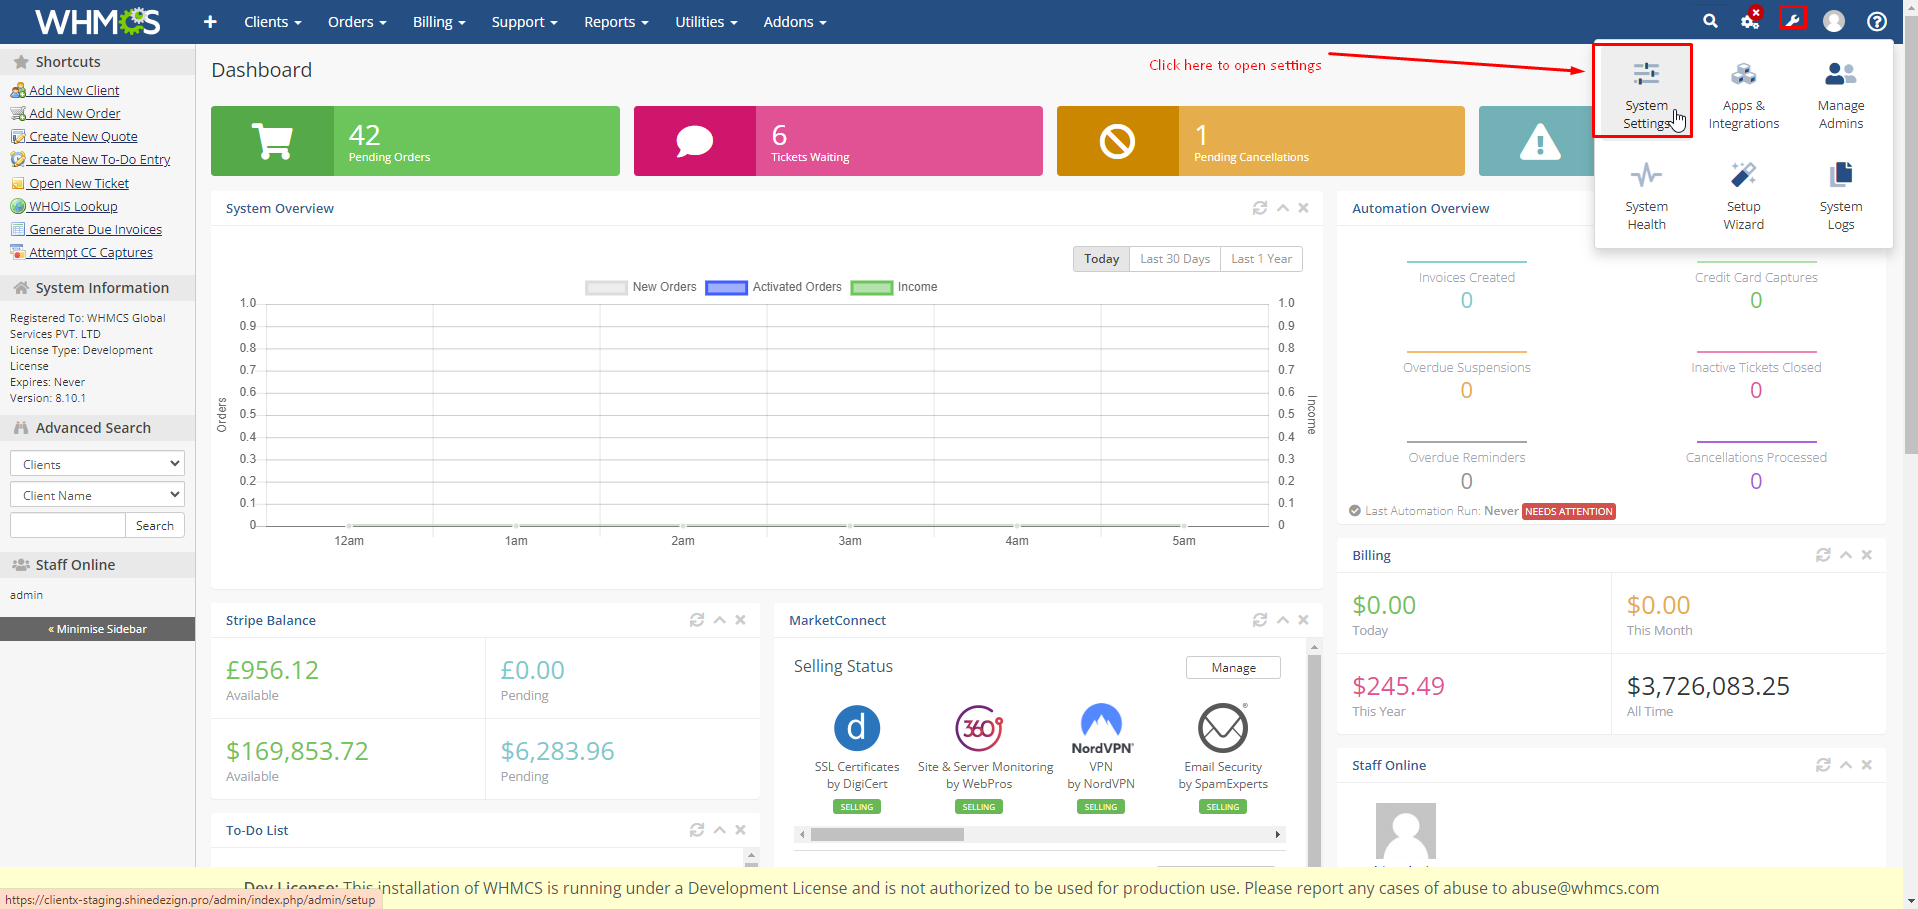
step :-33 Addon module is configured now lets configure the template.
step:- 34 click on the general settings.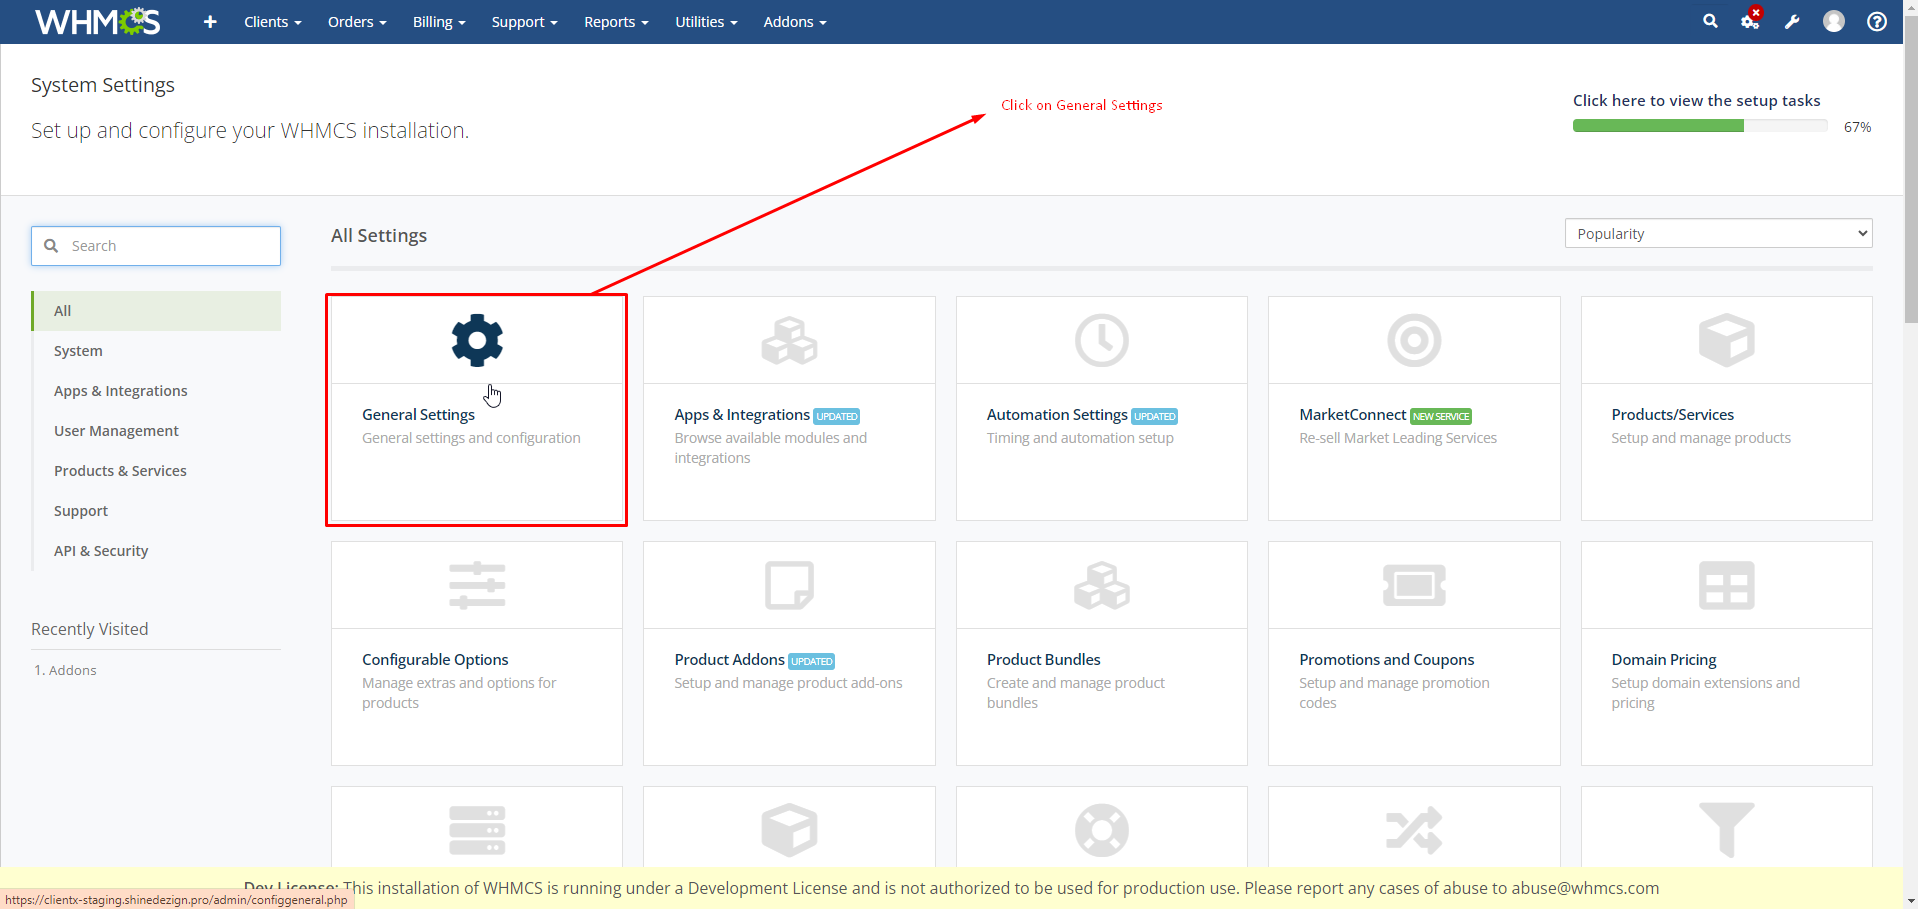
step:- 35 Open Following dropdown to select the theme.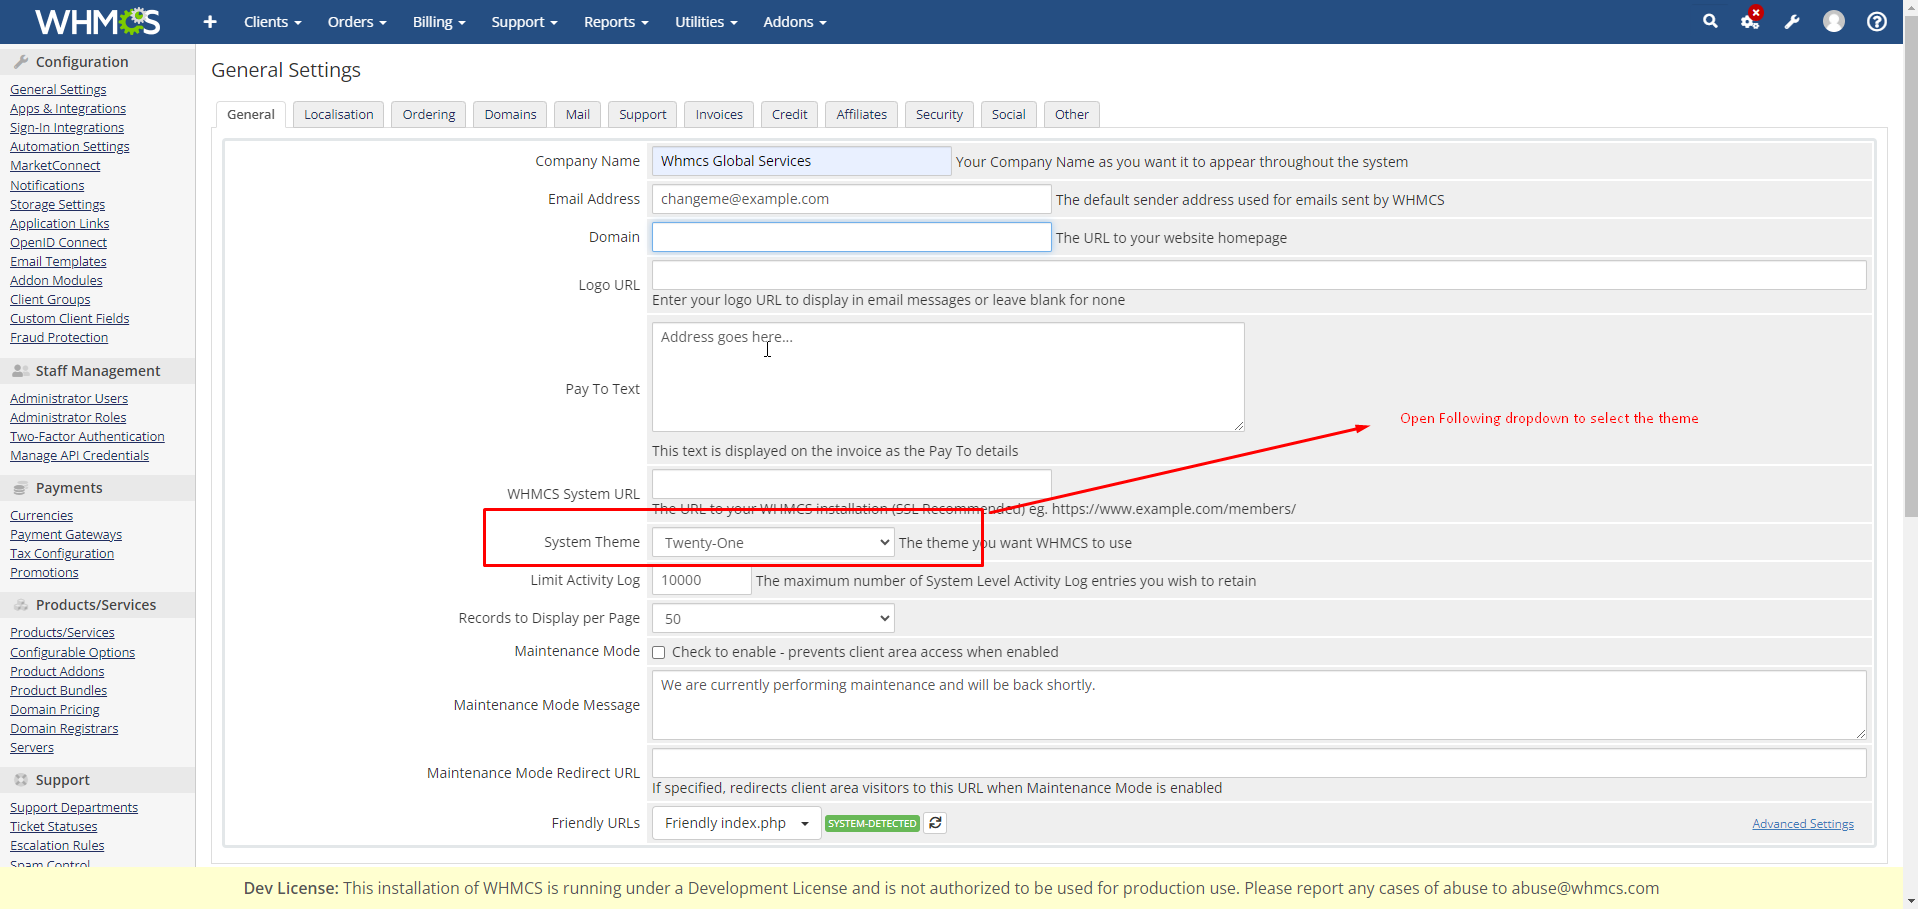
step:- 36 Select Hostx_child from drop down.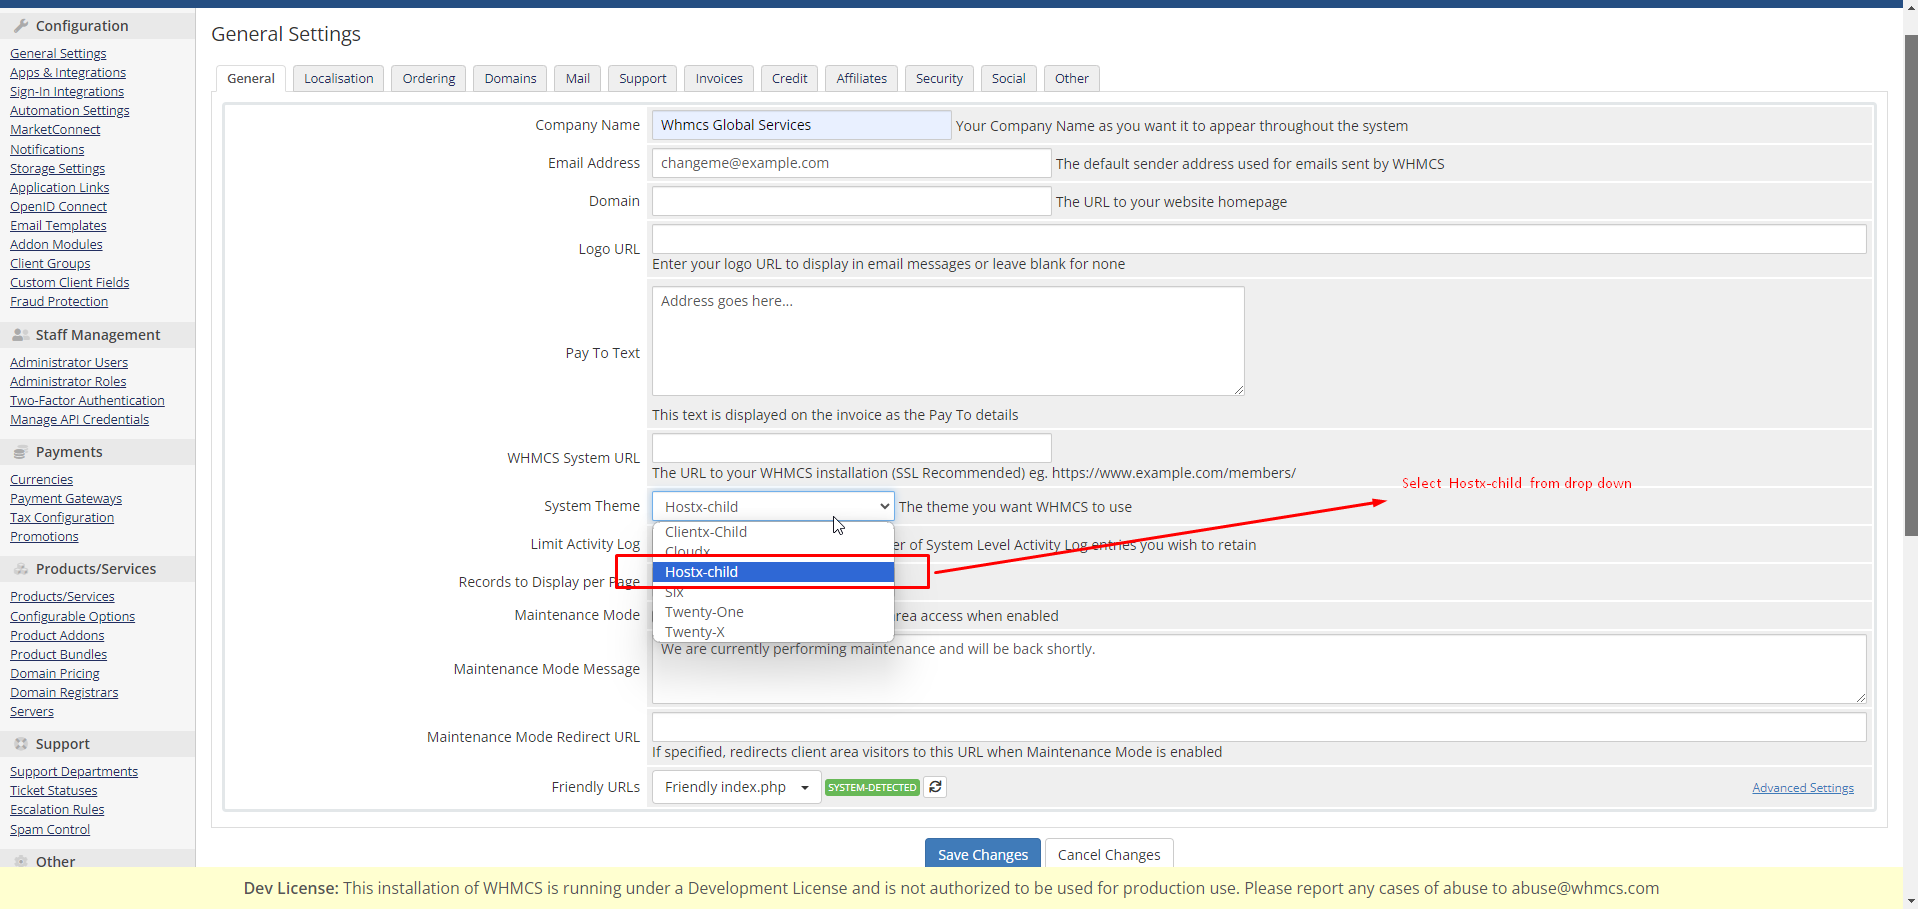
step:- 37 After selecting theme click on save changes so that theme will be activated as default.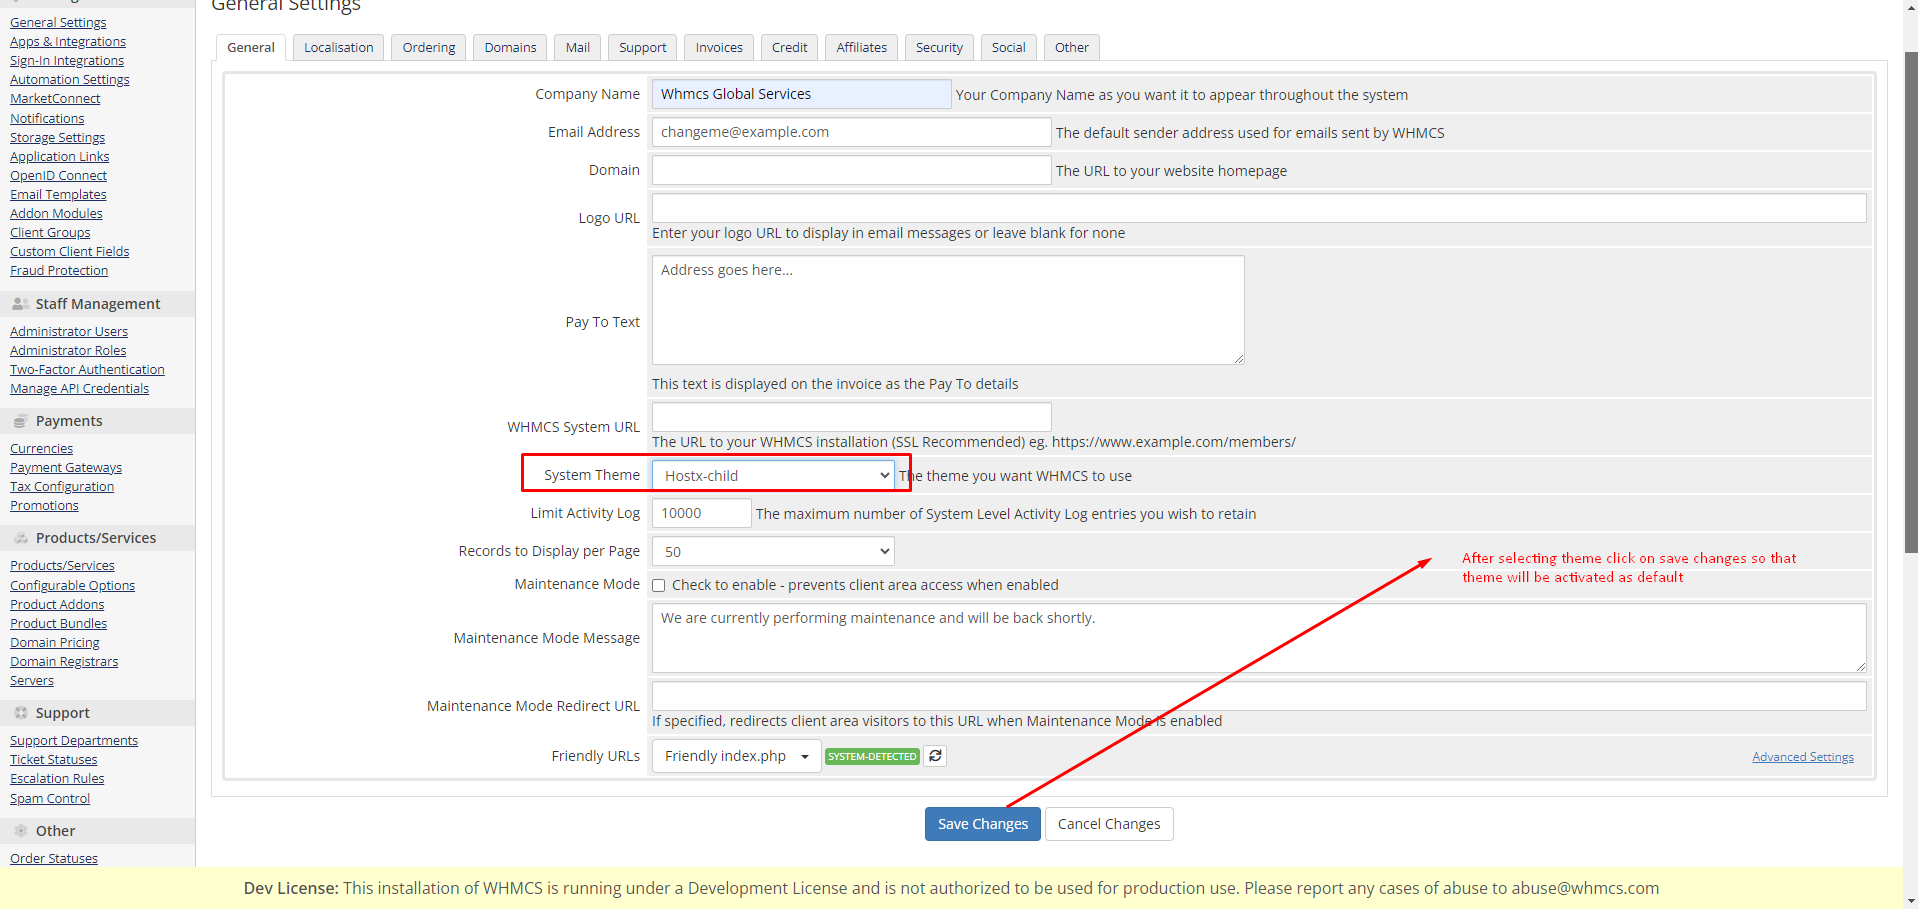
step:- 31 Click on System setting to step order form.
step:- 32 Now Template is activated lets activate the Hostx Cart.
step:- 33 Click on the general settings.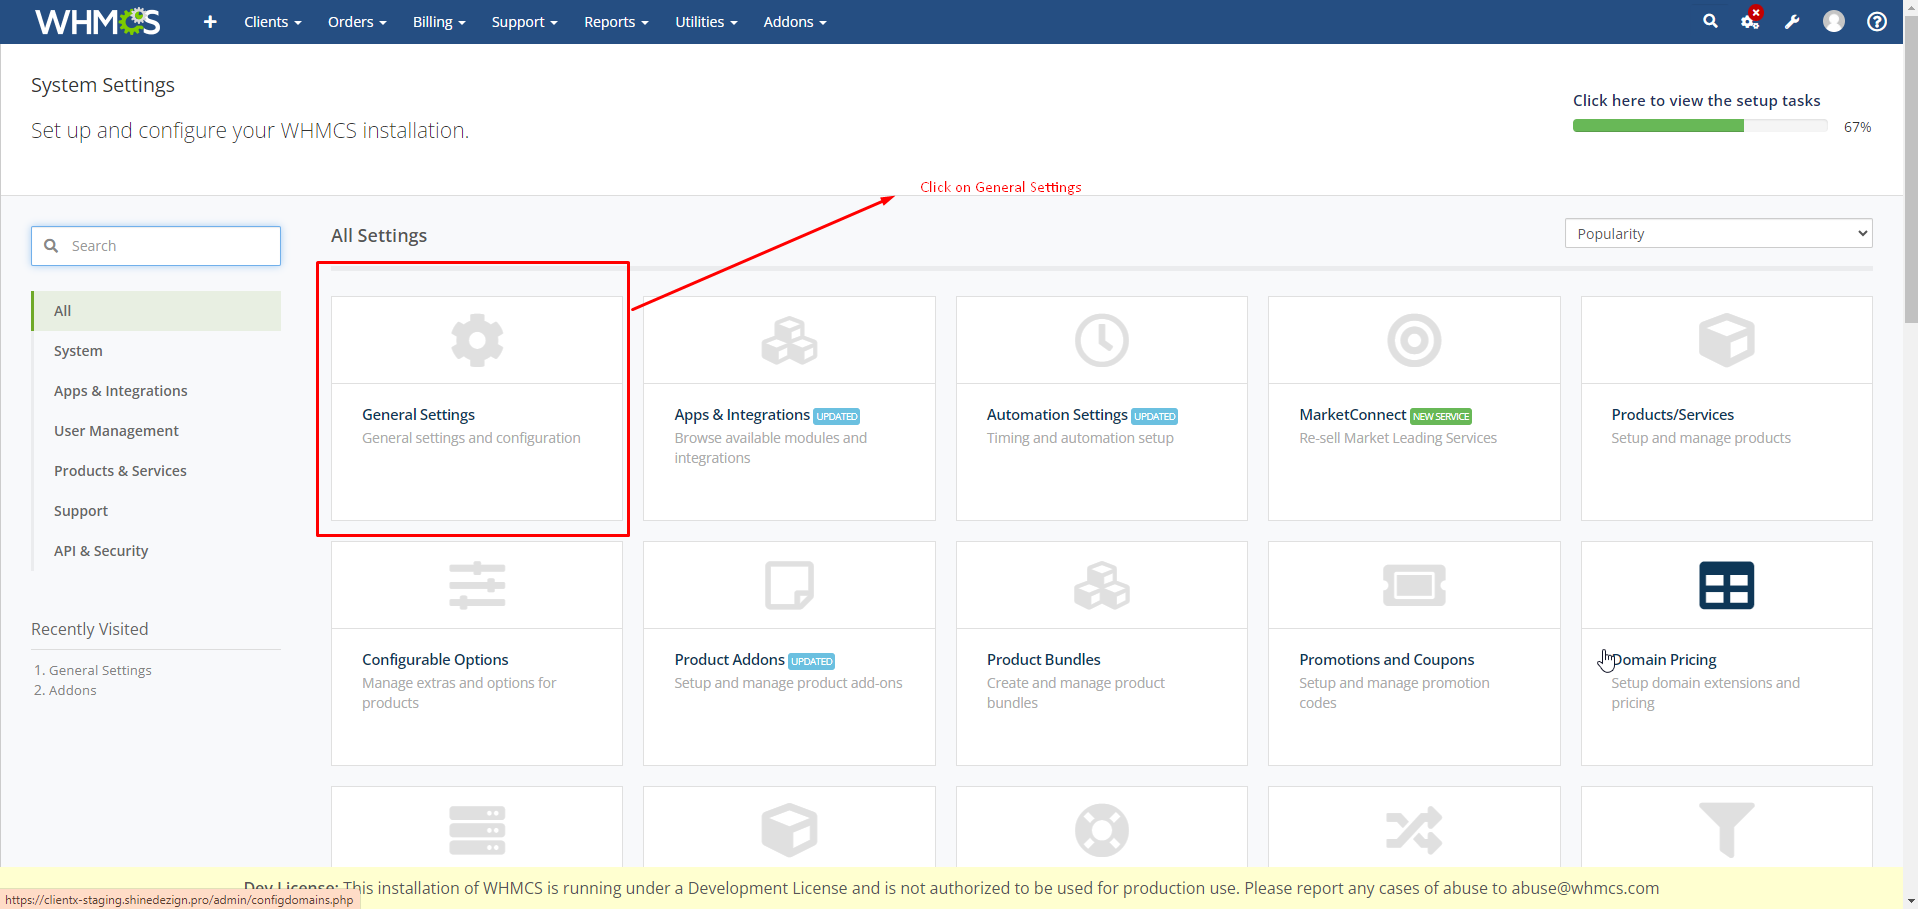
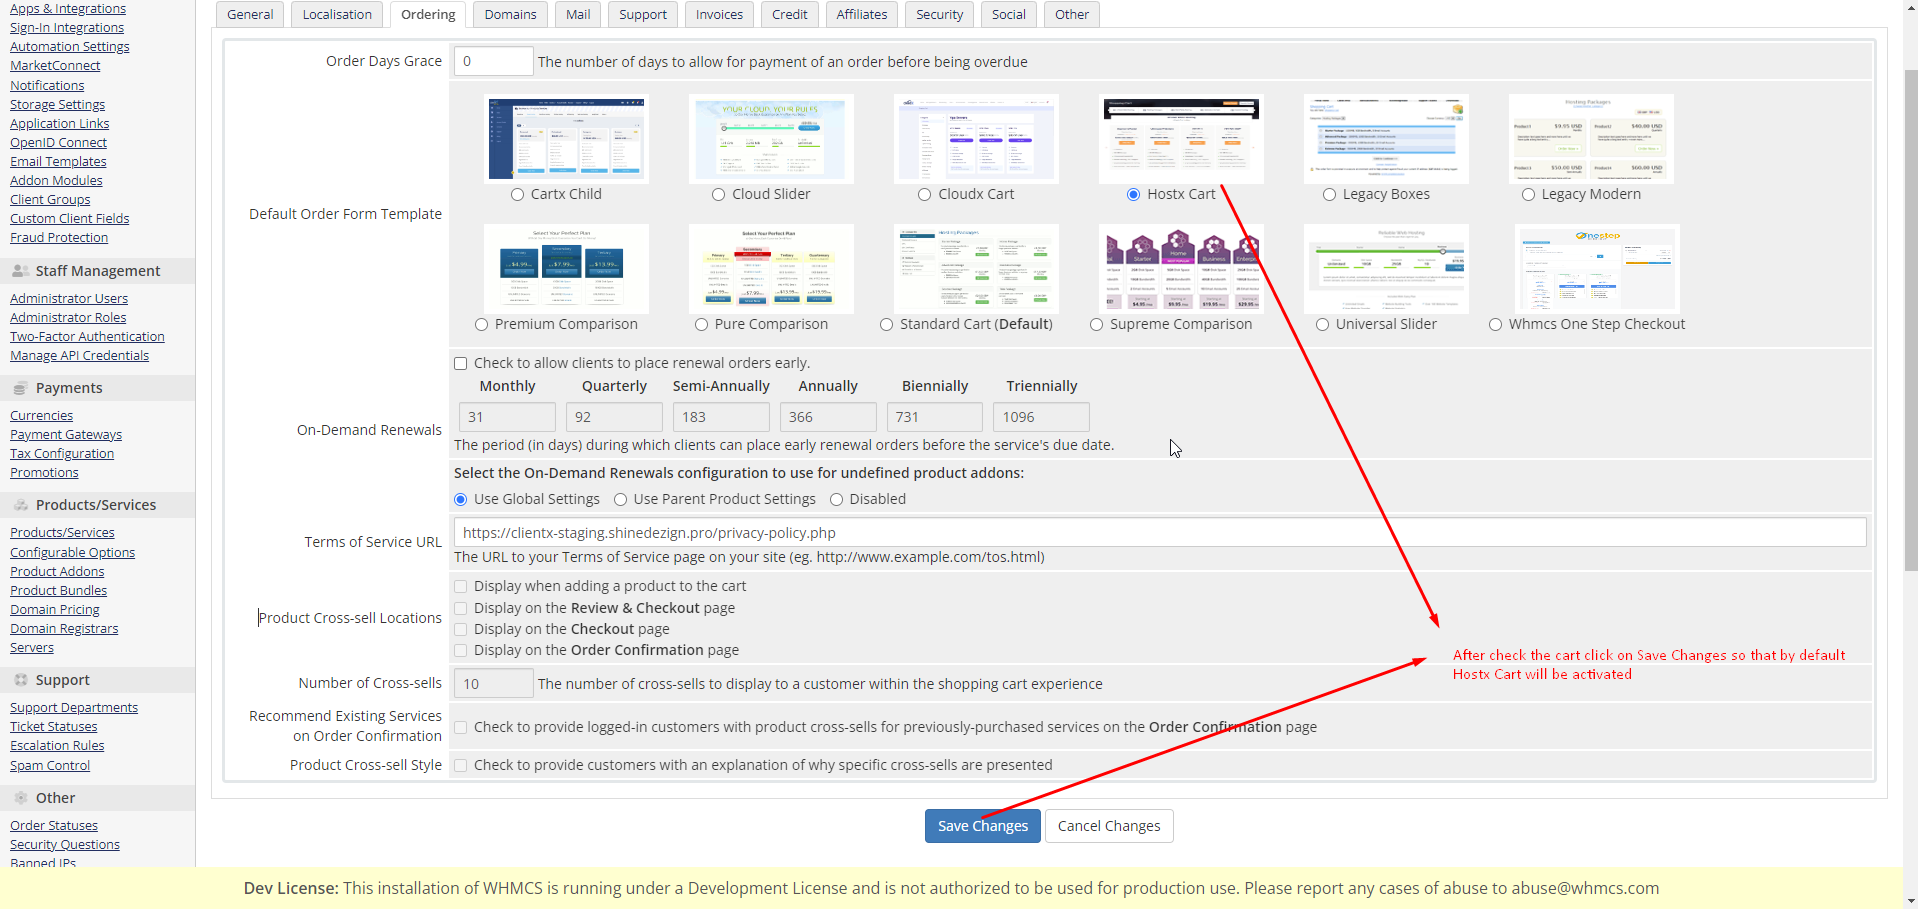
step:- 34 Click on the ordering tab.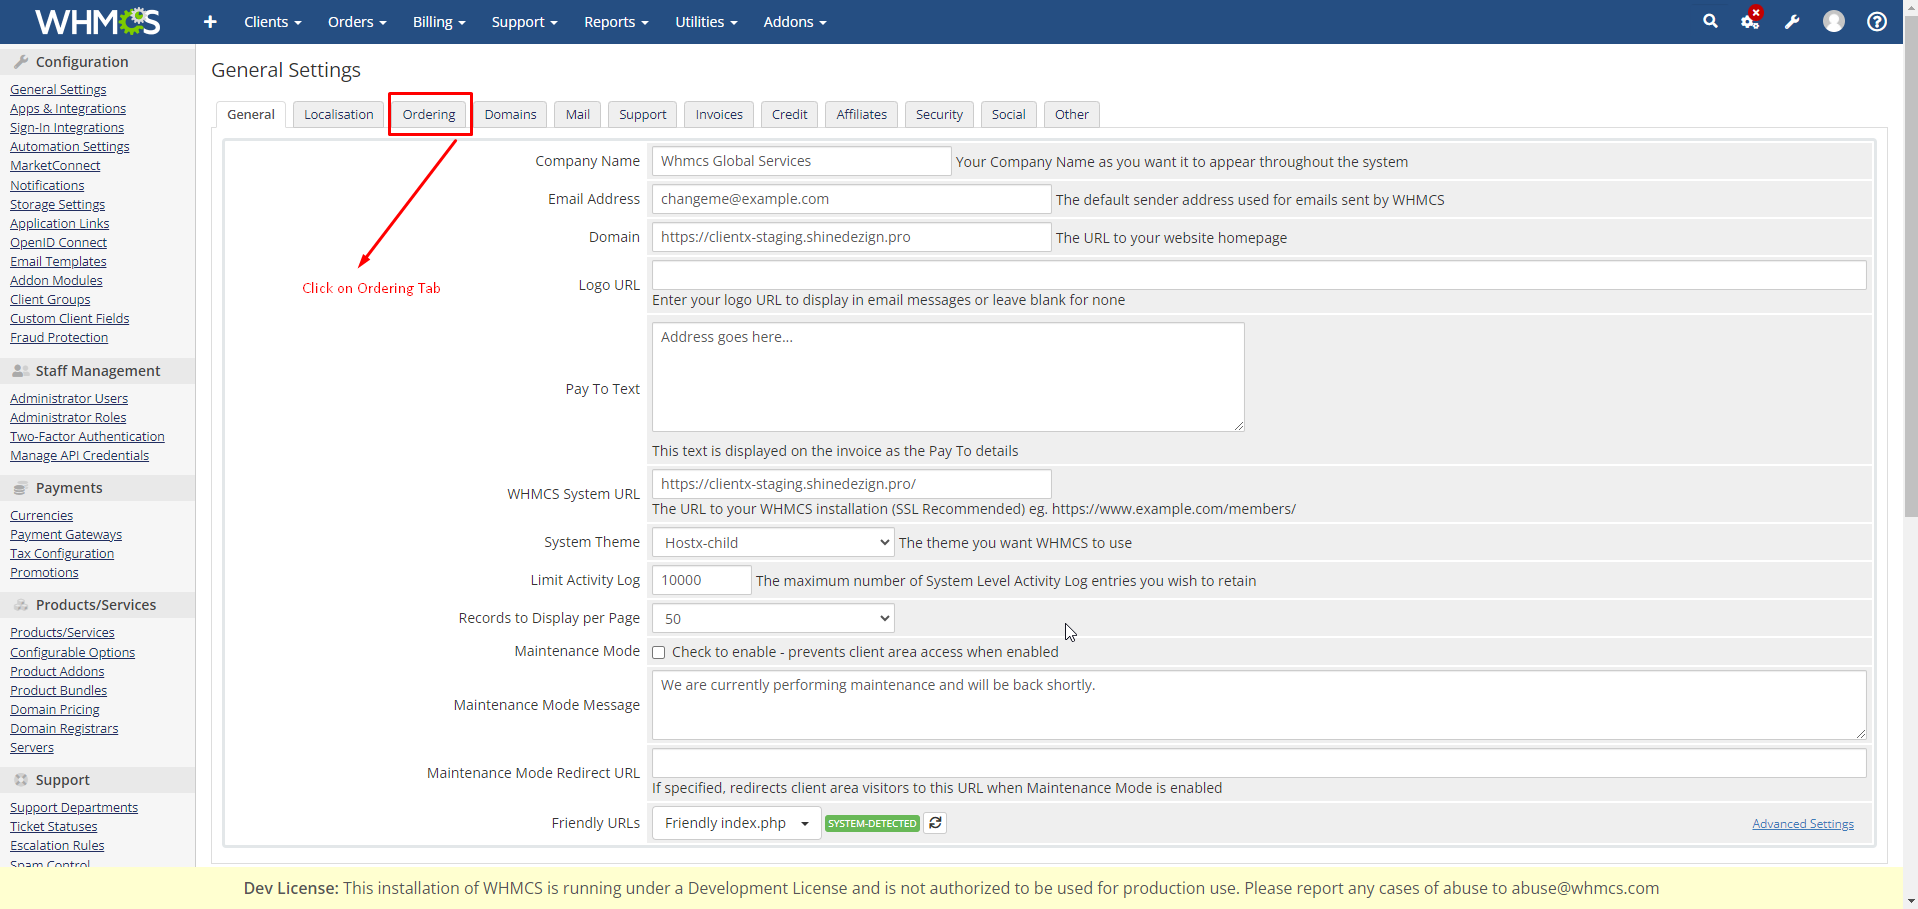
step:- 35 Click on this cart to activate the hostx cart.
step :- 35 After check the cart click on Save Changes so that by default Hostx Cart will be activated.