Step 1:- How to add more disk.
Step:- Disks at the backend.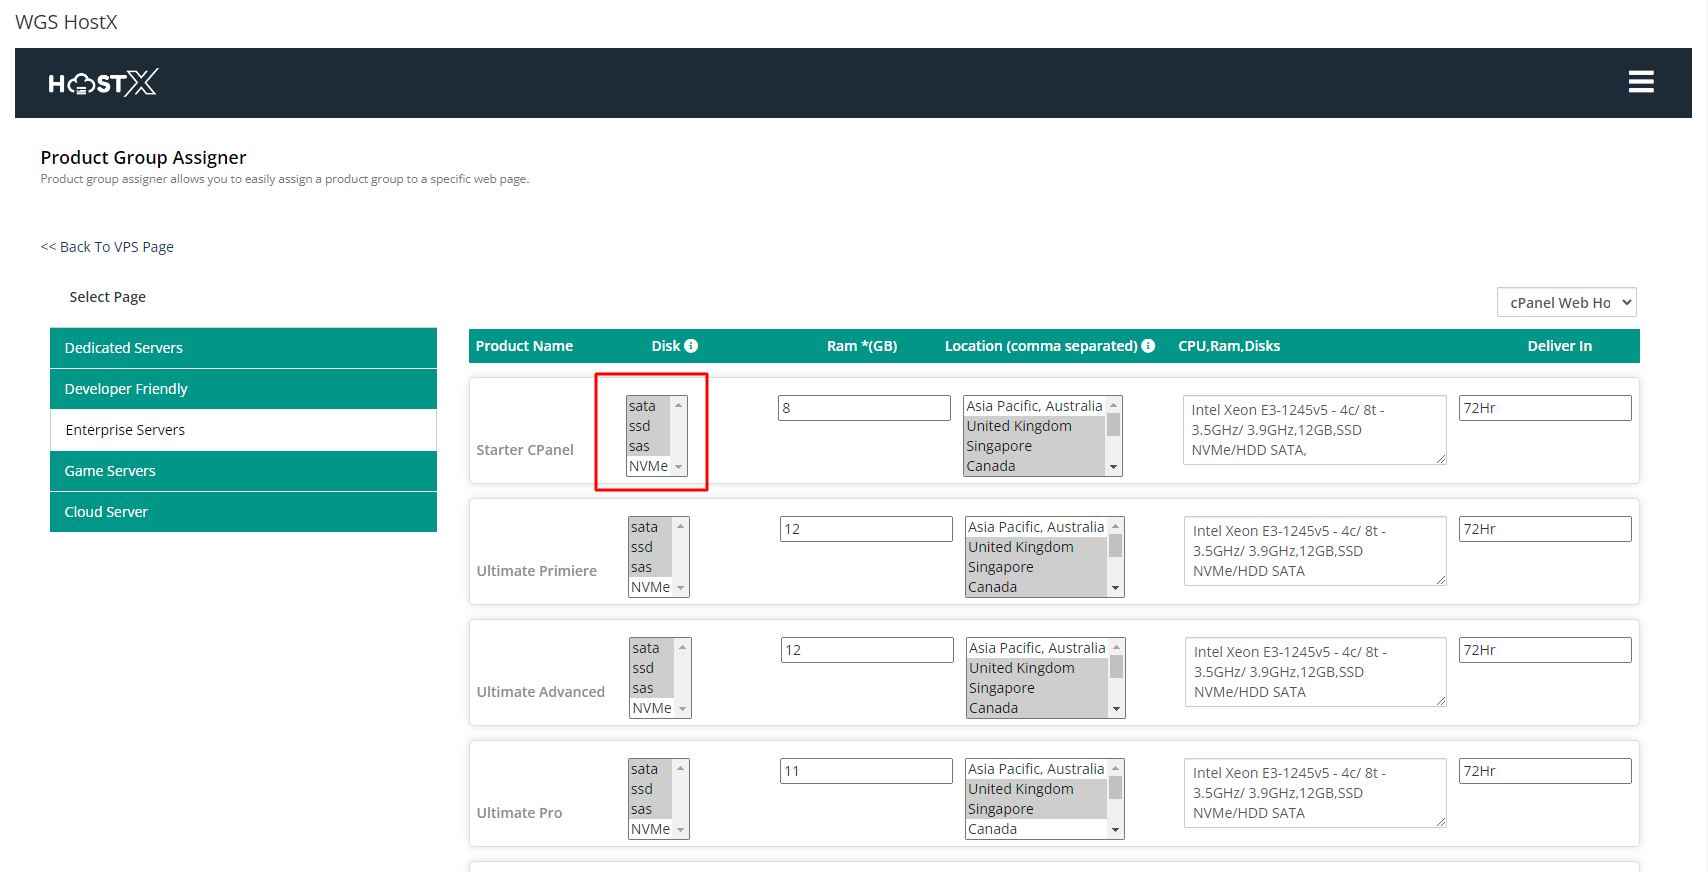
Step 2:- Got to the following path in the server modules/addons/hostx/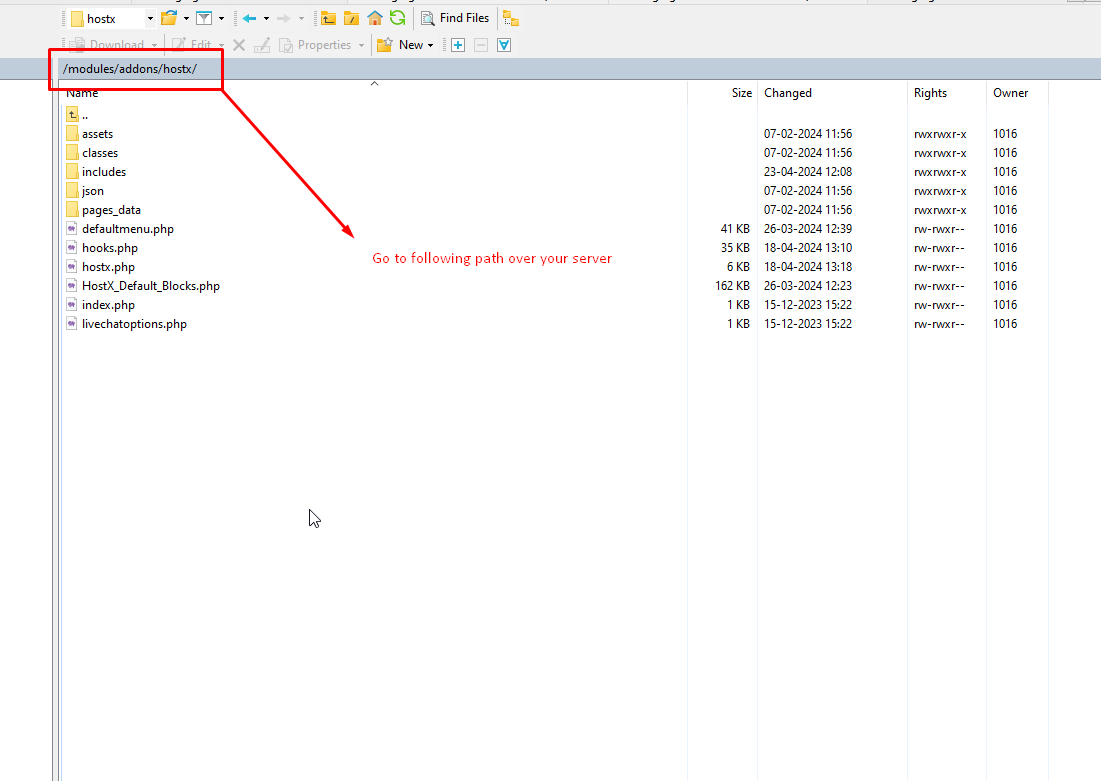
Step 3:- Open the json folder shown in the screenshot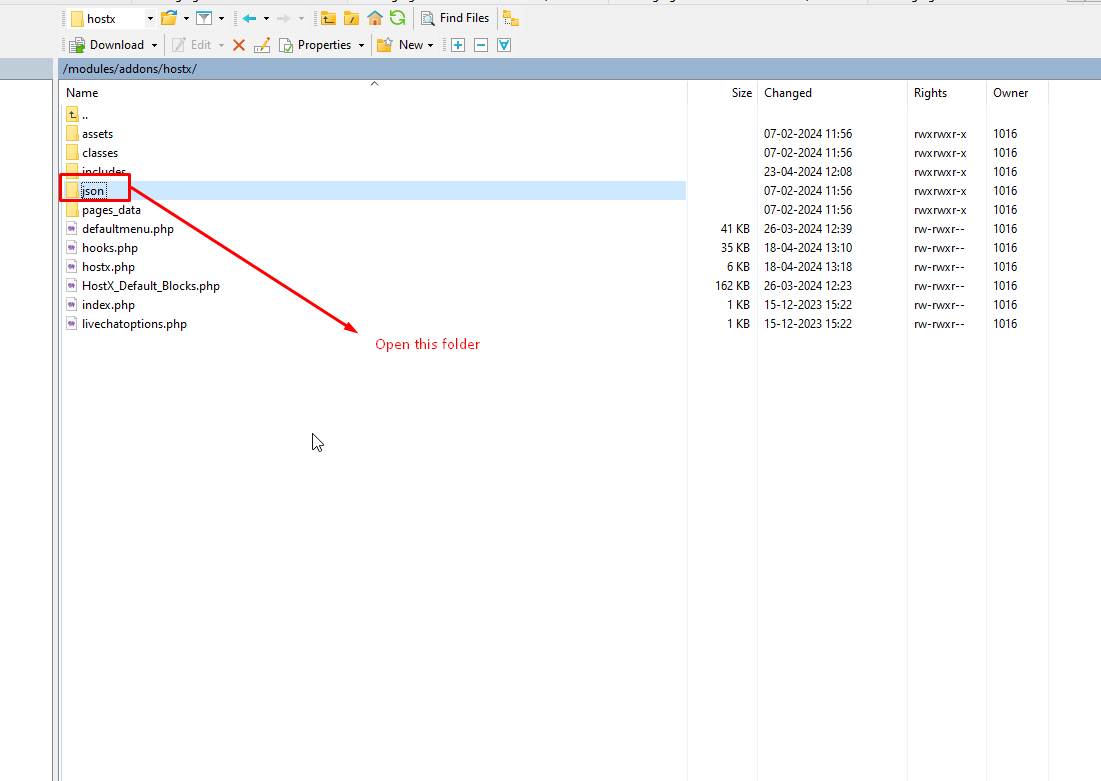
Step 4:- Go to the overrides folder.
Step 5:- Now remove .new after then the file name will be list.extradedicatedsetting.json .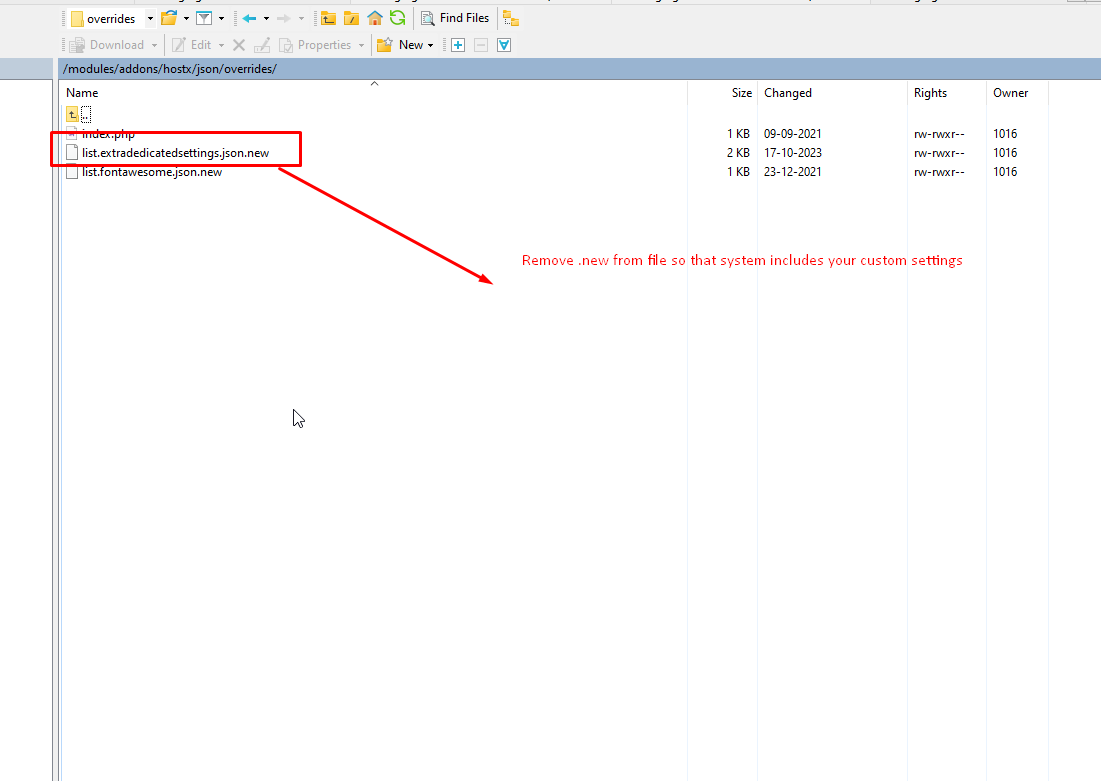
Step 6:- After removing your file will be like now edit the file.
Step 7:- edit list.extradedicatedsettings.json following file.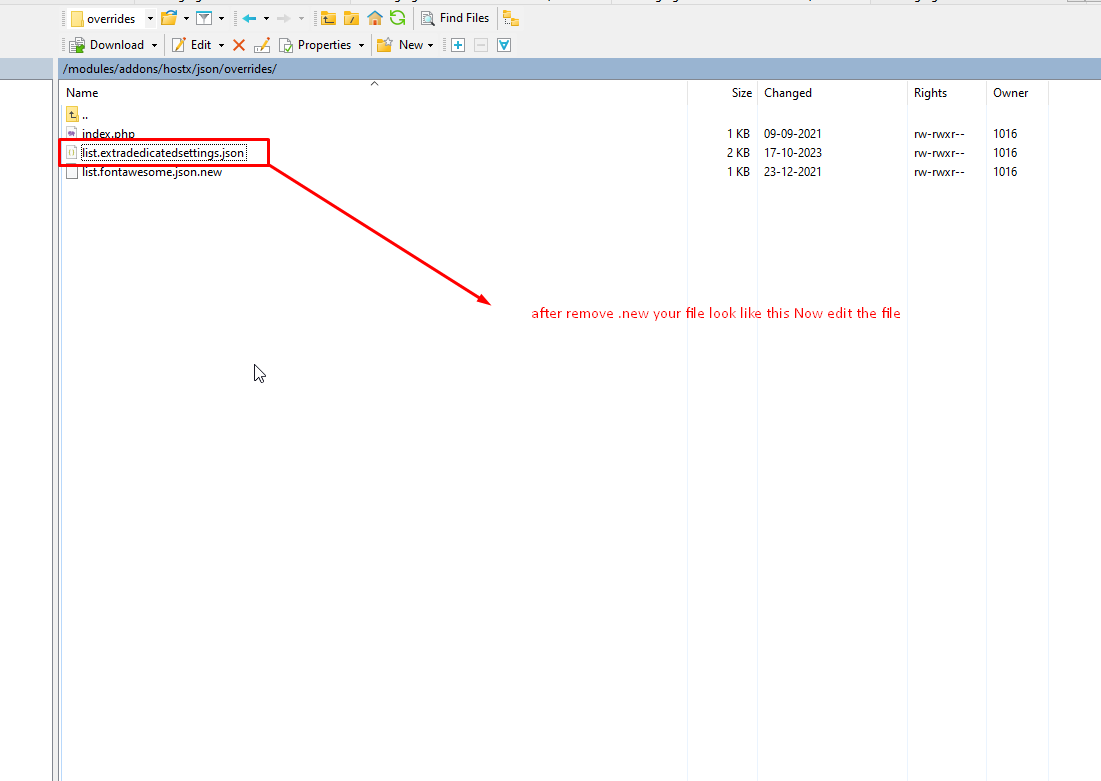
Step 8:- Copy the line highlight below and paste under same line.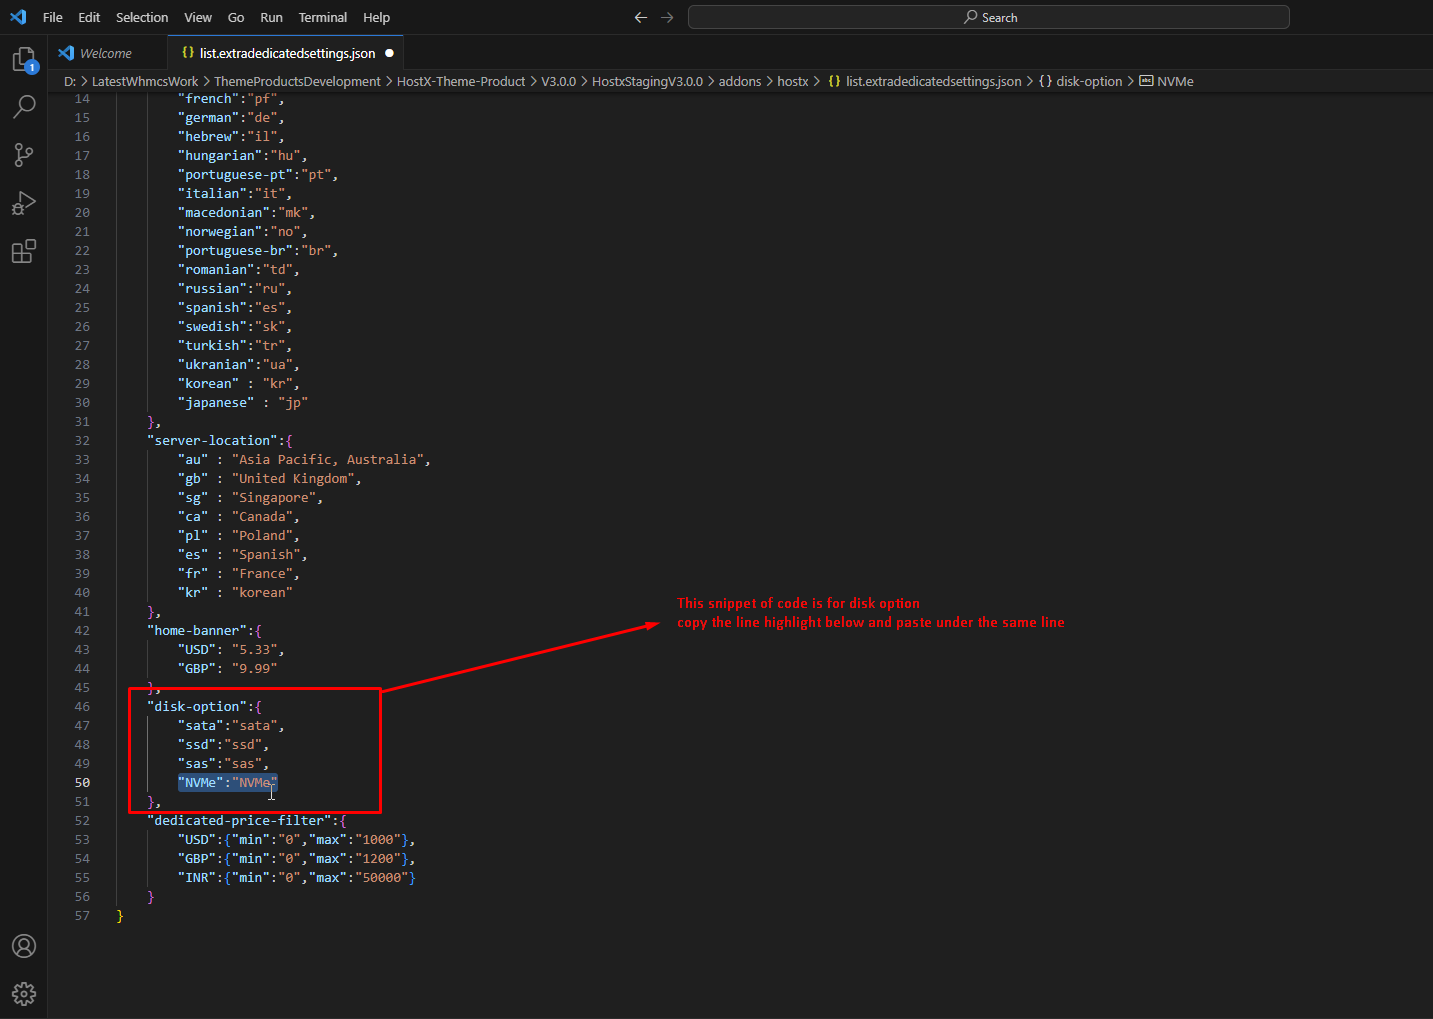
Step 9:-After pasting make sure you have added the , to the above line so that format can be changed into json format.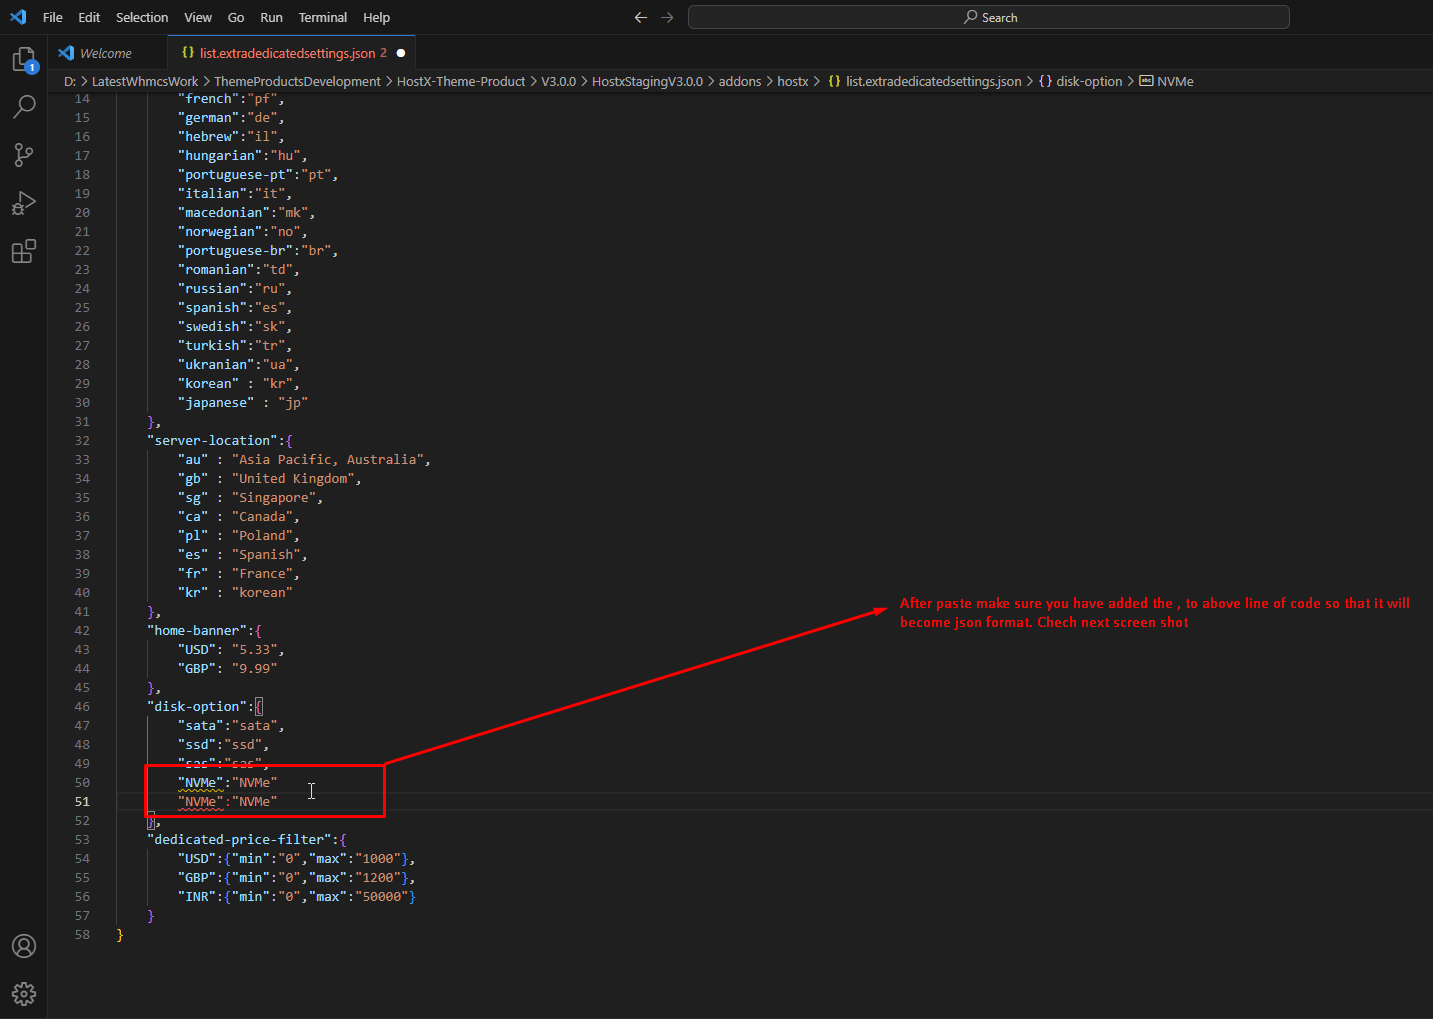
Step 10:-Now it is proper json you can change the disk name accordingly.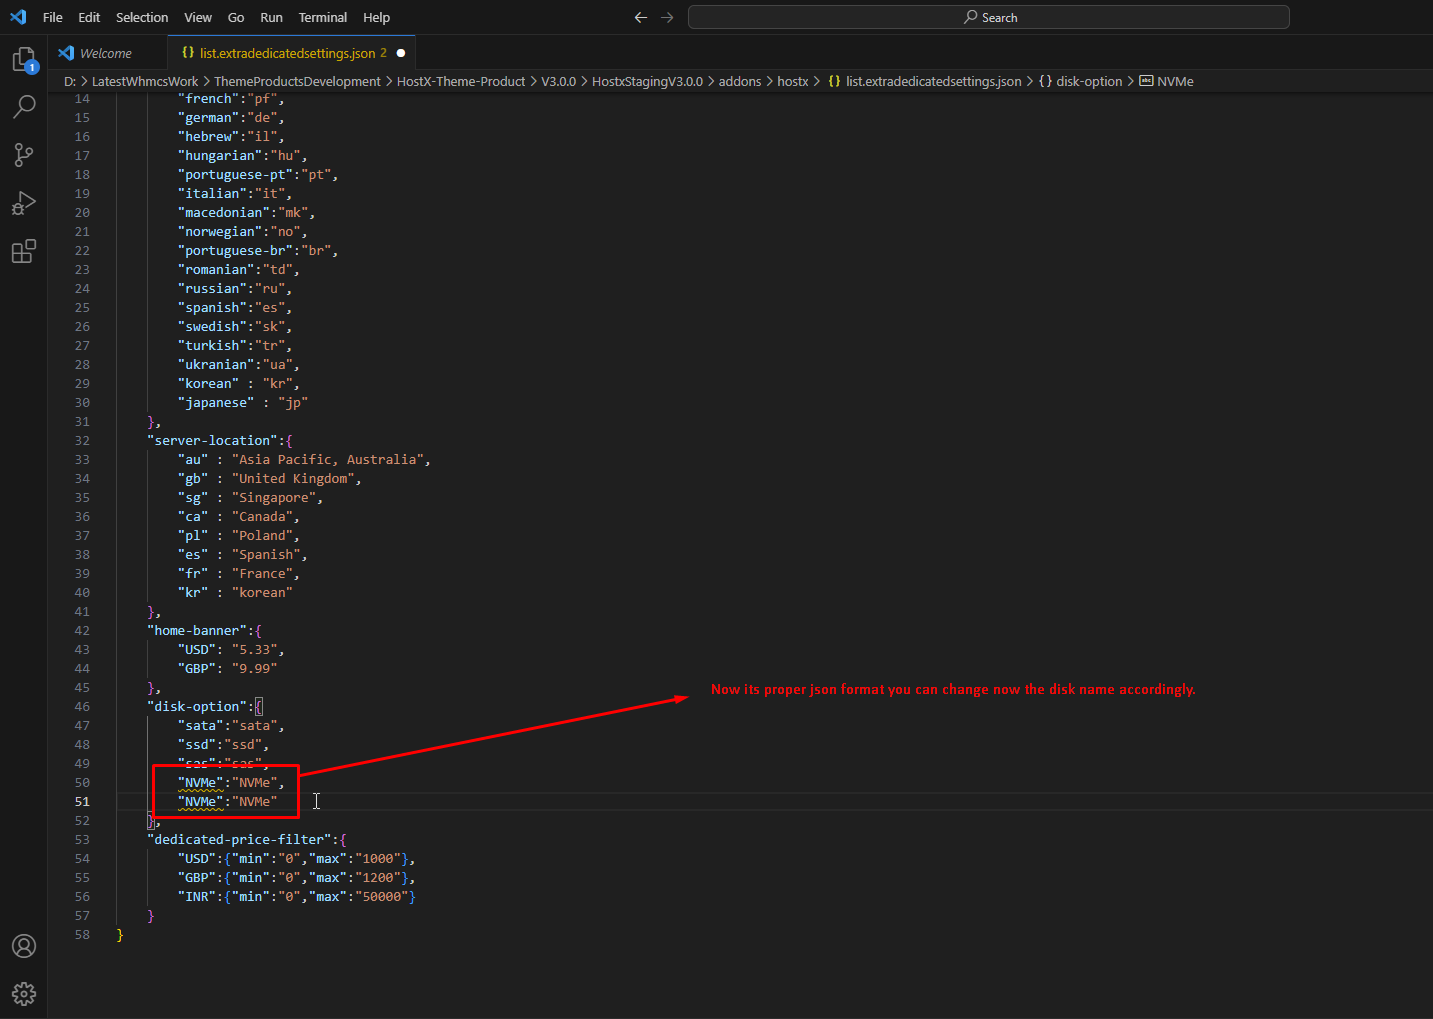
Step 11:- Now you can add the disk type.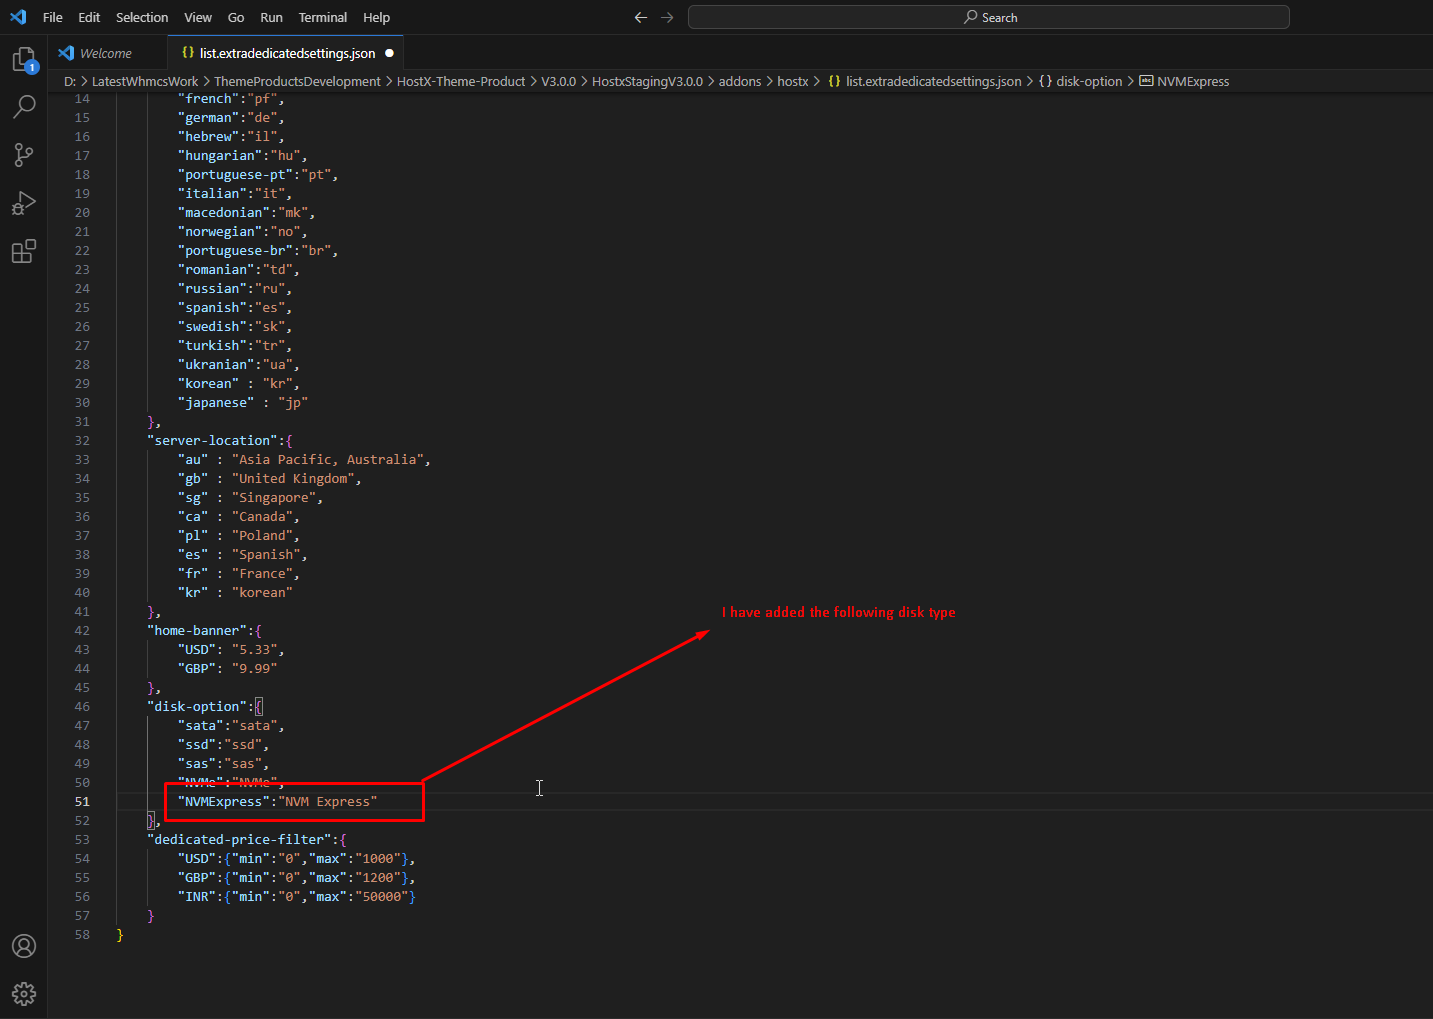
Please note :- The side value will not support any blank space or any special character it will cause the effect on the filter functionality.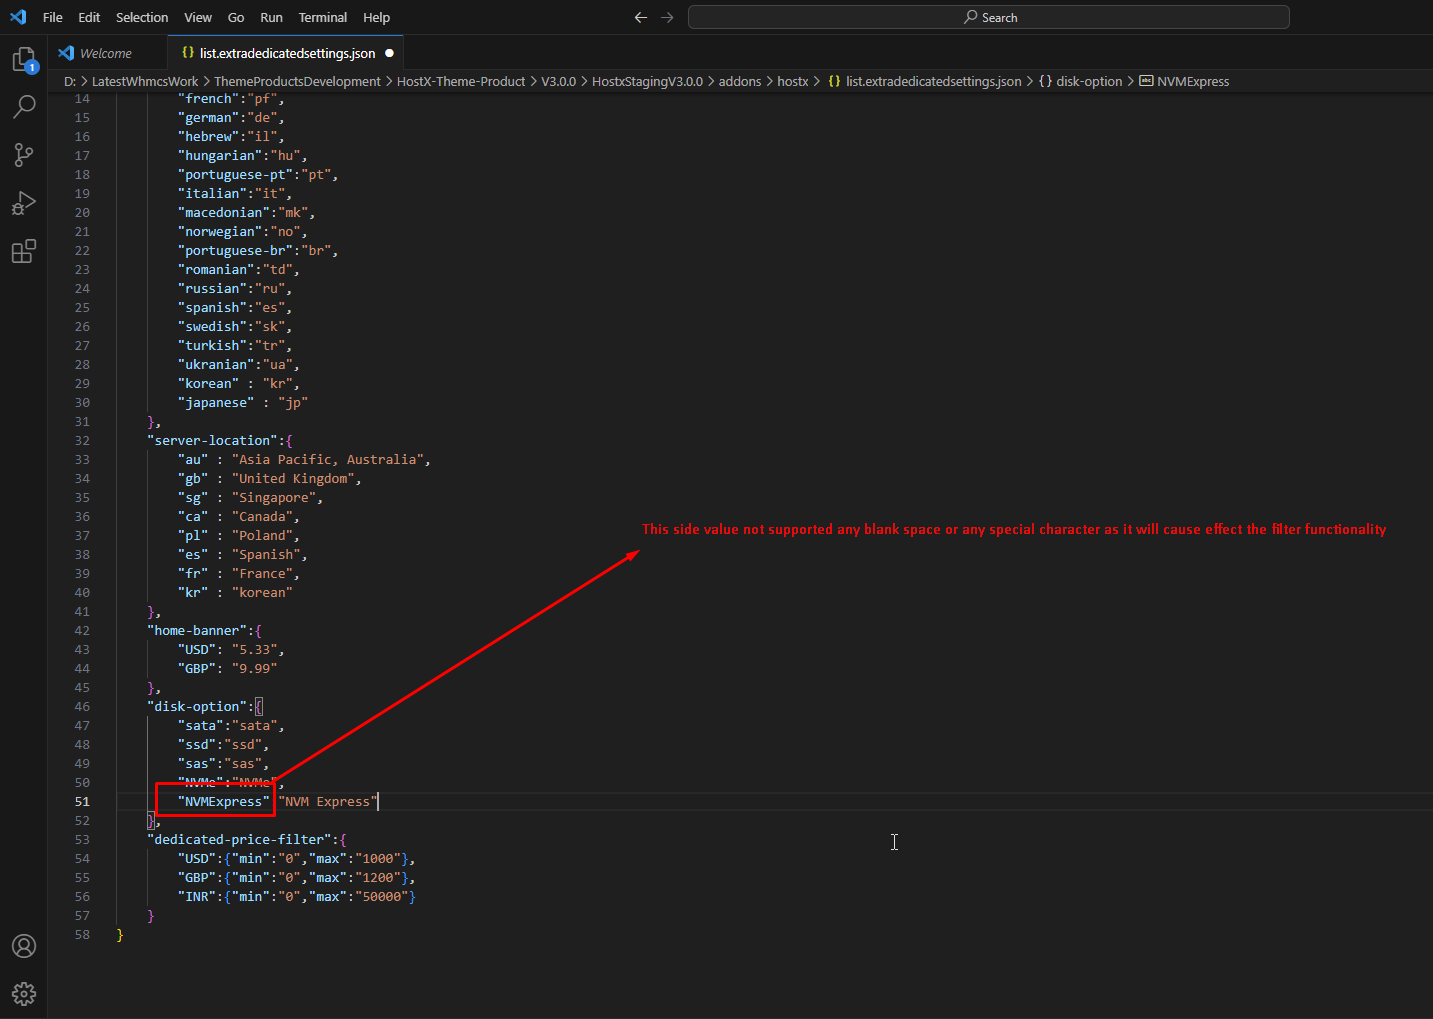
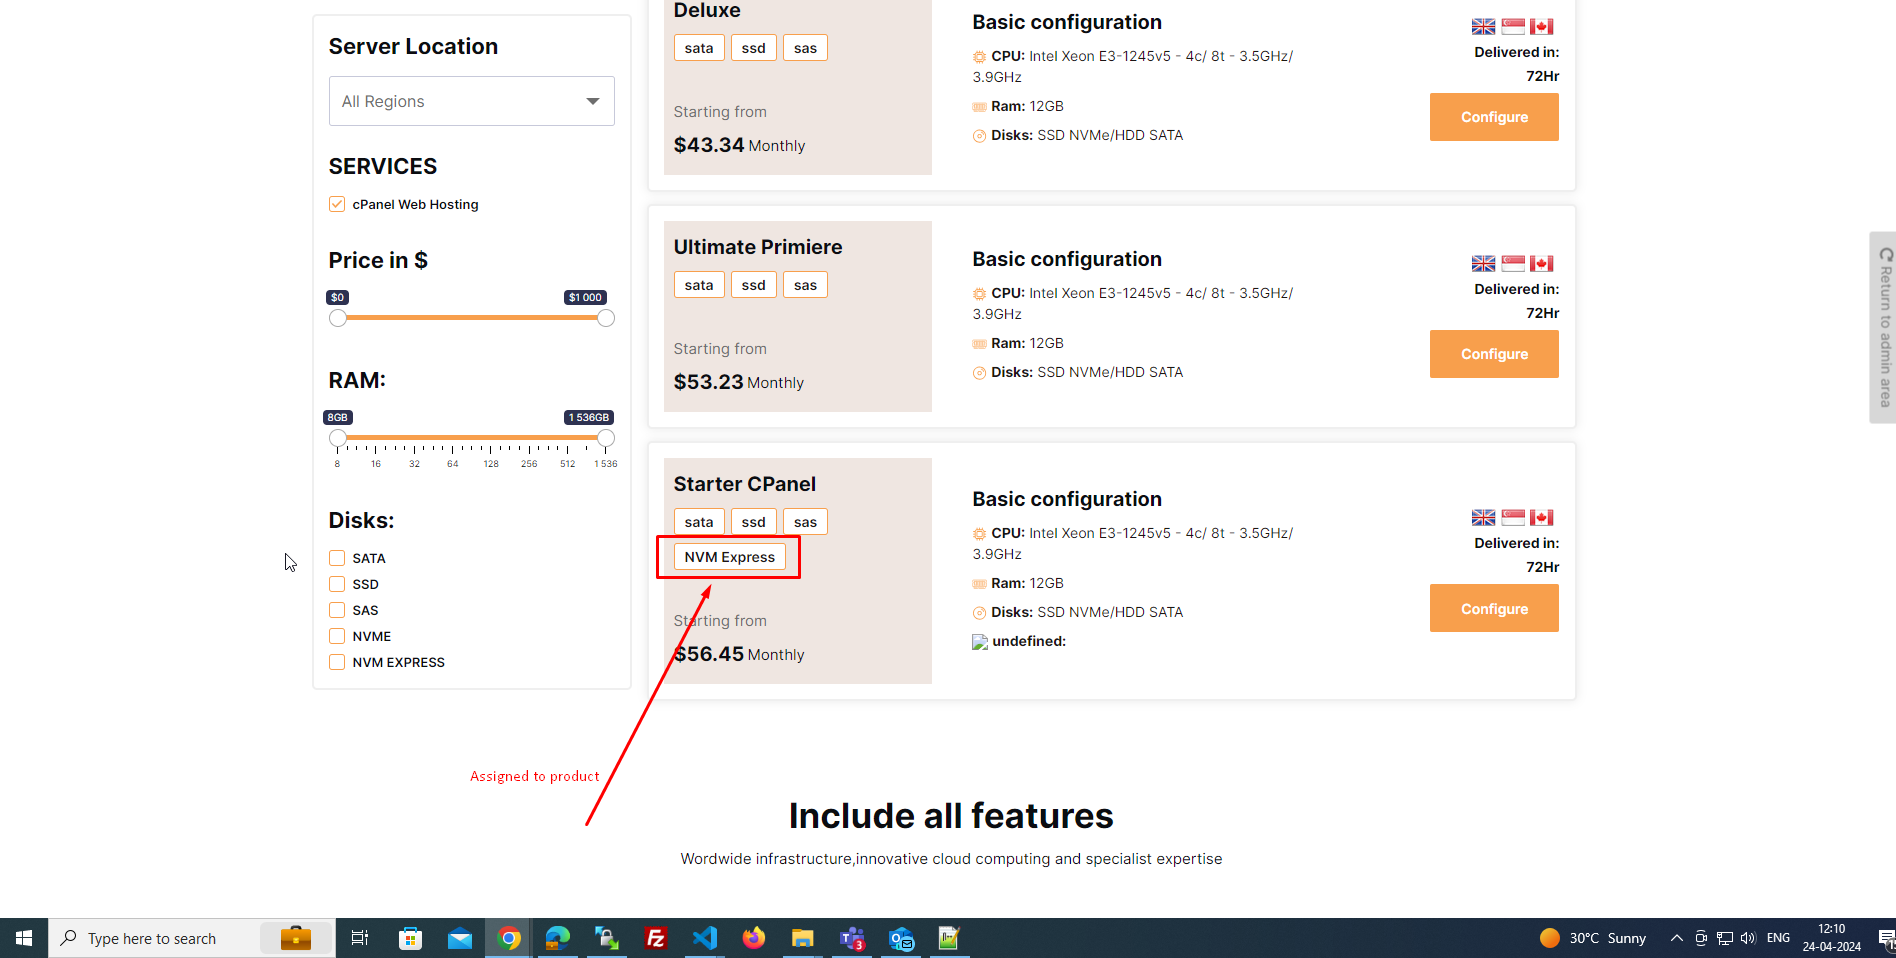
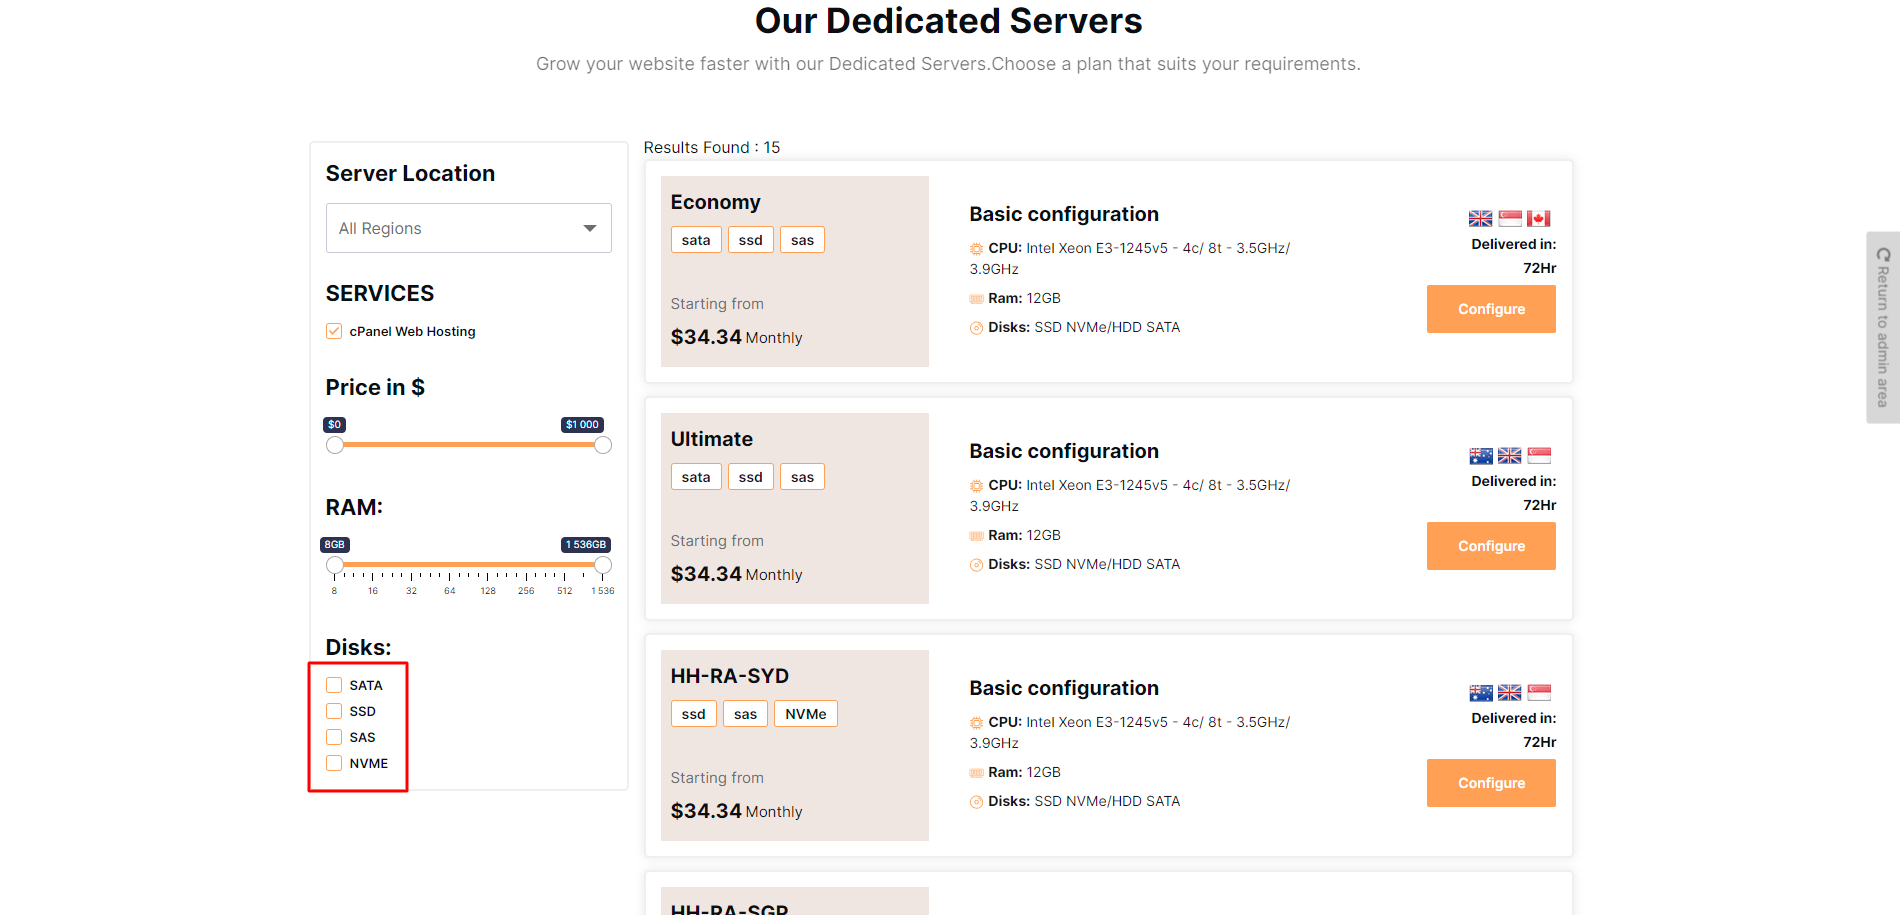
Step 12:-Now you will see the option were you have added the disk.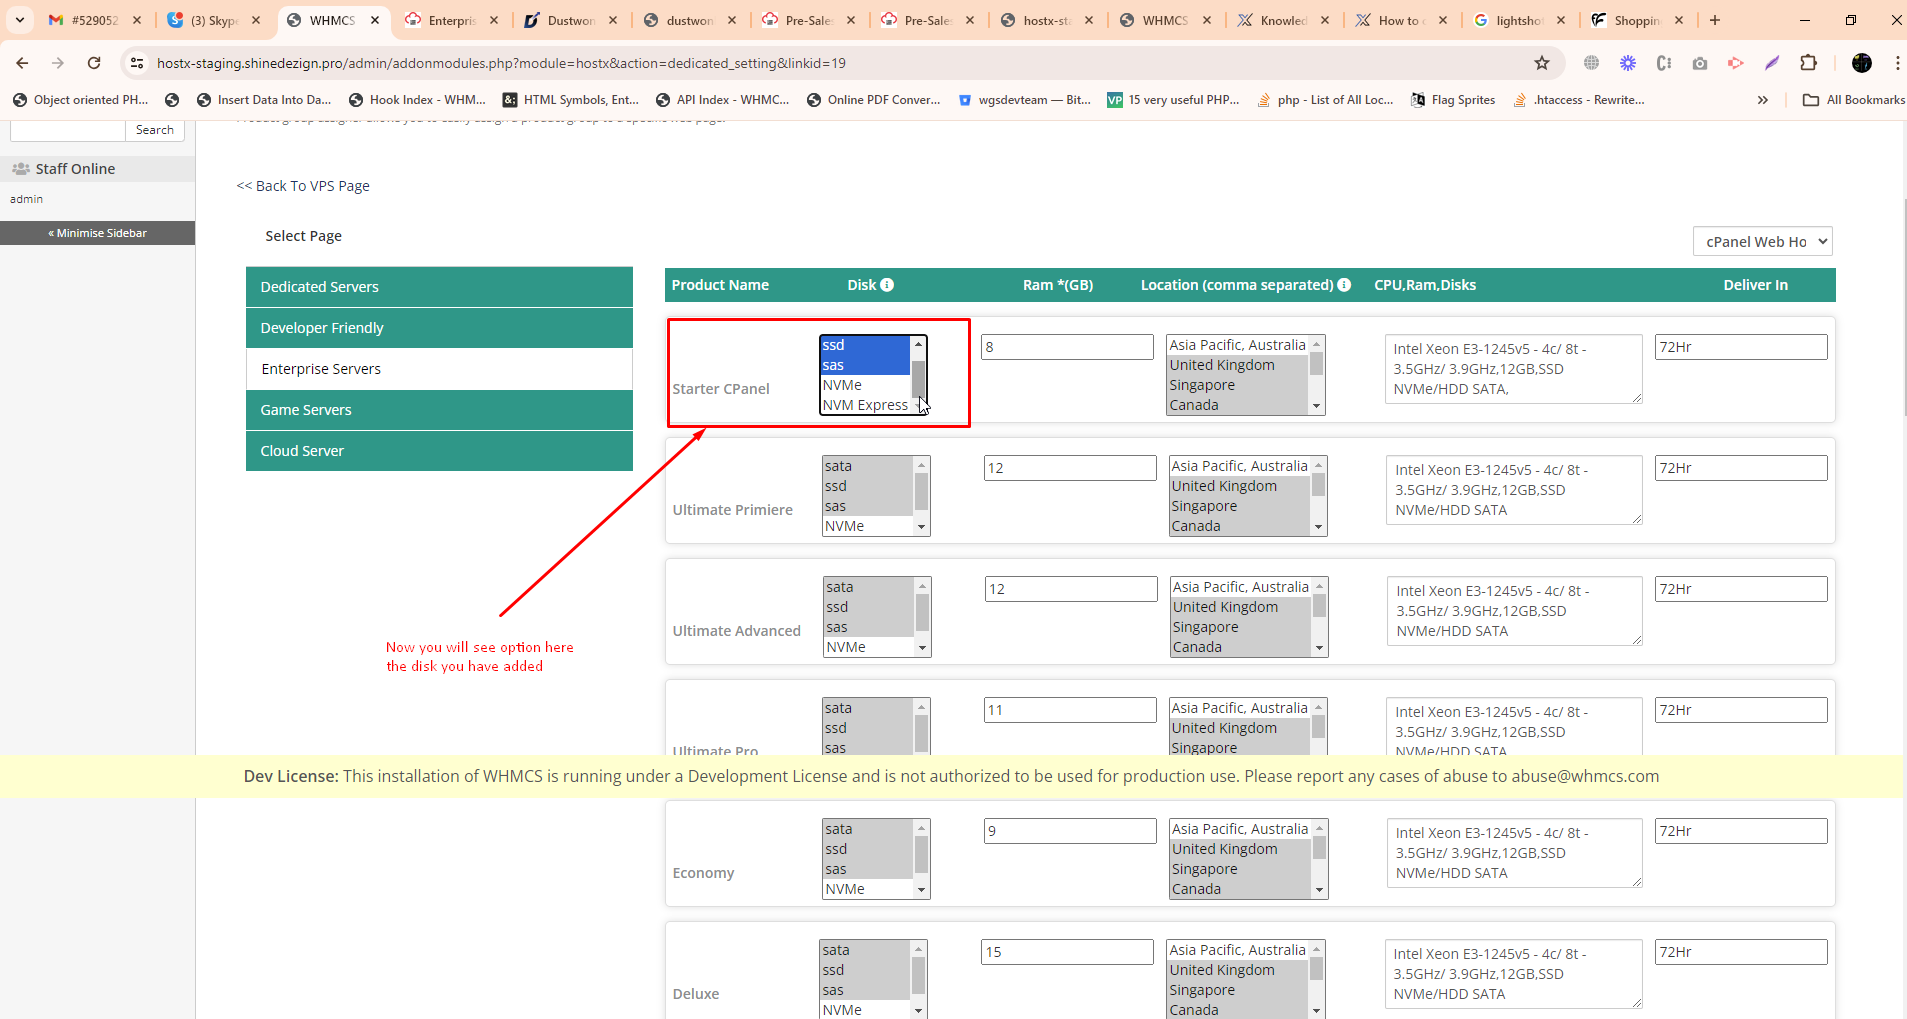
Step 13:- In the frontend you will see the option given in the image below.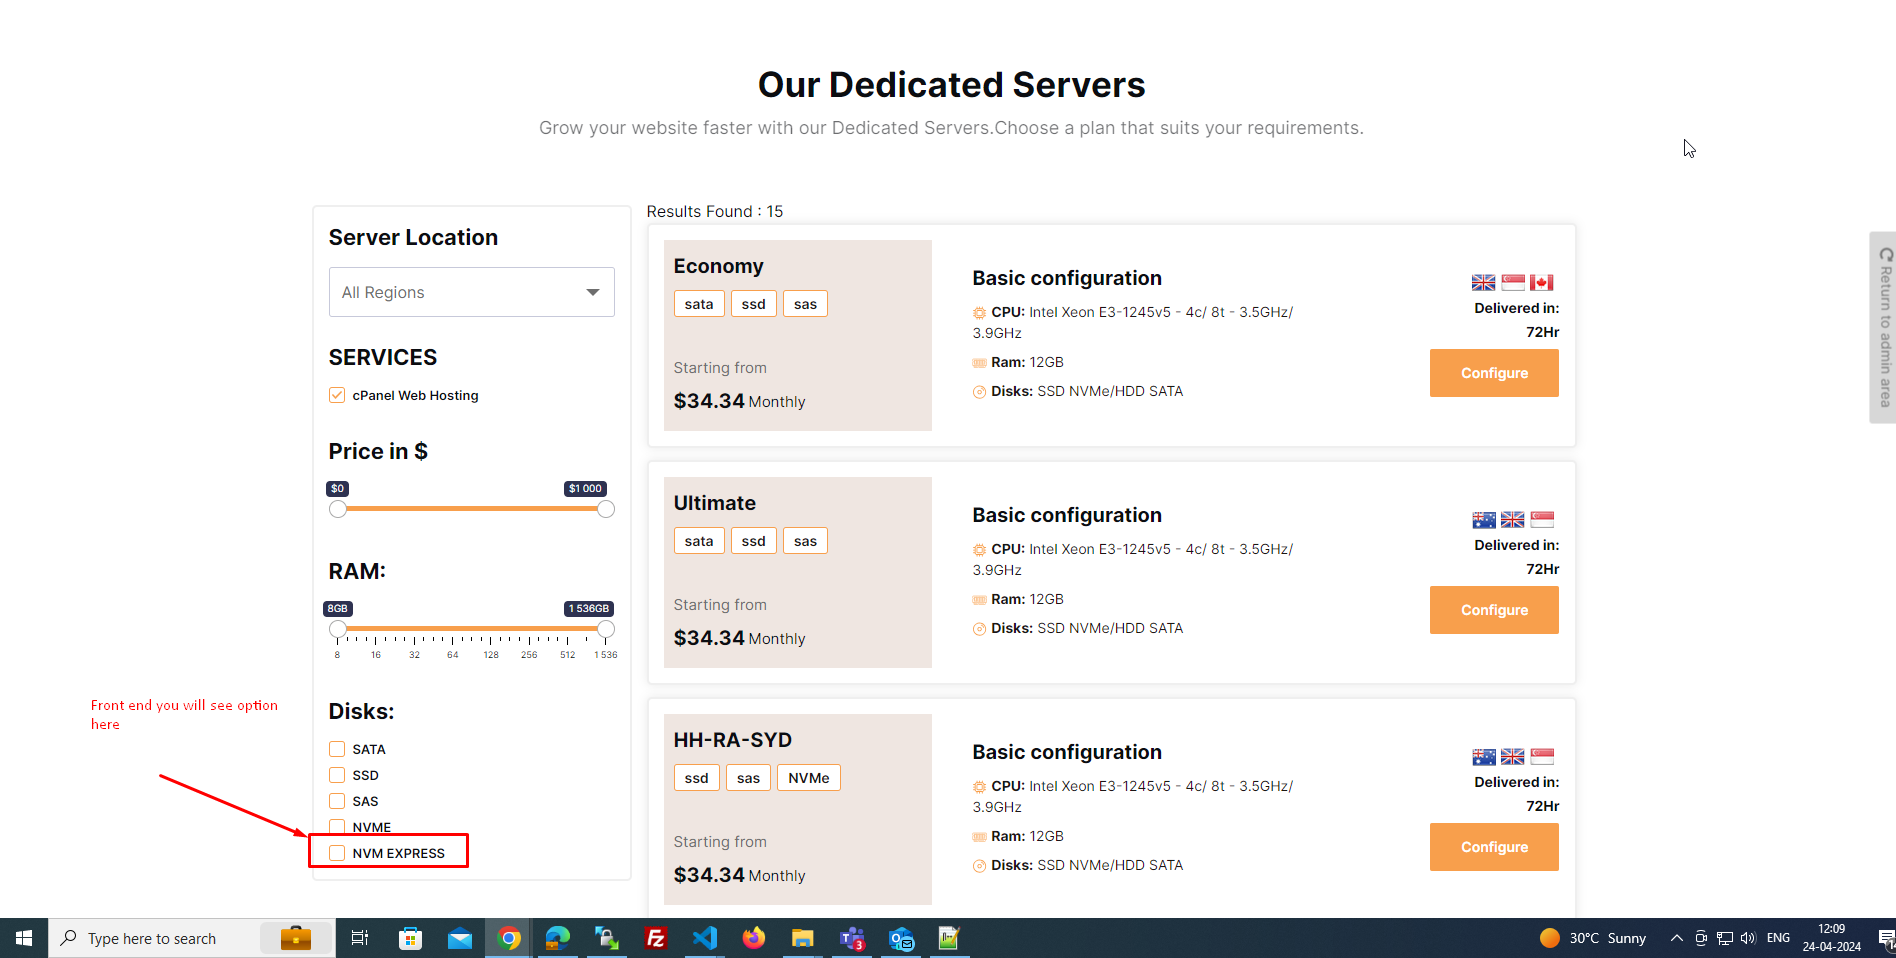
Step 14:- Here you can see in which product it is assigned.