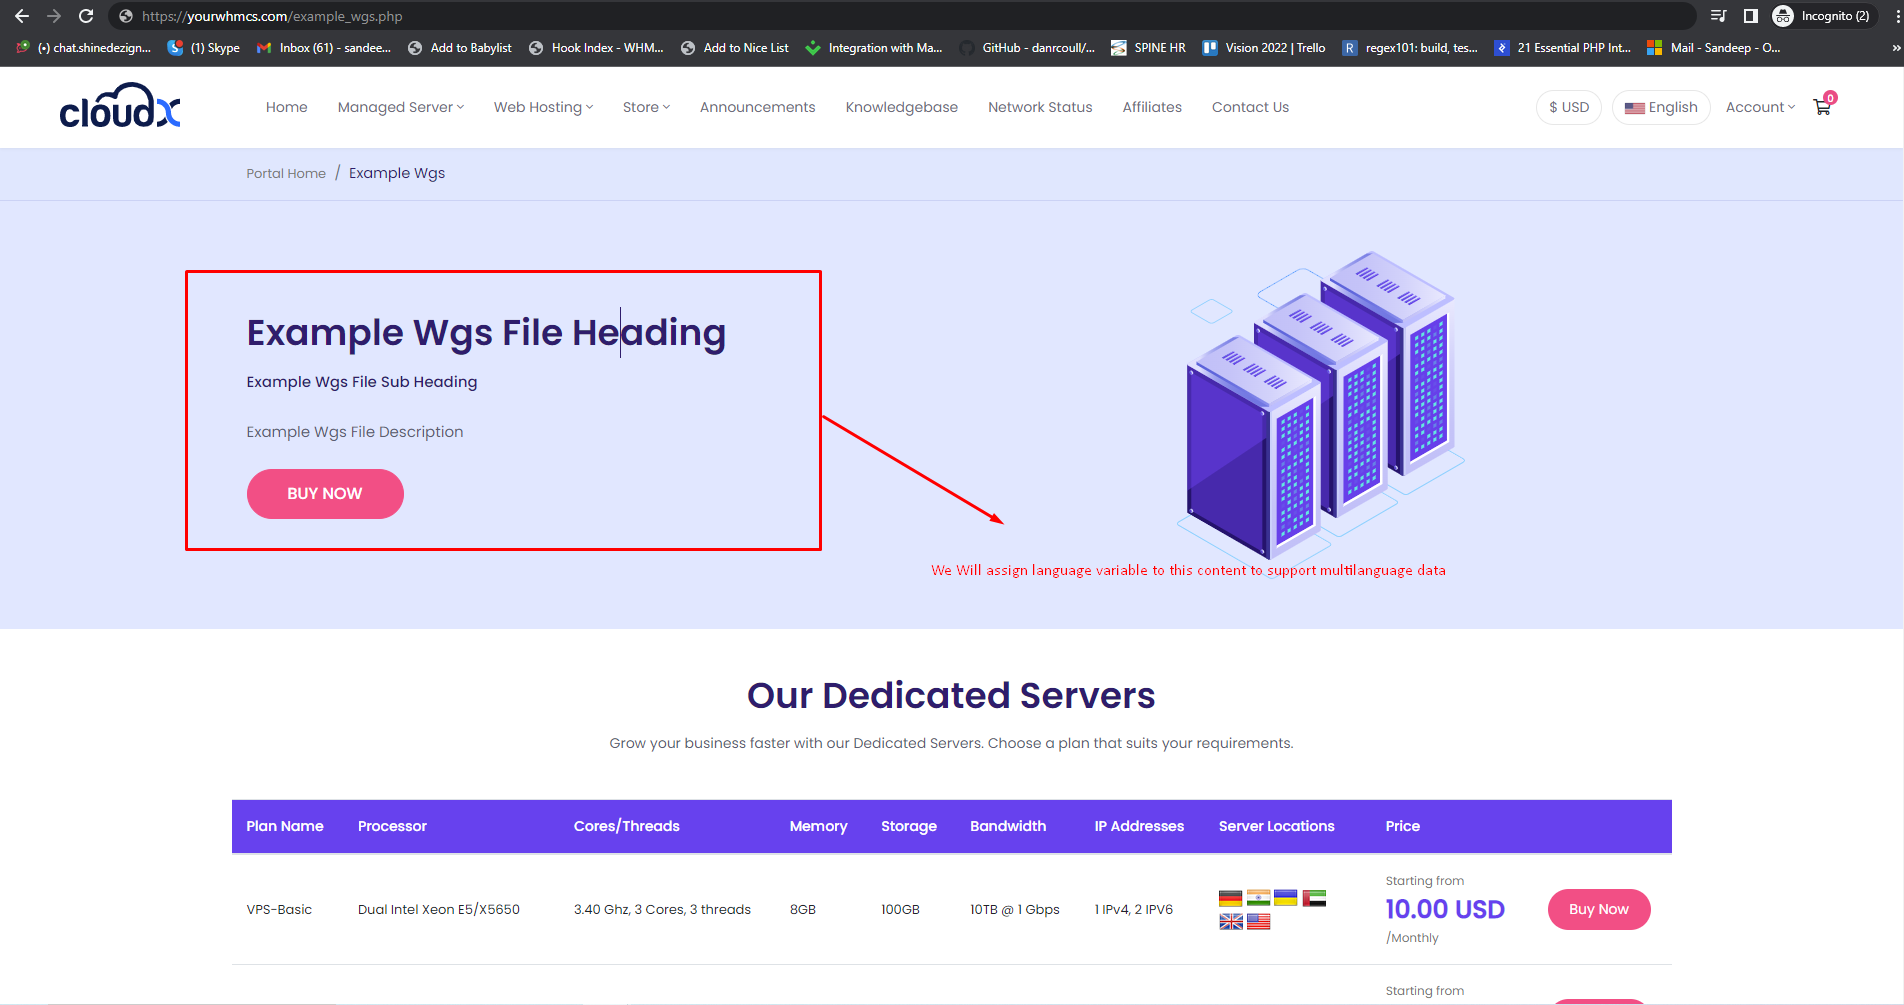
Step 1: By defining language variable for content. In this way you can add content for each language your whmcs supported.
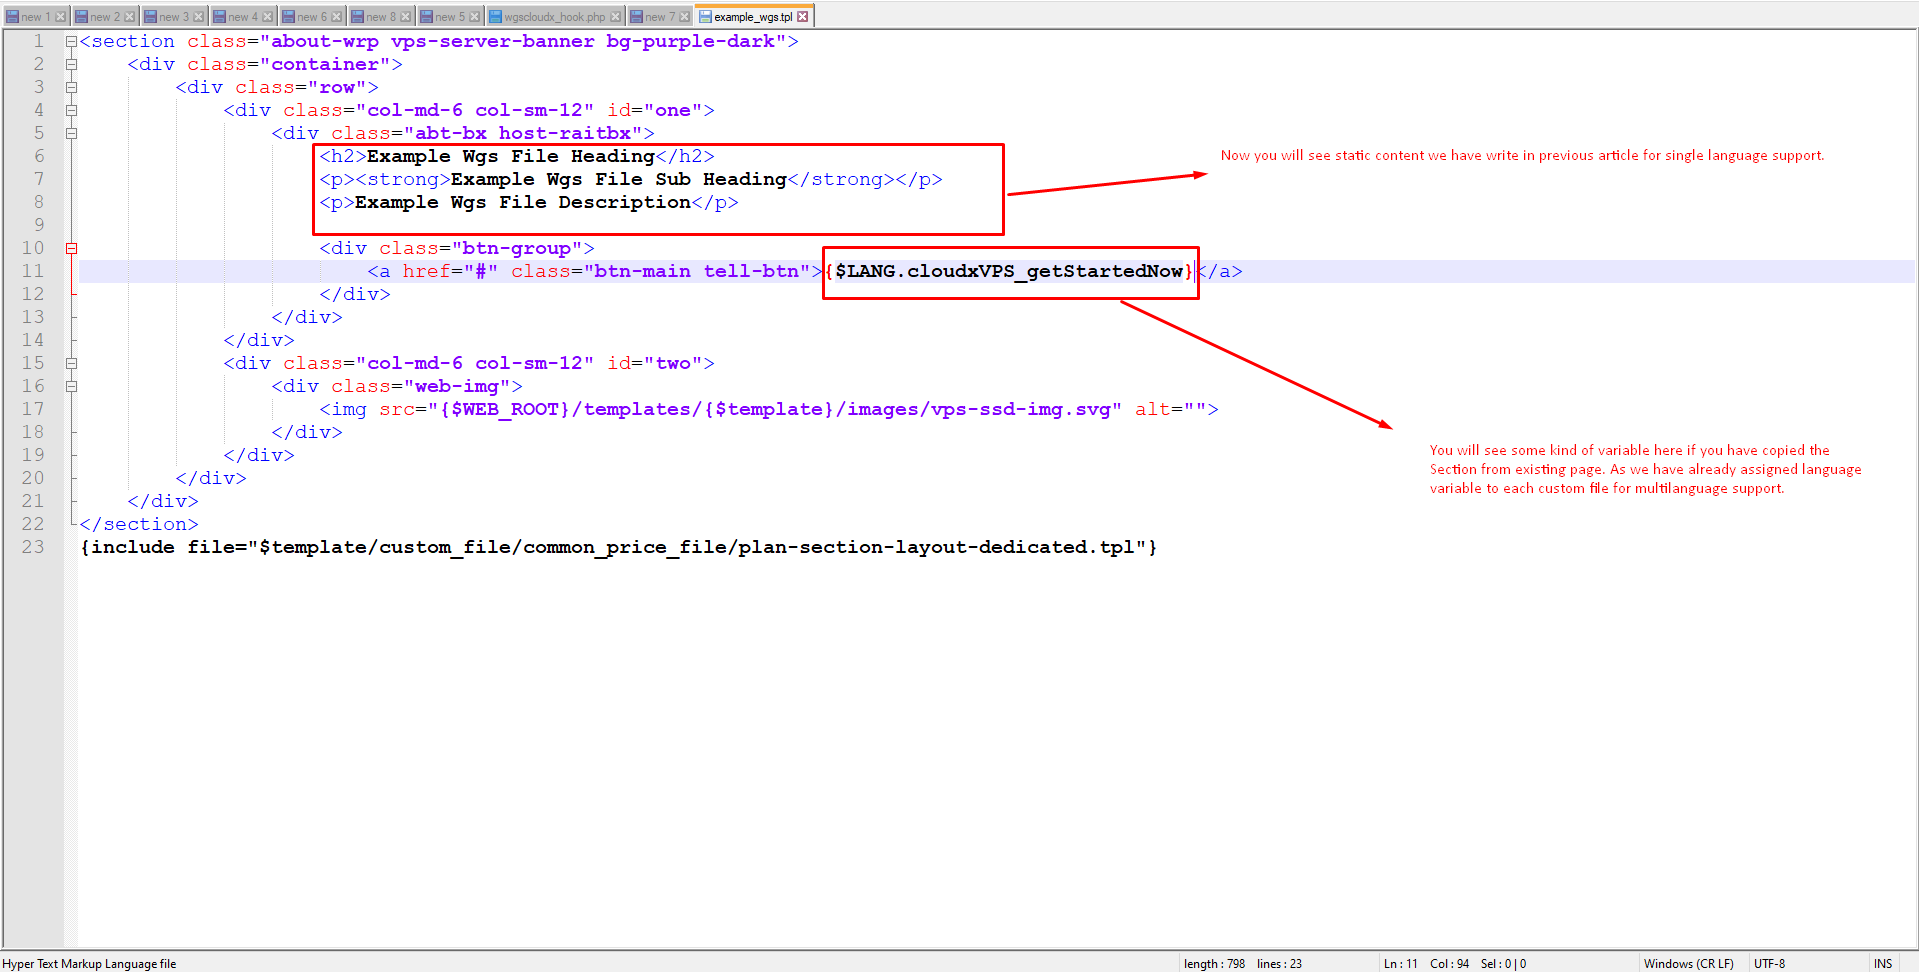
Step 2: Once you open the file in the editor of your choice, you will see a section as shown below which has the static content which we changed in the previous article.
Also below if you have copied the file correctly from an existing page, you will see a {$LANG.cloudVPS_getStartedNow} variable. This is our language variable.
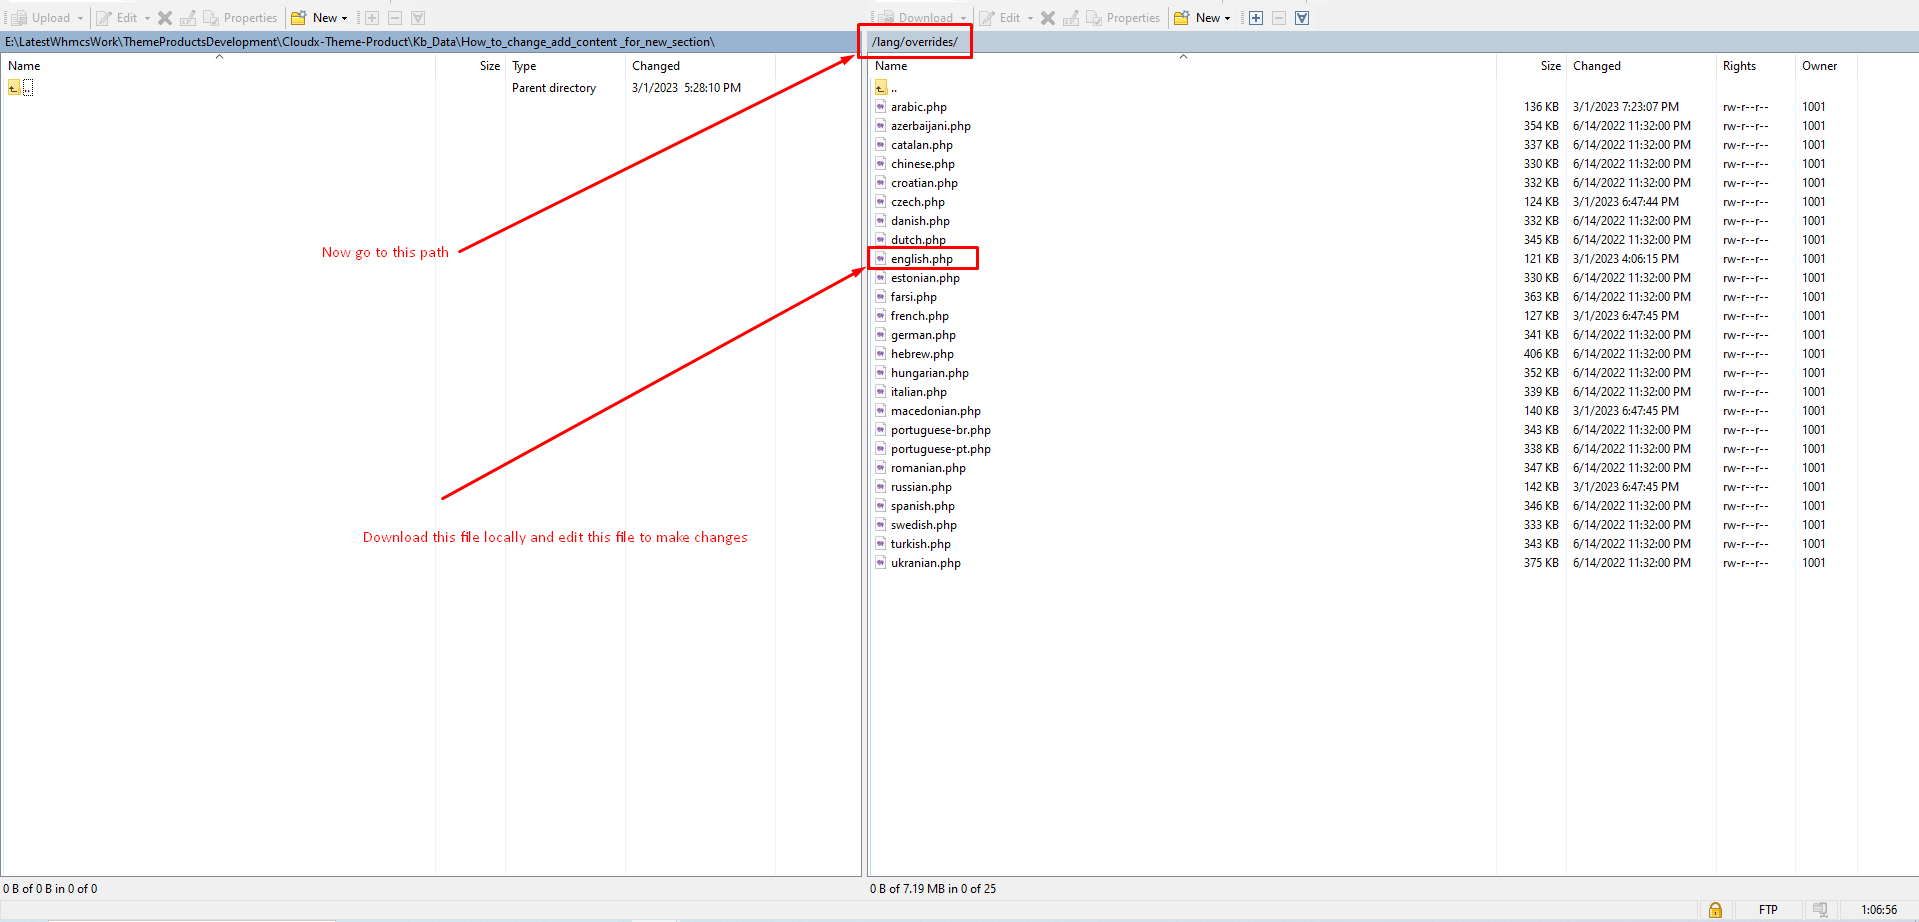
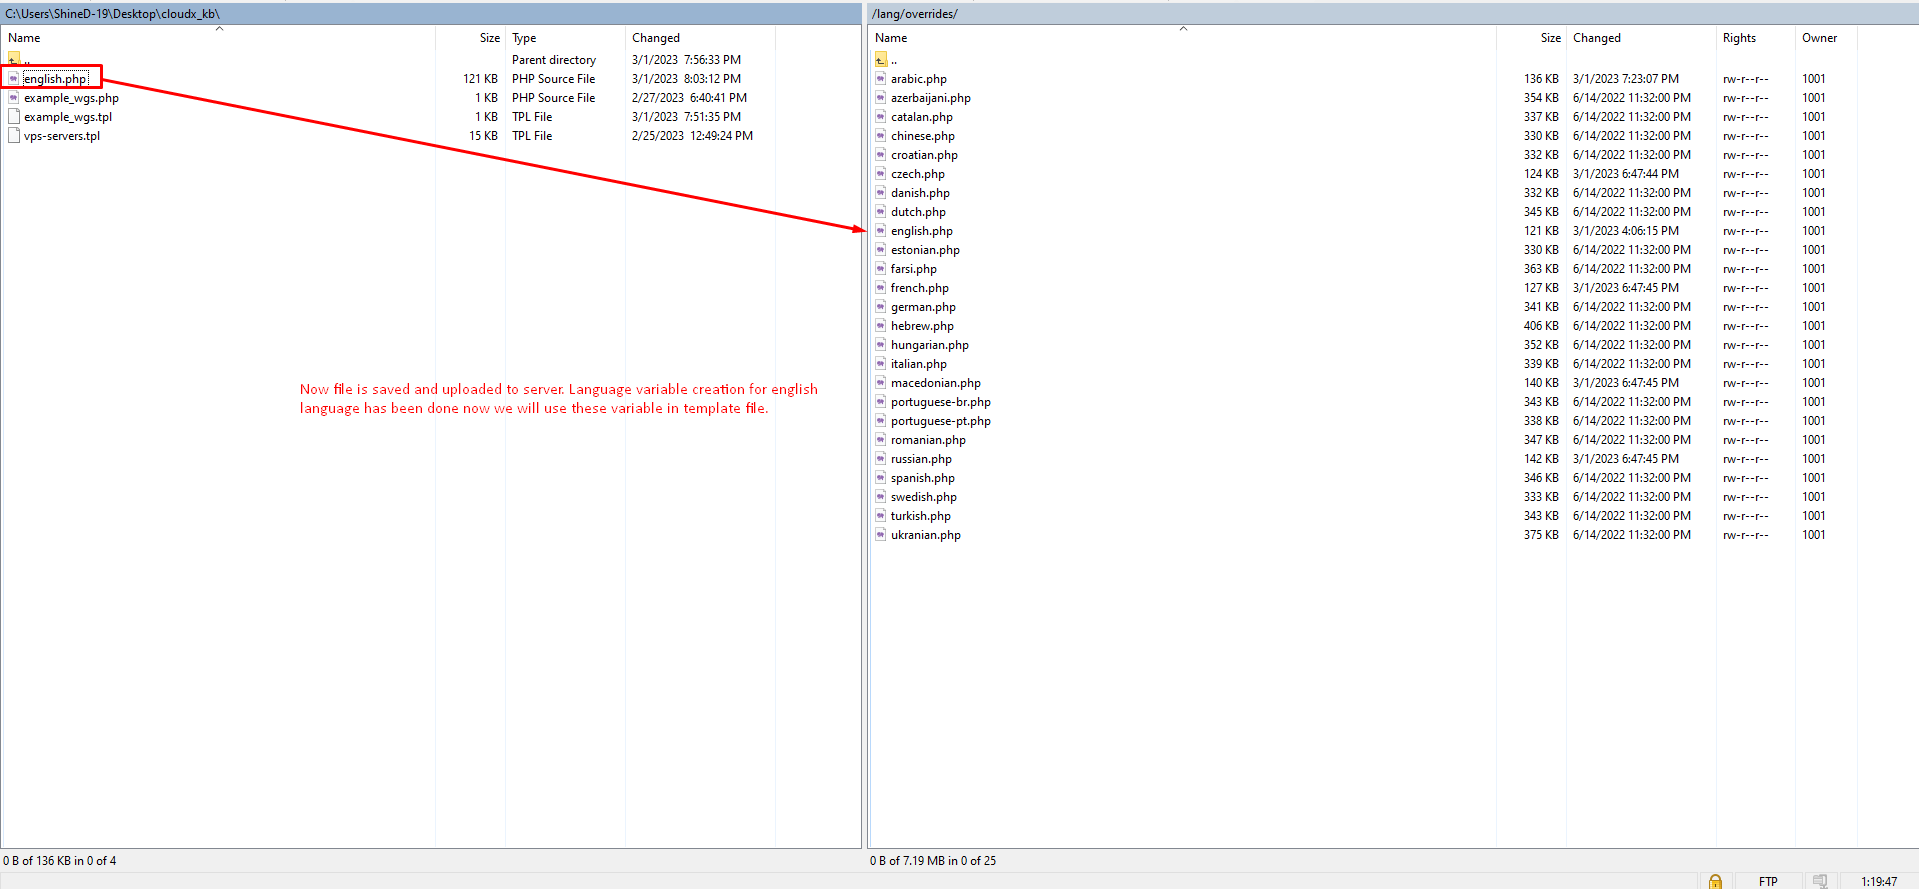
Step 3: Once you have the file ready from previous step, Now go to this path as shown below /lang/overrides/. Download english.php file locally and edit this file to make changes.
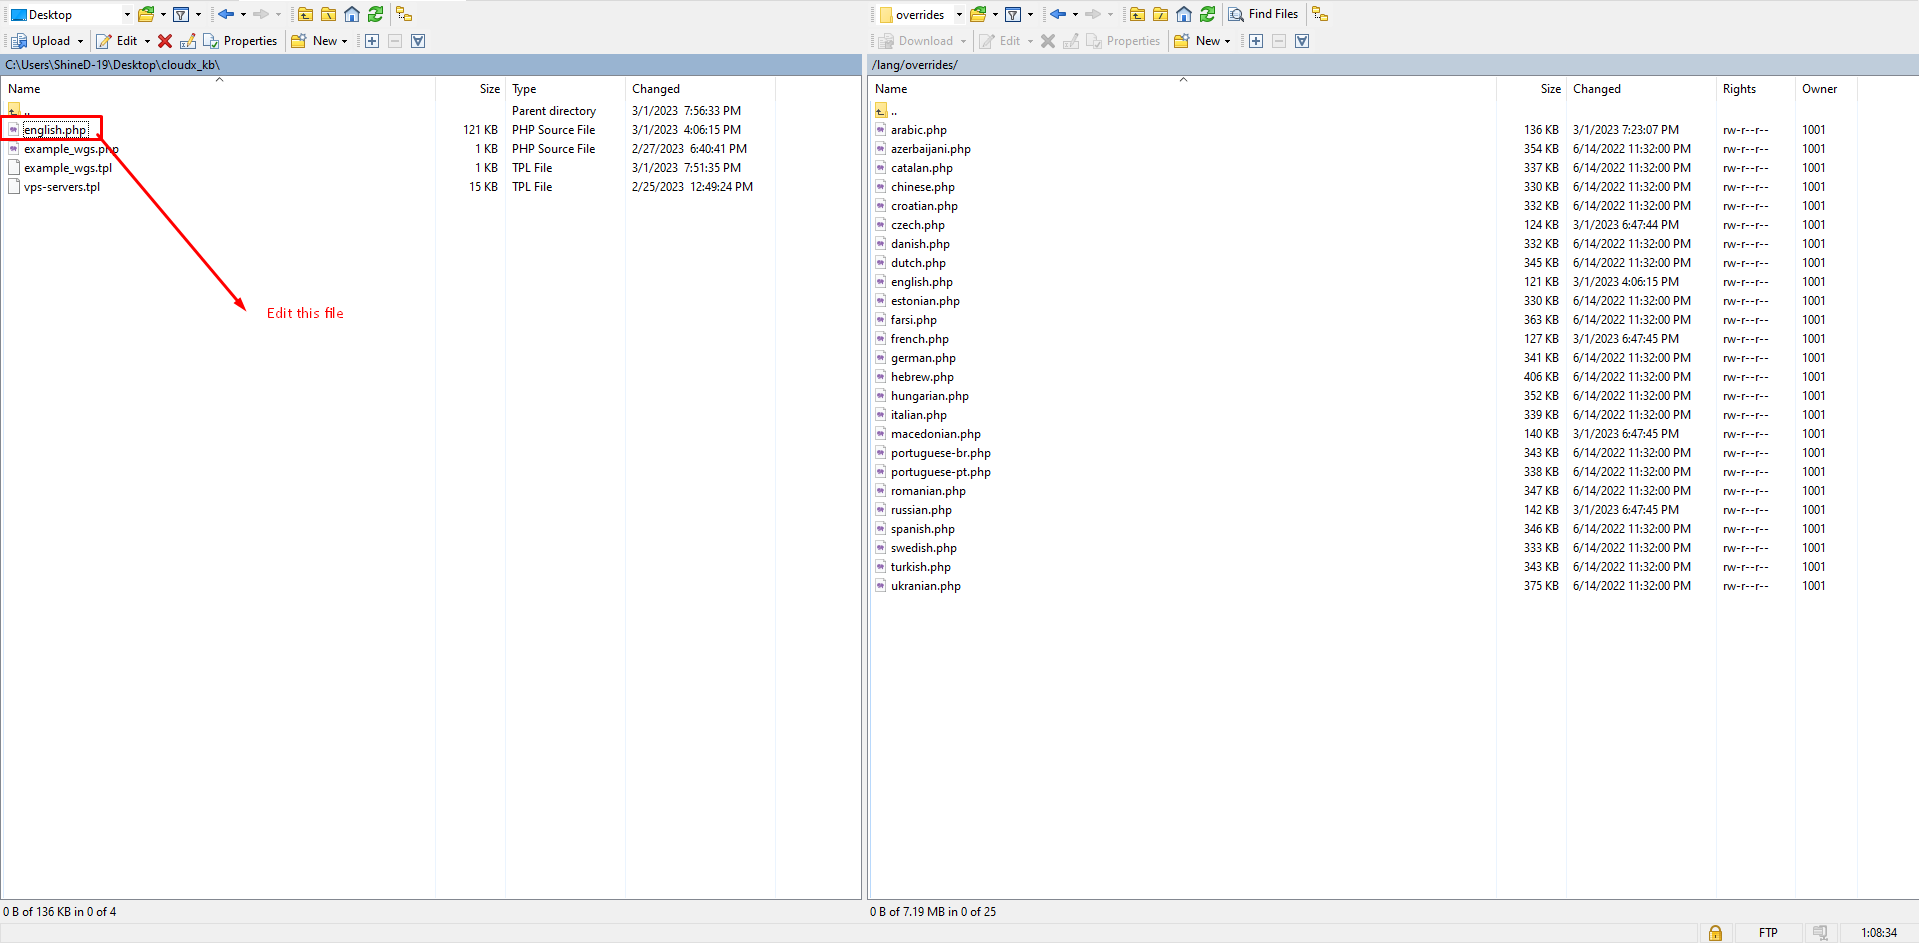
Step 4: Now edit the english.php file as shown below.
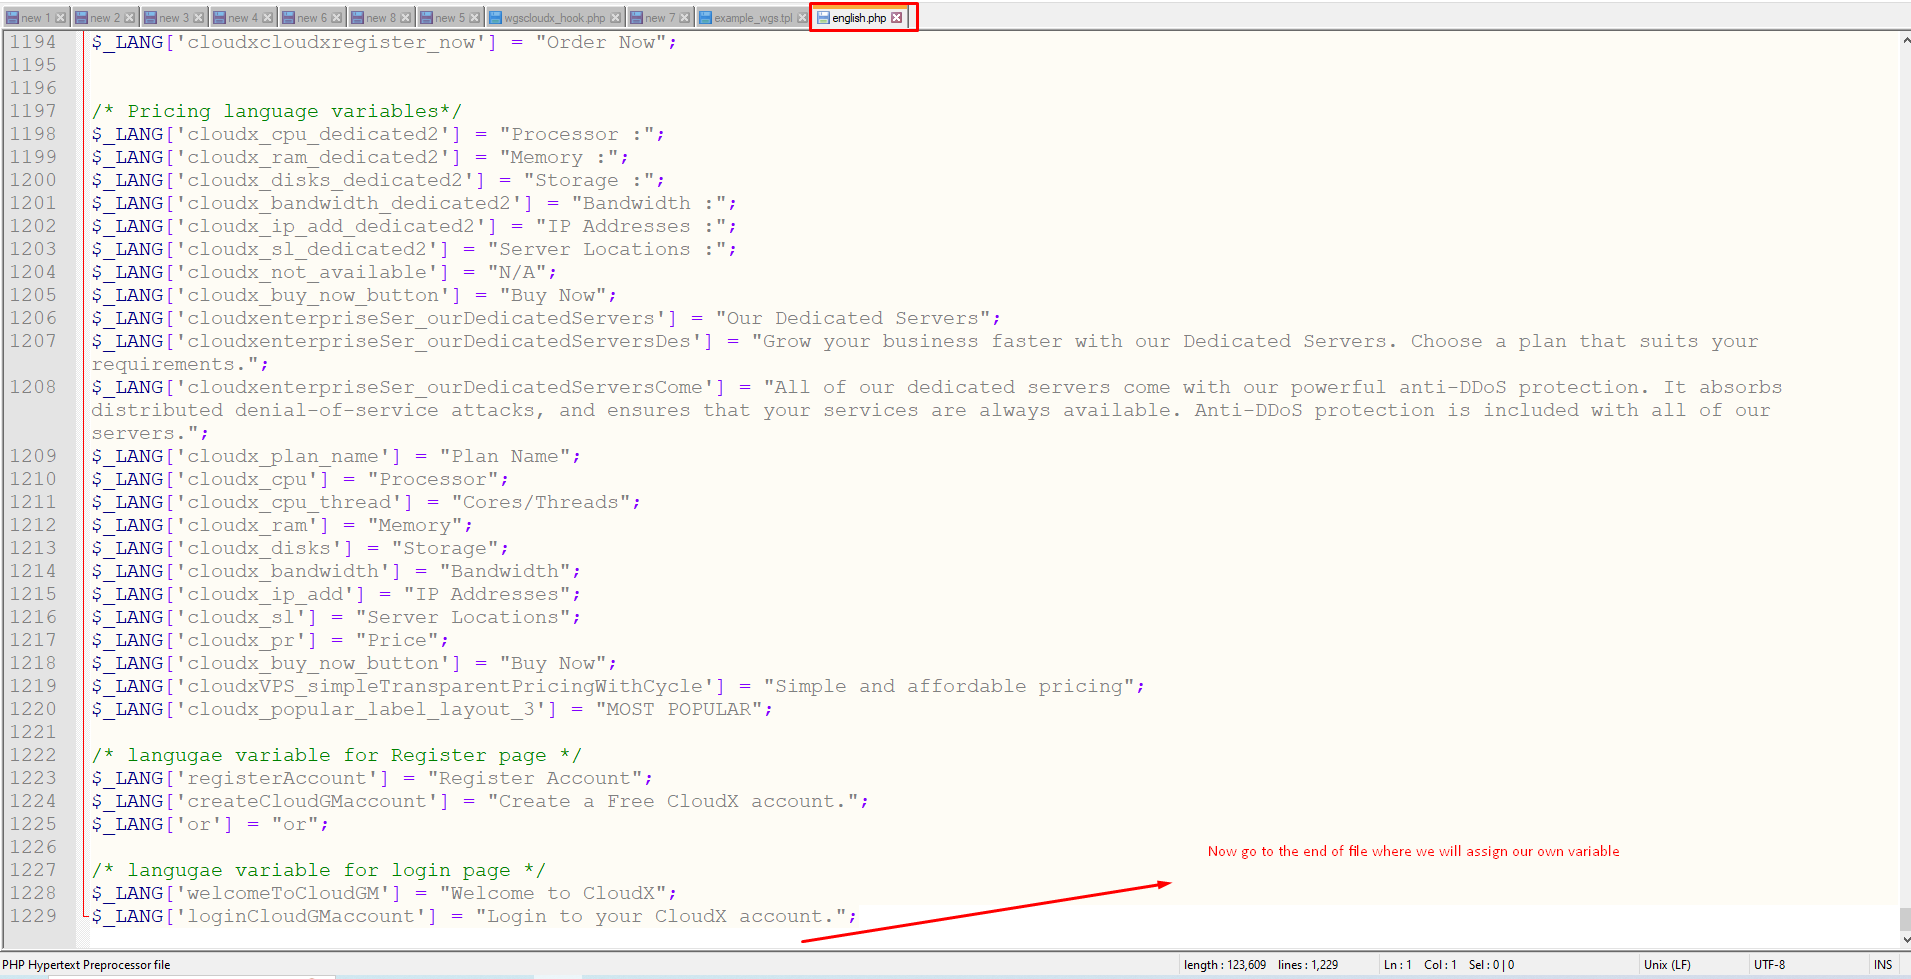
Step 5: Now go to the end of the file where we assign our own variables.
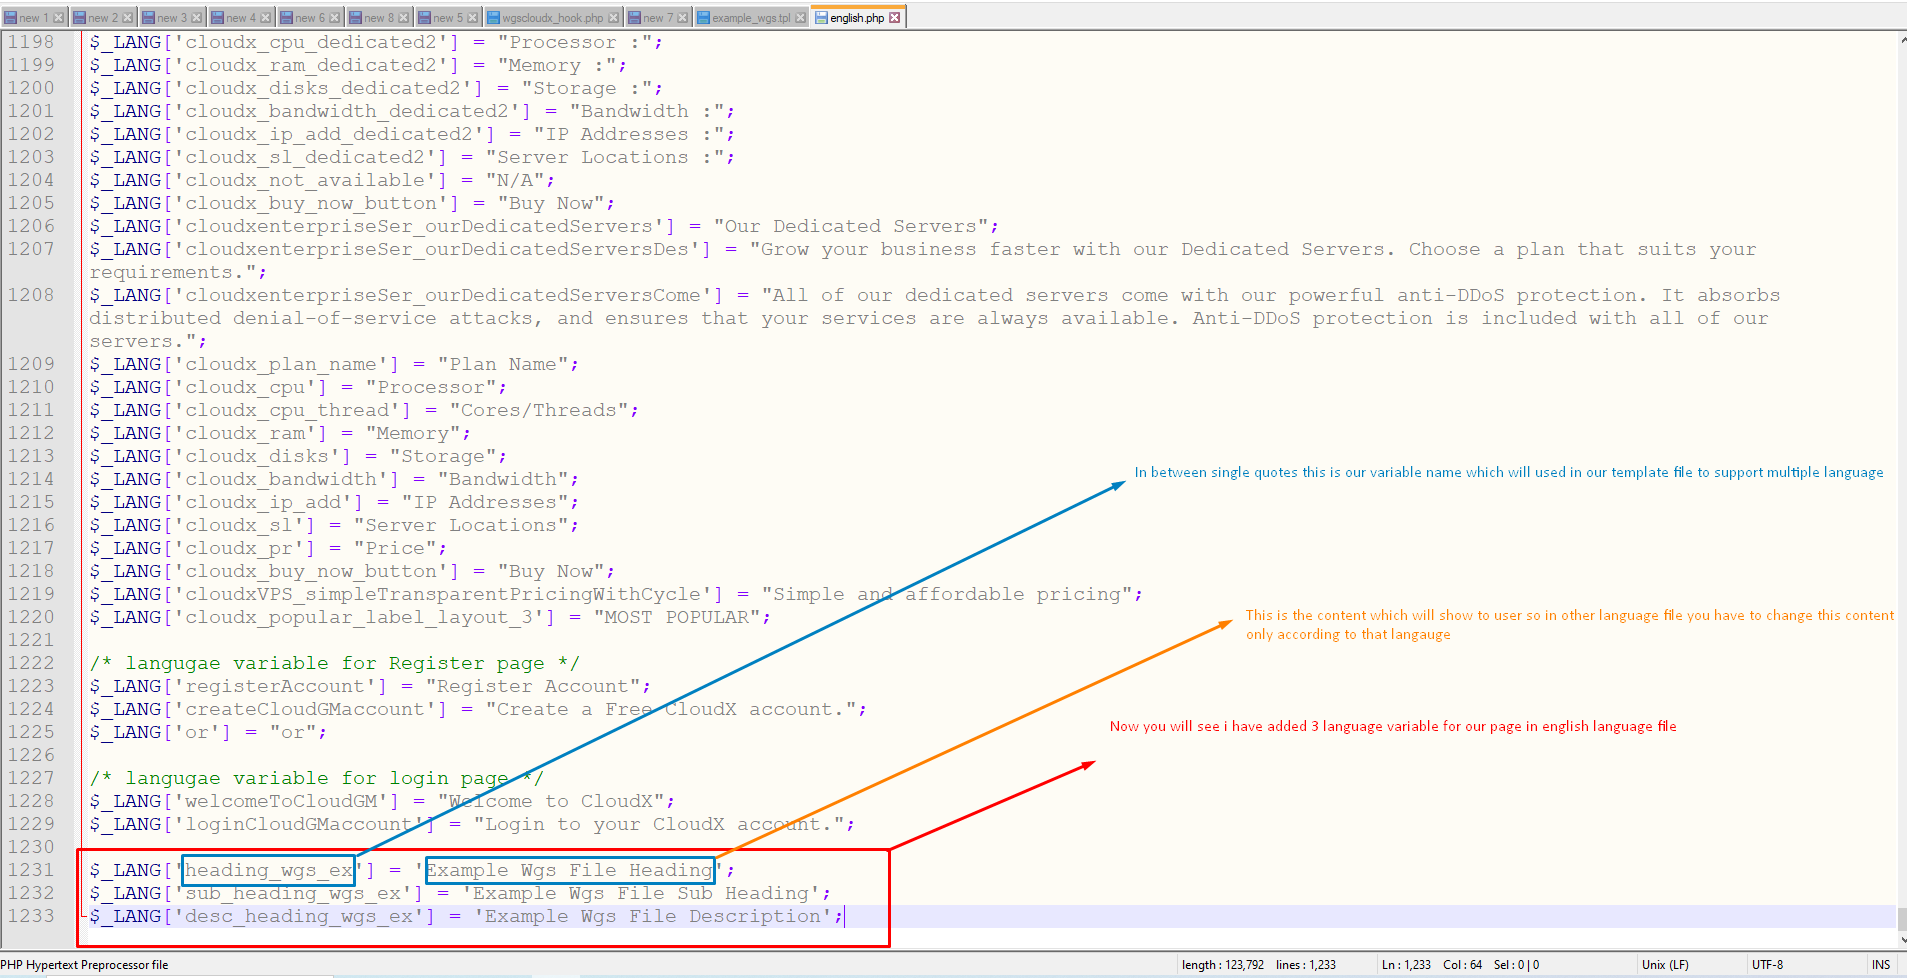
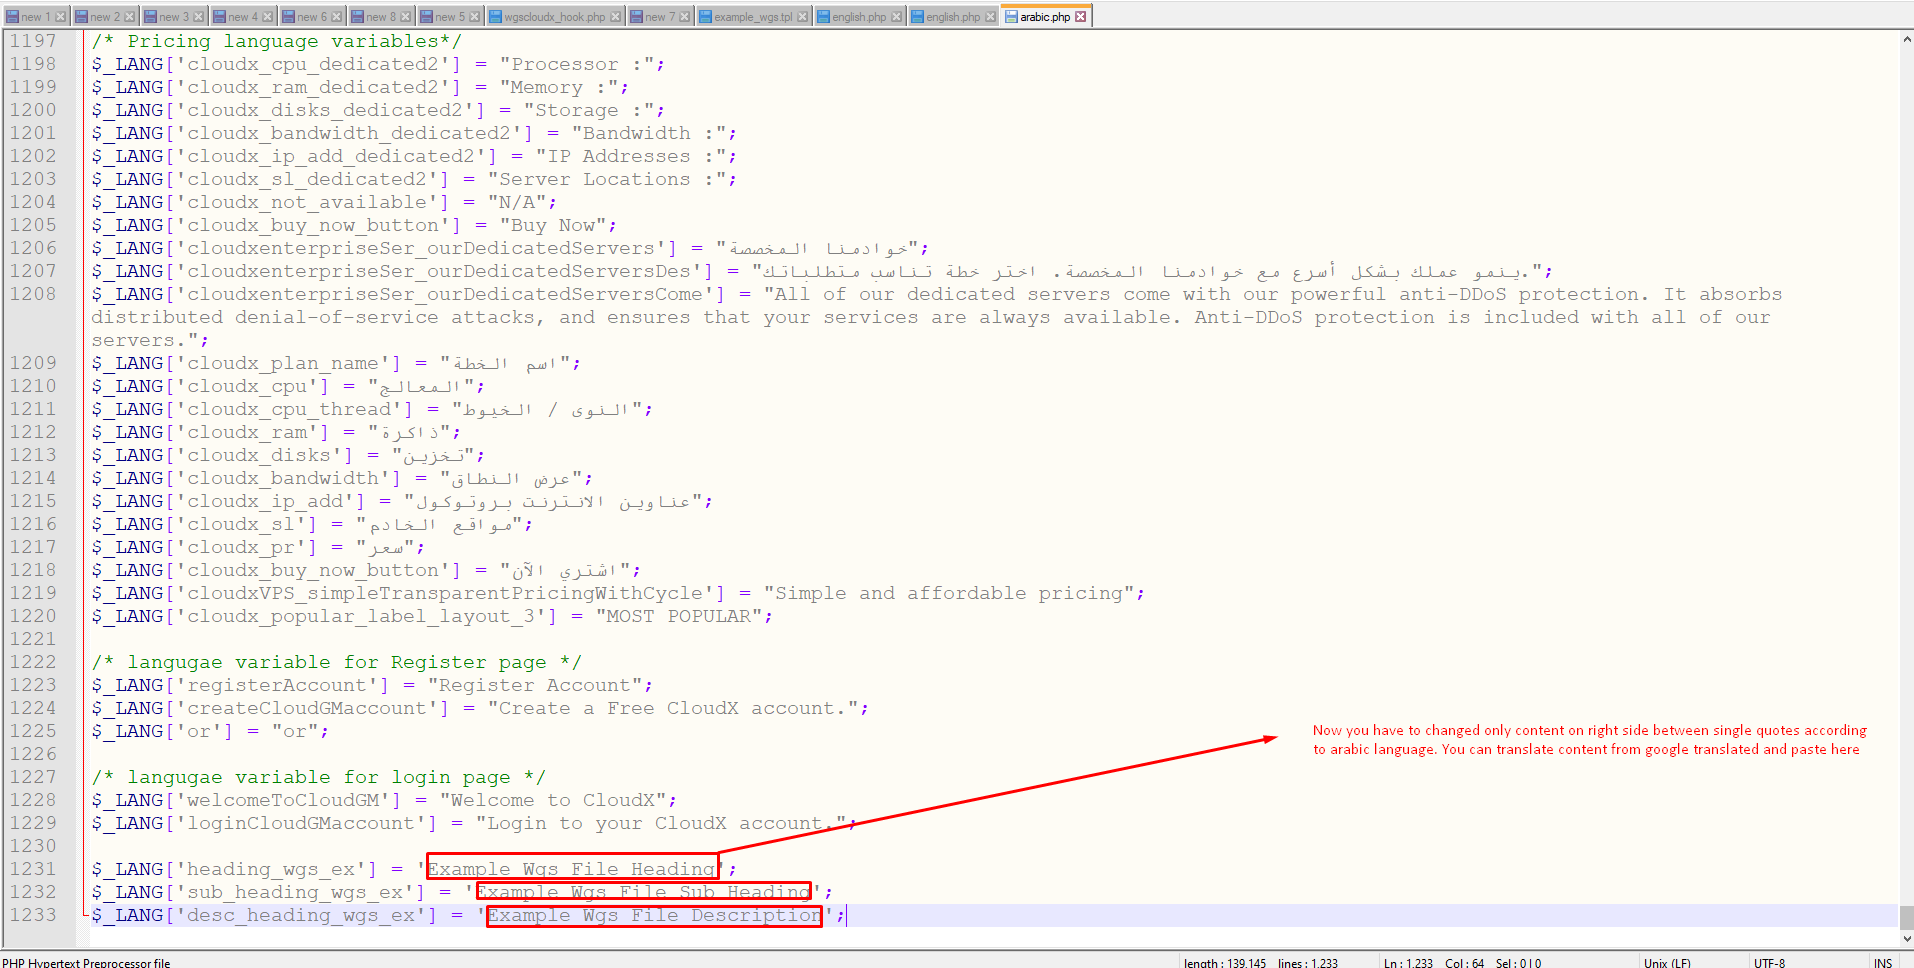
Step 6: Now you can see that in the below mentioned screenshot there are three lines of code, which I have also copied below, in this code the $_LANG['heading_wgs_ex'] is our new language variable, we will be assigning this variable the value of content that we want in our language for example this is the english page so the content that we have added is Example Wgs File Heading.
Similarly we have two other variables as shown below.
You change the value of this variable according to the language you want.
$_LANG['heading_wgs_ex'] = 'Example Wgs File Heading';
$_LANG['sub_heading_wgs_ex'] = 'Example Wgs File Sub Heading';
$_LANG['desc_heading_wgs_ex'] = 'Example Wgs File Description';
Note: You can copy the syntax from below code and update the value accordingly mention in next steps.
Step 7: Once you have saved the file, You need to upload the file to the server, Once done you can use these language variables in the template file
Step 8: Once you open the file in the editor of your choice, you will see a section as shown below which has the static content which we changed in the previous article.
Also below if you have copied the file correctly from an existing page, you will see a {$LANG.cloudVPS_getStartedNow} variable. This is our language variable.
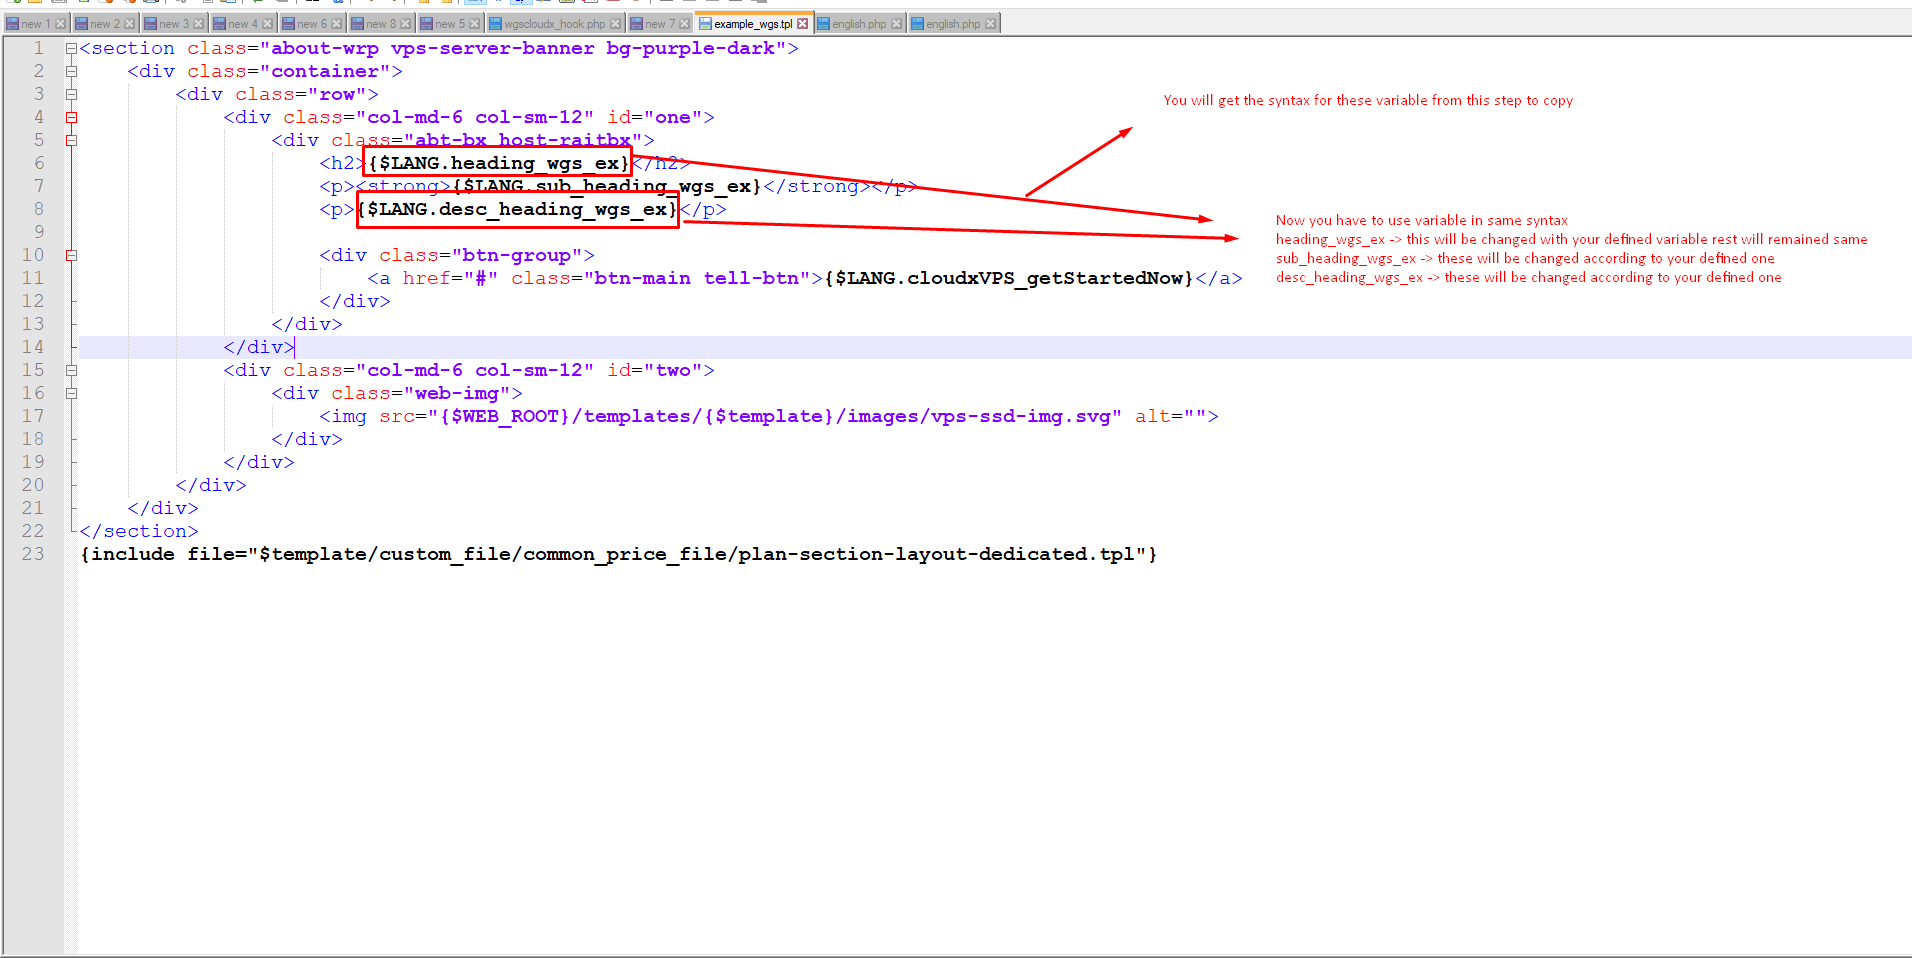
Step 9: You can copy the syntax from below code and update the value accordingly mention in below steps.
{$LANG.heading_wgs_ex}
{$LANG.sub_heading_wgs_ex}
{$LANG.desc_heading_wgs_ex}
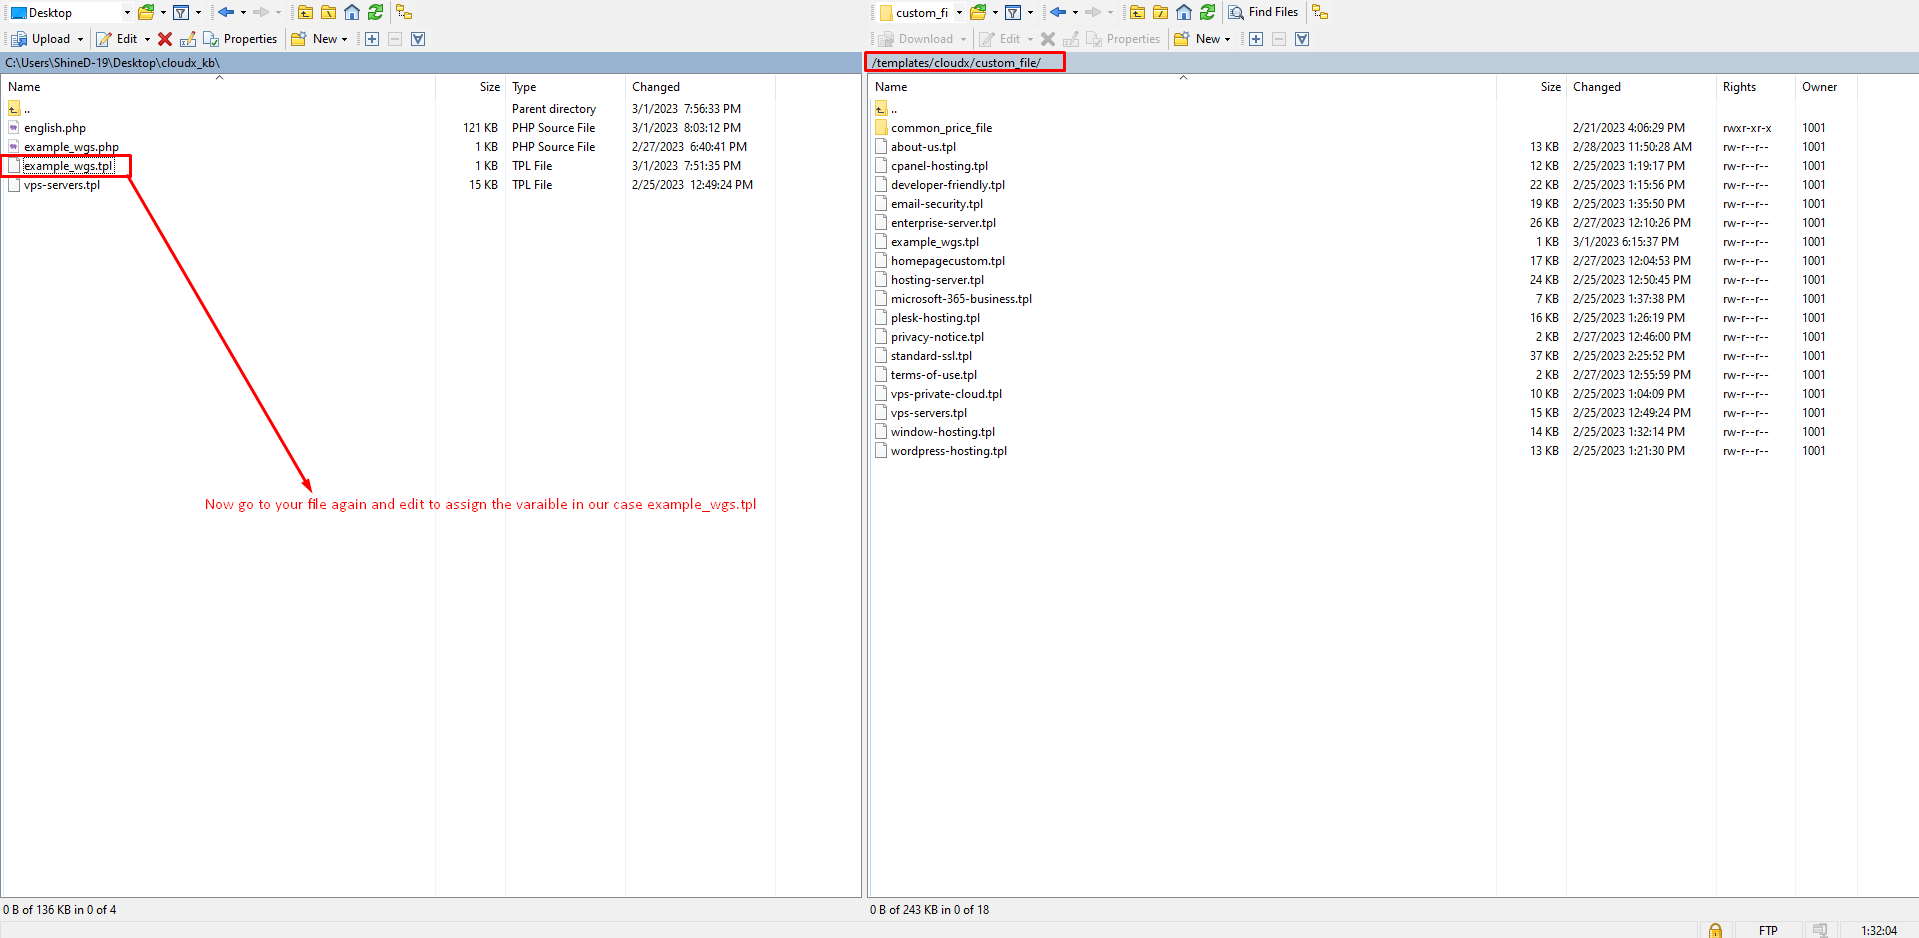
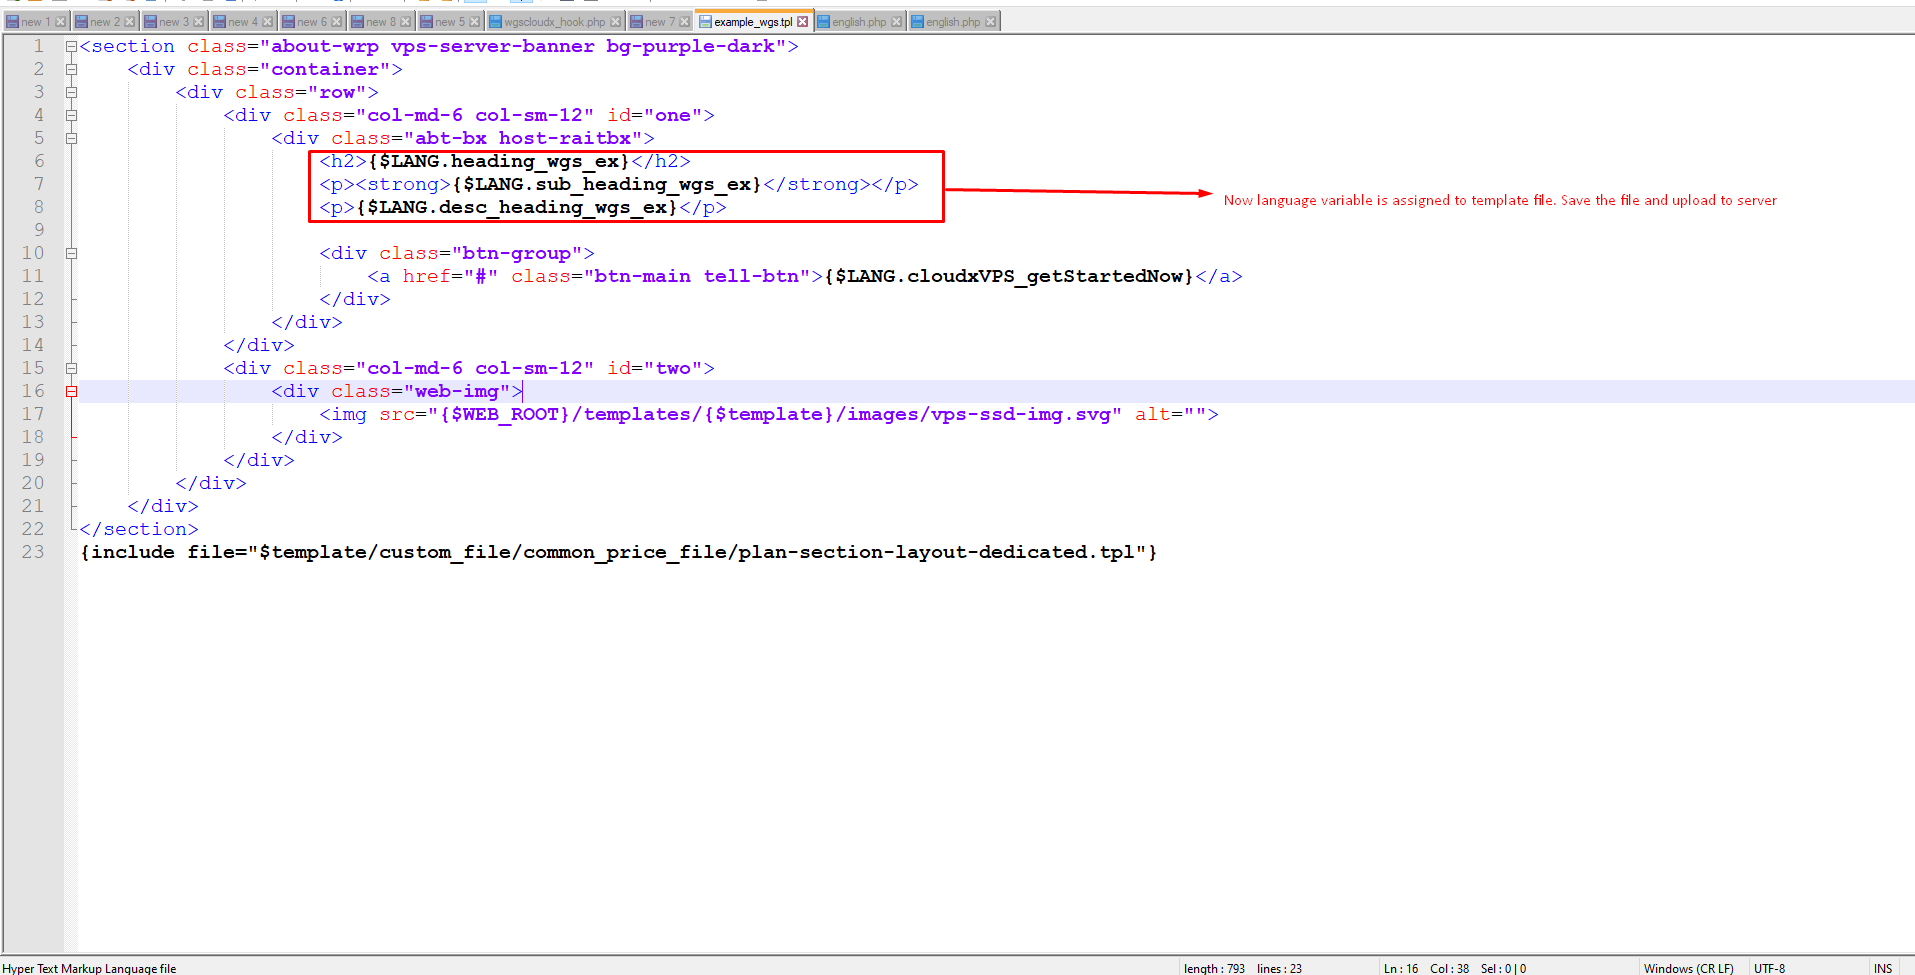
Step 10: Now language variable is assigned to template file. Save the file and upload to server.
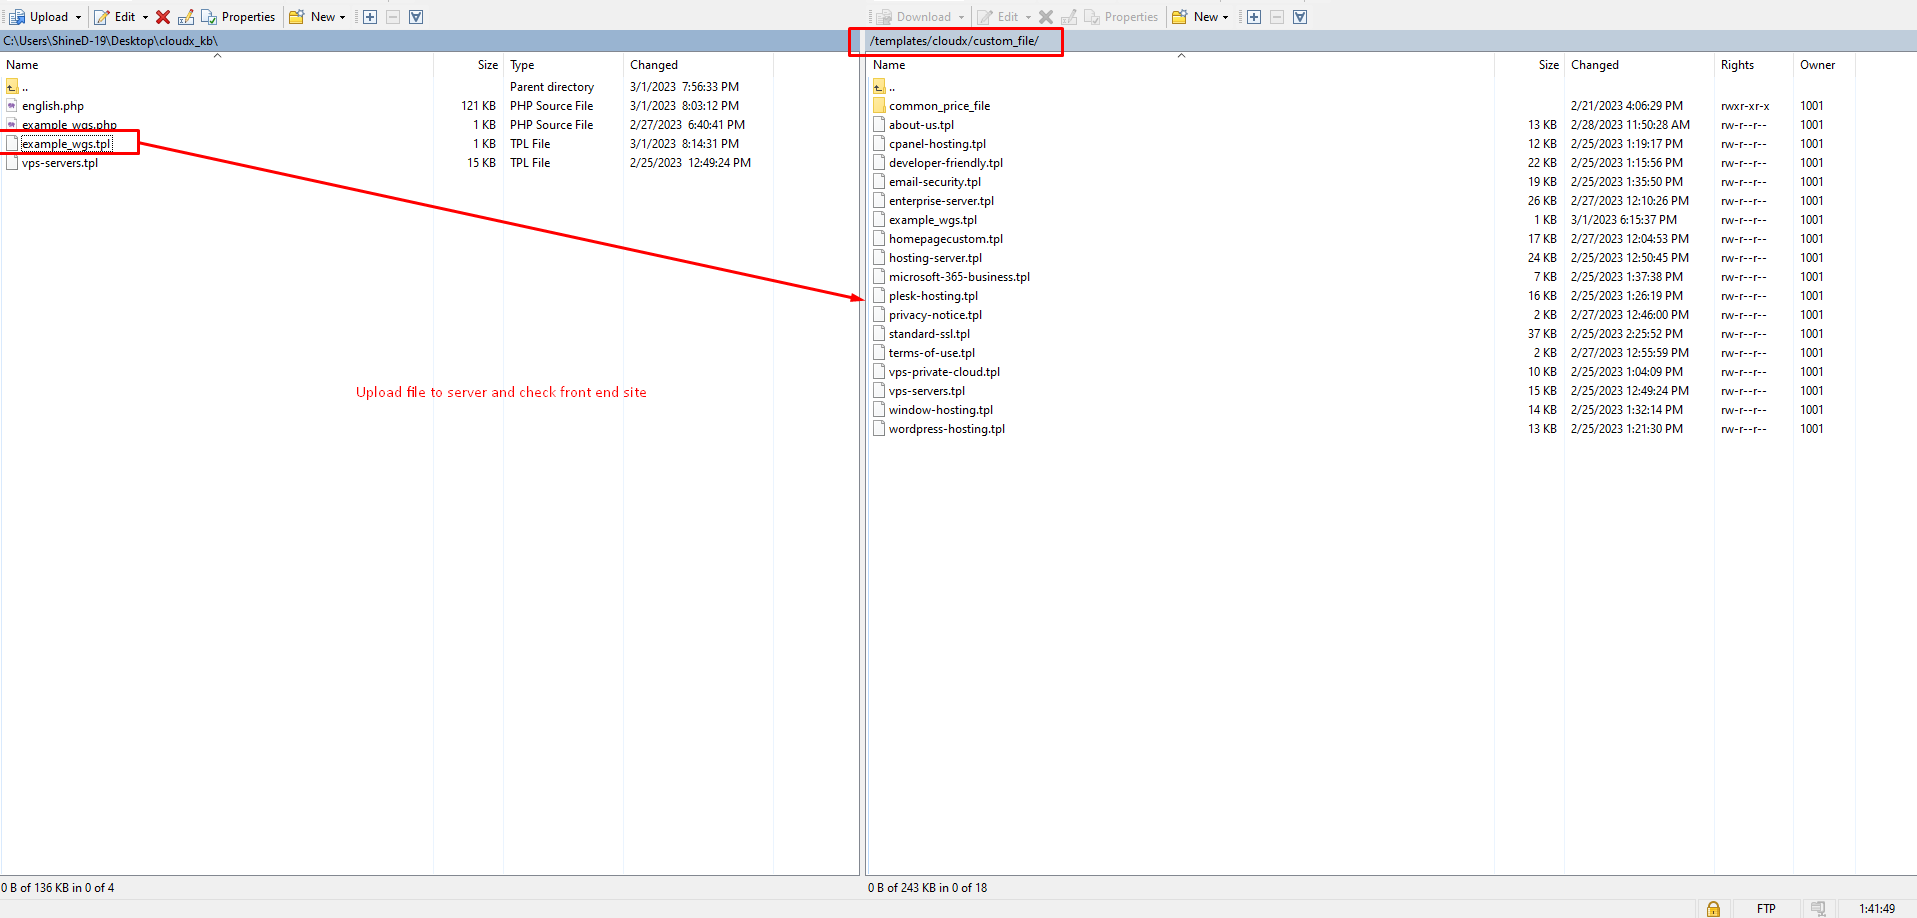
Step 11: Upload the file to the server on the given path/template/cloudx/custom_file/ and check the frontendside for changes.
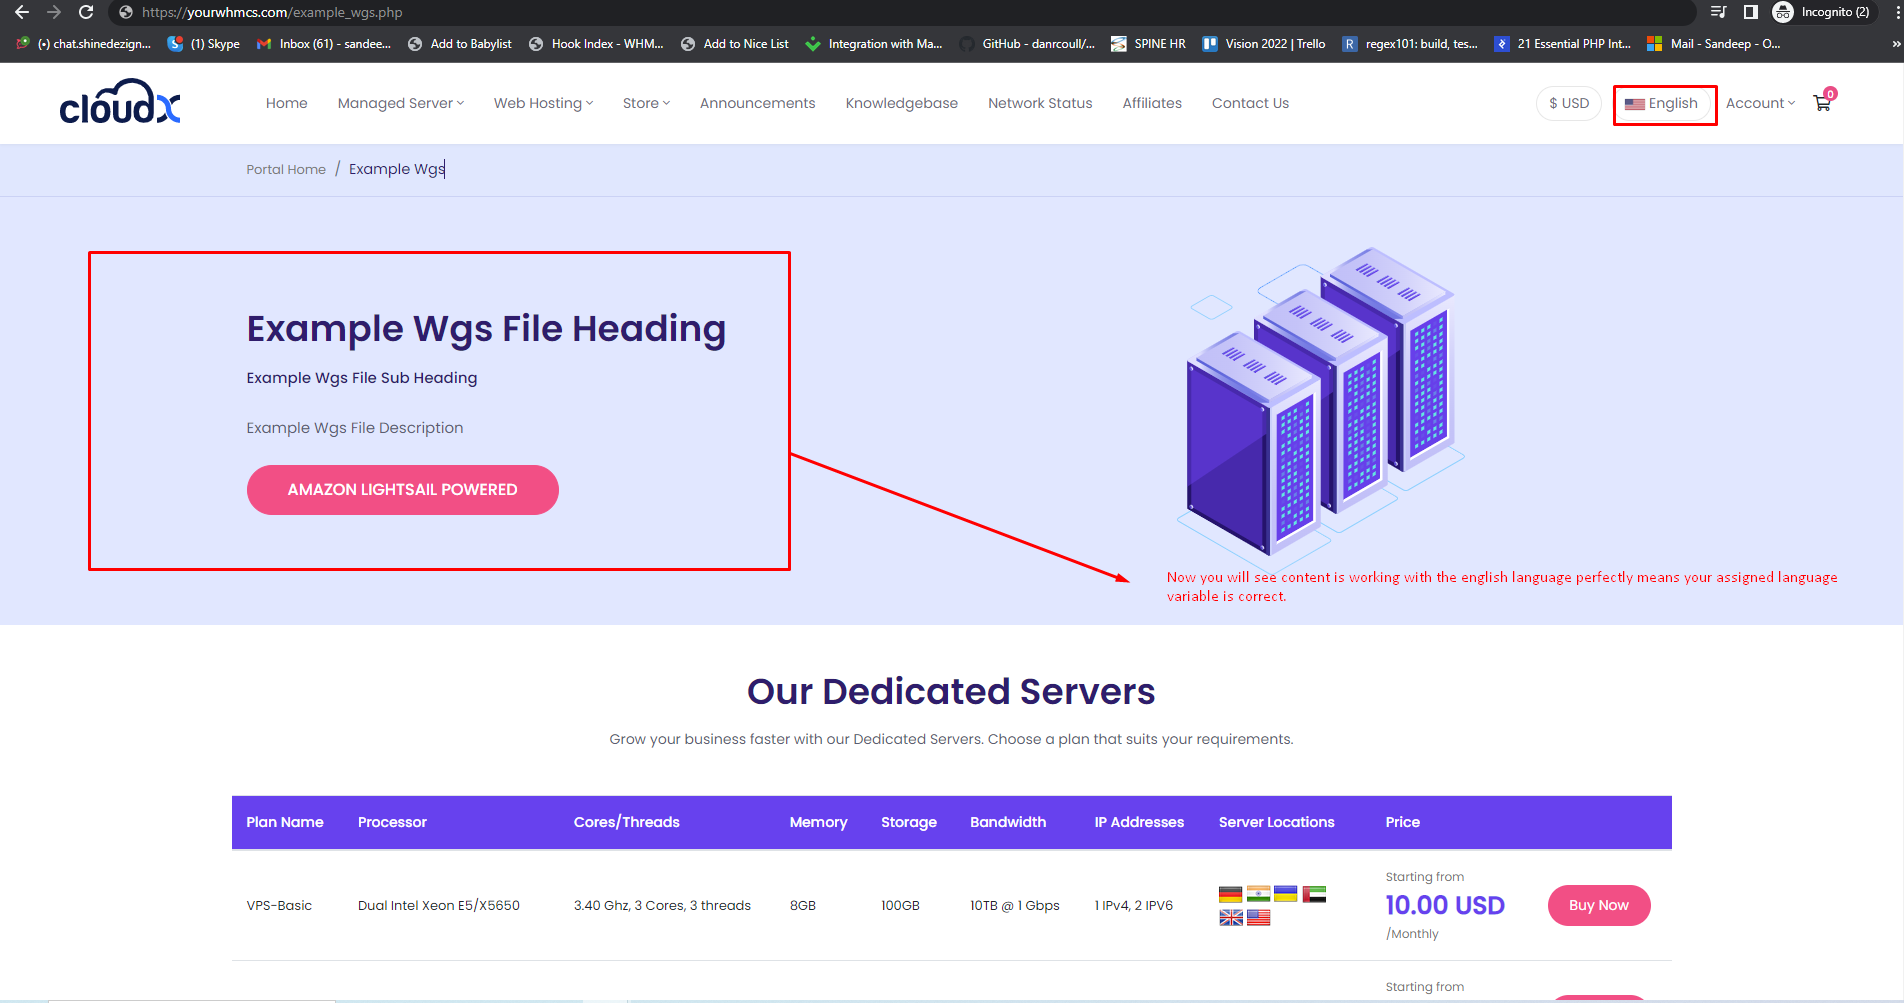
Step 12: Now if you see that your content is working perfectly it means your previous steps were successful.
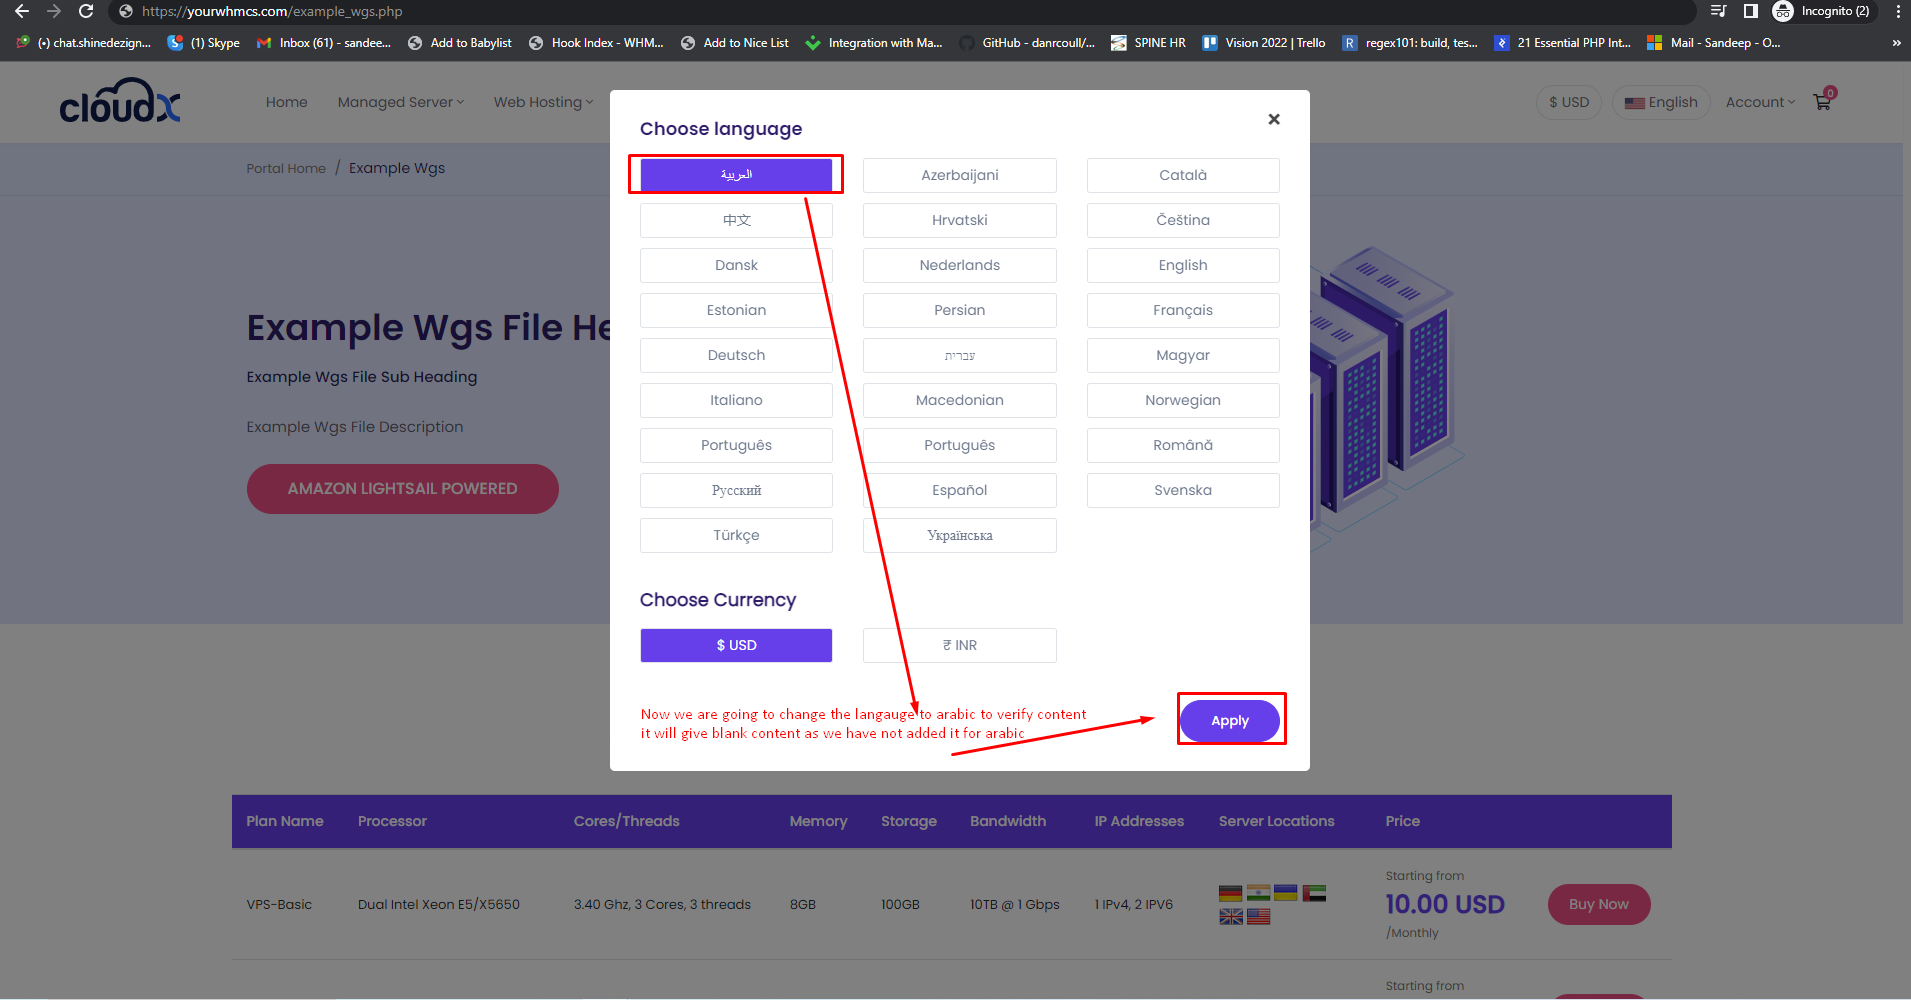
Step 13: Now change the language to arabic and click on apply, you should see a blank content as we have not assigned the language variable for arabic content.
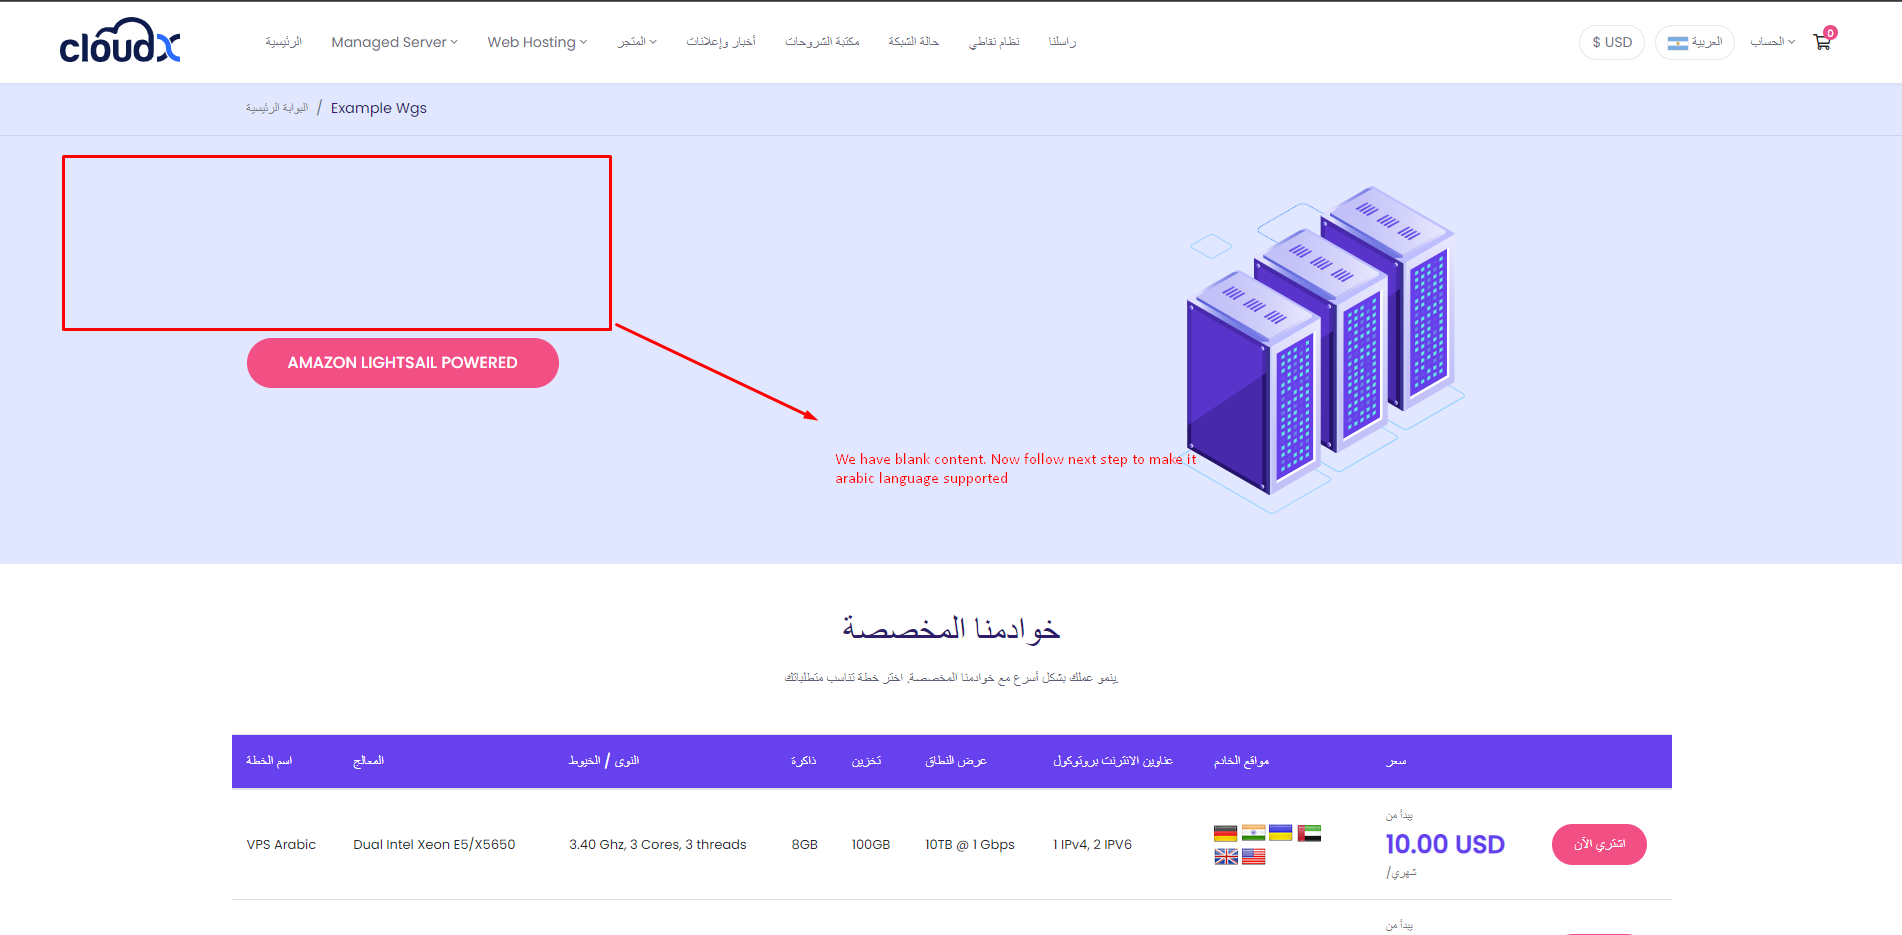
Step 14: As we can see here is the blank content. to make it changed we need to follow the further step.
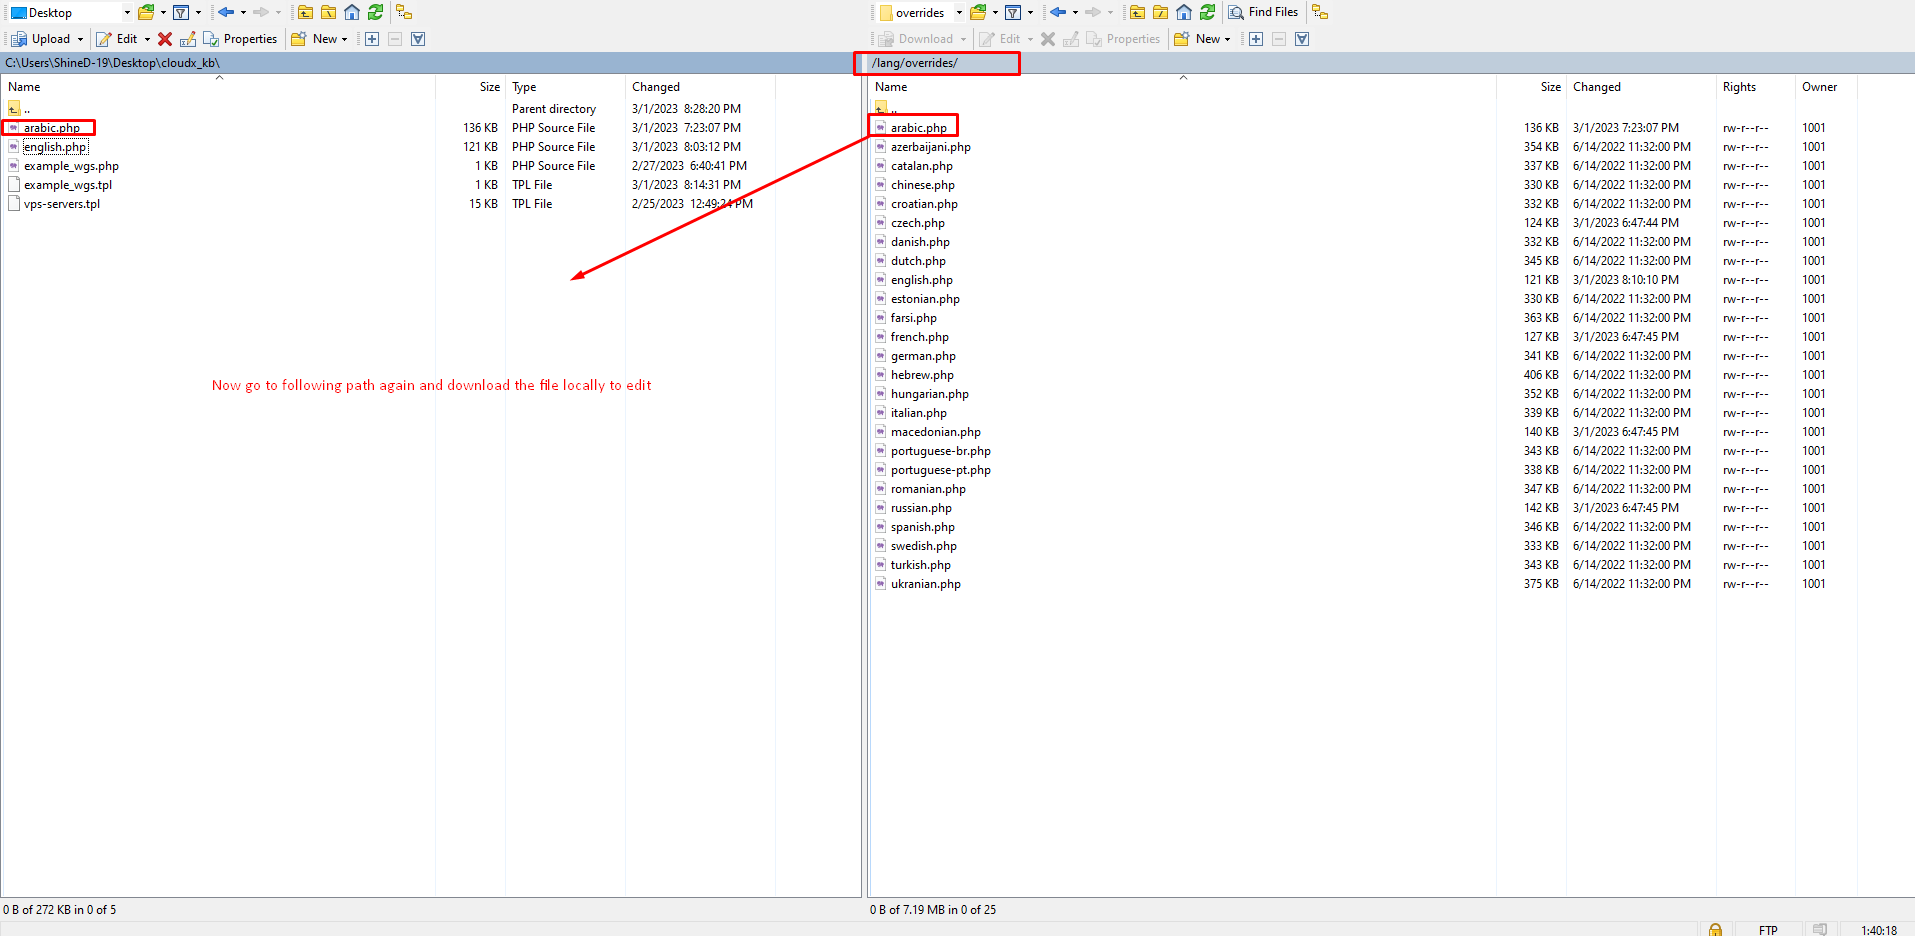
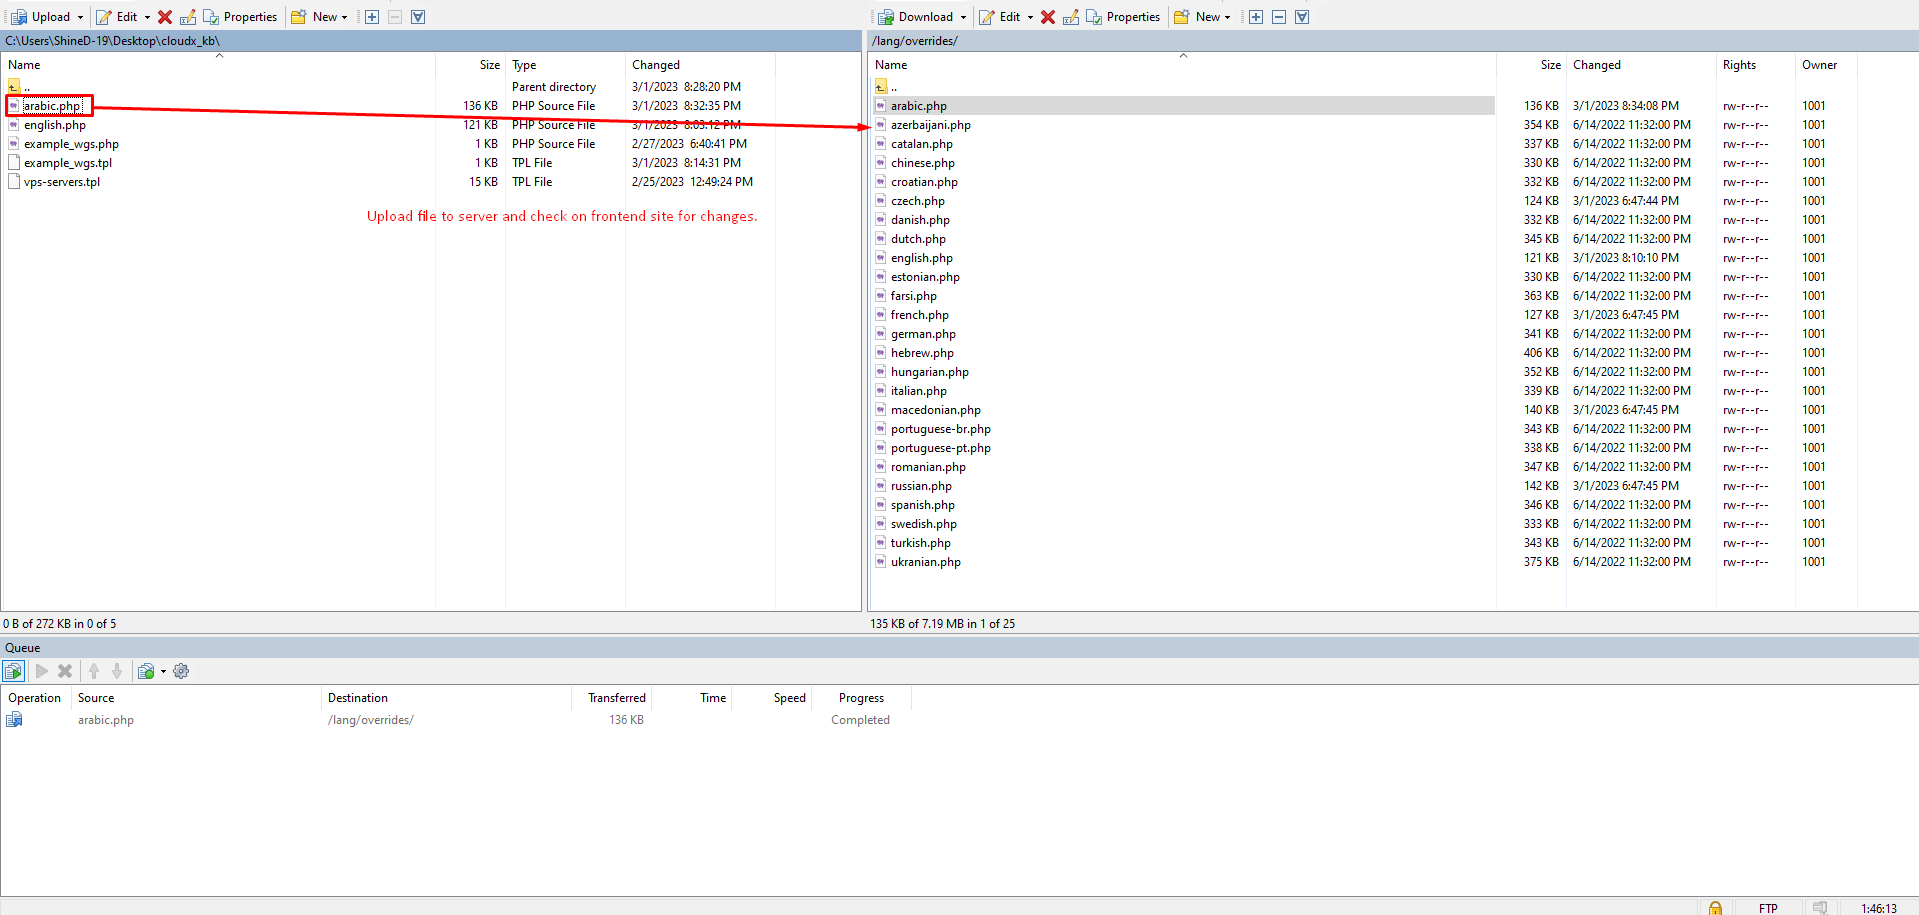
Step 15: Now got the following path /lang/overrides/ and download the arabic.php file locally to edit.
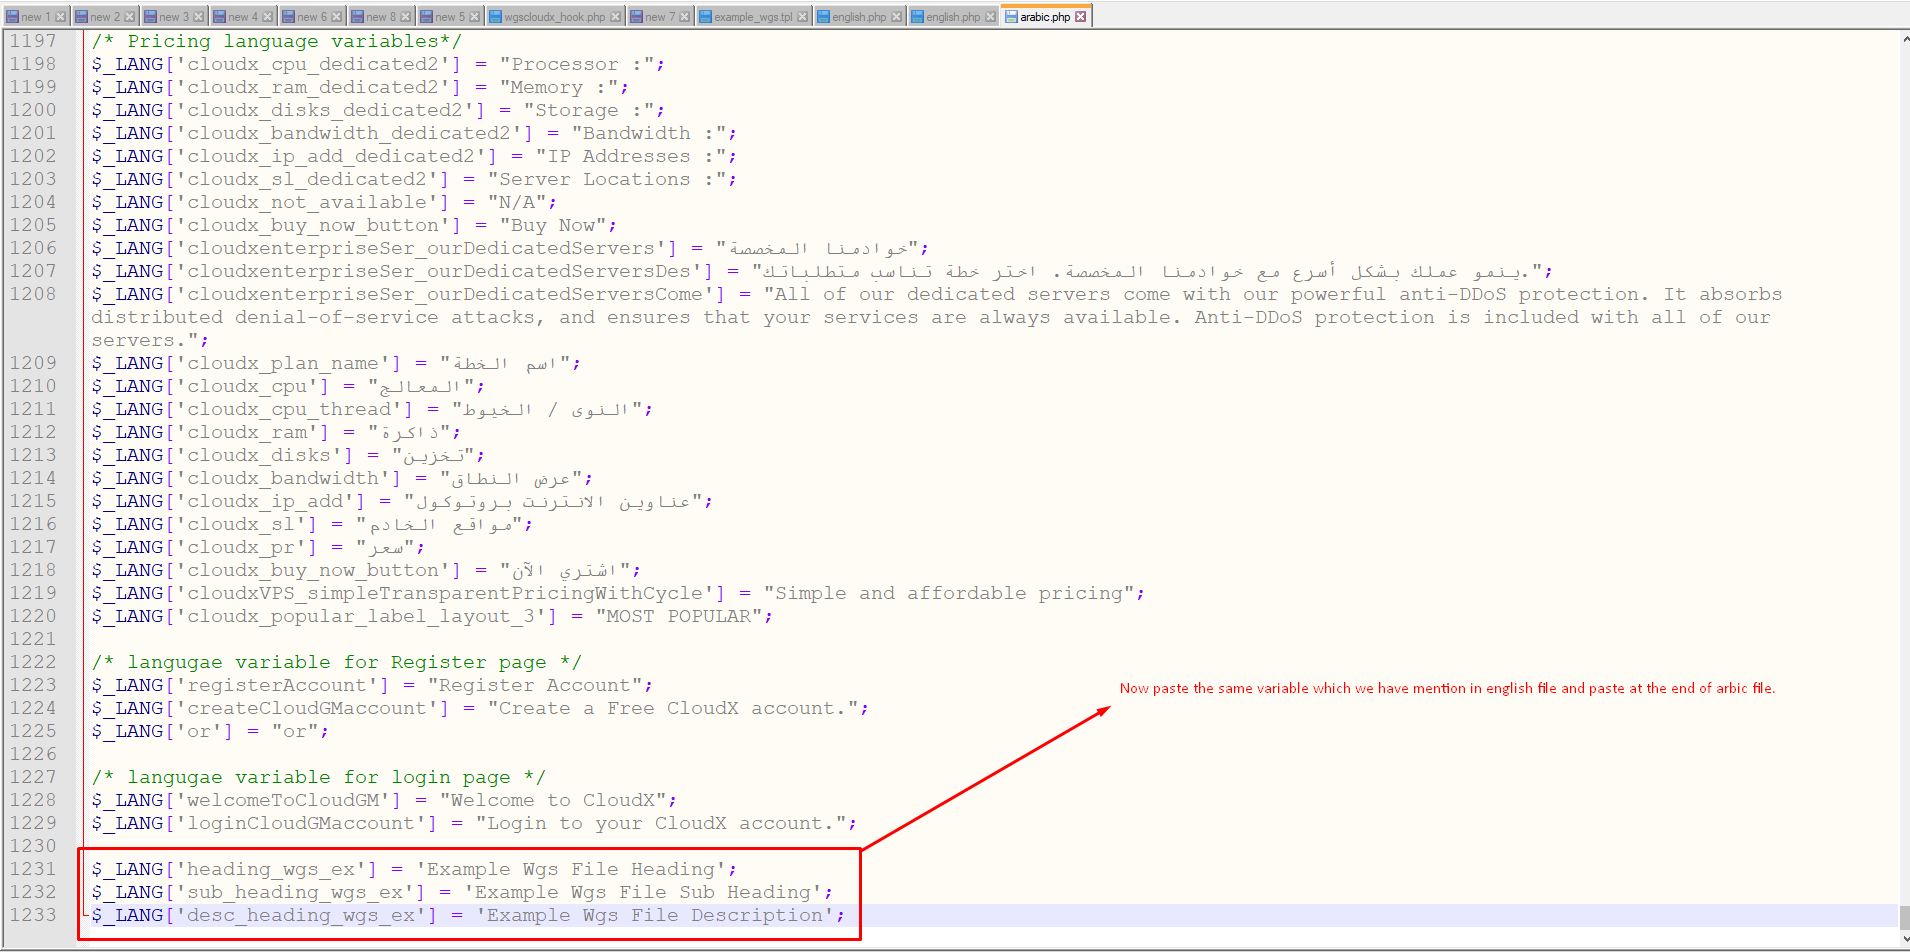
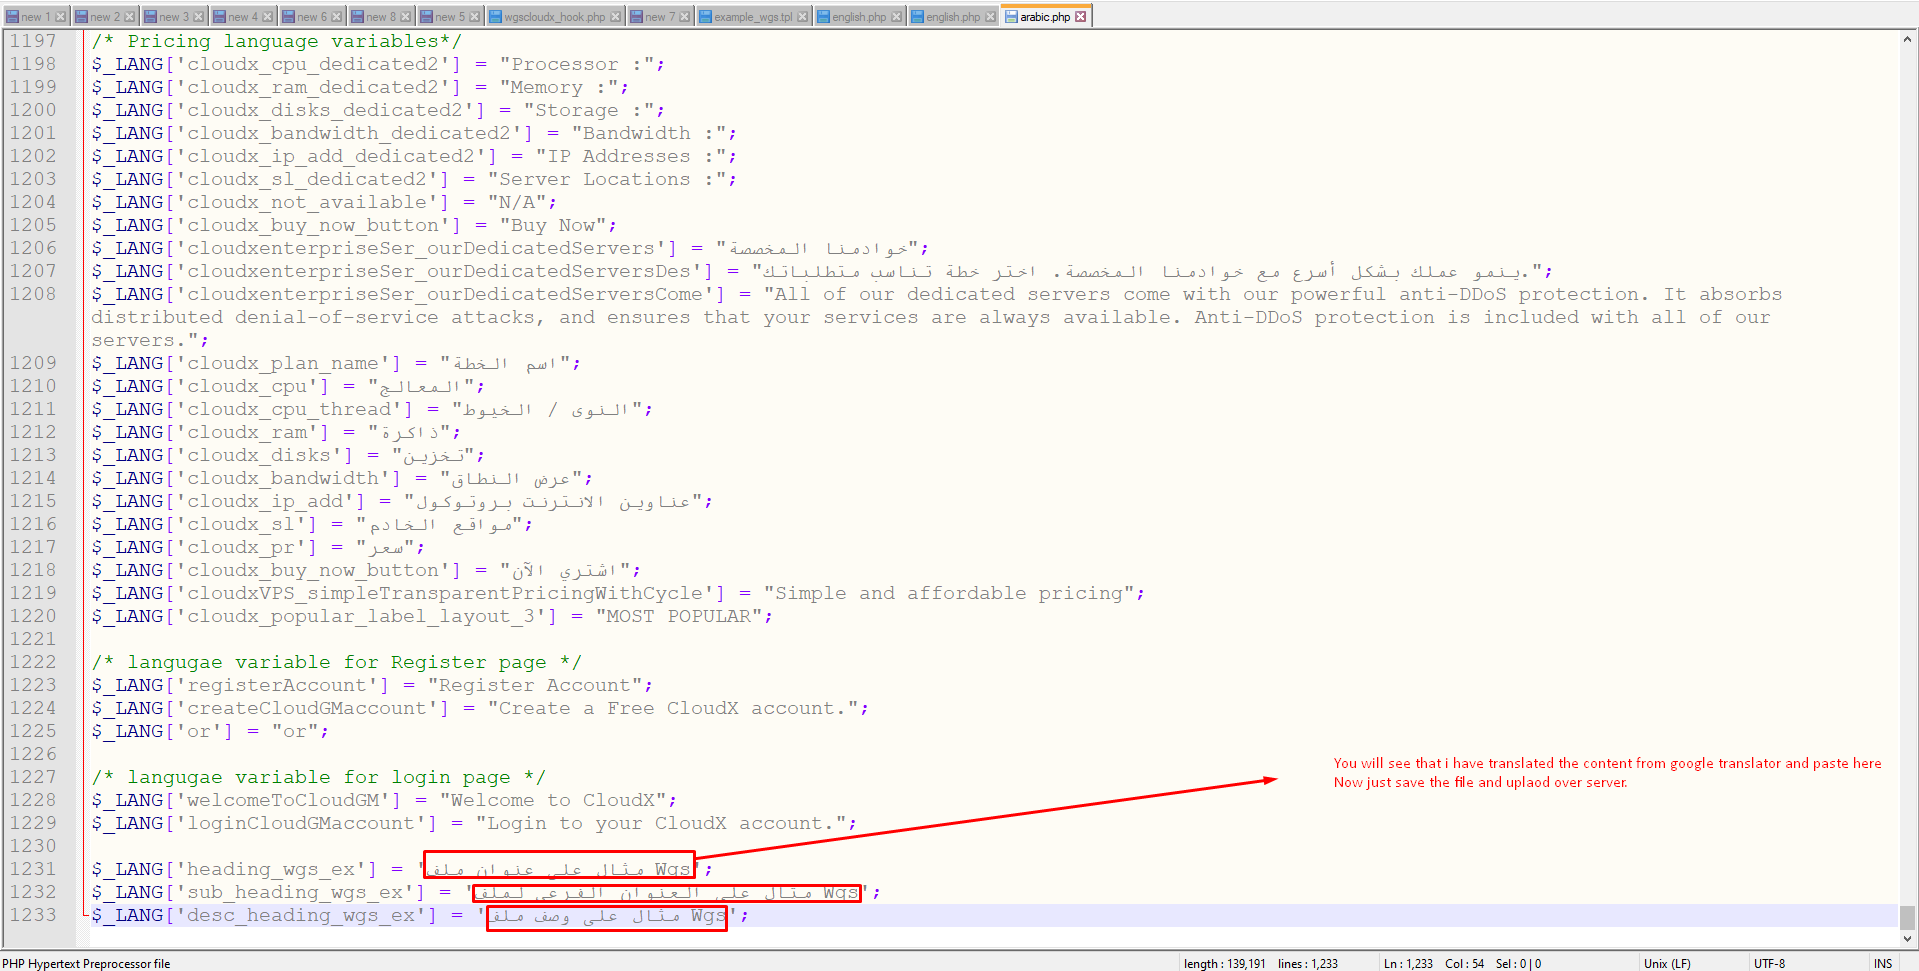
Step 16: Now paste the same variables which we used in english language page and at the end of the file.
Step 17: Now you have to change the content by assigning it to the variables on the right-hand side you can use google translator to convert this english to the arabic language.
Step 18: Once you have done the previous step and added your arabic content, please save the file and upload it to your server.
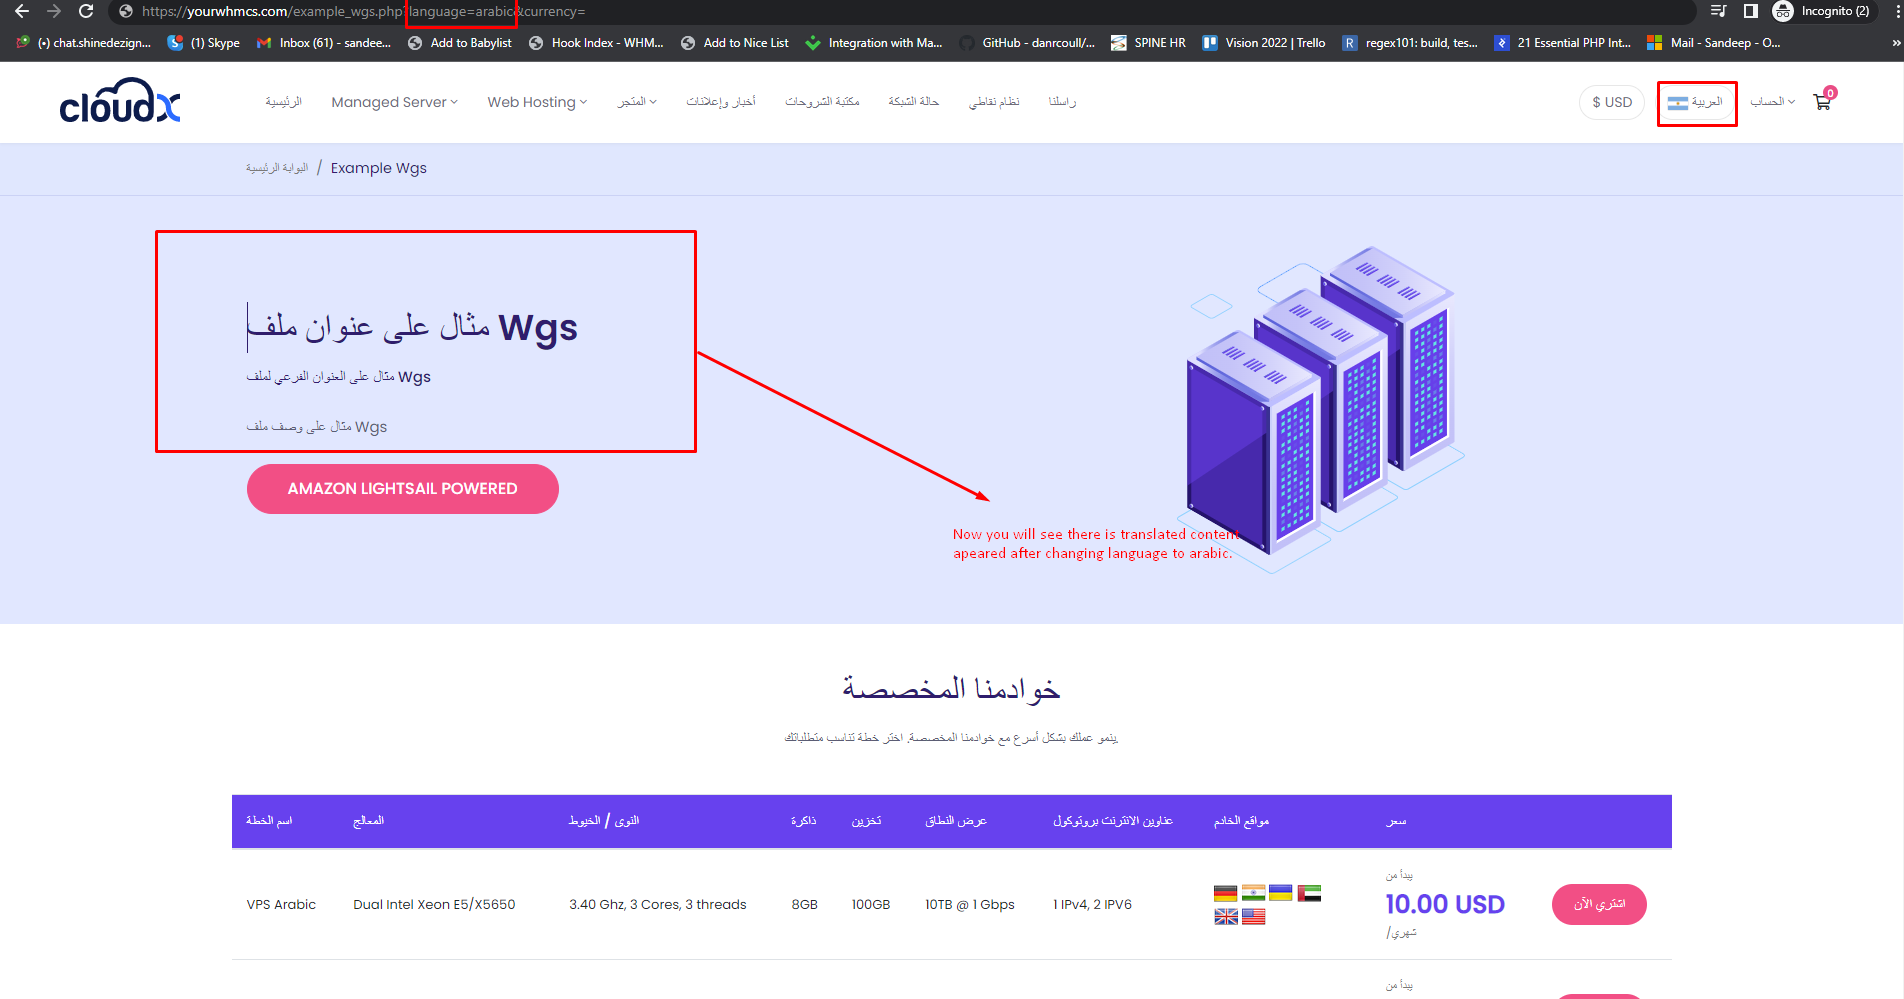
Step 19: After uploading check the frontend site for changes.
Step 20: Now you will be able to see your translated content on the website.
Step 21: Repeat the process from Step 15 onwards to make changes in other langauge of your choice. By going to the following path as mentioned in the screenshot below.

