How to create New Pages
Step 1: Open Ftp/Cpanel
Step 2: Go to your WHMCS Instance Root
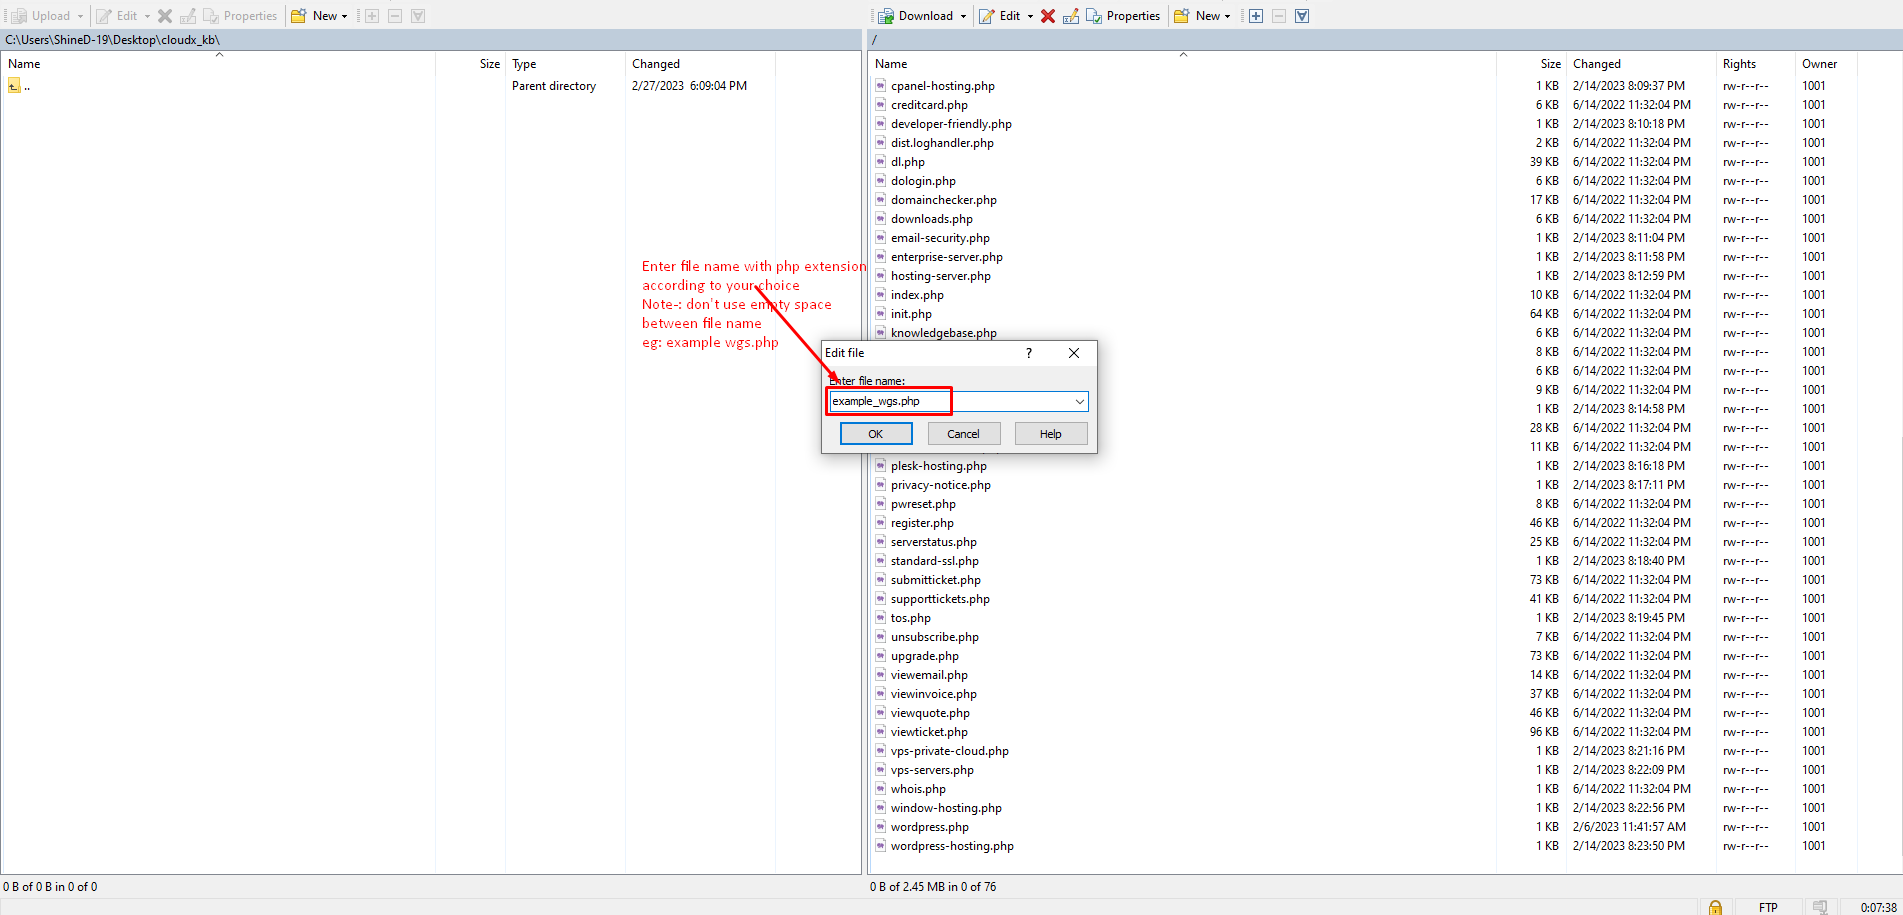
Step 3: Now Create the Php File with the name you want ie. example_wgs.php as shown in the screenshots below.

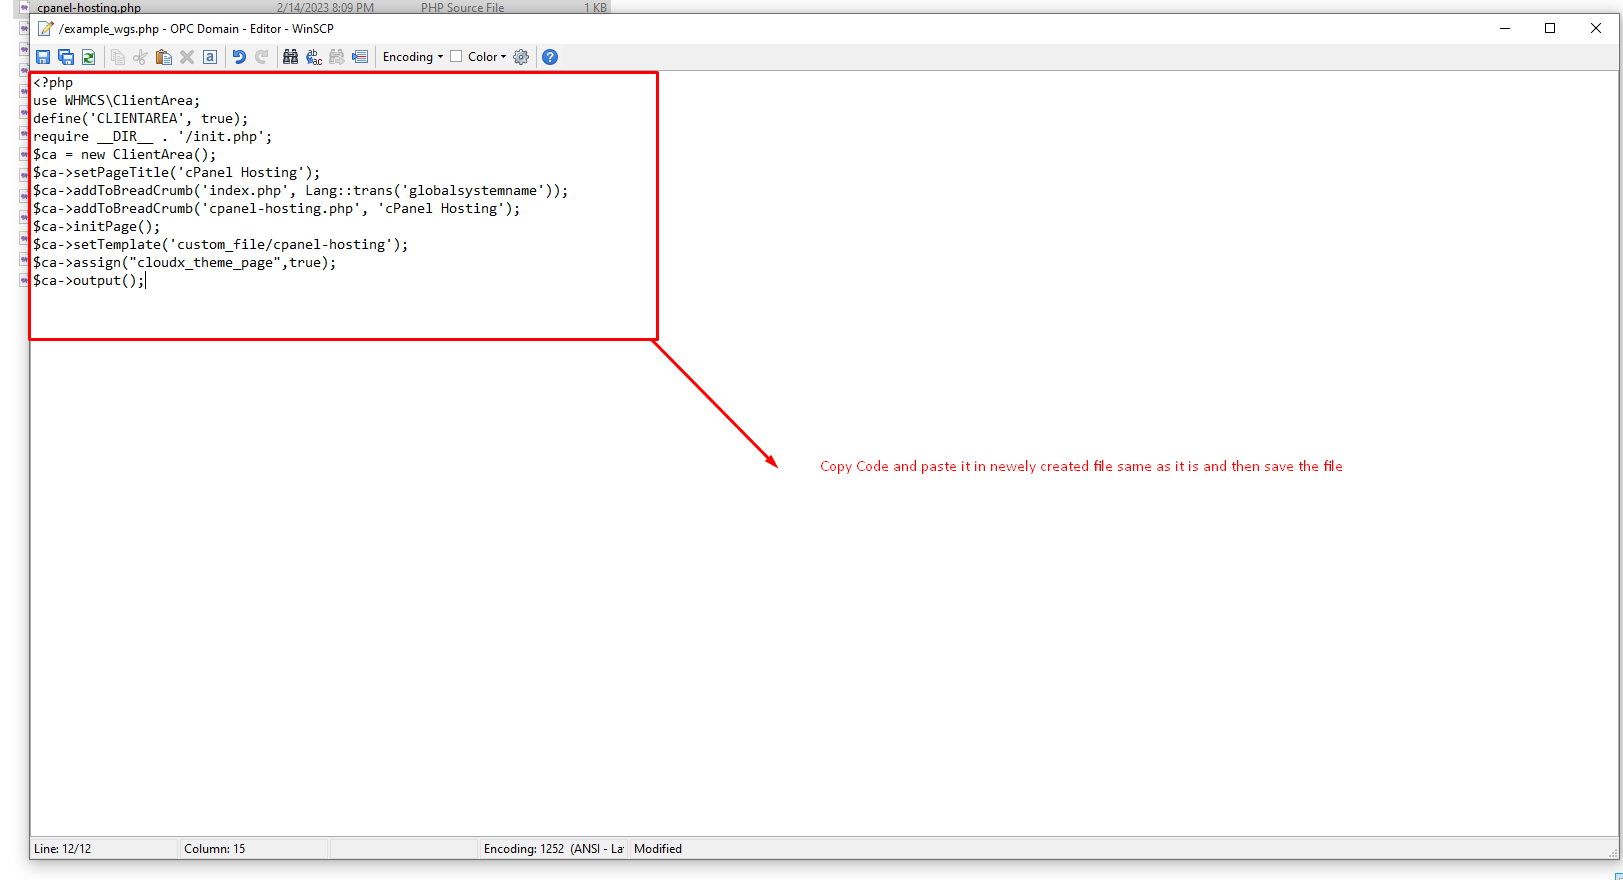
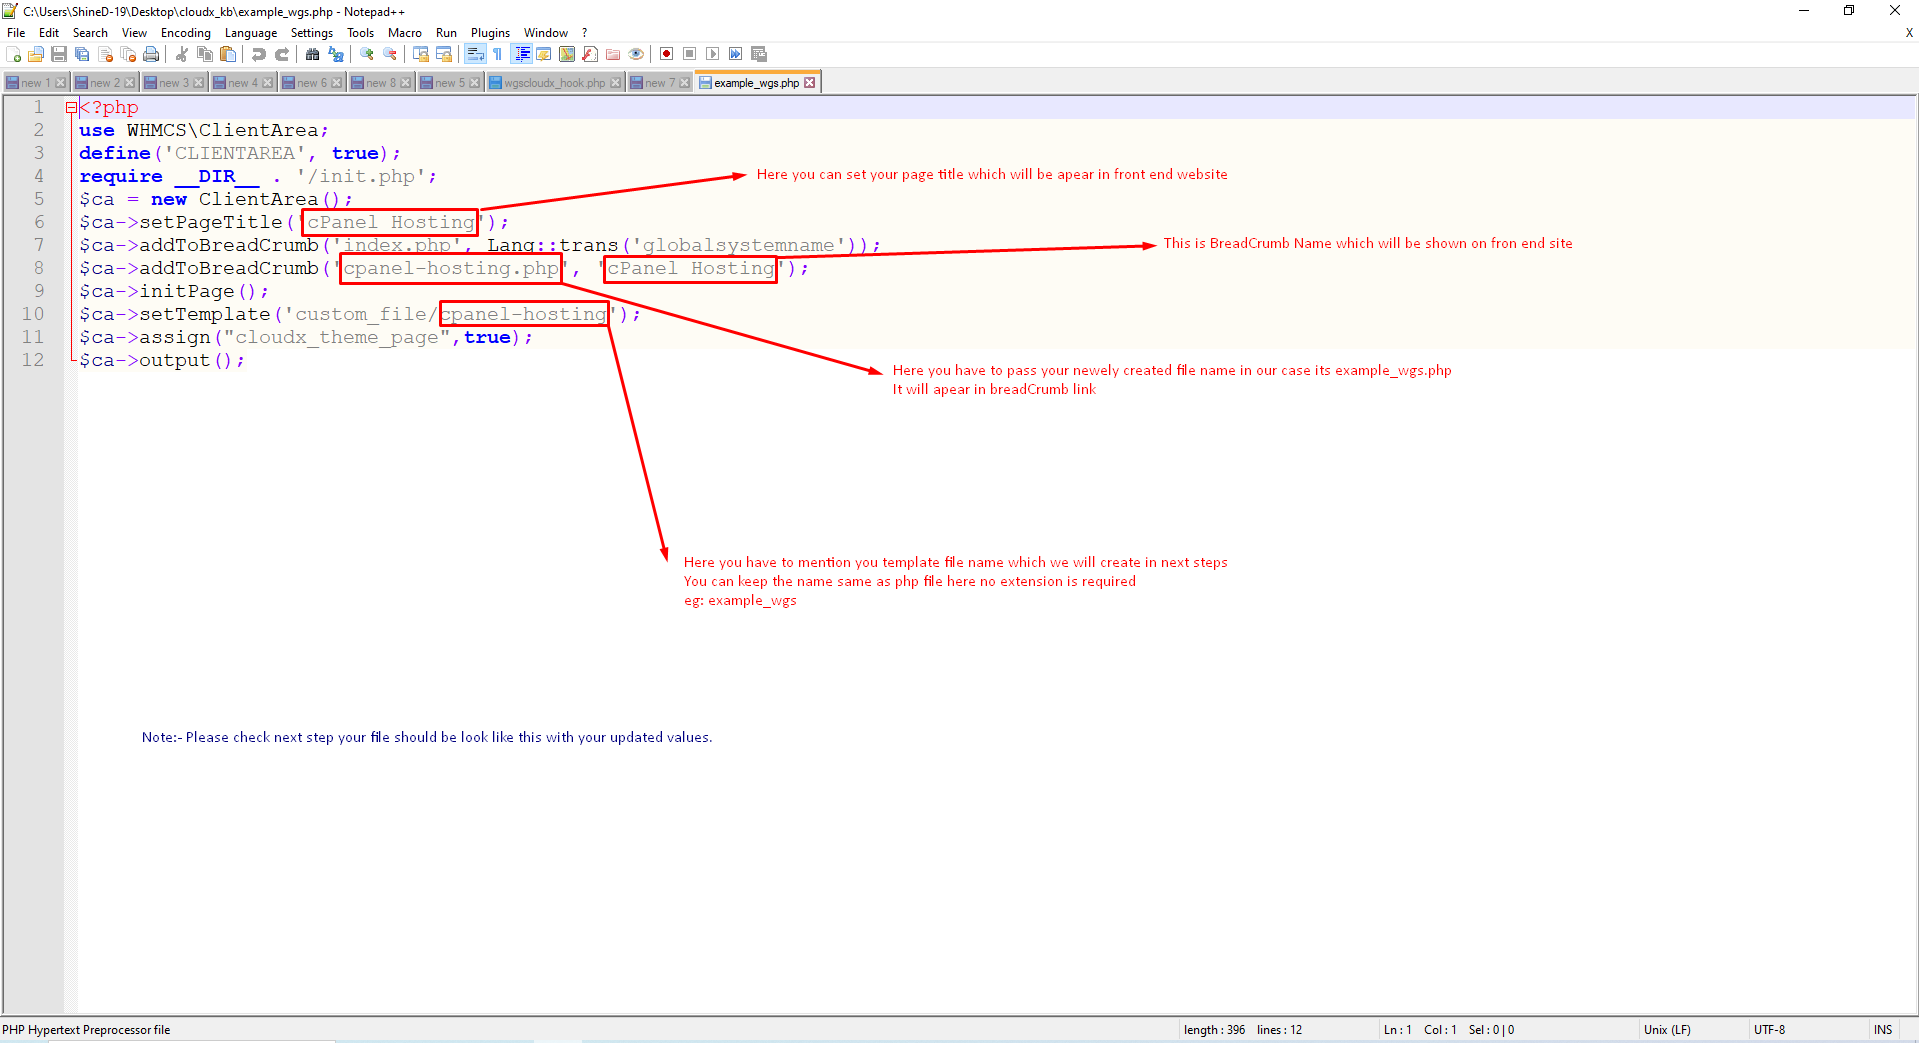
Step 4: Copy the code as mentioned below and paste it in newly created file and save the file.
<?php
use WHMCS\ClientArea;
define('CLIENTAREA', true);
require __DIR__ . '/init.php';
$ca = new ClientArea();
$ca->setPageTitle('cPanel Hosting');
$ca->addToBreadCrumb('index.php', Lang::trans('globalsystemname'));
$ca->addToBreadCrumb('cpanel-hosting.php', 'cPanel Hosting');
$ca->initPage();
$ca->setTemplate('custom_file/cpanel-hosting');
$ca->assign("cloudx_theme_page",true);
$ca->output();
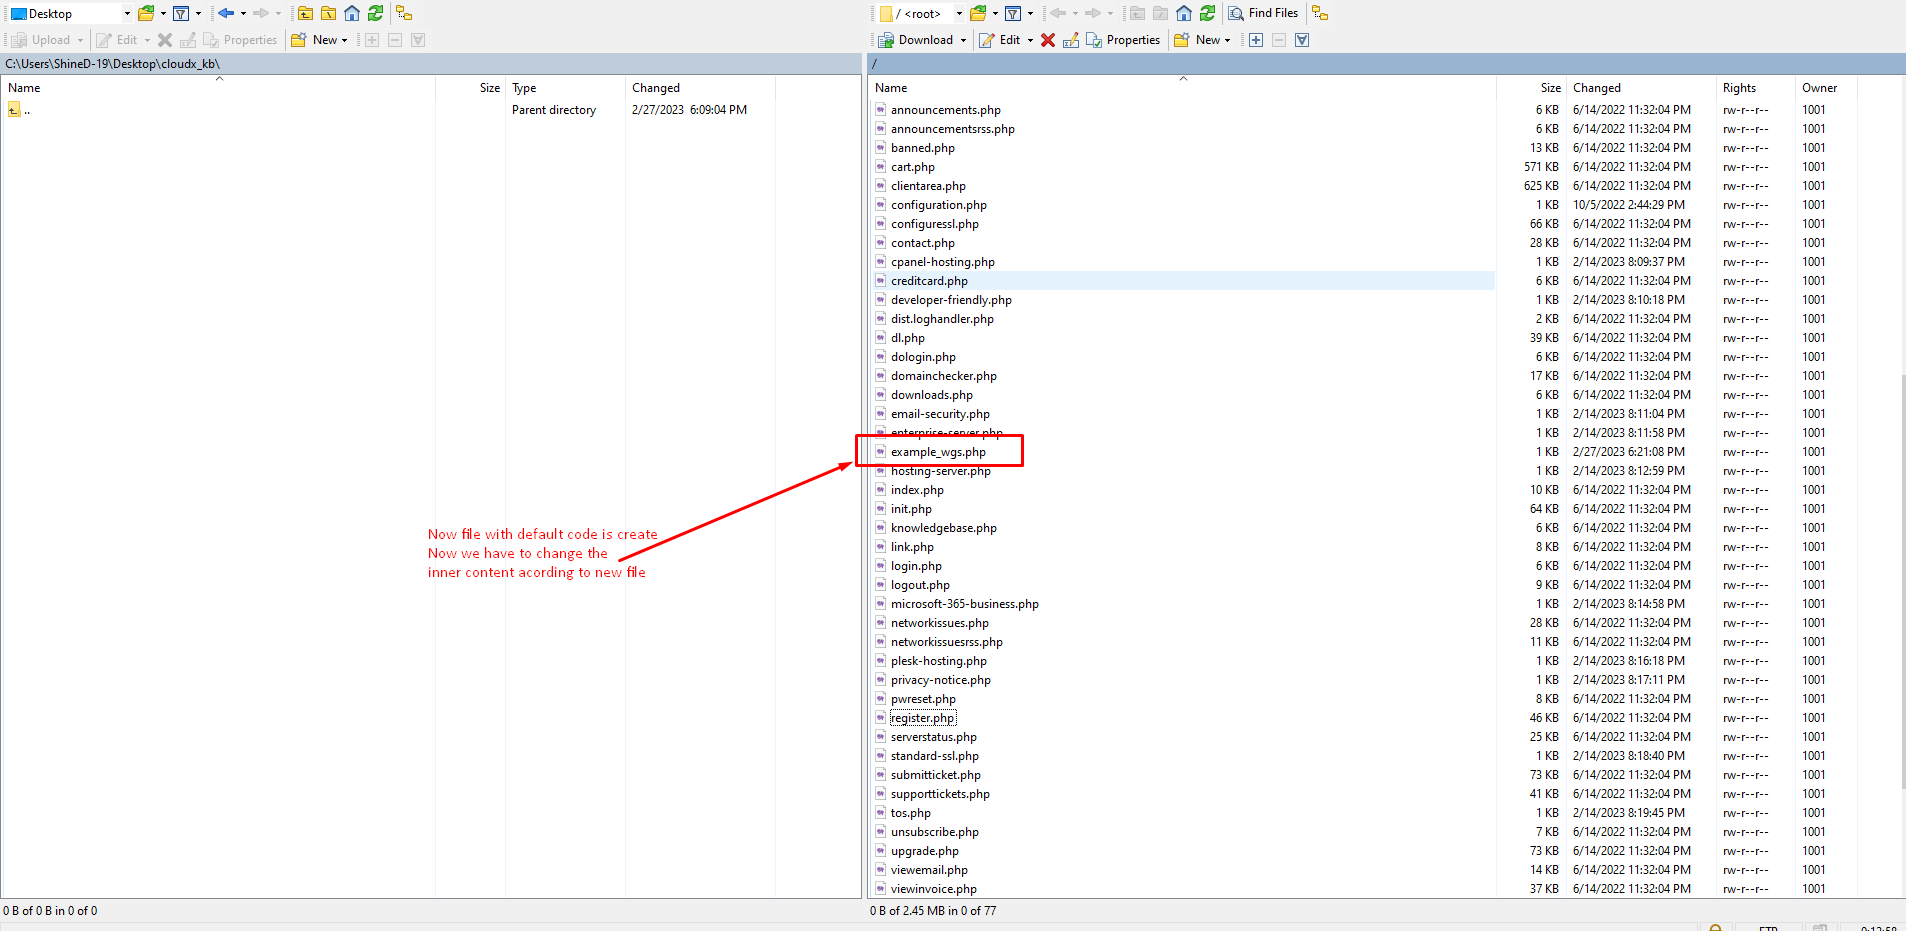
Step 5: The file with default code would be created, now you have to change its inner content according to the new file.
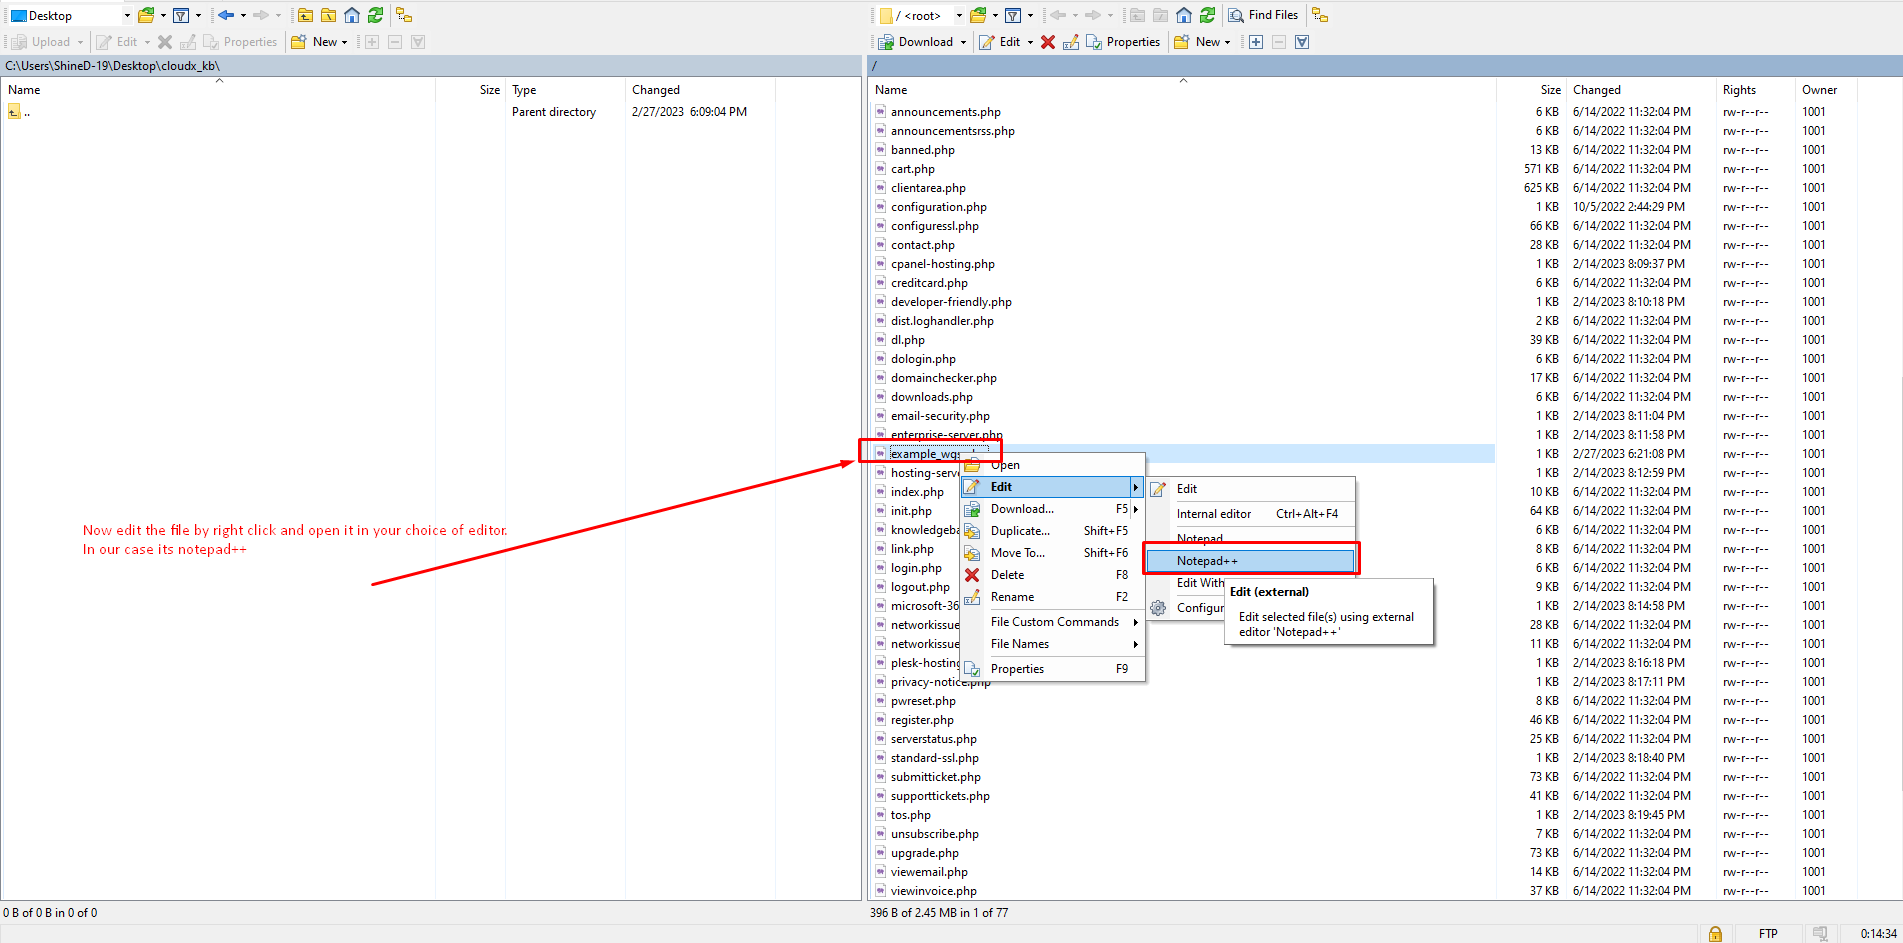
Step 6: Now edit the files by right click and open it in your choice of editor In our case its notepad++
Step 7: Now you can edit the page tittle Breadcrum content and your newly created file name under add to breadcrum option. Also, you can add the custom file under template which we will be creating in further steps.
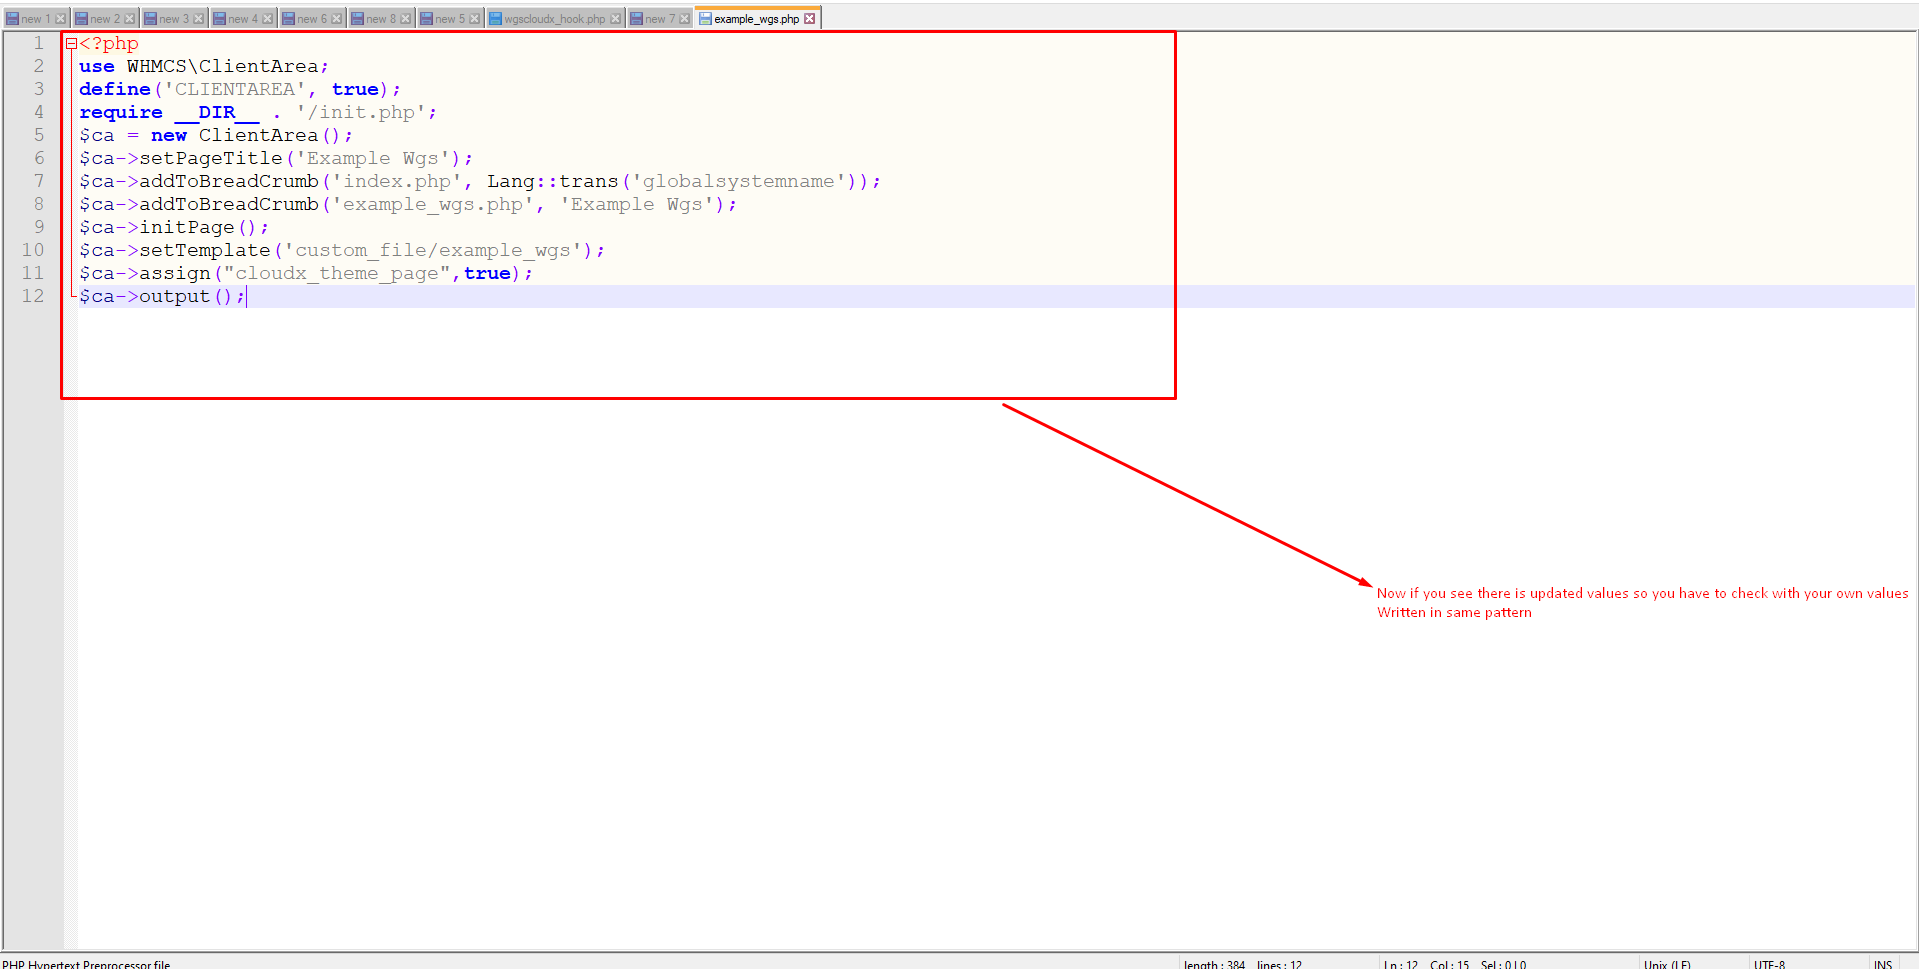
Step 8: Now if you see there is an updated values so you have to check with your own values written in same pattern.
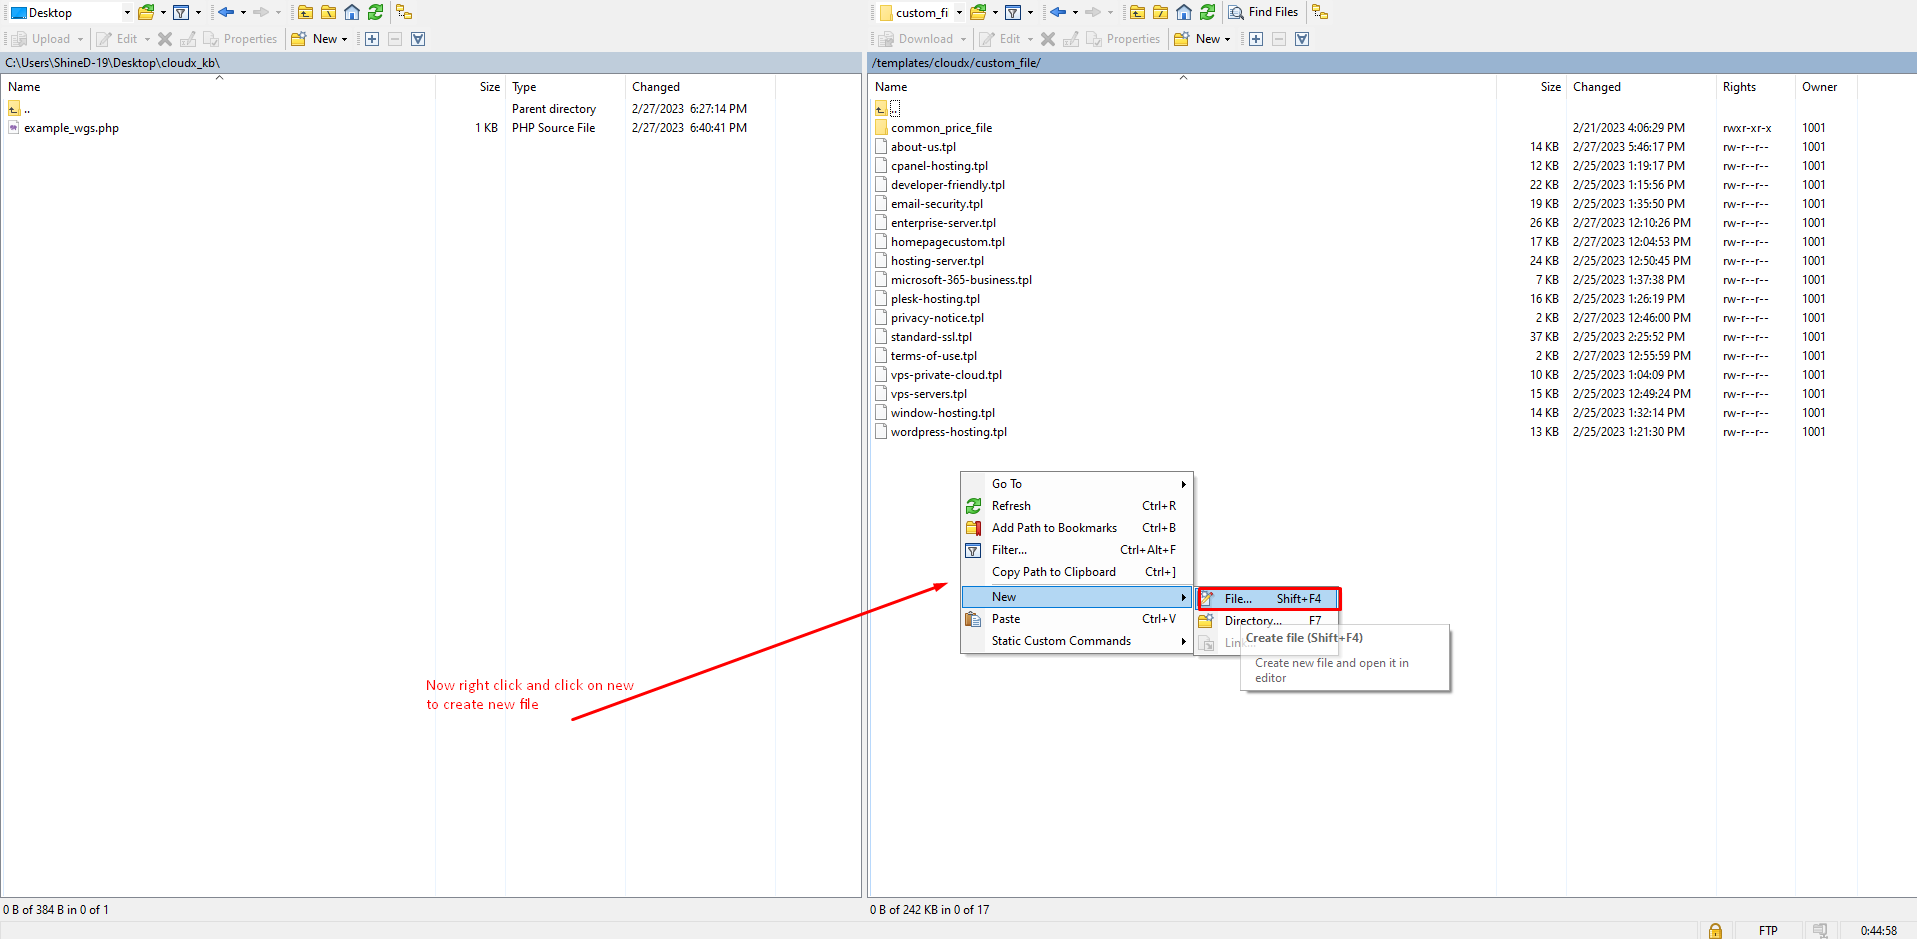
Step 9: Now you need to navigate to this path so that here we can create template file which we assigned in PHP file under (step 7)

Step 10: Now click on right side and then click on new option to create a new file as shown in the screenshot below.
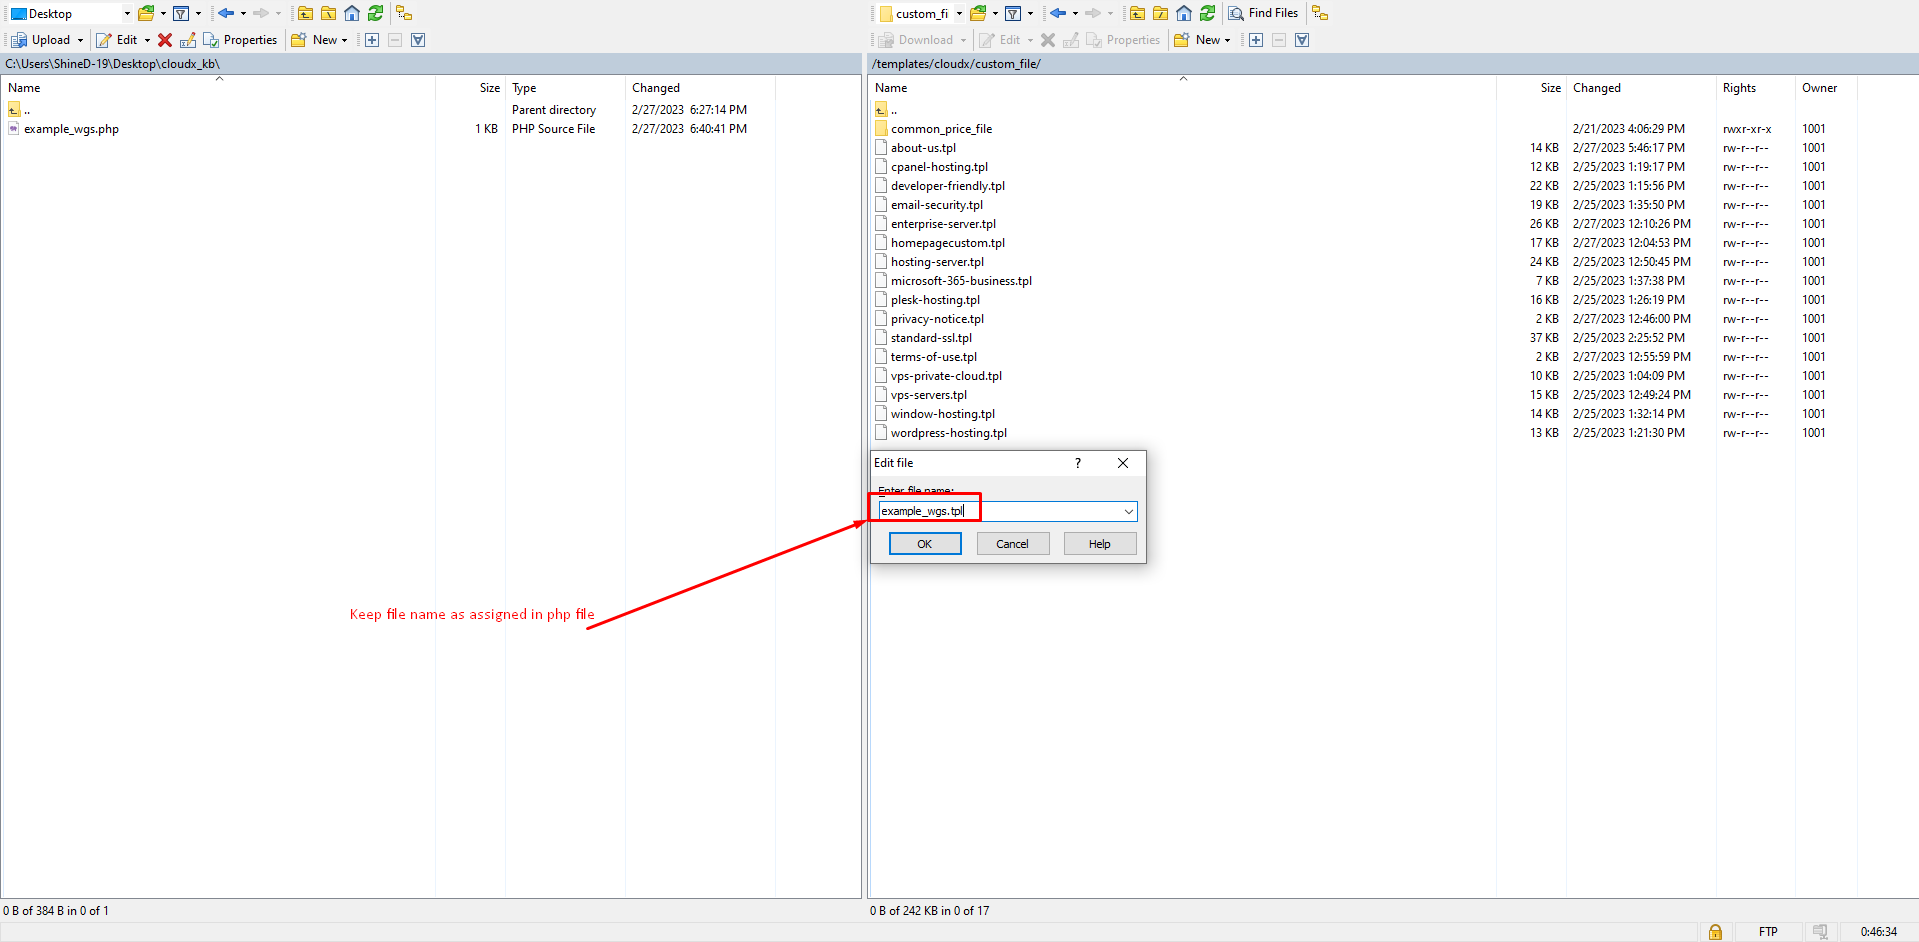
Step 11: Now keep the file name as assigned din PHP file
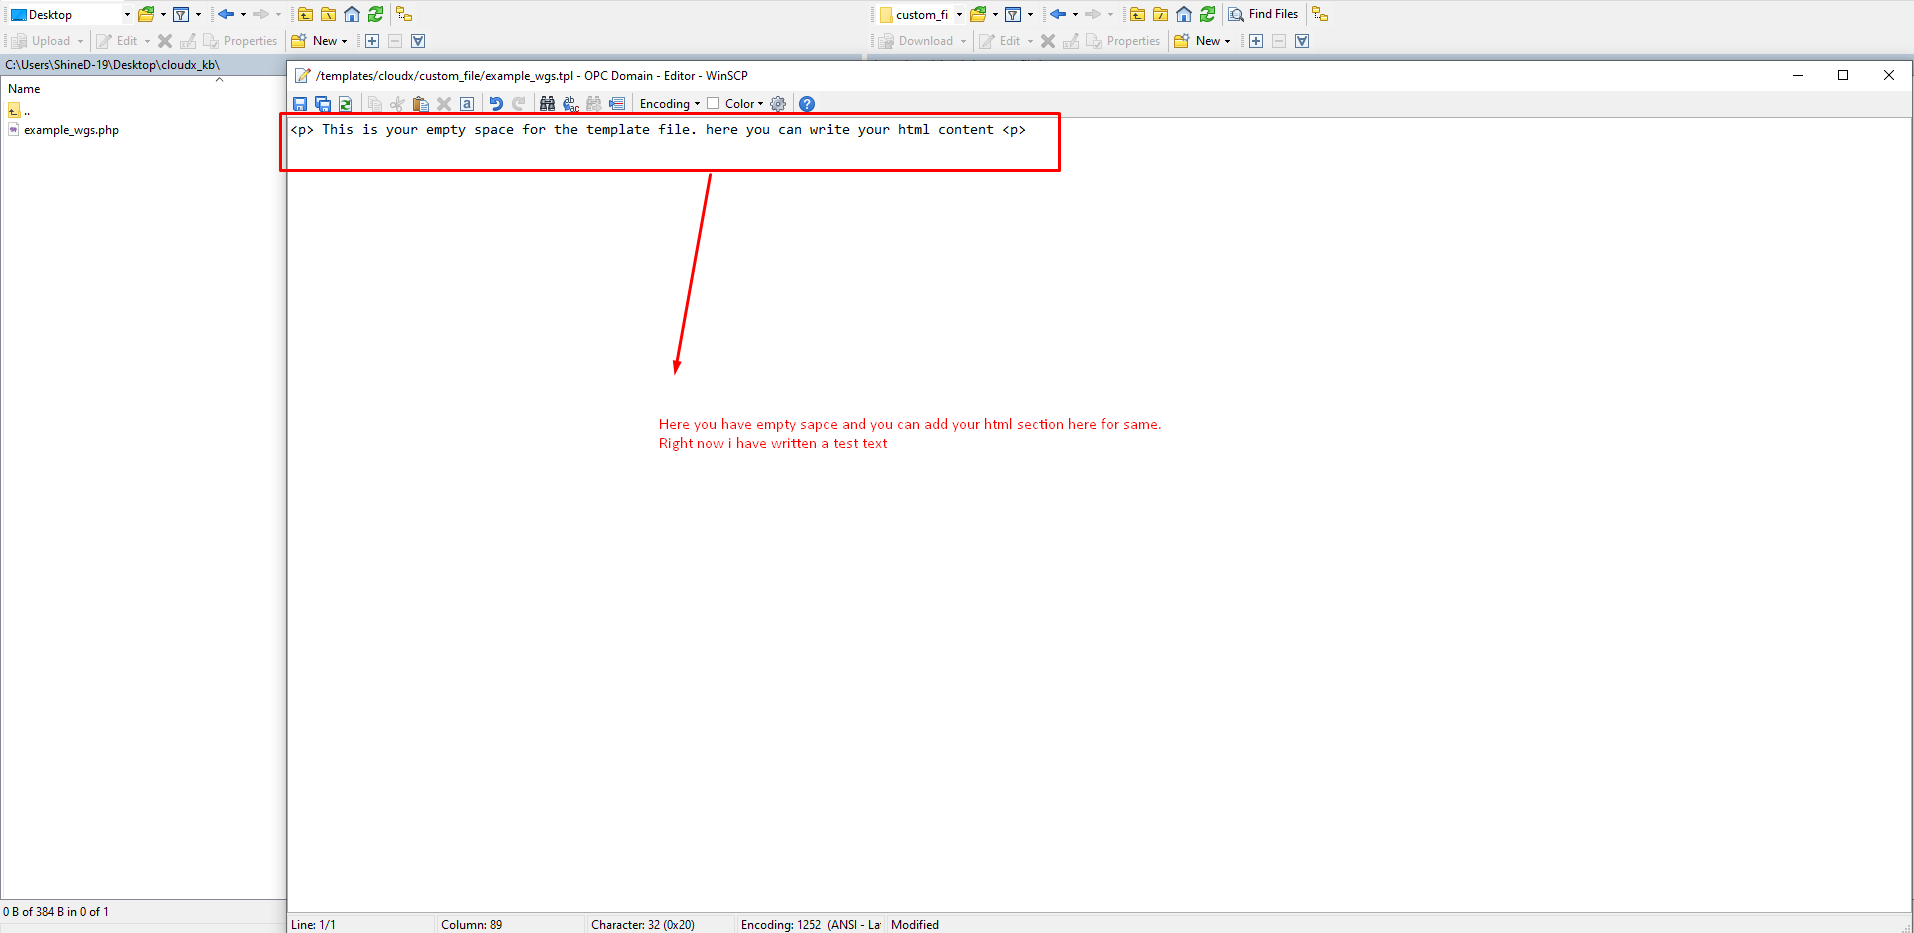
Step 12: Here you have an empty space where you can add your HTML section.
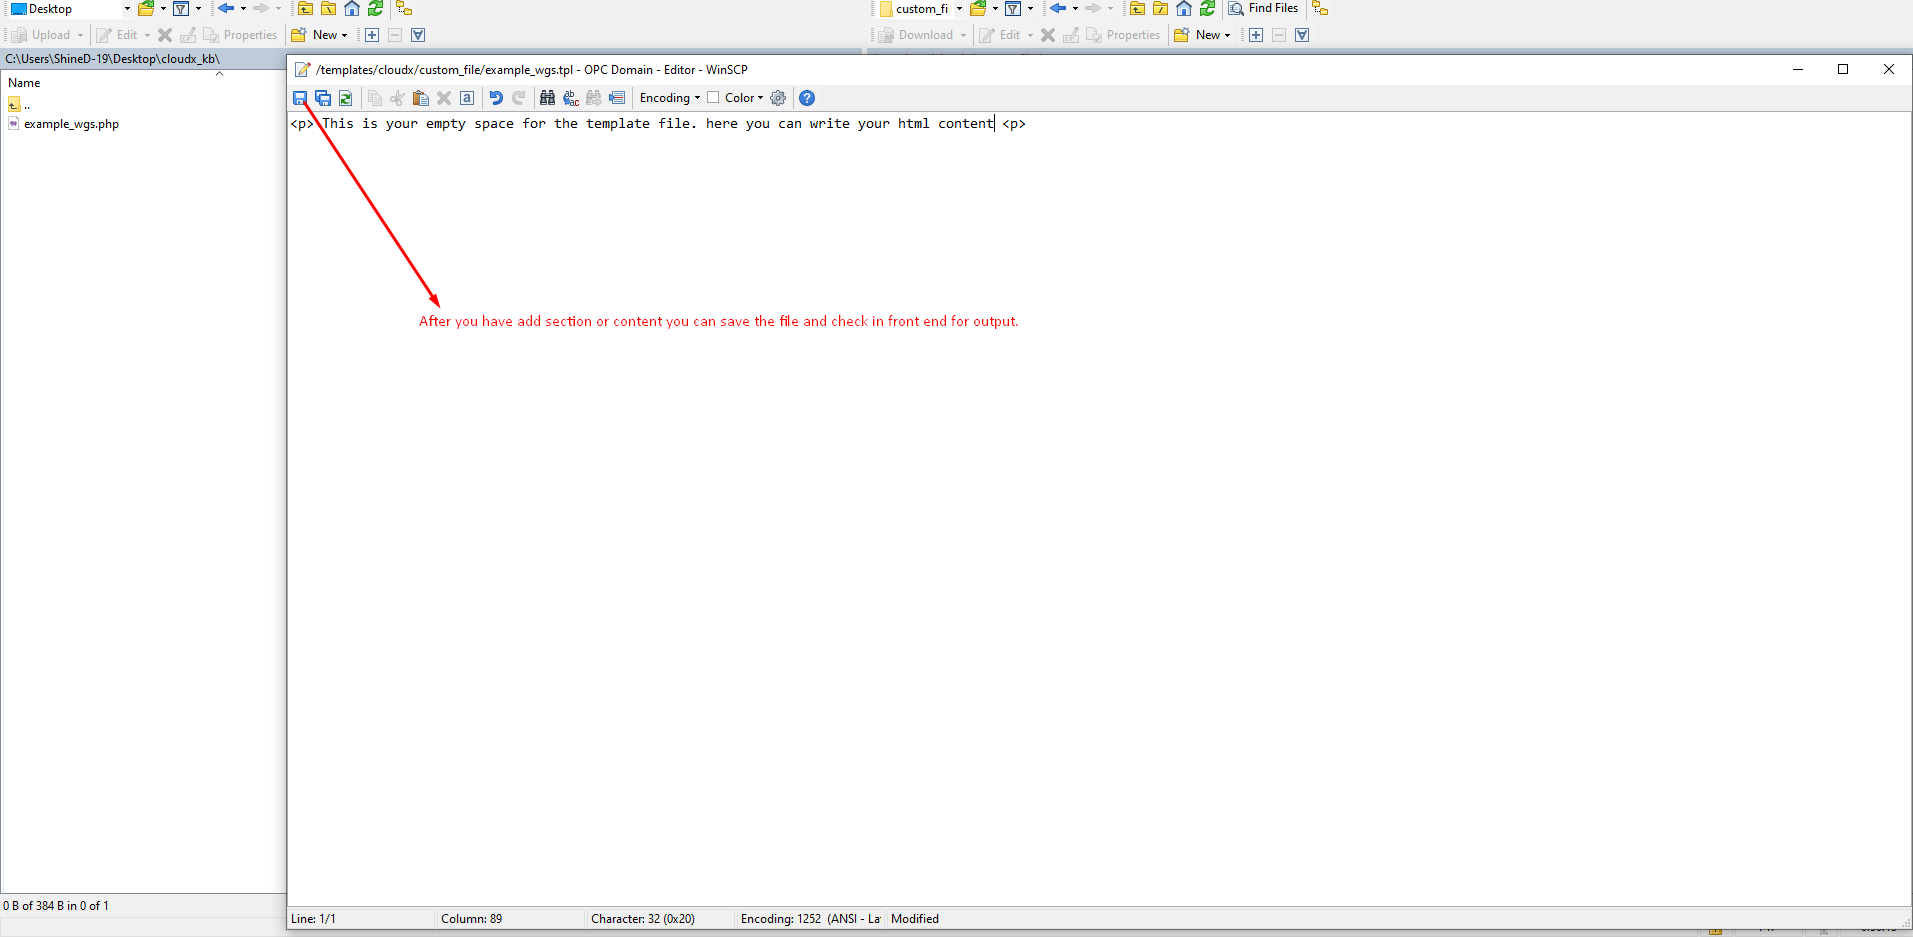
Step 13: After that you have added the section or content, then you can save the file and check in front end for output.
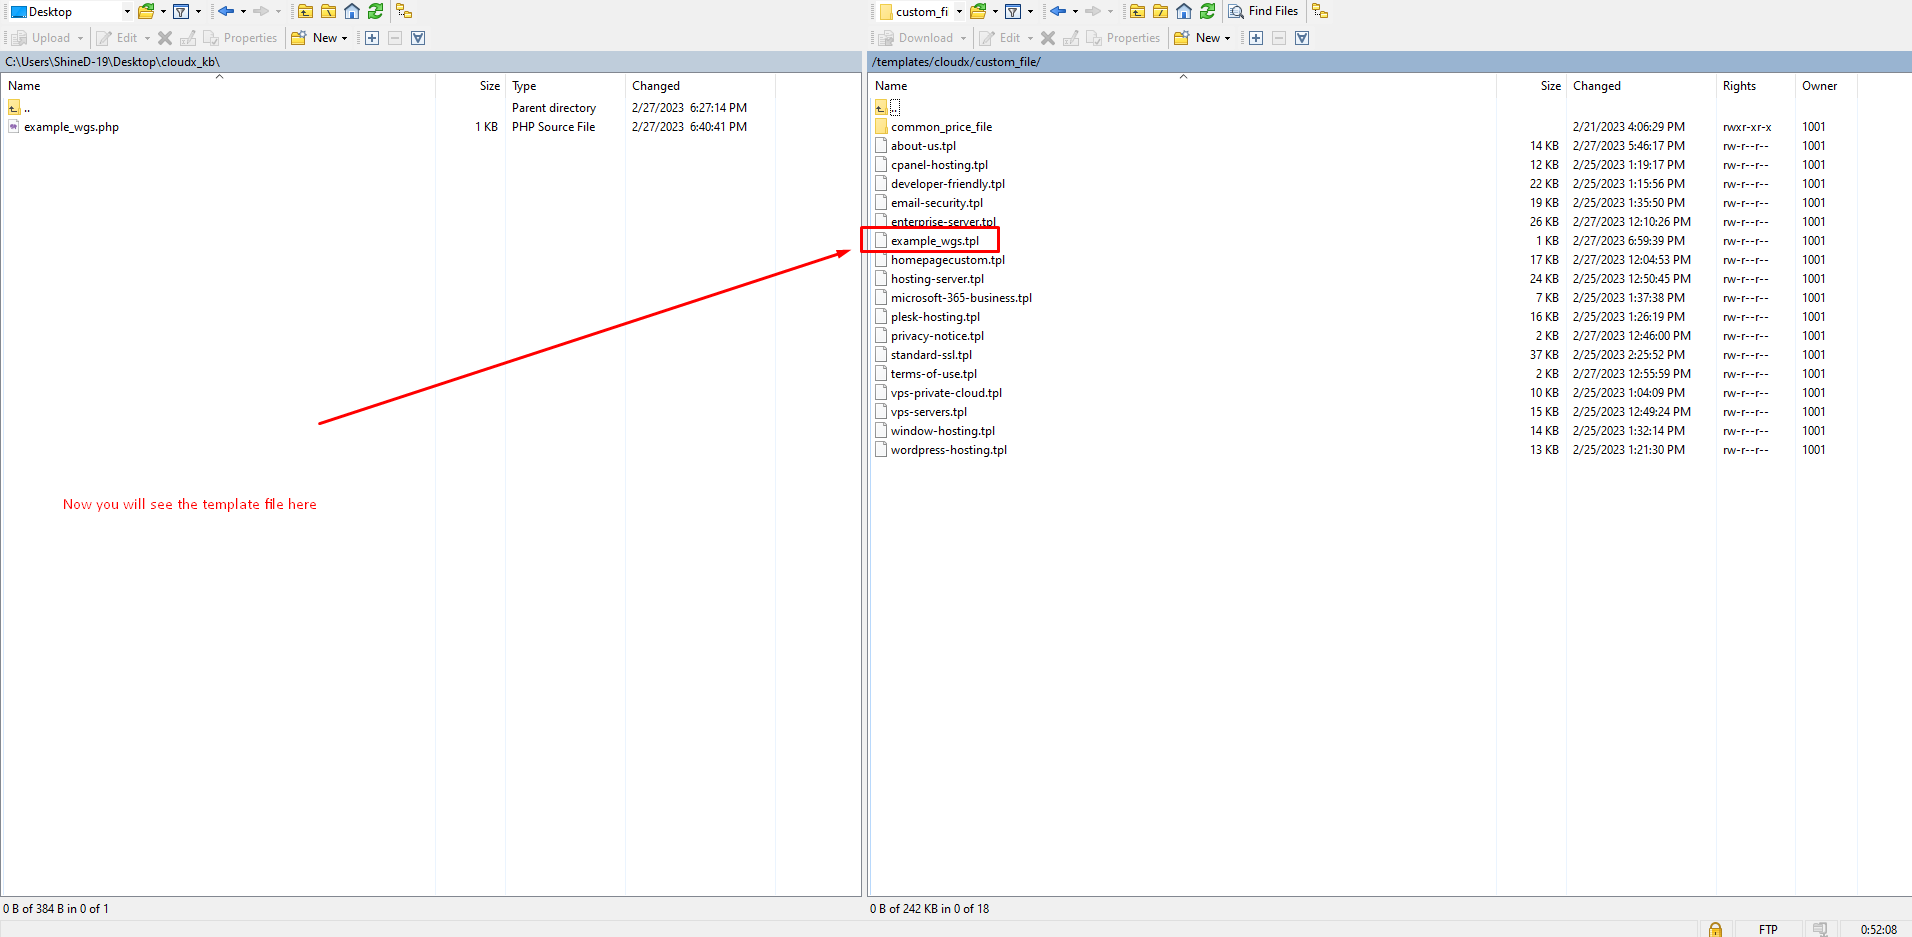
Step 14: Now you will see the template file here as shown in the screenshot below.
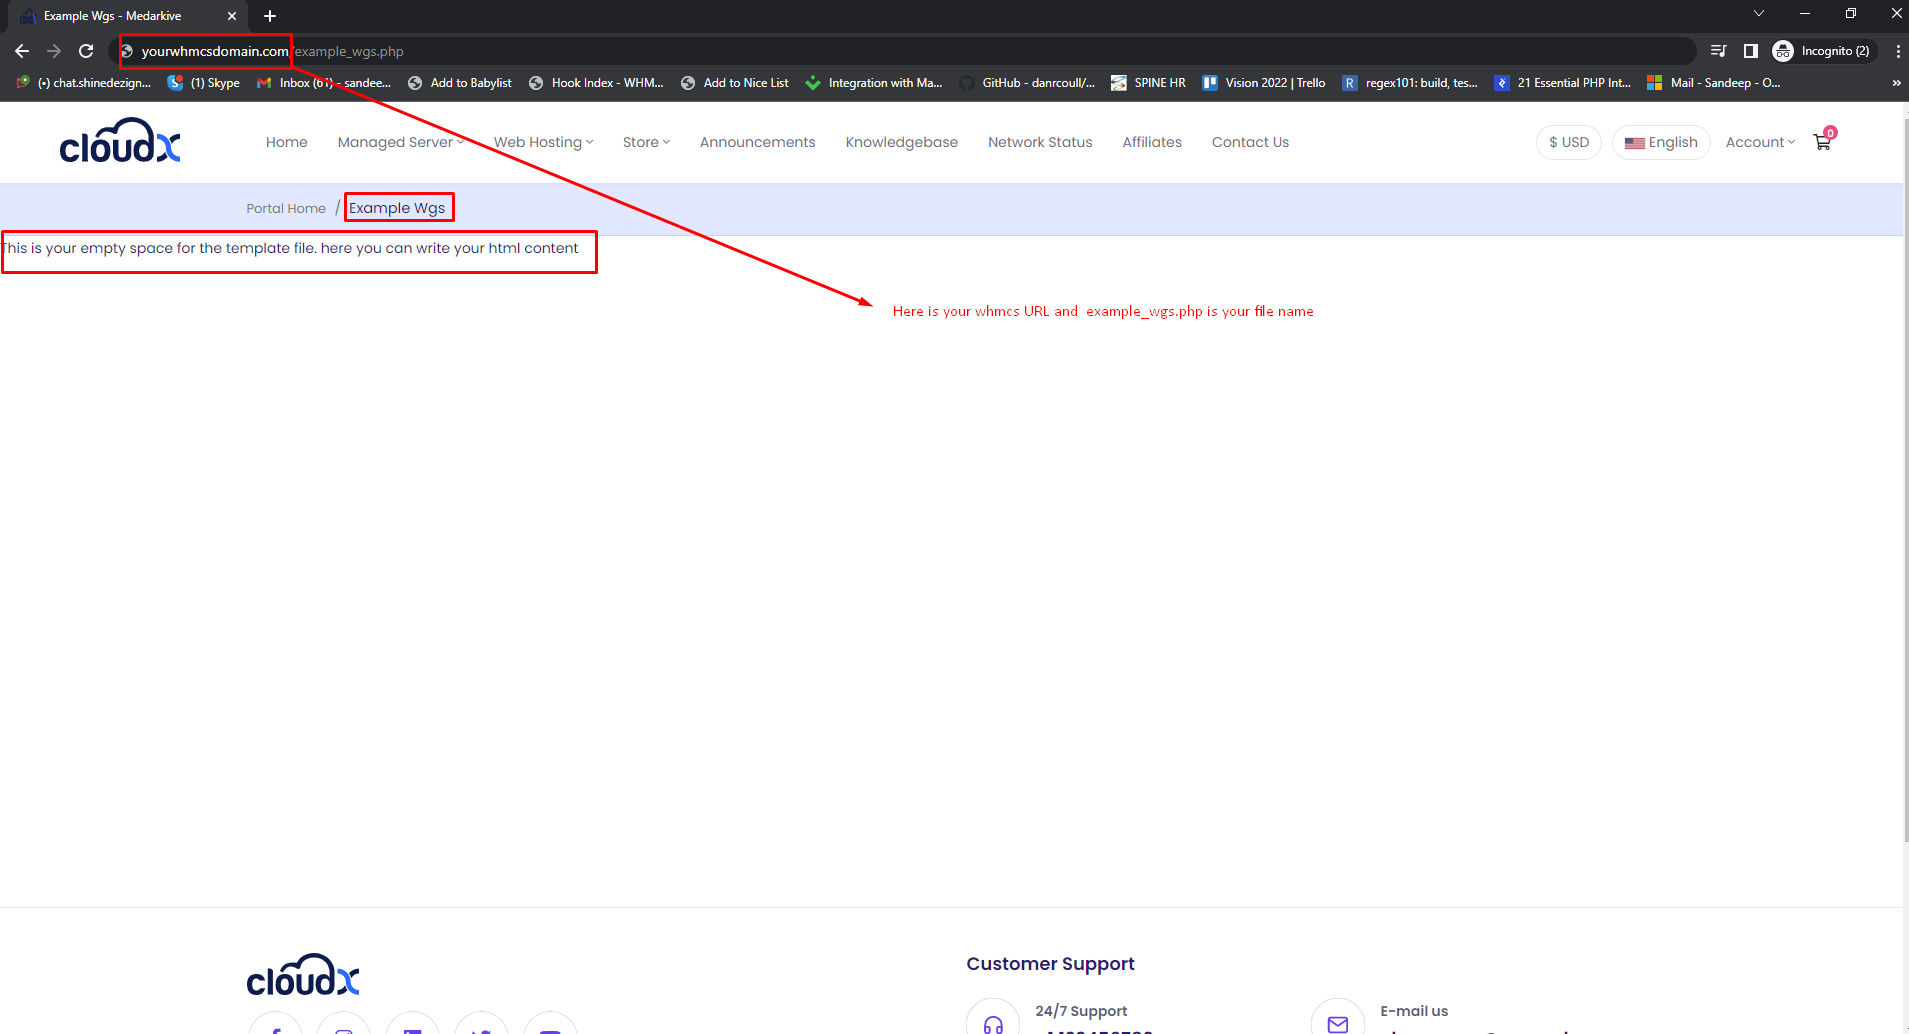
Step 15: Here is your WHMCS URL and example_wgs.php is your file name.
Note: Now you have to add html section and all in example_wgs.tpl file which is placed at the following path "/templates/cloudx/custom_file/"
Step 16: Follow this link to add some section in the newly created page
Step 17: Follow this link to Assign Dynamic Pricing Block to page.
