Step 1: Log in to WHMCS Admin
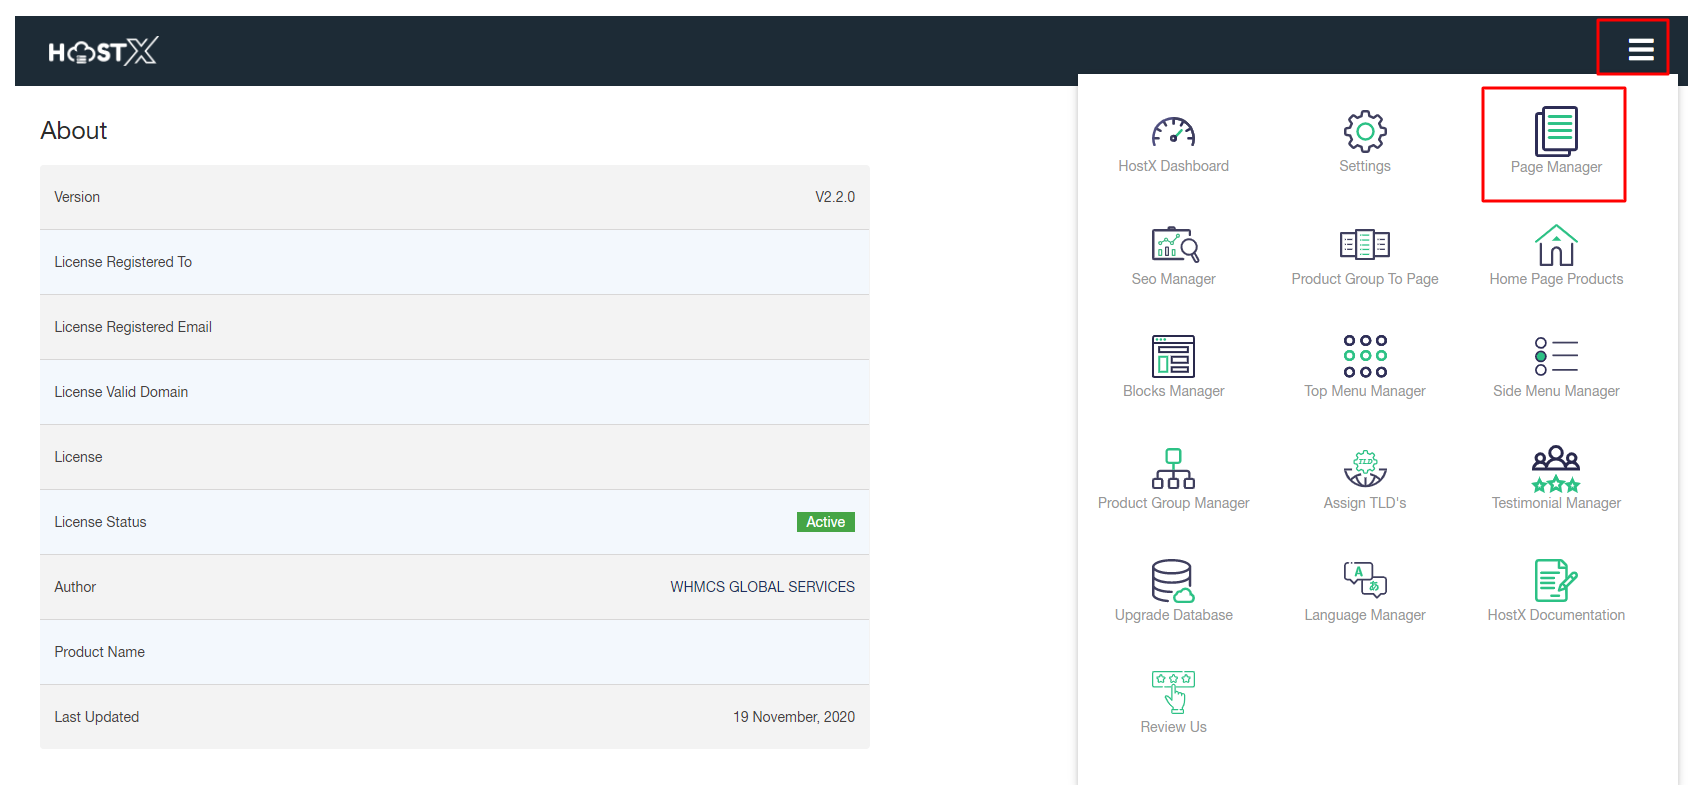
Step 2: Go to Add-ons > WGS HostX >Page manager
Step 2. Hit the Add New Page button

Here you will get multiple options to customize and create a new page:
1. Page Title: Enter the title for your new page

2. Page Name: Give this page a name or it can be your focus keyphrase

3. Select Page Type: With HostX admin panel, you can create three different type of pages:
- Static Page: If you want to create a basic informative page mainly focused on providing fixed content to all clients, then select this page type.
- VPS Product Page: If you want to add a pricing table to fetch dynamic product data, then choose VPS type product page.
- Dedicated Product Page: If you want to add dedicated servers block on your client area page and want to display some additional information like CPU, RAM, Disks, etc., in a different layout, then choose this option.

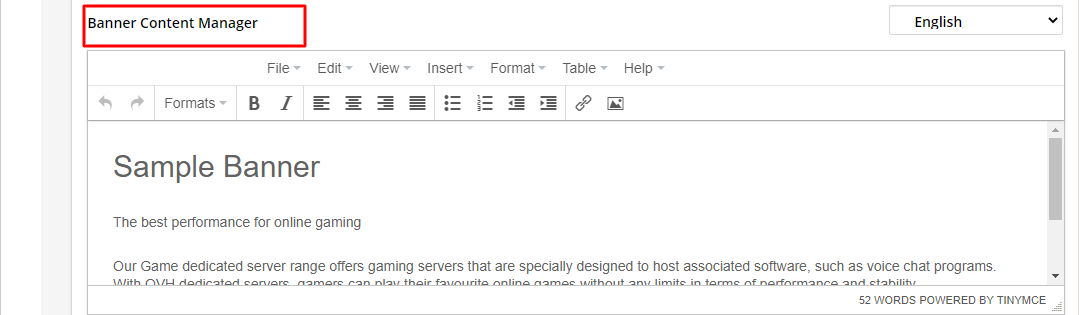
4. Banner Content Manager: Add, delete, modify, or optimize the internal page content and set the preferred page language.
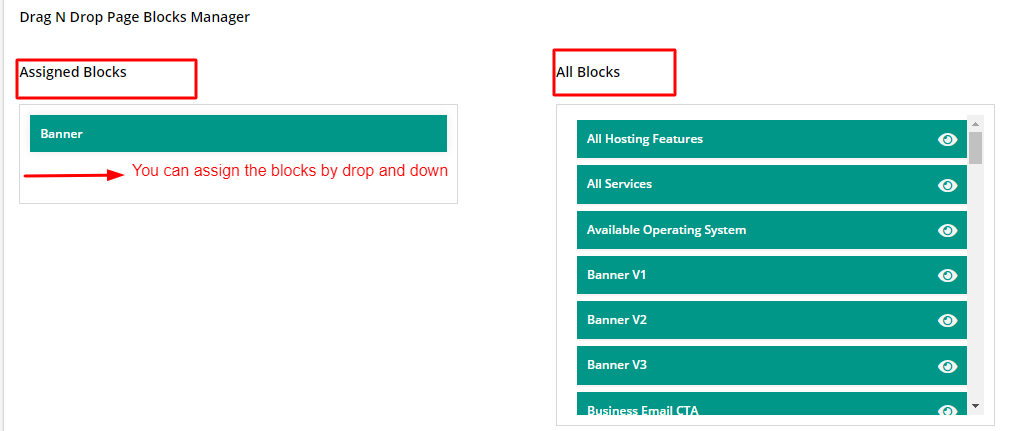
5. Drag N Drop Page Blocks Manager: In order to add more blogs in a newly created page, drag the required blocks from the All Blocks section and drop them to the Assigned Blocks section.
6. Add Custom CSS Style Code: If you want to add some more styling to your newly created page, then enter the custom CSS Style Code in this section

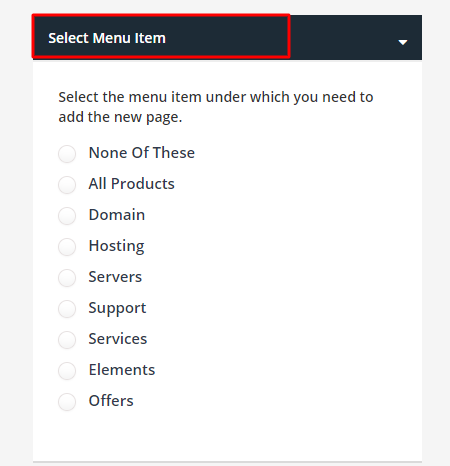
7. Select Menu Item: Select the desired menu item under which you need to add the new page.
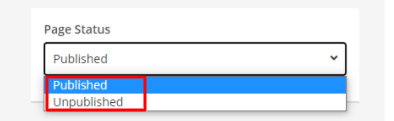
8. Page Status: Set your page status to Published or Unpublished.
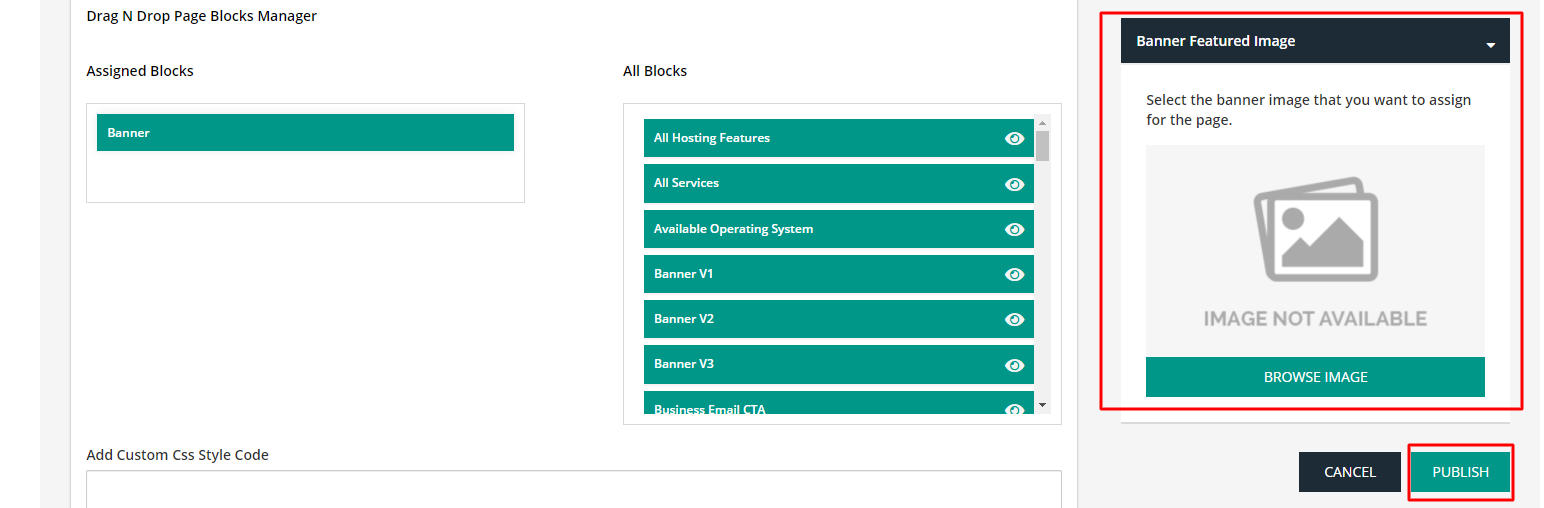
9. Banner Featured Image: Click on Browse Image and select the desired image for the new page.